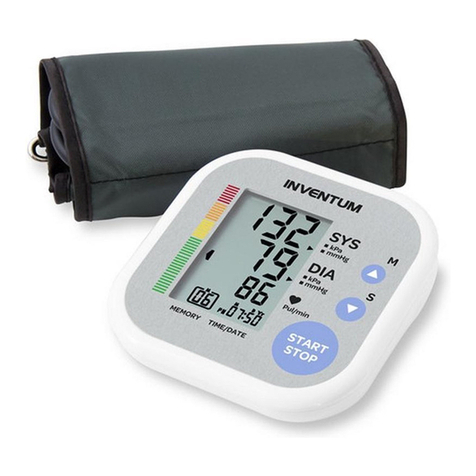
Prolife PA3 Backlight User manual

RU Руководство по эксплуатации
EN Instruction manual
DIGITAL
BLOOD PRESSURE MONITOR
Prolife PA3 Backlight

2
TABLE OF CONTENTS
1 Introduction ................................................................................................................................................
1.1 Features of the prolife PA3 Backlight.................................................................................
1.2 Important information about self–measurement.....................................................
2 Important information on the subject of blood pressure
And its measurement............................................................................................................................
2.1 Causes affecting the blood pressure level .....................................................................
2.2 Which values are normal?.........................................................................................................
3 Important facts about atrial fibrillation (afib)..........................................................................
4 Complete set of the blood pressure monitor........................................................................
5 Putting the digital blood pressure monitor into operation..........................................
5.1 Inserting the batteries.................................................................................................................
5.2 Reading the set date....................................................................................................................
5.3 Setting the time / date ...............................................................................................................
6 Measurement procedure....................................................................................................................
6.1 Measurement preparation.......................................................................................................
6.2 Common sources of error.........................................................................................................
6.3 Fitting the cuff..................................................................................................................................
6.4 Measuring procedure..................................................................................................................
6.5 Discontinuing a measurement..............................................................................................
6.6 Memory – storage and recall of the measurements................................................
6.7 Memory – cancellation of all measurements...............................................................
7 Appearance of the heart arrhythmia indicator for early detection...........................
8 Error messages / malfunctions........................................................................................................
9 Care and maintenance.........................................................................................................................
10 Warranty........................................................................................................................................................
11 Service life.....................................................................................................................................................
12 Battery life.....................................................................................................................................................
13 Safey, care and disposal.......................................................................................................................
14 Reference to standards ........................................................................................................................
15 Remark............................................................................................................................................................
16 Technical specifications .......................................................................................................................
17 Information provided by manufacturer.....................................................................................
DIGITAL BLOOD PRESSURE MONITOR PROLIFE PA3 BACKLIGHT EN

3
EN
1 INTRODUCTION
1.1. FEATURES OF THE PROLIFE PA3 BACKLIGHT
The Digital Blood Pressure Monitor Prolife PA3 Backlight (with integrated date/
time display) is a fully automatic, digital blood pressure measuring device for use
on the upper arm, which enables very fast and reliable oscillometric measure-
ment of the systolic and diastolic blood pressure as well as the pulse frequency.
The device offers a very high and clinical tested measurement accuracy and has
been designed to provide a maximum of user–friendliness.
The device is intended for clinical, home and other use.
Before using, please read through this instruction manual carefully and then
keep it in a safe place. For further questions on the subject of blood pressure
and its measurement, please contact your doctor.
If you have any further questions related to the interpretation of the blood pres-
sure readings and its measurement process, please contact your doctor.
ATTENTION!
1.2. IMPORTANT INFORMATION ABOUT SELF–MEASUREMENT
•Use of non-original components may cause malfunction of the device
and reading errors.
•If the cuff replacement is required, use only the original one.
•The device is not designed to measure the pressure in newborns.
•Twisting of the connecting tube may affect the blood pressure meas-
urement results.
•Do not put a cuff on the limb in case of the skin puncture (wounds).
•Putting a cuff on body area with a vascular catheter or anastomosis (arteri-
ovenous fistula) may cause impaired circulation and harm to health.
•It is not recommended to measure the pressure on the limb, if other
medical electrical equipment (device) is connected to it. Inflating the cuff
may temporarily disable this equipment.
•Make sure the blood circulation in the limb is not disturbed for a long
period during the operation of the device.
•The device is not intended for simultaneous use with high-frequency
surgical equipment in the operating room.

4
•REMEMBER
Self-monitoring of blood pressure levels does not imply establishing
diagnosis and modification of treatment prescribed by a doctor. Consult
your doctor if pressure values are outside the normal range. The treatment
regimen can be changed (dosage modification or drug replacement) only
after agreement with your doctor.
•Do not consider the pulse frequency readings as reference values when
heart pacemaker is used.
ELECTROMAGNETIC INTERFERENCE
The device contains sensitive electronic components (Microcomputer). Therefore,
avoid strong electrical or electromagnetic fields in the direct vicinity of the device
(e.g. mobile telephones, microwave cookers). These can lead to temporary impair-
ment of the measuring accuracy.
2 IMPORTANT INFORMATION
ON THE SUBJECT OF BLOOD PRESSURE
AND ITS MEASUREMENT
2.1. CAUSES AFFECTING THE BLOOD PRESSURE LEVEL
The blood pressure level is regulated by a specific region of the brain – vaso-
motor center. The blood pressure change is subject to the heart force and
rate as well as the tone and lumen of blood vessels. Relaxation of the unstri-
ated muscles of the blood vessel walls results in pressure reduction due to the
expansion of the lumen of blood vessels.
The blood pressure level changes periodically during cardiac activity: the maxi-
mum value (systolic blood pressure value) is observed in the period of blood
ejection out of the heart ventricles (systole), the minimum value (diastolic blood
pressure value) is observed at the end of the relaxation period (diastole).
The blood pressure values must lie within normal ranges to prevent critical
condition of health.
2.2. WHICH VALUES ARE NORMAL?
The blood pressure is considered to be elevated, if at rest the diastolic pres-
sure level is 90 mmHg or above and/or the systolic pressure level is above
140 mmHg. In this case, please consult your doctor. Maintenance of such pres-
sure levels for a long period of time pose risk to health.

5
EN
Should the systolic blood pressure values lie between 140 mmHg and
160 mmHg and / or the diastolic blood pressure values lie between 90 mmHg
and 100 mmHg, immediately, please consult your doctor immediately. Further-
more, regular self–checks will be necessary.
With blood pressure values that are too low, i.e. systolic values under 100 mmHg
and / or diastolic values under 60 mmHg, likewise, please consult your doctor.
Even with normal blood pressure values, a regular self–check with your blood
pressure monitor is recommended. In this way you can timely detect deviations
from permissible values and take the necessary measures to prevent hyperten-
sion and the development of complications. If for medical reasons you have to
control your blood pressure, measure it regularly at the same time of the day and
keep a self-monitoring diary so that the doctor could evaluate changes in values.
Never use the results of your measurements to alter independently the drug
doses prescribed by your doctor.
Table for classifying blood pressure values (unit: mmHg) according
to World Health Organization:
Range Systolic Diastolic Recommendation
Blood pressure
too low Lower than 100 Lower than 60 Consult your doctor
Blood pressure
optimum 100–120 60–80 Self–check
Blood pressure
normal 120–130 80–85 Self–check
Blood pressure
slightly high 130–140 85–90 Consult your doctor
Blood pressure
too high 140–160 90–100 Seek medical advice
Blood pressure
far too high 160–180 100–110 Seek medical advice
Blood pressure
dangerously high Higher than 180 Higher than 110 Urgently seek
medical advice

6
Further information
If your values are mostly standard under resting conditions but exceptionally
high under conditions of physical or psychological stress, it is possible that you
are suffering from so–called «labile hypertension». This condition also requires
correction, please consult a doctor.
3 IMPORTANT FACTS
ABOUT ATRIAL FIBRILLATION (AFIB)
What is Atrial Fibrillation (AFIB)? Normal heart functions rhythmically, alternating
the phases of contraction and relaxation.
Specialized cardiac muscle cells (so-called cardiac conduction system) generate
electrical pulses which make the heart contract by "pushing" the blood into the
vessels. Atrial fibrillation occurs in the event of impaired functioning of the cardiac
conduction system and the appearance of disorganized electrical signals in the
atria, causing their irregular contraction (fibrillation). Atrial fibrillation is the most
common form of cardiac arrhythmia or irregular heartbeat. Atrial fibrillation may
be asymptomatic, but significantly increases the risk of stroke. This case requires
medical supervision.
How does AFIB impact my family or me?
People with AFIB have a five-fold higher risk of getting stroke. Since the chance
of having a stroke increases with age, AFIB screening is recommended for
people over 65 years and older. Persons aged over 50 with high blood pressure
(diagnosed with hypertension), diabetes, cardiac distress and prior stroke also
need timely diagnosis of atrial fibrillation. In young people AFIB screening
is not recommended as it could generate false positive results and unnecessary
anxiety. In addition, young individuals with AFIB have a relatively low risk of
getting stroke as compared to elder people. ADVANCE AFIB detection provides
a convenient way to screen for AFIB .Knowing your blood pressure and knowing
whether you or your family members have AFIB can help reduce the risk of
stroke. ADVANCE AFIB detection provides a convenient way to screen for AFIB
whilst taking your blood pressure. Risk factors you can control High blood pres-
sure and AFIB are both considered «controllable» risk factors for strokes. Know-
ing your blood pressure and knowing whether you have AFIB is the first step
in proactive stroke prevention.

7
EN
4 THE VARIOUS COMPONENTS
OF THE DIGITAL BLOOD PRESSURE MONITOR
mmHg
TIME
DATE
kPa mmHg
ON / Afib Button Memory Button Power ConnectorCuff connection
opening
Time Button
DISPLAY
Average
Trafik light Display
Heart symbol
Memory Ser No.
Pressure Unit
Time and Date
Pulse
Systolic Value
Diastolic Value
Curf Sheck
Indicatro
Measurement Indicator
Arm Movement
Indicator
Heart Arhythmia Indidator
Battery Warning Symbol
Atrial Fibrillatin Indicator (AFIB)

8
5 PUTTING THE DIGITAL BLOOD PRESSURE
MONITOR INTO OPERATION
5.1. INSERTING THE BATTERIES
1. Insert the batteries (4 x size AAA 1.5V), thereby observing the indicated
polarity.
2. If the battery warning , icon appears in the display, the batteries
remain 20% power to warn user the batteries will be run out.
3. If the battery warning , эicon appears in the display, the batteries are
empty and must be replaced by new ones.
ATTENTION!
After the battery warning , icon appears, the device is blocked until
the batteries have been replaced.
Please use «AAA» Long–Life or Alkaline1.5 V Batteries.
The use of 1.2 V Accumulators is not recommended.
If the blood pressure monitor is left unused for long periods, please remove
the batteries from the device.
5.2. READING THE SET DATE
1. Please press the TIME button
and the date will be shown in the display.
5.3. SETTING THE TIME / DATE
This Digital Blood Pressure Monitor incorporates an integrated clock with date
display. This has the advantage, that at each measurement procedure, not only the
blood pressure values are stored, but also the exact moment of the measurement.
After new batteries have been inserted, the clock begins to run TIME 12:00 and
DATE 1–01.
You must then re–enter the date and current time. For this, please proceed
as follows.
1. Press the TIME button for at least 3 seconds firstly, user icon will blink. Then
press TIME button again the display now indicates the set year, during
which the four characters blink. The correct year can be entered by pressing
the MEMORY button.
TIME
DATE

9
EN
2. Press the TIME button again. The display now switches to the current date,
during which the first character (month) blinks. The corresponding month
can now be entered by pressing the MEMORY button.
3. Press the TIME button again. The last two characters (day) are now blinking.
The corresponding day can now be entered by pressing the MEMORY button.
4. Press the TIME button again. The display now switches to the current time,
during which the first character (Hour) blinks. The corresponding hour can
now be entered by pressing the MEMORY button.
5. Press the TIME button again. The last two characters (Minutes) now blink.
The exact time can now be entered by pressing the MEMORY button.
6. After the settings, press the Time
Button. Indicatorus «MmHg»
will blink. Press the Time button
again to TIME to complete
the setup device. The setting
is confirmed and the clock starts
running. On the screen the
current time is displayed.
DATE DATE
DATE DATE
TIME TIME
TIME TIME
TIME

10
7. To view the date, press the Time Button.
Further Information
With each press of the button (TIME, MEMORY) one input is made (e.g. switching
over from hours to minutes mode, or altering the value by +1). However, if you
keep the respective button depressed, you can switch more quickly to find the
desired value respectively.
6 MEASUREMENT PROCEDURE
6.1. MEASUREMENT PREPARATION:
•Avoid eating, smoking as well as all forms of exertion directly before the
measurement. All these factors influence the measurement result. Try and
find time to relax by sitting in an armchair in a quite atmosphere for about
ten minutes before the measurement.
•Measure always on the same arm (normally left).
•Try to carry out measurements regularly at the same time of the day, since
the blood pressure level changes during the course of the day.
6.2. COMMON SOURCES OF ERROR
Comparable blood pressure measurements always require the same
conditions! In a state of physical and emotional rest.
•Take a comfortable position, relax and do not toughen muscles of the arm
subject to measurements. If necessary, use a cushion for support.
•The performance of an automatic sphygmomanometer can be influenced
by extreme environmental conditions: high or low temperature, humidity,
elevation of the measurement point above sea level.
•Prevent deformation and twisting of the cuff tube.
•Improper (loose) fixation of the cuff on the arm causes false measurement
values.
TIME
DATE

11
EN
6.3. FIXATION OF THE CUFF
Insert the connector into the cuff connection opening (as shown in Fig. 1) and
make sure that the connection is tight.
mmHg
1. Fix the cuff with Velcro fastener so that
it lies comfortably and fits snugly to your
arm. The distance between the edge of the
cuff and the middle of the elbow should be
about 1~2 cm.
2. Lay the arm on a table, with the palm
upwards. The cuff should be at the level
of the heart, if necessary place a cushion
under the forearm. Ensure support of the
arm on a horizontal surface. Stay calm for
2 minutes before measurement.
3. Keep your legs straight and uncrossed,
lean on the back of the chair.
Fig. 1
Cuff
Сonnector
1–2 cm
Chief Artery

12
6.4. MEASURING PROCEDURE
Measuring in standard mode
In this mode, an indication of pulse wave
arrhythmia is possible.
AWhen the cuff is securely fixed, you can
start measurement:
1. Press the ON/OFF button, the
pump begins to inflate the cuff.
During this time, the cuff pressure
values are continuously displayed.
If the cuff is not firmly fixed and does
not fit snugly to the arm, the symbol
will appear on the display
and will flash during the measure-
ment. If the cuff is fixed properly,
the symbol will appear on the
display.
In case of insignificant movement
of the arm during the measurement,
the symbol ,will appear on the
display and the measurement will
continue, otherwise the display will
show the error Err2.
2. When a certain level of pressure
in the cuff is reached, the air gradu-
ally comes out of it. During meas-
urement, the display shows the
cuff pressure values. When the
arterial pulse is detected, the heart
symbol begins to flash on the
display. After the measurement is
completed, the display shows the
values of systolic, diastolic pressure
and pulse rate.
TIME TIME
TIME

13
EN
Example 1: (Fig. 2):
Systole 120,
Diastole 80,
Pulse 70,
And Arrhythmia detected,
cuff fit well.
Example 2: (Fig. 3):
Systole 120,
Diastole 80,
Pulse 70,
And Arrhythmia detected,
cuff fit too loose.
Example 3: (Fig. 4):
Systole 128,
Diastole 86,
Pulse 68,
And a movement detected,
cuff fit well.
The measurement results are displayed, until you switch the device off. If no button
is pressed for 3 minutes, the device switches automatically off, to save the batteries.
Fig. 2
mmHg
TIME
Fig. 3
mmHg
TIME
mmHg
TIME
Fig. 4

14
Measuring in Afib Mode ( 2-measurement mode )
The AFIB mode provides two automatic consecutive measurements, the result is then
analyzed and displayed. The blood pressure is a non-constant value and fluctuates
over a short period of time, therefore, the result determined in this way is more reliable
than one produced by a single measurement.
When the cuff is properly fixed, you can start
measurement:
1. Hold the ON/AFIB button for more than
one second until the symbol appears on the
display .
During measurement a number 1 or 2 is
shown on the left-hand side of the display,
depending on which of the two consecutive
measurements is currently being performed.
The interval between measurements is 15
seconds (complies with requirements of
«Blood Pressure Monitoring, 2001, 6:145-
147» for oscillometric instruments). There
is a countdown function.
The results of the first measurement are not
displayed. The blood pressure values will be
displayed only after 2 measurements.
Do not remove the cuff from the arm for
the entire duration of the consecutive
measurements.
In some cases, the third measurement can
be automatically performed to obtain the
exact result.
2. When a certain level of pressure in the cuff
is reached, the air gradually comes out of
it. During measurement, the display shows
the cuff pressure values. When the arterial
pulse is detected, the heart symbol begins
to flash on the display .
After the measurement is completed, the
display shows the values of systolic, dias-
tolic pressure and pulse rate.
<1 sec
TIME
TIME
TIME

15
EN
Example 1: (Fig. 5):
Systole 128,
Diastole 86,
Pulse 68,
Afib detected.
Icon of Arrhythmia
and Afib .
will be appeared Arm movement
detected and cuff fit
too loose detected.
Example 2: (Fig. 6)
Systole 128,
Diastole 86,
Pulse 68,
arrhythmia detected,
but no Afib detected.
Arm movement detected
and cuff fit well.
The measurement results are displayed until you switch the device off. If no button is pressed
for 3 minutes, the device switches automatically off.
Appearance of the Atrial Fibrillation Indicator for early Detection.
This device is able to detect atrial fibrillation (AFIB). This icon indicates
that atrial fibrillation was detected during the measurement. If atrial fibrilla-
tion is detected, it is recommended to repeat the measurement again. If the
AF symbol appears after repeated measurement, you are advised to wait for
one hour and perform the measurement one more time. If the AFIB symbol
appears on the display after a pause of 1 hour, you are advised to consult a
doctor. If after repeated measurement the AFIB symbol is no longer displayed,
there is no cause for concern. In this case, it is recommended to measure the
pressure the next day. Keep the arm still during measuring to avoid false read-
ings. This device may not detect atrial fibrillation in people with pacemakers
or defibrillators.
6 .5. DISCONTINUING A MEASUREMENT
If it is necessary to interrupt a blood pressure measurement for any reason
(e.g. the patient feels unwell), the power button ON / button can be pressed
at any time. The device then immediately lowers the cuff–pressure automatically.
Рисунок 5
TIME
TIME
Рисунок 6

16
6.6. MEMORY.
STORAGE AND RECALL OF THE MEASUREMENTS
The blood pressure monitor automatically stores the 199
last measurement values. By pressing the MEMORY button,
an average value of the last 3 measurements as well as the
last measurement and the further last 198 measurements
(MR199,MR198,…,MR1) can be displayed one after the other.
TIME
mmHg
DATE
mmHg
TIME
mmHg
6.7. MEMORY.
CANCELLATION OF ALL MEASUREMENTS
Before you delete all readings stored in the
memory, make sure you will not need refer
to the readings at a later date. You may keep
a self-monitoring diary and record data in
writing to provide additional information to
your doctor.
In order to delete all stored readings, depress
the MEMORY button for at least 5 seconds,
the display will show the symbol «CL» and
then release the button. To permanently
clear the memory, press the MEMORY
button while «CL» is flashing.
MА:
average value of the
last 3 measurements
M25:
values of the last
measurement
M24–M23:
values of the measurement before
5 sec

17
EN
7 APPEARANCE OF THE HEART ARRHYTHMIA
INDICATOR FOR EARLY DETECTION
This icon indicates that certain pulse irregularities were detected during
the measurement.
In most cases, this is no cause for concern (for example, with the so-called respiratory
arrhythmia, which is a normal variant). However, if the symbol appears on a regular
basis (e.g. several times a week with measurements taken daily), you are advised
to inform your doctor.
Please show your doctor the following explanation: information for the doctor
on frequent appearance of the Arrhythmia indicator.
This device is an oscillometric blood pressure monitor that also analyses pulse
frequency during measurement. The device is clinically tested. The arrhythmia
symbol is displayed after the measurement, if pulse irregularities occur during
measurement.
The device does not replace a cardiac examination, but serves to detect rhythm
disturbanceirregularities at an early stage.
8 ERROR MESSAGES / MALFUNCTIONS
If an error occurs during a measurement, the measurement is discontinued and
a corresponding error code is displayed.
Error No. Possible cause(s)
No pulse has been detected
The influence of external impact on the measurement results.
Reason: The arm was moved during the Measurement (Artefact)
The inflation of the cuff takes too long.
The cuff is not correctly seated

18
The measured readings indicated an unacceptable difference between
systolic and diastolic pressures. Take another reading following
directions carefully. Contact you doctor if you continue to get
unusual readings
Pressure is over 290 mmHg
Other possible malfunctions and their elimination
If problems occur when using the device, the following points should be checked
and if necessary, the corresponding measures are to be taken:
Malfunction Remedy
The display remains empty when the
device is switched on although
the batteries are in place
Check batteries for correct polarity and if
necessary insert correctly
Check battery performance and replace if
necessary
The device gives an error message several
times in succession or the measurement
values do not correspond to subjective
general condition (too high / low).
Check the positioning of the cuff
Measure the blood pressure again in
peace and quiet under observance of the
details made under point 5
The results of several consecutive meas-
urements vary significantly
Please read and understand “The most
common causes of errors” section. Repeat
the measurement again, making sure all
the rules for its execution are followed.
Note: The blood pressure is a dynamic
value and fluctuates continually,
therefore, a minor difference in values
is acceptable between consecutive
measurements
Blood pressure measured differs from
those values measured by the doctor
Keep a self-monitoring diary and show it to
your doctor at the next visit.
Note: A patient may experience «white
coat syndrome» at the doctor’s appoint-
ment, so the pressure readings are high-
er than in a familiar home environment

19
EN
Further Information
•The level of blood pressure is subject to fluctuations even with healthy
people. Important thereby is, that comparable measurements always
require the same conditions (Quiet conditions)! If, in spite of observing all
these factors, the fluctuations are larger than 15 mmHg, and / or you hear
irregular pulse tones on several occasions, please consult your doctor. The
same computer program is used in every individual device, and has thus
also been clinically tested. The manufacture of the devices takes place
according to the terms of the European standard for blood pressure meas-
uring devices (see technical data). If you have any technical problems with
the blood pressure monitor, please contact the service center or the manu-
facturer's representative.
•Never attempt to repair the device yourself!
•If you have questions related to the operation of the device and possible
malfunctions, please contact the official representative of the manufac-
turer or the service center. Any manipulations with the device (opening,
mechanical or any other damage) will void all warranty claims.
9 CARE AND MAINTENANCE
•Do not expose the device to extreme temperatures, humidity, dust or
direct sunlight.
•The cuff contains an airtight chamber. Handle it carefully and avoid defor-
mation when twisting or bending.
•Clean the device with a soft, dry cloth. Do not use gasoline and solvents.
Gently remove any contaminations from the cuff with a damp cloth and
soapy water. Machine washing is prohibited!
•Avoid mechanical and vibration effects on the device. Handle it carefully.
•It is forbidden to open the device housing and perform any other individual
manipulations!
10 WARRANTY
The Digital Blood Pressure Monitor Prolife PA3 Backligh has a 10 years warranty
from the date of purchase.
The warranty does not apply to damage caused by improper handling, accidents,
not following the operating instructions or alterations made to the device by third
parties.

20
The warranty is valid only in the presence of a warranty coupon, completed
by an official representative, confirming the date of sale and cash receipt. The
warranty does not cover consumables, parts and accessories such as: batteries,
AC adapter, cuff.
Warranty and free of charge service is not performed when:
•use of the device in violation of the operating instructions;
•in case of damage as a result of deliberate or erroneous actions of the
consumer due to improper or negligent treatment;
•the presence of traces of mechanical impact, dents, cracks, chips, etc.,
on the body of the device, traces of the opening of the casing, disassem-
bly, traces of attempts to repair outside the authorized maintenance center,
traces of moisture ingress or aggressive agents, or any other foreign interfer-
ence in the construction of the device, as well as in other cases of violation by
the consumer of the rules for storage, cleaning, transportation and technical
operation of the device, provided in the operating instructions;
•penetration of oils, dust, insects, liquids and other foreign objects inside
the device.
Precisely follow the instructions to ensure reliable and long–term operation of the device.
If the device does not work properly, contact the seller.
For repair and maintenance, please contact a specialized after–sales service.
The manufacturer reserves the right to make changes in the design of the device.
The information of the date of mass production and the importer is placed
on the individual package.
11 SERVICE LIFE
The service life of the device is 10 years.
12 BATTERY LIFE
It is used approx. 400 times measurement with 4–size «AAA» alkaline Batteries.
13 SAFEY, CARE AND DISPOSAL
SAFETY AND PROTECTION
•This device may be used only for the purpose described in this instruction
manual. The manufacturer can not be held liable for the damageca used
by incorrect application.
Table of contents
Languages:
Other Prolife Blood Pressure Monitor manuals


