manuals.online logo
Brands
  1. Home
  2. •
  3. Brands
  4. •
  5. Radica Games
  6. •
  7. Game Console
  8. •
  9. Radica Games TETRIS 74063 User manual

Radica Games TETRIS 74063 User manual

E
Model 74063
For 1 to 2 players / Ages 8 and up
INSTRUCTION MANUAL
P/N 82386000 Rev.A
WARNING: EPILEPSY AND SEIZURES READ
BEFORE OPERATING YOUR ARCADE
LEGENDS TETRIS
A few people may experience epileptic seizures when viewing
flashing lights or patterns in our daily environment. These per-
sons may experience seizures while watching TV pictures or
playing video games. Players who have not had any seizures
may nonetheless have an undetected epileptic condition.
Consult your physician before playing video games if you have
an epileptic condition or experience any of the following symp-
toms while playing video games: altered vision, eye or muscle
twitching, other involuntary movements, loss of awareness of
your surroundings, mental confusion and/or convulsions.
BATTERY INSTALLATION
This game is powered by four (4) AA (LR6) batteries.
• Using a screwdriver, loosen the screw until the battery
compartment door can be removed.
• Insert four (4) AA (LR6) batteries (we recommend alkaline) as
indicated inside the battery compartment.
• Replace the battery compartment door and tighten the screw
with a screwdriver. Do not over-tighten.
ADULT SUPERVISION IS RECOMMENDED WHEN
CHANGING BATTERIES.
TV CONNECTION
NOTE: To connect Tetris directly to a TV, the TV must be
equipped with audio and video input jacks or a Scart input. They
are commonly found on the front of the TV near the contrast,
color, and picture adjustment controls or on the rear of the TV
near the antenna and cable/satellite jacks.
If your TV does not have audio and video input jacks or a Scart
input, insert the yellow video plug from the Main Unit into the
video-in (yellow) jack on your TV, the white audio plug into the
left audio-in (white) jack. Then set the TV to the appropriate
video input mode (see your TV’s operating manual for details).
NOTE: If your TV is not stereo, you can either plug the white
audio plug into the audio-in jack and leave the red audio plug
disconnected, or if you would like to hear the sounds from both
the left and right audio channels, you can use a 2 into 1 audio
cable (available at your local electronics store) to allow you to
connect both the white and red plugs to the single audio-in jack.
If your TV does not have audio and video input jacks, you may
connect Tetris through a VCR connected to your TV.
CONNECTING TO A VCR
To connect Tetris to your VCR, insert the yellow video plug from
the Main Unit into the video in (yellow) jack on your VCR, the
white audio plug into the left audio in (white) jack or via the Scart
adaptor. Then set the VCR to the appropriate video input mode
(see your VCR’s operating manual for details).
NOTE: If your VCR is not stereo, you can either plug the white
audio plug into the audio-in jack and leave the red audio plug
disconnected, or if you would like to hear the sounds from both
the left and right audio channels, you can use a 2 into 1 audio
cable (available at your local electronics store) to allow you to
connect both the white and red plugs to the single audio-in jack.
ADULT SUPERVISION IS RECOMMENDED WHEN CONNECT-
ING CABLES TO A TV AND VCR.
BUTTONS FUNCTIONS
TETRIS
THE LEGEND
Created in 1985 by Alexey Pazhitnov at the Moscow Academy of
Science, Tetris has grown into one of the biggest and most suc-
cessful video games of all time. Originally created on the
Electronica 60 (a soviet terminal computer), Tetris was eventually
released to every game and computer system ever made.
Marketed as the first game to come out from behind the iron
curtain, tens of millions of copies of the game have since been
sold.
Owing its success to its simple design and addictive gameplay,
Tetris was simple to start, but nigh impossible to master.
Featuring seven different pieces made from different patterns of
four squares, Tetriminos, the goal is to clear lines from the game-
board by filling them horizontally. If the blocks reach the top of
the gameboard, you lose.
SET UP
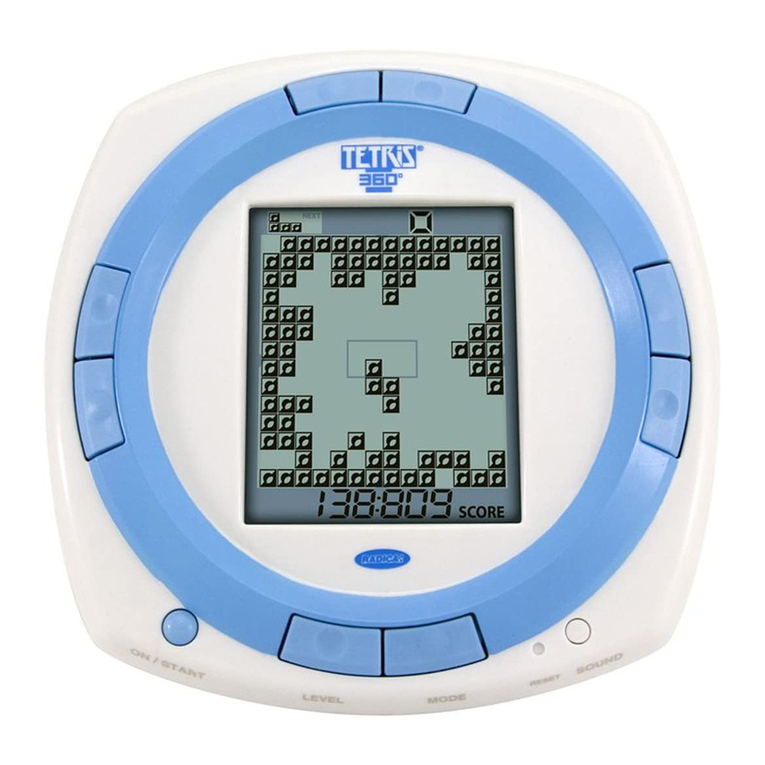
The Arcade Legends Tetris contains 5 different versions of Tetris
and includes two-player head to head frenzy!
TO USE:
1. Load battery compartment with four AA (LR6) batteries.
Alkaline batteries work best.
2. Plug the Arcade Legends into the AV jacks on TV matching
the color of the jack to the cord.
3. Turn on the Arcade Legends by sliding the “Power Switch”
4. A menu screen should load. Using the controller, choose if
you would like to play a 1 player or 2 player game by pushing
Left or Right on the controller. Pressing Down selects the
game mode.
5. Next, choose which version of Tetris you wish to play by
pushing Left or Right on the controller. Pressing Down
selects the game.
BASIC CONTROLS
Arcade Legends Tetris features a unique control specifically
designed for Tetris. Built in the form of a Tetrimino, you manipu-
late the falling blocks by twisting and moving a single control:
Right or Left – Move piece Right or Left
Twist Right – Rotate piece 30 degrees Clockwise
Twist Left – Rotate piece 30 degrees Counter-Clockwise
Down – Speeds piece down the screen
GAME TYPES:
STANDARD TETRIS (1 PLAYER ONLY)
The objective is to manipulate the falling tetrominos to form
complete horizontal rows of blocks. Points are earned for each
line cleared. Bonus points are earned for simultaneous line
clears. The more lines that the player completes, the faster the
tetrominoes fall from the top of the screen. This game has no
time limit, and is only completed when the player tops out.
GARBAGE TETRIS (1 OR 2 PLAYERS)
Depending on the level, the player starts with a certain number
of garbage rows, with blocks randomly placed on the field. The
objective is to clear all of the garbage blocks. Points are earned
by clearing all of the garbage blocks in as short of a time as
possible. Bonus points are earned for playing at more difficult
levels.
TIMED TETRIS (1 OR 2 PLAYERS)
The objective is to complete a certain number of lines as quickly
as possible. The level that the player is playing will determine the
number of lines that they are required to clear. Points are earned
by clearing the goal number of lines in as short of a time as pos-
sible. Bonus points are earned for playing at more difficult levels.
HOT
-LINE TETRIS (1 PLAYER ONLY)
Six “hot-lines” are arranged on the Tetris board. Only by com-
pleting rows that are on the hot lines does a player score points.
The higher up the Tetris board, the more points that are awarded
for a line cleared on a hot-line. No points are awarded for a line
that is cleared that is not on a hot-line. This game has no time
limit, and is only completed when the player tops out.
BATTLE TETRIS (2 PLAYERS ONLY)
Played similar to Standard Tetris, the objective of this game is to
make the opposing player top out. However, when a player com-
pletes a combination of more then one line, garbage rows will be
added to the bottom of the opposing players Tetris board. The
number of garbage rows is dependant on the number of rows
that the player has completed. Each player will be given the
same pieces in the same order.
TROUBLE SHOOTING
TV
To locate your auxiliary channel, which is usually not 3 or 4, but
a gaming channel found mostly found between 2 and 99 (exam-
ple 2, 1, 0, 99), first try 00 to see if it is the auxiliary channel.
Channels downwards from 3 until a Line 1 or Line 2, Video 1 or
Video 2, Front, Aux, AV, etc., appears on screen, then push the
power button on the game and it should automatically come on
if you have selected the correct channel. If this does not work,
another way to determine your auxiliary channel is to take a look
at your television remote. There may be a button on the remote
that may take you directly to the correct channel. The buttons
Directional Pad
On/Off
you are looking for may be labeled Input, AUX, AV, Line,
TV/Video, or Video. If your remote has one of these buttons, turn
your television back to Channel 3 and select that button. The
power button on the game should be turned on in order for the
game to appear on the television. If your television remote does
not have any of these buttons, and channel 00 is not working,
you may need to search the main menu for a way to determine
your auxiliary channel. If none of these methods have helped you
locate your auxiliary channel, you may need to check your
owner's manual and/or contact a local television repair company.
VCR
When connecting to a VCR, you must first start with a blue
background showing on your television screen. To obtain a blue
screen, try inserting a videotape into the VCR, let it start to play,
then hit the stop button. This may give you a blue screen, then
you can channel down to your auxiliary channel. If the blue
screen still does not appear, try entering your TV and/or VCR
main menu and see if it gives you options to select a blue screen
background. Many times if you enter the main menu on your tel-
evision you can change the setting from cable to video and dis-
play a blue screen. Also if you have an older television, you may
locate a hidden door on your television that has color, picture,
horizontal, vertical, and cable, antennae buttons. If your televi-
sion includes this panel, you can select the antennae/cable but-
ton and see the blue screen appears. If you have tried all of
these options and are still unsuccessful connecting the console,
then you may need to check your VCR owner’s manual or con-
tact the manufacturer to find out how to set up your VCR for
console games.
Remember, you can't play our games through a cable box or
satellite, so if you own one of these make sure it is turned off
before connecting the game. You can connect our games
through DVD players with the same connection as a VCR.
If you still have difficulty with setup or operation of your game,
please call our players helpline mentioned at the end of this
manual.
CAUTION
• As with all small batteries, the batteries used with this
device should be kept away from small children who might
still put things in their mouths. If a battery is swallowed,
consult a physician immediately.
• Be sure you insert the battery correctly and always follow
the device and battery manufacturer’s instructions.
•Do not dispose of batteries in fire.
• Batteries might leak if improperly installed, or explode if
recharged, disassembled or heated.
MAINTENANCE
•Handle this device carefully.
•Store this device away from dusty or dirty areas.
• Keep this device away from moisture or extreme temperature.
• Do not disassemble this device. If a problem occurs, press the
Power button off and on, or remove and replace the batteries
to reset the device, or try new batteries. If problems persist,
consult the warranty information located at the end of this
instruction manual.
•Use only the recommended battery type.
• Do not mix old and new batteries.
• Do not mix alkaline, standard (carbon-zinc) or rechargeable
(nickel-cadmium) batteries.
• Do not use rechargeable batteries.
• Do not attempt to recharge non-rechargeable batteries.
•Remove any exhausted batteries from the device.
•Do not short-circuit the supply terminals.
• Insert batteries with the correct polarity.
Please retain this for future reference.
NOT SUITABLE FOR CHILDREN UNDER 3 YEARS DUE TO
LONG CABLES
FOR UNITED STATES
This device complies with Part 15 of the FCC Rules. Operation is
subject to the following two conditions: (1) this device may not
cause harmful interference and (2) this device must accept any
interference received, including interference that may cause
undesired operation.
WARNING: Changes or modifications to this unit not expressly
approved by the party responsible for compliance could void the
user’s authority to operate the equipment.
NOTE: This equipment has been tested and found to comply
with the limits for a Class B digital device, pursuant to Part 15 of
the FCC Rules. These limits are designed to provide reasonable
protection against harmful interference in a residential installa-
tion. This equipment generates, uses and can radiate radio fre-
quency energy and if not installed and used in accordance with
the instructions, may cause harmful interference to radio com-
munications. However, there is no guarantee that interference
will not occur in a particular installation. If this equipment does
cause harmful interference to radio or television reception, which
can be determined by turning the equipment off and on, the user
is encouraged to try to correct the interference by one or more
of the following measures:
• Reorient or relocate the receiving antenna.
• Increase the separation between the equipment and receiver.
• Connect the equipment into an outlet on a circuit different from
that to which the receiver is connected.
• Consult the dealer or an experienced radio TV technician for
help.
90-DAY LIMITED WARRANTY
(This product warranty is valid in the United States and
Canada only)
Radica Games Limited warrants this product for a period of 90
days from the original purchase date under normal use against
defective workmanship and materials (batteries excluded). This
warranty does not cover damage resulting from accident, unrea-
sonable use, negligence, improper service or other causes not
arising out of defects in material or workmanship. Radica Games
Limited will not be liable for any costs incurred due to loss of
use of this product or other incidental or consequential costs,
expenses or damages incurred by the purchaser. Some states
do not allow the exclusion or limitation of incidental or conse-
quential damages, so the above limitations may not apply to
you. This warranty gives you specific legal rights and you may
also have other legal rights, which vary from state to state.
During this 90-day warranty period, the game will either be
repaired or replaced (at our option) without charge to the pur-
chaser when returned prepaid with proof of date of purchase to:
Radica USA, Ltd., 13628-A Beta Road, Dallas, Texas 75244,
USA. Please remove the batteries and wrap the unit carefully
before shipping. Please include a brief description of the prob-
lem along with your return address and mail it postage prepaid.
IMPORTANT: Before returning the unit for repair, test it with fresh
alkaline batteries. Even new batteries may be defective or weak
and low battery power is a frequent cause of unsatisfactory
operation.
FOR UNITED KINGDOM
PRODUCT WARRANTY
(This product warranty is valid in the United Kingdom only)
All products in the RADICA®range are fully guaranteed for a
period of 6 months from the original purchase date under normal
use, against defective workmanship and materials (batteries
excluded). This warranty does not cover damage resulting from
accident, unreasonable use, negligence, improper service or
other causes not arising out of defects in material or
workmanship.
In the unlikely event that you do experience a problem within the
first 6 months, please telephone the UK Technical Support team:
Tel. 0871 222 8278. Calls are charged at 10p per minute and
will show up on your standard telephone bill. Helpline hours
are 2pm-11pm, Monday to Friday.
IMPORTANT: Always test the product with fresh alkaline batter-
ies. Even new batteries may be defective or weak and low
battery power is a frequent cause of unsatisfactory operation.
YOUR STATUTORY RIGHTS ARE NOT EFFECTED.
Distributed in the U.K. by:
RADICA U.K. Ltd.
The Old Stables, Munns Farm,
Cole Green, Hertfordshire,
SG14 2NL, England
Distributed in the U.S. by:
RADICA U.S. Ltd.
13628-A Beta Road
Dallas, TX 75244-4510
RADICA:®
ARCADE LEGENDS IS A TRADEMARK
OF RADICA GAMES LTD.
©2004 RADICA GAMES LTD.
PRODUCT SHAPE™
ALL RIGHTS RESERVED
Tetris®; © Elorg 1987; © Elorg 2004
Tetris Logo by Roger Dean;
© The Tetris Company 1997 All rights Reserved
Original Concept and Design by Alexy Pajitnov
Tetris® licensed to the Tetris Company and sublicensed to Radica Games

Other Radica Games Game Console manuals
Radica Games CUBE WORLD L7286 User manual

Radica Games
Radica Games CUBE WORLD L7286 User manual

Radica Games 76013 JIBBI User manual

Radica Games
Radica Games 76013 JIBBI User manual
Radica Games BRAIN GAMES 823B4900 User manual

Radica Games
Radica Games BRAIN GAMES 823B4900 User manual
Radica Games L7274 User manual
Radica Games
Radica Games L7274 User manual
Radica Games 77038 User manual

Radica Games

Radica Games 77038 User manual

Radica Games Sports 20Q User manual

Radica Games

Radica Games Sports 20Q User manual

Radica Games Sudoku 76043 User manual

Radica Games

Radica Games Sudoku 76043 User manual

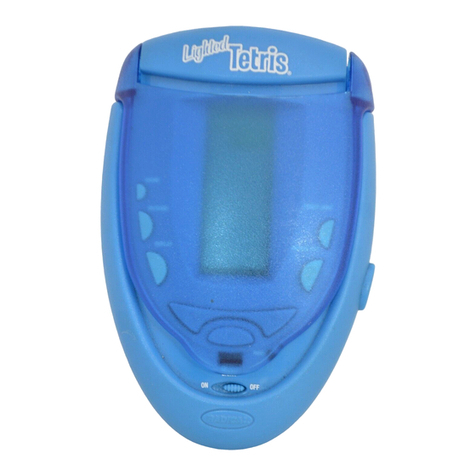
Radica Games Lighted Tetris User manual

Radica Games

Radica Games Lighted Tetris User manual

Radica Games 77001 User manual

Radica Games

Radica Games 77001 User manual

Radica Games Big Screen Tetris I6002 User manual

Radica Games

Radica Games Big Screen Tetris I6002 User manual

Radica Games BIG SCREEN Free Cell User manual

Radica Games

Radica Games BIG SCREEN Free Cell User manual

Radica Games 9904 User manual

Radica Games

Radica Games 9904 User manual

Radica Games BIG SCREEN SUDOKU 76042 User manual

Radica Games

Radica Games BIG SCREEN SUDOKU 76042 User manual

Radica Games Jibbi User manual

Radica Games

Radica Games Jibbi User manual

Radica Games N9494 User manual

Radica Games

Radica Games N9494 User manual

Radica Games Solitaire Lite 9812 User manual

Radica Games

Radica Games Solitaire Lite 9812 User manual

Radica Games Play TV OPUS 8046 User manual

Radica Games

Radica Games Play TV OPUS 8046 User manual

Radica Games Big Screen FreeCell I5008 User manual

Radica Games

Radica Games Big Screen FreeCell I5008 User manual

Radica Games SPACE INVADERS 74064 User manual

Radica Games

Radica Games SPACE INVADERS 74064 User manual

Radica Games 76026 User manual

Radica Games

Radica Games 76026 User manual

Radica Games NoLimit texas holdem User manual

Radica Games

Radica Games NoLimit texas holdem User manual

Radica Games 20Q User manual

Radica Games

Radica Games 20Q User manual

Radica Games Bass Fishin 3732 User manual

Radica Games

Radica Games Bass Fishin 3732 User manual

Radica Games N7314 User manual

Radica Games

Radica Games N7314 User manual

Popular Game Console manuals by other brands

Kogan KAHVG43CAMA user manual

Kogan

Kogan KAHVG43CAMA user manual

Silph PokeDex HANDY312 instruction manual

Silph

Silph PokeDex HANDY312 instruction manual

V-tech REV IT UP IN RADIATOR SPRINGS user manual

V-tech

V-tech REV IT UP IN RADIATOR SPRINGS user manual

Sony PlayStation3 CECH-2001A Safety and support

Sony

Sony PlayStation3 CECH-2001A Safety and support

Sony 120GB Playstation 3 CECH-2001B instruction manual

Sony

Sony 120GB Playstation 3 CECH-2001B instruction manual

AtGames LEGENDS GAMER MINI instruction manual

AtGames

AtGames LEGENDS GAMER MINI instruction manual

VisuaLimits VL-FOCUS user manual

VisuaLimits

VisuaLimits VL-FOCUS user manual

Sony PS4 FORTNITE PRO Safety guide

Sony

Sony PS4 FORTNITE PRO Safety guide

LeapFrog Leapster 2 quick guide

LeapFrog

LeapFrog Leapster 2 quick guide

Bally Professional Arcade Fun & Brains owner's manual

Bally

Bally Professional Arcade Fun & Brains owner's manual

Nintendo 3DS Operation manual

Nintendo

Nintendo 3DS Operation manual

DreamGEAR STEREO GRIP AND MEDIA KIT user guide

DreamGEAR

DreamGEAR STEREO GRIP AND MEDIA KIT user guide

Hasbro Electronic Hand-Held TRANSFORMERS quick start guide

Hasbro

Hasbro Electronic Hand-Held TRANSFORMERS quick start guide

Sony PlayStation 5 quick start guide

Sony

Sony PlayStation 5 quick start guide

Sega GHOST SQUAD - EVOLUTION manual

Sega

Sega GHOST SQUAD - EVOLUTION manual

Sony CECHK08 quick reference

Sony

Sony CECHK08 quick reference

Microsoft XBOX Product and Regulatory Guide

Microsoft

Microsoft XBOX Product and Regulatory Guide

Sony CFI-1215B quick start guide

Sony

Sony CFI-1215B quick start guide

manuals.online logo
manuals.online logoBrands
  • About & Mission
  • Contact us
  • Privacy Policy
  • Terms and Conditions

Copyright 2025 Manuals.Online. All Rights Reserved.