TaWc of ConteHts
IMPORTANT SAFETY INSTRUCTIONS ................ 1
Introduction
Key Features Overview ............................................... 2
DVI-HDTV Input ............................................. 2
Dolby* Virtual ................................................... 2
PIP (Picture-In-Picture) and POP
(Picture-Outside-Picture) ................................ 2
Auto Tuning ...................................................... 2
V-Chip: Parental Controls ................................. 2
Chapter 1: Connections and Setup
Things to Consider Before You Connect .................. 4
Protect Against Power Surges .......................... 4
Protect Components from Overheating .......... 4
Position Cables Properly to Avoid Audio
Interference ..................................................... 4
Important Stand and Base Safety
Information ..................................................... 4
Use Indirect Light .............................................. 4
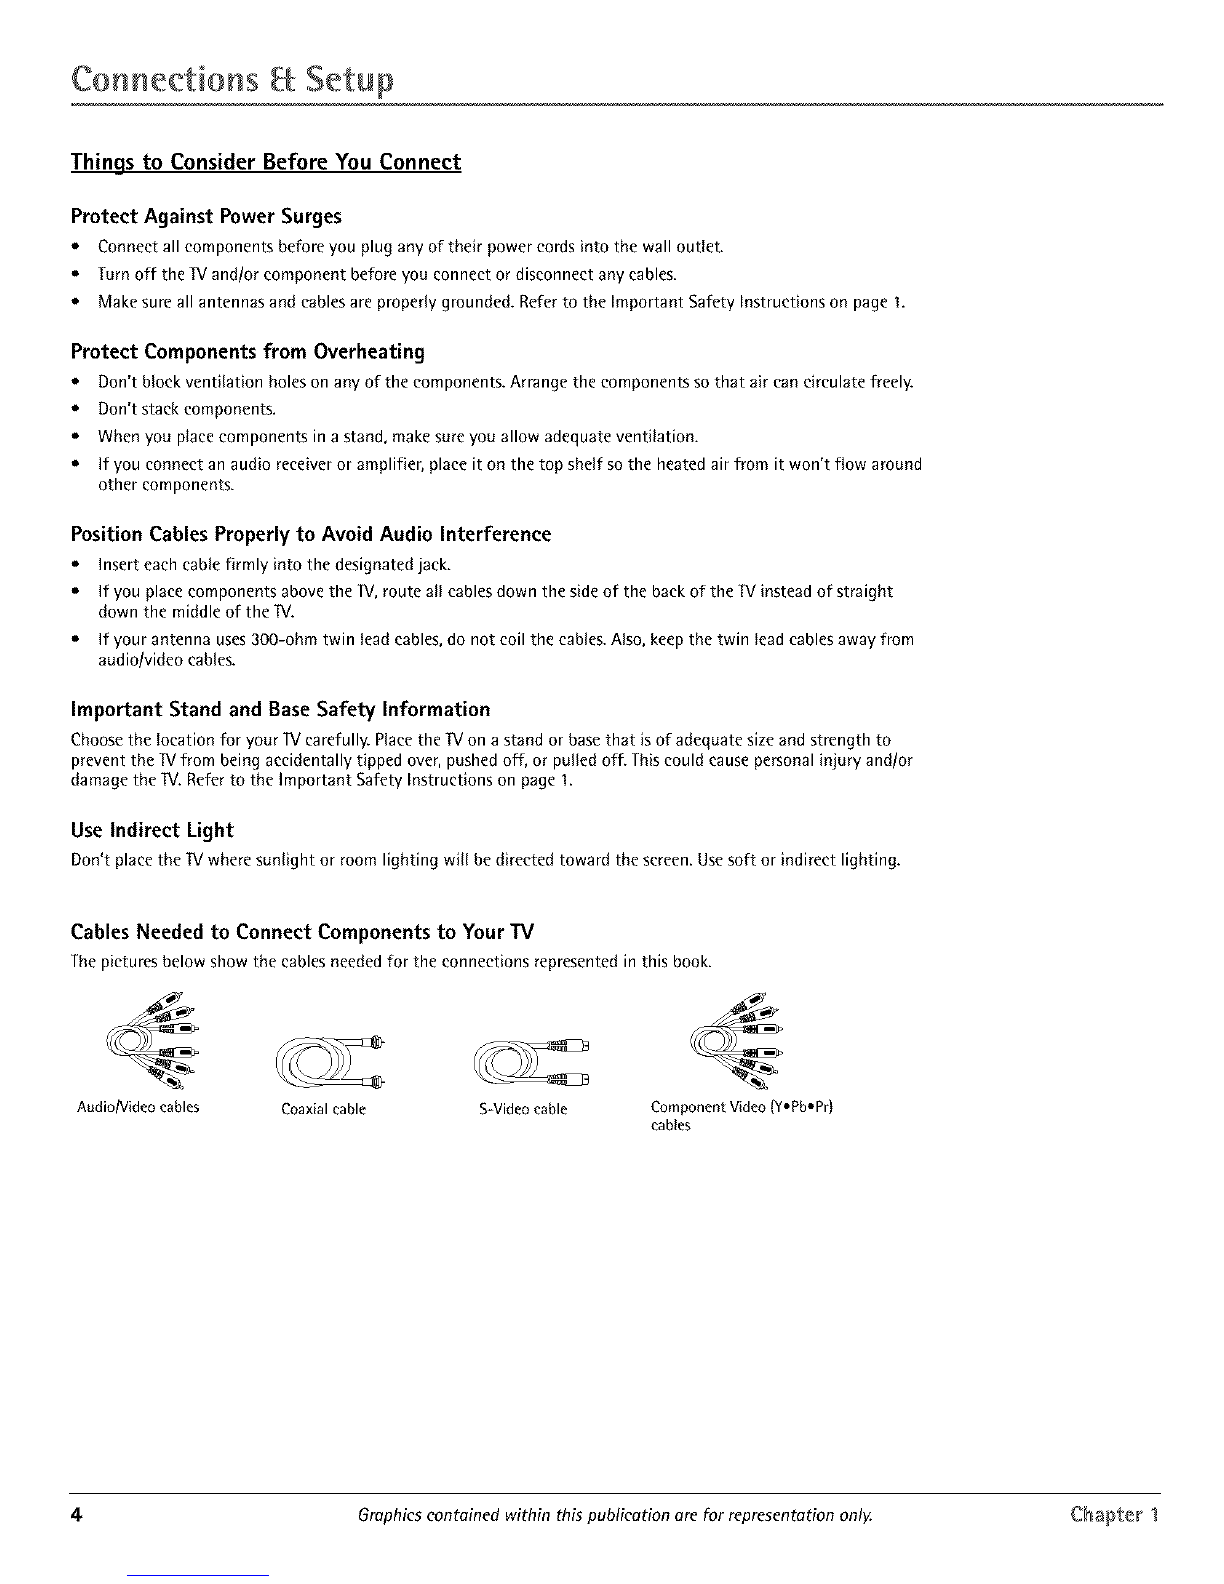
Cables Needed to Connect Components to
Your TV ............................................................ 4
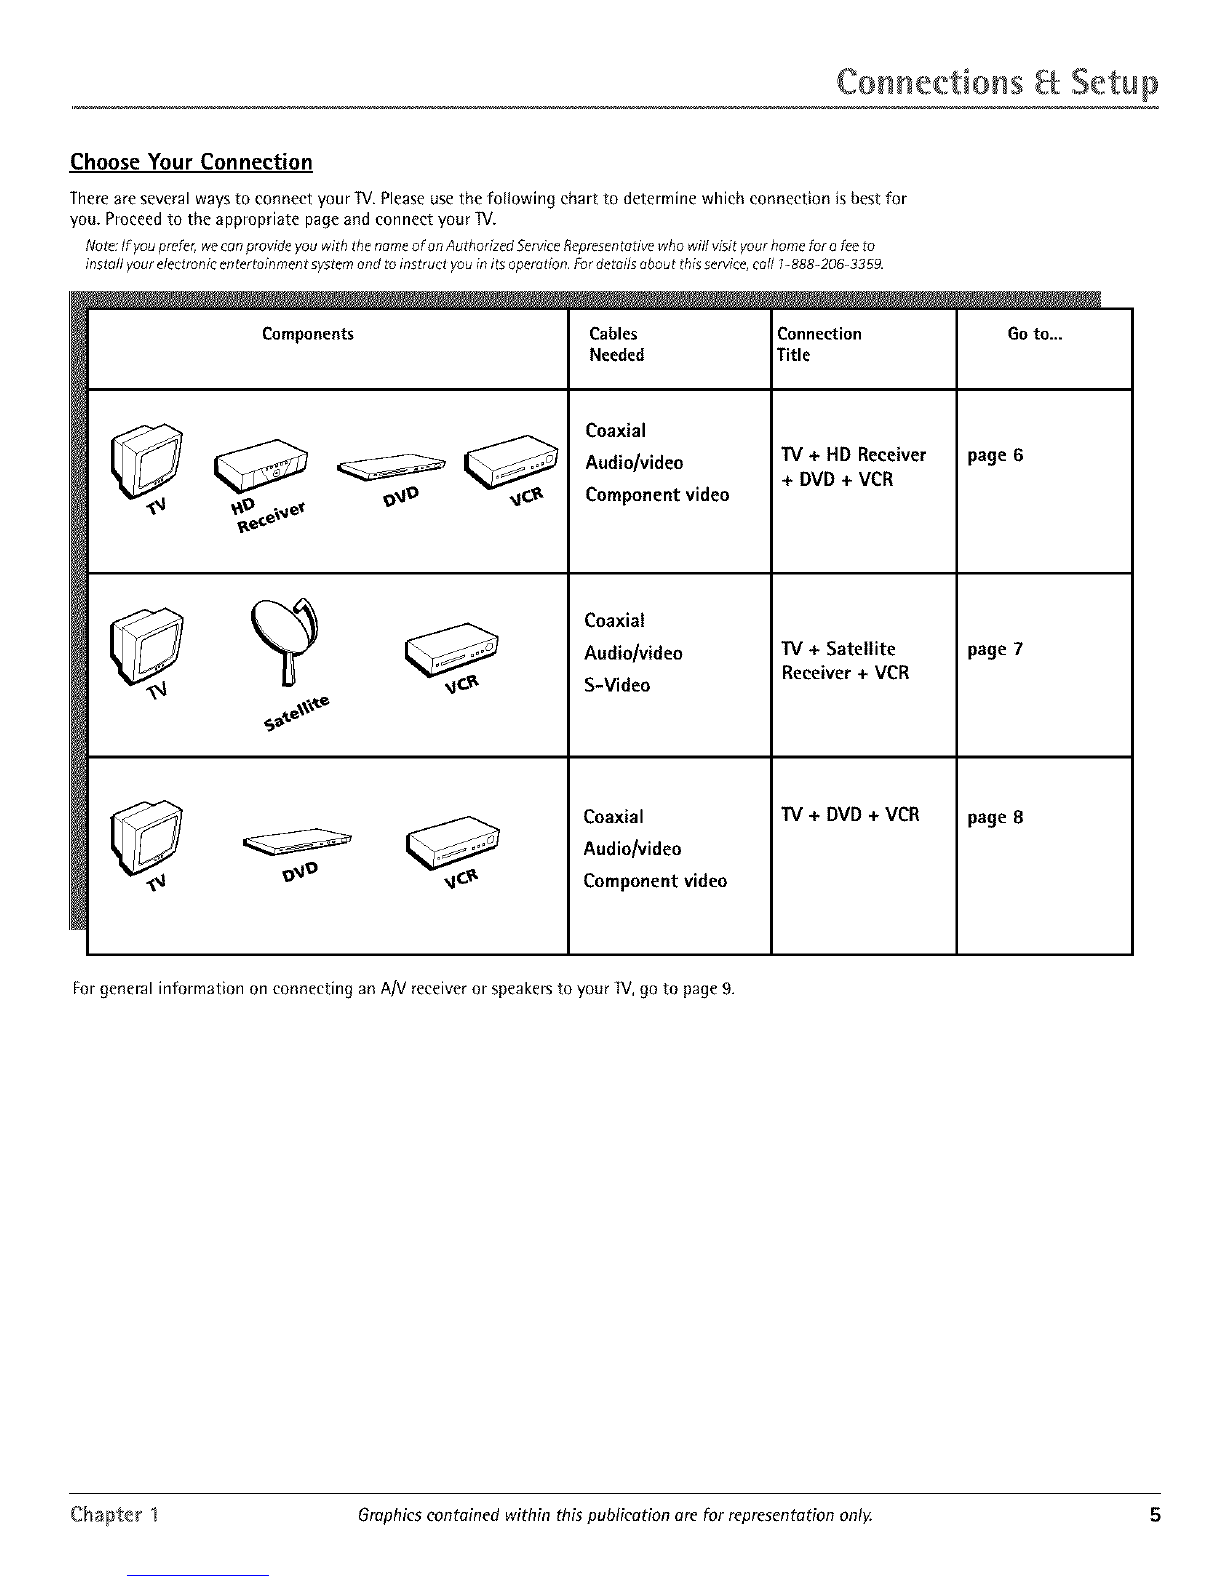
Choose Your Connection ............................................ 5
TV + HD Receiver + VCR + DVD Player .................... 6
TV + Satellite Receiver + VCR .................................. 7
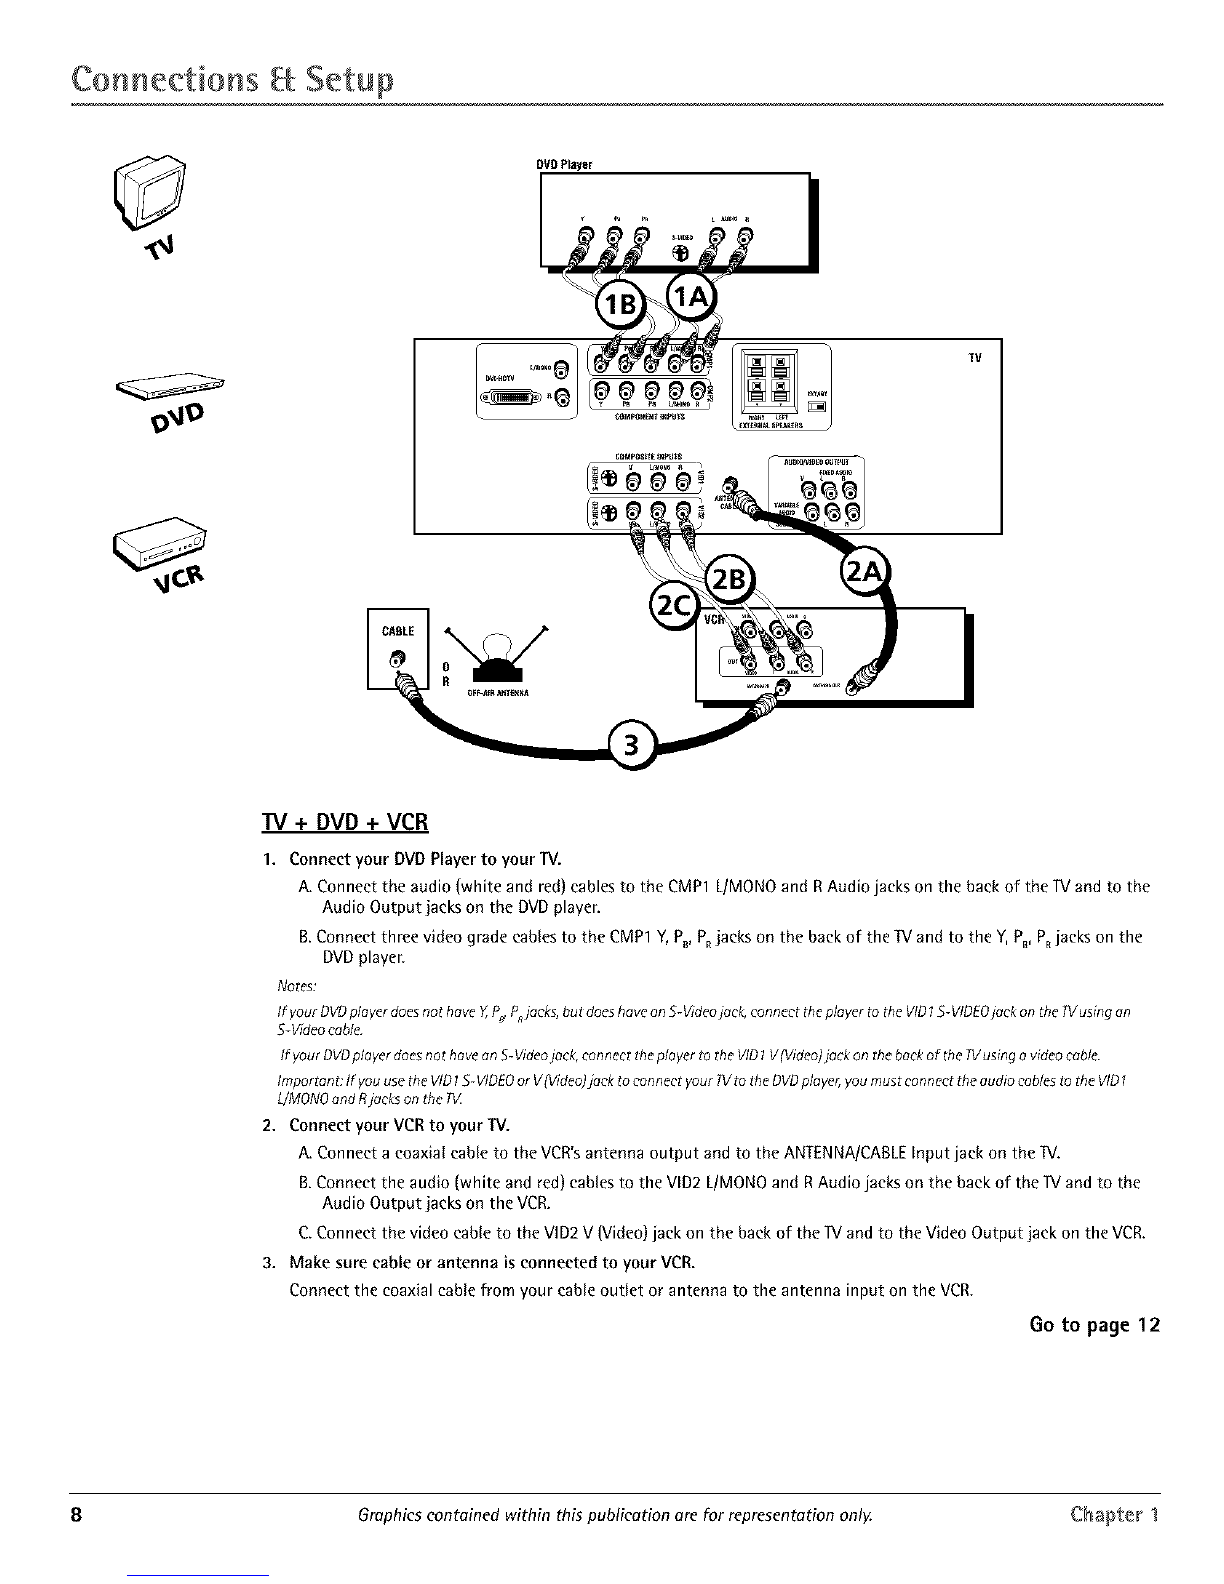
TV + OVO + VCR ......................................................... 8
IV+ AN Receiver or Speakers .................................. 9
Explanation of Jacks ................................................ 10
The Front of Your IV ............................................... 11
Front Inputs ..................................................... 11
Front Panel Buttons ........................................ 11
Plug in theTV ........................................................... 11
Put batteries in the remote ..................................... 11
How to Use the Remote Control to Complete the
Initial Setup ............................................................ 11
Turn on theTV .......................................................... 11
Complete the Initial Setup ...................................... 11
Set the Menu Language ................................. 12
Complete Auto Channel Search ..................... 12
Changing Lists and Labels .............................. 12
Auto Convergence .......................................... 12
Chapter 2: Using the Remote Control
The Buttons on the Remote Control ...................... 13
Using the INPUT Button ................................. 14
Programming the Remote to Operate Other
Components ............................................................ 14
Find Out If You Need to Program the
Remote .......................................................... 14
Programming the Remote .............................. 14
How to Use the Remote After You've
Programmed It .............................................. 15
Remote Control Codes ............................................. 15
Chapter 3: Using the TV's Features
Channel Banner ........................................................ 17
Why You Should Use the Autotuning Feature ...... 17
How to Set Up the Autotuning Feature ........ 17
Parental Controls and V-Chip ................................. 18
How V-Chip Works .......................................... 18
V-Chip TV Rating ............................................. 19
Blocking Specific Content Themes ................. 20
Viewing Specific Content Themes .................. 20
V-Chip Movie Rating Limit ............................. 20
V-Chip Unrated Program Block ...................... 21
Lock/Unlock Parental Controls ....................... 21
Front Panel Block ............................................ 21
PIP (Picture-in-Picture) and POP
(Picture-outside-Picture) Operation ................... 21
PIP and POP Buttons ....................................... 21
Chapter 4: Using the TV's Menu System
Sound Menu .............................................................. 22
Picture Menu ............................................................ 23
Channel Guide Menu ............................................... 23
Time Menu ................................................................ 24
Parental Control Menu ............................................ 24
PiP Menu ................................................................... 24
Setup Menu .............................................................. 24
Chapter 5: Other Information
Troubleshooting ........................................................ 26
Care and Cleaning .................................................... 27
Limited Warranty ..................................................... 28
Accessories ................................................................ 29
3