Reliance Orbic User manual

Orbic User Manual

2
Contents
1.Using This Manual ……..……………………………………………….……….. 4
2.Safety Instructions ……………………………………………………………….. 5
3.Boxed Contents …………………………………………………………………….. 7
4.Hardware Specification …………………………………………….…….….… 7
5.Product Overview………………………………………………………….….….. 8
6. Connectivity …….…………………………………………………………….…….. 9
6.1 Connecting to a PC ……………………………….……….……….…….... 9
6.2 Connecting an external USB device ……………...……..……….... 9
6.3 Connecting a micro SD Card ………………………….…….………..… 9
7.Getting Started ………………………………………………….……….………… 10
7.1 Charging the battery …………………………….……….……….…….... 10
7.2 Startup ………………………………………………………….…….……….... 11
7.3 Shutdown …………………………………………………….……….………… 11
7.4 Desktop ……………………….………………………………….…….………… 12
7.5 Sleep Mode …………………………………………….…………….………… 14
7.6 Configuring the Wallpaper ………………………………….…….……. 14
7.7 Applications ………………………………………………………….………… 15
7.8 Using the Touch Screen …………………………………….….……….… 16
7.9 Using Google Search ………………………………………….……………. 16
8.System Settings ………………………………………………………..………….. 18
8.1 Wireless & Networks …………………………………………..……….… 18
8.2 Bluetooth …………………………………………………………….….……... 21
8.3 Sound …………………………………………………………………….…….... 22
8.4 Display ………………………………………………………..…………….….... 23
8.5 Storage …………………………………………………………….……….….... 24
8.6 Battery …………………………………………………………..……….…….... 25
8.7 Apps …………………………………………………………………….…………. 25
8.8 Location Services ……………………………………………….…………… 26
8.9 Security ……………………………………………….…………………..……… 27
8.10 Language & Input ……………………………….…………………………… 28

3
8.11 Backup & Reset ………………………………….…………………………… 28
8.12 Accounts ………………………………………………….….………………….. 29
8.13 Date & Time …………………………………………….….………………….. 31
8.14 Accessibility ………………………………………………………..…………… 32
8.15 Developer Options …………………………………………………….….… 33
8.16 About Tablet …………………………………………….…………………….. 34
9.
Common Applications ………………………………………………….………
34
9.1
Browser Internet Access …………………………………………………. 34
9.2
Calculator ………………………………………………………….………….… 35
9.3
Calendar ……………………………………………………….……….….……. 35
9.4
Clock …………………………………………………………….……….....……. 36
9.5
Downloads ………………………………………………….………………….. 36
9.6
Email …………………………………………………………….…………..……. 37
9.7
Gmail / Google Play ……………………………………….……………….. 39
9.8
1Mobile Market ………………………………………….………………….. 42
9.9
Explorer ……………………………………………………….…………………. 43
9.10 Music ………………………………………………………….……………..…… 44
9.11 Sound Recorder …………………………………………….………………… 44
9.12 Gallery (Video Player) ……..………………………….…………………… 45
9.13 Camera …………………………………………………………………….……… 46
9.14 Widgets Page …………………………………………….……………………. 46

4
1. Using This Manual
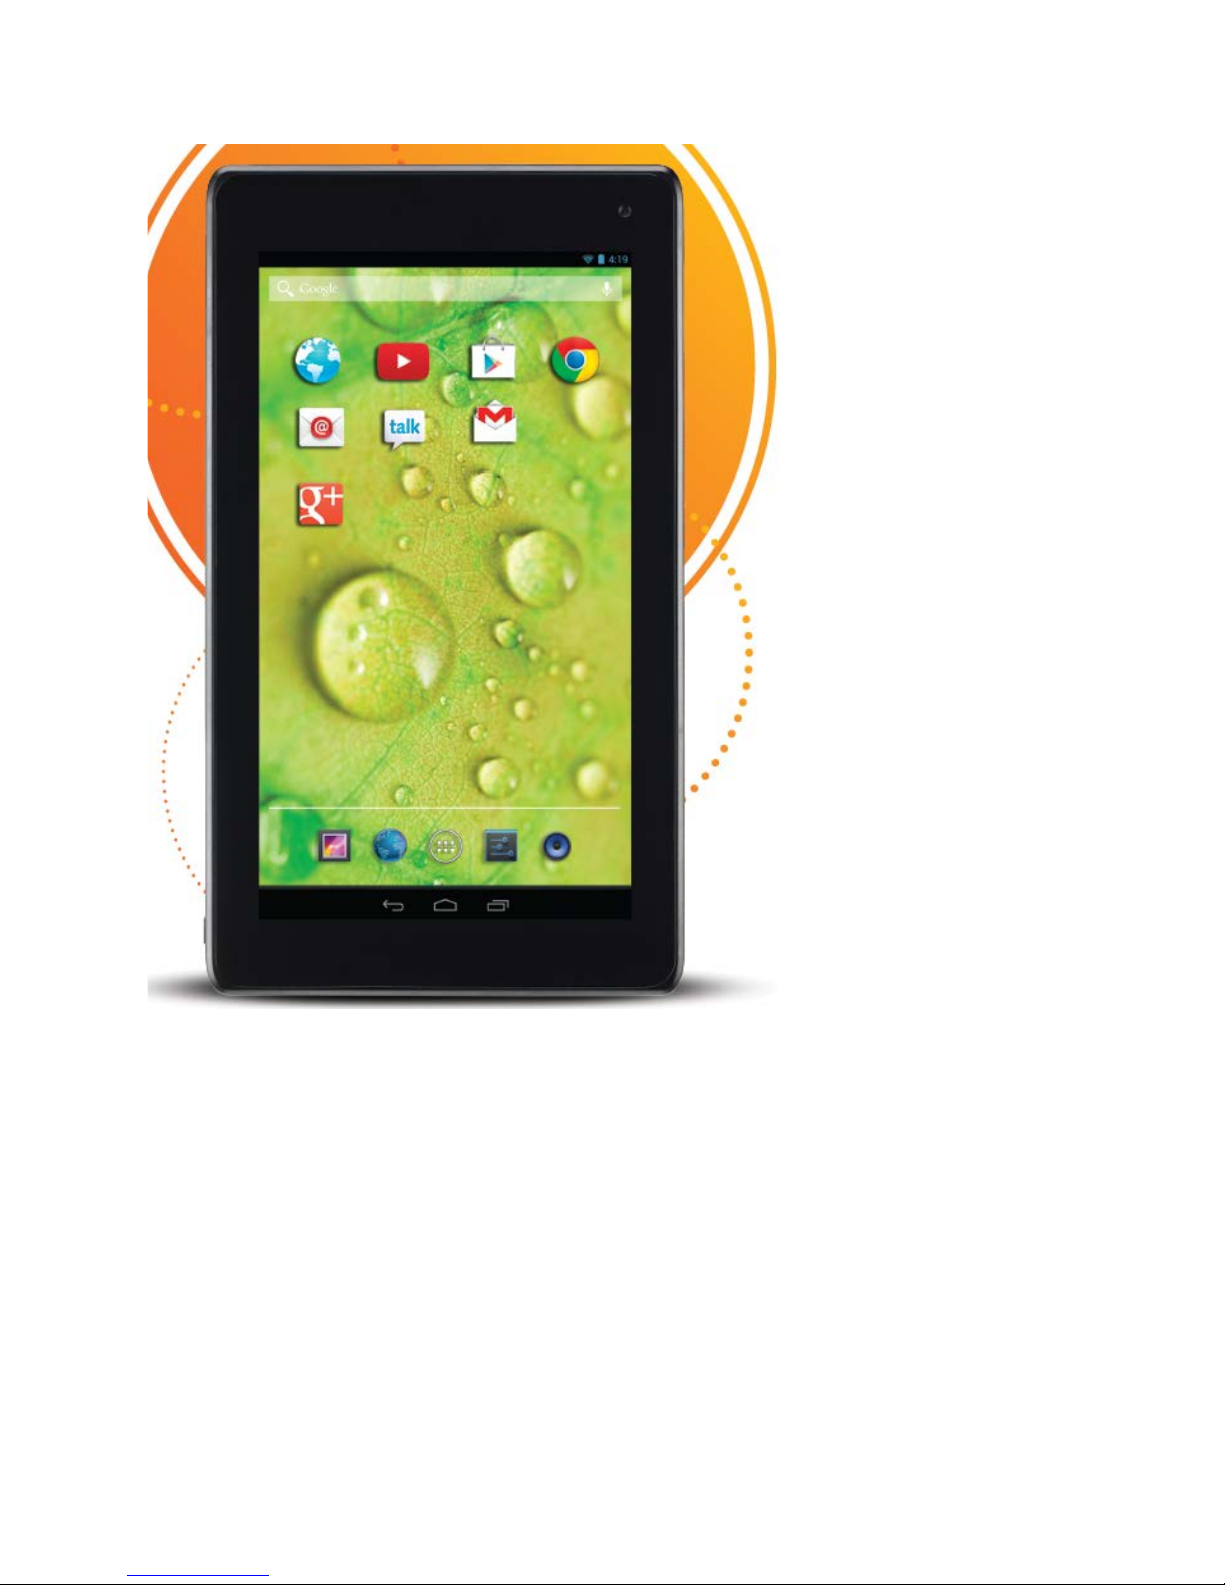
Congratulations on your purchase of this Tablet. This powerful and versatile
tablet brings the best of the web and mobile computing to your fingertips in a
lightweight, highly versatile platform that fits an active lifestyle. Built around the
Google Android Jelly Bean operating system, the tablet gives you access to
thousands of useful and entertaining applications to enhance your mobile experience.
With integrated wireless access and a highly responsive touchscreen, you can read
books and newspapers on the go; stay up-to-date on the latest news, sports, and
weather; manage your multimedia and business files; browse the web, and lots more.
Note: This Tablet does not have built in 3G and can only access the Internet when
connected to a wireless (Wi-Fi) network. If you would like to access the Internet while
on the move there are a number of 3G Mobile Hotspots / MiFi devices available from
all the major mobile operators. These will allow the Tablet to connect wirelessly with
the Hotspot, bringing the Internet to you when on the move.
Read Me First
•
Please keep this manual for future reference.
•
Please read this manual and all safety instructions carefully before using your
Tablet to ensure safe and proper use.
•
The descriptions in this manual are based on the default settings of your device.
•
Images and screenshots used in this user manual may differ in appearance from
the actual product.
•
Formatting and delivery of this user manual is based on the Google Android Jelly
Bean operating system and may vary depending on the device.
•
Content in this user manual may differ from the product, and is subject to
change without prior notice.
•
Available features and additional services may vary by device, software, or
service provider.
•
Applications and their functions may vary by country, region, or hardware
specification. are not liable for performance issues caused by third-party
applications.
•
Tablet is not liable for performance issues or incompatibilities caused by user
editing of system settings.
•
Software, wallpapers, images, sound sources, and other contents provided in
this device are licenced for limited use between and their respective owners.
Extracting and using these materials for commercial or other purposes is an
infringement of copyright laws. cannot be held liable for such copyright
infringement by the user.

5
Trademarks
Tablet and the logo are registered trademarks.
The Android logo, Google Search™, Google Maps™, Google Mail™, YouTube™, Android
Market™, and GoogleTalk™ are trademarks of Google, Inc.
Bluetooth® is a registered trademark of the Bluetooth SIG, Inc. worldwide.
HDMI® is a registered trademark of HDMI Licensing, LLC.
2. Safety Instructions
This user manual contains important safety instructions and information for proper
use of the device. Please follow the instructions in this manual carefully.
•
This is a high-density electronic product; please do not dismantle it by yourself.
•
Avoid shocks and do not let the device fall, as otherwise it may cause damage to
the device.
•
Do not use damaged power cords or plugs, or loose electrical sockets.
•
Do not touch the power cord with wet hands, or disconnect the charger by
pulling the cord.
•
Do not bend or damage the power cord.
•
Avoid using this product in the following environments: high and low
temperatures, humid environments, dusty environments, areas with strong
magnetic fields and prevent long-term exposure to the sun. In particular please
avoid leaving the device in the car during summer if the doors are closed.
•
To clean the product, gently wipe the product using a moist cotton cloth; the use
of other chemical cleaning is prohibited unless they are specifically designed for
this purpose. This product should be kept away from water droplets splashes, so
cups filled with liquids should not be placed near the product. Do not use
alcohol, thinners or petrol to clean the display.
•
If using the headset for a long time, high volume may cause permanent damage
to hearing.
•
Do not use headphones when going across a road, driving a motorcycle or
bicycle, in order to avoid traffic accidents.
•
Please use only the supplied battery, charger and accessories, the use of any
other type of product would be a breach of warranty regulations, and may be
dangerous.
•
Do not short-circuit the charger or the battery.

6
•
Do not drop or cause an impact to the charger or the battery.
•
Please deal with waste machinery and accessories according to local
environmental regulations.
•
If you have any questions about the use of this product, please contact your
local dealer or the Tablet customer service center.
•
The Standby Time of the batteries may vary due to different environmental
influences.
•
Any loss of data caused by product damage, repair or through any other issues
relating to the device are not covered under warranty. Please ensure you make
timely backups of all your data.
•
Do not handle a damaged or leaking Lithium Ion (Li-Ion) battery. For safe
disposal of your Li-Ion batteries, contact your nearest authorised recycling
centre.
•
Handle and dispose of batteries and chargers with care. Never dispose of
batteries or devices in a fire. Follow all local regulations when disposing of used
batteries or devices.
•
Never place batteries or devices on or in heating devices, such as microwave
ovens, cookers, or radiators. Batteries may explode when overheated.
•
Never crush or puncture the battery. Avoid exposing the battery to high
external pressure, which can lead to an internal short circuit and overheating.
Touchscreen Precautions
For optimal use of the touch screen, remove the screen protection film before using
your device.
To avoid scratching the touch screen, do not use sharp tools.
Do not allow the touch screen to come into contact with other electrical devices.
Electrostatic discharges can cause the touch screen to malfunction.
Do not allow the touch screen to come into contact with water. The touch screen may
malfunction in humid conditions or when exposed to water.
Your touch screen has a layer that detects small electrical charges emitted by the
human body. For best performance, tap the touch screen with your fingertip. The
touch screen will not react to touches of sharp tools, such as a stylus or pen which
could damage and mark the screen.

7
3. Boxed
Cont
e
nts
1. Tablet Device
2. Power Adapter
3. Quick Start Guide
4. Safety and Warranty guide
5. USB Cable (for connecting to a PC)
4. Hardware Specification
Processor
1.2GHz Cortex Dual Core Processor
PowerVR SGX540 Graphics Processor
Memory 1GB DDR3 high-speed memory
Storage8GB built-in with support for external micro SD card up to 32GB
W
ireless
IEEE802.11b/g/n
Wireless internet
USB USB2.0 OTG high speed interface
Video OutputHDMI 1.4 high definition video output interface
Audio 3.5mm earphone interface, Built-in microphone
Screen
Size 7 inch capacitive multi touch
Resolution 1024 x 600
Operation
Capacitive
5 point multi touch screen
System Android Jelly Bean
Others
Size (Length × Width × Thickness) 193.5 × 112.4 × 9.5mm
Weight 290g approx.
Battery Built-in polymer lithium battery 3000mAh

8
5. Product Overview
10
1 2
3 4 5 6 7 8 9
1. Micro SD Slot 2. Power Button
3. Power-in Socket 4. Mini HDMI Connector
5. Micro USB Connector 6. Reset Button
7. 3.5mm Headphone Jack8. Microphone
9. Volume Control Buttons 10.Front Camera

9
6. Connectivity
6.1 Connecting to a PC
You can connect the Tablet directly to a PC or Laptop using the supplied USB cable.
Once connected to a PC, the Tablet will appear as a mass storage device allowing
you to access it in the same way you would a removable hard drive, with access via
explorer or my computer.
1. Using the USB cable, connect the micro USB connector to your Tablet.
2. Connect the USB connector to a PC or Laptop.
3. Open folders to view files.
4. Copy files from the PC or Laptop to your Tablet.
To disconnect the Tablet from a PC, click the USB device icon on the Windows task
bar and click the option to safely remove the mass storage device. Then remove the
USB cable from the PC. Failure to follow these instructions may result in loss of data
on your Tablet or damage to your device.
6.2 Connecting an external USB device
You can use a USB storage device to store additional files.
Note: Your device may not support some USB storage devices.
1. Using the USB Adapter Cable, connect the micro USB connector to your
Tablet.
2. Connect a USB device to the USB connector on the Adapter Cable.
3. Open Explorer.
4. Touch the USB symbol to view files on the USB device.
6.3 Connecting a micro SD Card
You can insert a micro SD Card into your Tablet to store additional files. Capacities up
to 32GB are supported.
1. Insert a micro SD Card into the micro SD Card slot.
2. Open Explorer.
3. Touch the SD Card symbol to view files on the micro SD Card.
See chapter 9.9 for more information on using Explorer.

10
7. Getting Started
7.1 Charging the battery
The Tablet has a built-in battery. Before using the device for the first time, you must
fully charge the battery. Use only the 5V power adapter provided with the device, or
alternatively the Tablet can be charged via a USB cable to a PC or other
USB charging source. Unauthorized chargers can cause batteries to explode or damage
your device.
When your battery charge is low, the device will emit a warning tone and display a low
battery message. The battery icon will also be empty. If the battery charge becomes
too low, the Tablet will automatically power off.
If the battery is completely discharged, the Tablet will not turn on. Allow a
depleted battery to charge for a few minutes before you try to turn on the device.
Charging via the power adapter
1. Connect the power adapter to the Power-in socket.
2. Plug the power adapter into a power outlet.
Charging via USB
1. Connect the USB cable to the micro USB socket.
2. Plug the USB cable into a USB power source (power adapter, PC, Laptop etc.).
When it is charging, the battery symbol in the bottom right hand corner of the desktop
will show a charging (lightning) symbol .
When the battery is fully charged (no lightning symbol in the battery icon), unplug the
power adapter or USB cable from the Tablet and then from the power socket. To save
energy, unplug or turn off the power adapter at the socket, when not in use.
Note: You can use the Tablet while it is charging, but it may take longer to charge.
While the Tablet is charging, the touch screen may not function correctly. If this
happens, unplug the power adapter from the device in order to use it.
While charging, the Tablet may get warm. This is normal and should not affect your
device’s lifespan or performance.
If your Tablet is not charging properly, please contact support (see chapter 11).
Connecting the power adapter or USB cable improperly may cause serious damage to
the Tablet, the power adapter or the USB power source. Any
damage caused by misuse is not covered by the warranty.

11
7.2 Startup
Press and hold the power bu on for 3 seconds un l the Tablet starts to boot. Once it
has finished, the lock screen will be shown. To unlock, drag the “locked” symbol to
the right un l it becomes an “unlocked” symbol.
Note: This screen may have different wallpaper; this can be customized by the user.
You will now be at the default desktop page.
7.3 Shutdown
Press and hold the power bu on un l the Power off pop-up appears on the desktop.
Choose the OK op on to power offthe Tablet (as shown below).

12
7.4 Desktop
The Tablet runs the latest version of the Android Operating System. Android Jelly Bean
has a similar user interface to previous versions, but has been updated
specifically for use with tablet devices.
The image below shows the layout of the desktop and where information can be found
and accessed.
Notification
Bar (slide down to see notifications) Wi-Fi status and signal strength
Battery Status
Quick Settings
Shortcut
(slide down to
access)
All Applications
Quick
Links
Bar
(slide to move
through
apps)
Back Home Recent Apps
The All Applications Quick Links Bar can be scrolled up and down in order to access any
of the applications installed on the tablet.
In the top left hand corner is the Notifications Bar, which informs you of any activities
that the tablet is currently carrying out, or which have recently been completed. This
can be accessed by holding your finger on the bar and sliding your finger downwards.
Information shown in this bar will include downloads, application installations and
recently received messages etc.
In the top right hand corner is the Quick Settings Shortcut, which allows access to
shortcuts for brightness, settings, Wi-Fi, screen rotation, battery power, airplane mode
and bluetooth switching etc. This can be accessed by holding your finger on the Wi-Fi,
battery or clock icons and sliding your finger downwards.
At the bottom of the screen are the Back, Home and Recent App links. For more
information on these links see the following page.
To change the default image and to add and remove applications from the All
Applications Quick Links Bar, hold your finger down anywhere on the desktop for two
seconds. Untick any applications you don’t want to appear and select the back button.

13
When you next press on the Home icon , a Complete action using window will
popup. Tap on Launcher and then the Always link. Once done, the Android Home
Screen will appear and will become the default desktop.
The main interface controls on the desktop are shown below:
Icon Name Description
Opens the previous screen you were working in, even if it
Back
Home
was in a different app. Once you are back at the Home
Screen, you can't go any further back through your history.
Opens Home. If you’re viewing a left or right Home Screen,
opens the central Home Screen.
Recent Apps
Menu Button
Applications
Launcher
Battery Status
Opens a list of
thumbnail
images of Apps you have worked
with recently. To open an App, touch it. To remove a
thumbnail from the list, swipe it upwards or doqnwards.
Allows easy access to the menu options for the current
application.
(Android Home Screen only)
Allows access to all your apps and widgets.
Shows the current battery capacity or if the Tablet is
currently charging.
Status Icons Status icons to the left of the clock tell you which apps have
sent you
notifications.
Icons to the left of the clock, display
the current wireless network connection strength, battery
charge level etc.

14
7.5 Sleep Mode
During normal operation of the Tablet, press the power button once, to set the device
into sleep mode. The screen will turn off, but the device will be in a state of
readiness to be used at any time. To wake the device up again, press the power button
to resume normal operation. When the Tablet is not in use, you can use this
function in order to conserve the battery.
7.6 Configuring the Wallpaper (Android desktop only)
To change the Wallpaper on the Tablet, press one finger on any empty area of the
desktop and after a few seconds the Choose wallpaper from pop-up will appear.
Selecting Gallery, Live Wallpapers or Wallpapers will allow you to select from a
number of different options available as shown below.
Once you have chosen the wallpaper you would like, press the Set wallpaper button as
shown below.

15
7.7 Applica ons
To access all the applica ons available on the Tablet from the
Desktop, slide the All Applica ons Quick Links Bar up or down by
holding it with your finger and moving your finger up or down.
To select an applica on you wish to run, tap on the icon of the app
you wish to run to select and run it.
To add and remove applica ons from the All Applica ons Quick
Links Bar, hold your finger down anywhere on the desktop for two
seconds. Un ck any applica ons you don’t want to appear and
select the back bu on.
From this page you can run any applica on by touching the symbol for that applica on.
Each page of the applica ons list will show a number of installed applica ons, in
alphabe cal order. To access more applica ons, scroll the window to the le by
swiping your finger from right to le .

16
7.8 Using the Touch Screen
Use your fingers to manipulate icons, buttons, menus, the onscreen keyboard, and
other items on the touchscreen. You can also change the screen's orientation.
To select or activate something, touch it.
To type something, such as a name, password, or search term, just touch where you
want to type. A keyboard will popup and allow you to type into the field.
Other common gestures include:
Touch & hold
Touch & hold an item on the screen by touching it and not lifting your
finger until an action occurs.
Drag
Touch & hold an item for a moment and then, without lifting your
finger, move your finger on the screen until you reach the target
position. For example, you can drag to reposition shortcuts on the
Home Screen.
Swipe or slide Quickly move your finger across the surface of the screen, without
pausing when you first touch (so you don't drag something instead). For
example, you can slide a Home Screen left or right to view the other
Home Screens.
Double-tapQuickly tap twice on a webpage, map, or other screen to zoom. For
example, double tap a webpage in Browser to zoom in, and double-tap
again to zoom out.
Pinch In some apps (such as Maps, Browser, and Gallery), you can zoom in
and out by placing two fingers on the screen at once and pinching them
together (to zoom out) or spreading them apart (to zoom in).
7.9 Using Google Search
Google Search can help you find anything you need on your tablet or the web and is
available from the top of any Home Screen on the Tablet. There are two options
available:
•
Speak search terms: Touch the Microphone icon .
After you say what you're looking for, the Browser will open with a list of search
results.
•
Type search terms: Touch Google.
As you type, suggestions appear below the Search box.
The first few suggestions attempt to complete what you are typing:

17
•
To search for a suggestion immediately, touch it.
•
To add a suggestion to the search field, touch the arrow to its right. You can then
keep on typing or choose further suggestions.
•
To search for the contents of the search field, touch the Return key on the right
side of the keyboard.
The Browser will open with a list of search results, and below the search term will be
suggestions for all items found on your Tablet including the following:
•
A Maps marker indicates a business listing. Touch to view the listing, see its
location on a map, get directions or take other actions.
•
A Favorites icon identifies one of your bookmarks. Touch to open the
bookmarked page.
•
An App icon indicates one of your Apps. Touch to open the App.
•
A Book cover icon indicates one of your books. Touch to open that book.
•
A Music album icon indicates a song or other music you have downloaded to
your tablet. Touch to play that music.
•
A Video icon indicates one of your videos. Touch to play that video.
Set searchable items
To adjust where Google Search looks on your tablet:
1. On a Home Screen, touch Google.
2. Touch the Menu icon and select Settings and make sure that Searchable
items is selected.
3. Check the items on your tablet that you want to include in searches.
Manage Google Search privacy settings
1. On a Home Screen, touch Google.
2. Touch the Menu icon and select Settings and make sure that Google
Search is selected.
3. Adjust any of these settings:
Use Web History - Check to include suggestions based on previous searches
from your computer or other devices.
Manage Web History - Opens Browser to the web search history settings
associated with your Google Account.
Use My Location - Check to take account of your location in search results and
other Google services.

18
8. System Settings
To access all the available System Settings for the Tablet, you will need to access the
settings menu. Slide the All Applications Quick Links Bar up or down to select the
settings link and tap on it., Tap on the Settings icon from Application Launcher.
This will open the system settings interface. On the left hand side of the screen are all
the available settings options. Touching one of these groups allows access to all the
settings available within that group on the right hand side of the screen.
8.1 Wireless & Networks
Wi-Fi is a wireless networking technology that can provide Internet access at distances
of up to 100 meters, depending on the Wi-Fi router and your surroundings. To use
Wi-Fi, you need to connect to a wireless access point, or "hotspot." Some hotspots are
open and you can simply connect to them. Others implement security features that
require a password to be entered in order to ensure that only authorized users can
connect.
Note: To extend the life of your battery between charges, turn off Wi-Fi when you are
not using it. You can also set your Tablet to disconnect automatically from Wi-Fi
networks when it is sleeping.
To enable Wi-Fi:
1. Slide the Wi-Fi switch to the right of Wi-Fi to the On position.
2. Once Wi-Fi has been turned on, the Tablet will automatically scan for available Wi-
Fi networks and display the names of those it finds. Secured networks are indicated
with a Lock icon. If the Tablet finds a network that you connected to previously, it
will automatically connect to it.

19
3. Find the right network and select it by touching the entry. If the network is secured,
you are prompted to enter a password. Make sure you enter the correct password,
otherwise the Tablet will not be able to connect to the network.
Where can the correct password be found?
If you are connecting to a Wireless Network which is provided by a router which
has been supplied by BT, Sky etc. then the password will be printed on a sticker on
the unit. Please ensure that you enter any letters using the correct case. Uppercase
letters must be entered in uppercase and lowercase letters must be lowercase.
If the router doesn’t have a sticker showing the password, you will have to ask
whoever setup the wireless network to provide you with the correct password to
connect to the network.
Once finished, the Tablet will now be connected to the network. Once
connected, you will see the wireless icon in the status bar.

20
Add a Wi-Fi network
If your wireless network does not broadcast its name (SSID), or you are outside the
range of a Wi-Fi network, you can still add a Wi-Fi network so your Tablet will
remember it, along with any security credentials, and connect to it automatically
when it's in range.
1. Turn on Wi-Fi, if it's not already on.
2. Touch Add Network at the top of the screen.
3. Enter the SSID (name) of the network. If necessary, enter security or other
network configuration details.
4. Touch Save.
The information about the network is saved. Your Tablet will connect to this
network automatically the next time you come within range.
Forget a Wi-Fi network
You can make the Tablet forget about the details of a Wi-Fi network that you
added, if you no longer use it.
1. Turn on Wi-Fi, if it's not already on.
2. In the Wi-Fi settings screen, touch the name of the network.
3. Touch Forget in the dialog that opens.
Note: You should use Forget if you have entered the wrong password and need to
setup the connection again.
Configure proxy settings for a Wi-Fi network
Some networks require you to connect to internal or external network resources via a
proxy server. By default, the Wi-Fi networks you add are not configured to connect via
a proxy, but you can change that for each Wi-Fi network you've added.
1. In the Wi-Fi settings screen, touch and hold the name of the network.
2. Touch Modify network in the dialog that opens.
3. Select Show advanced options.
4. If the network has no proxy settings, touch None under Proxy Settings. If it does,
touch Manual in the menu that opens.
5. Enter the proxy settings supplied by your network administrator.
6. Touch Save.
The proxy settings apply only to the Wi-Fi network you modified. To change the proxy
settings for other Wi-Fi networks, modify them individually.
Table of contents
Languages: