RevoAce GCT2220W User manual

Table of Contents
Important Safeguard
s....................
Page 2
Expanded View & Parts list .................... 5
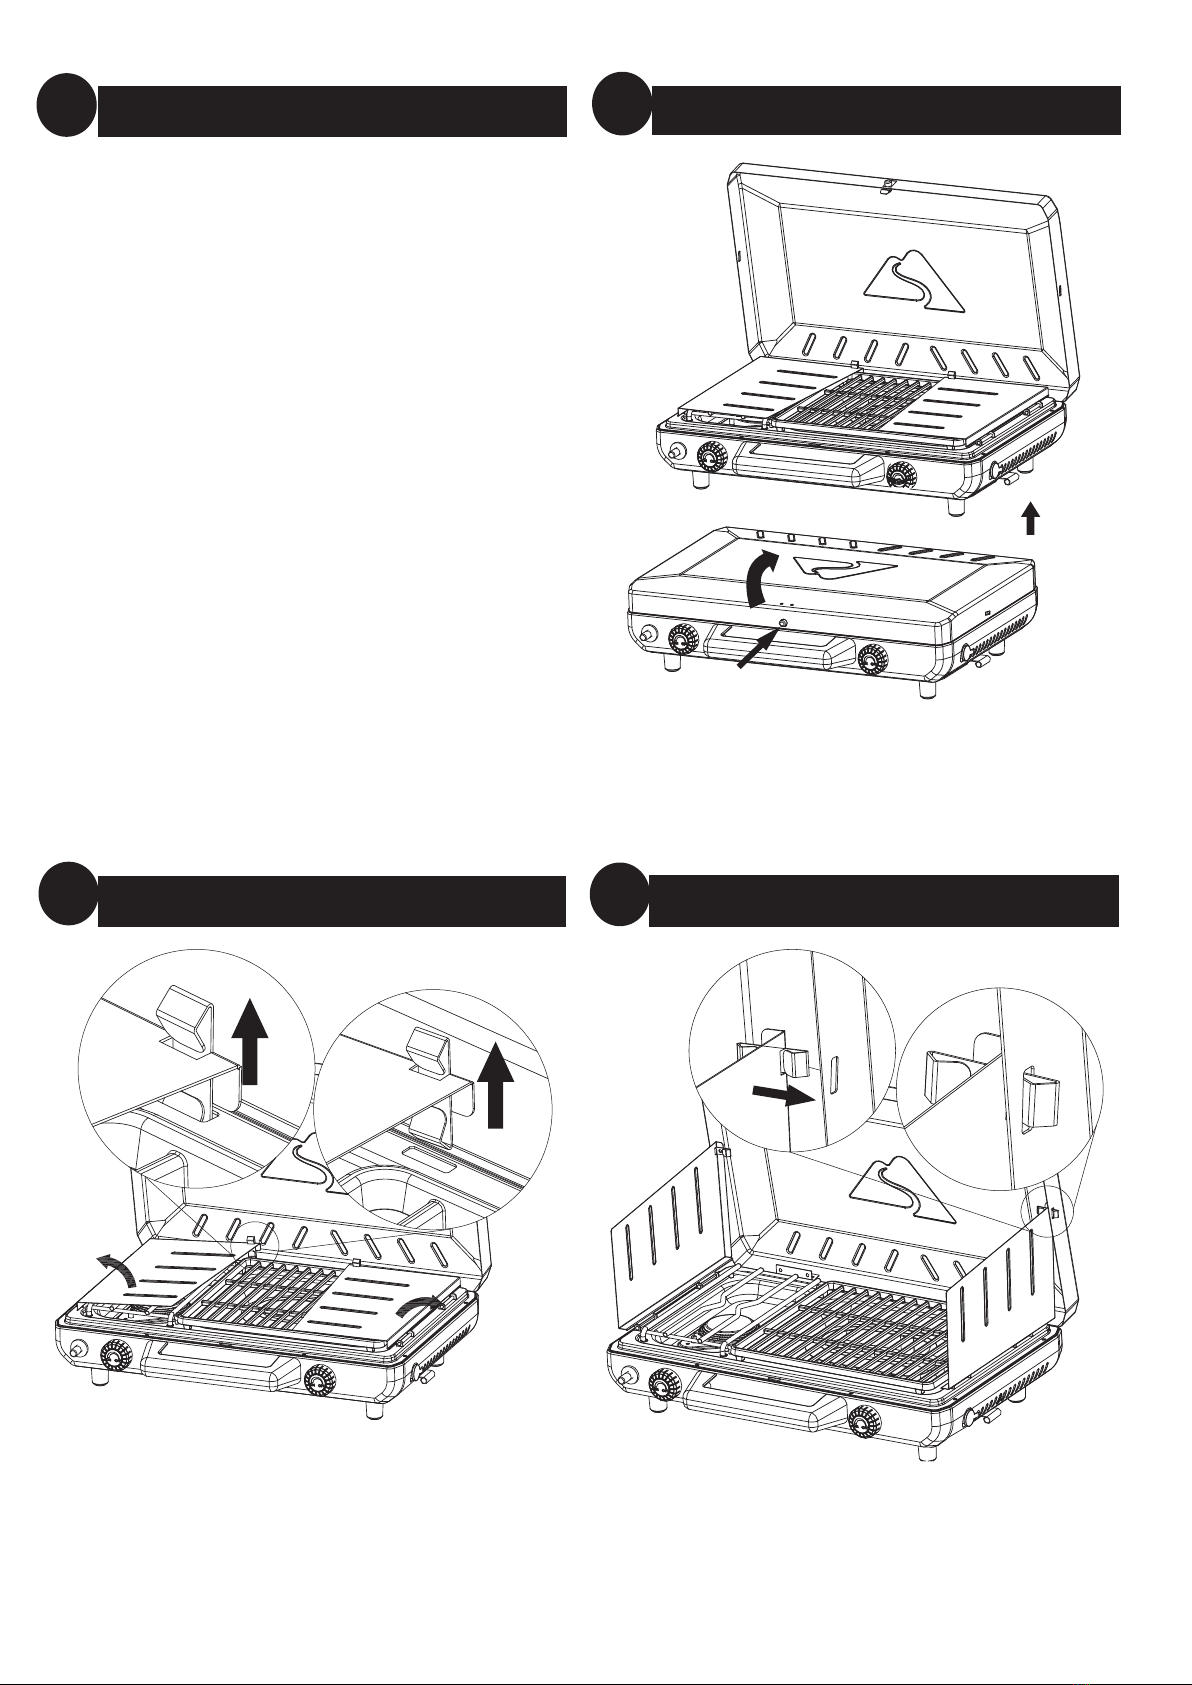
Assembly Instructions.........................6
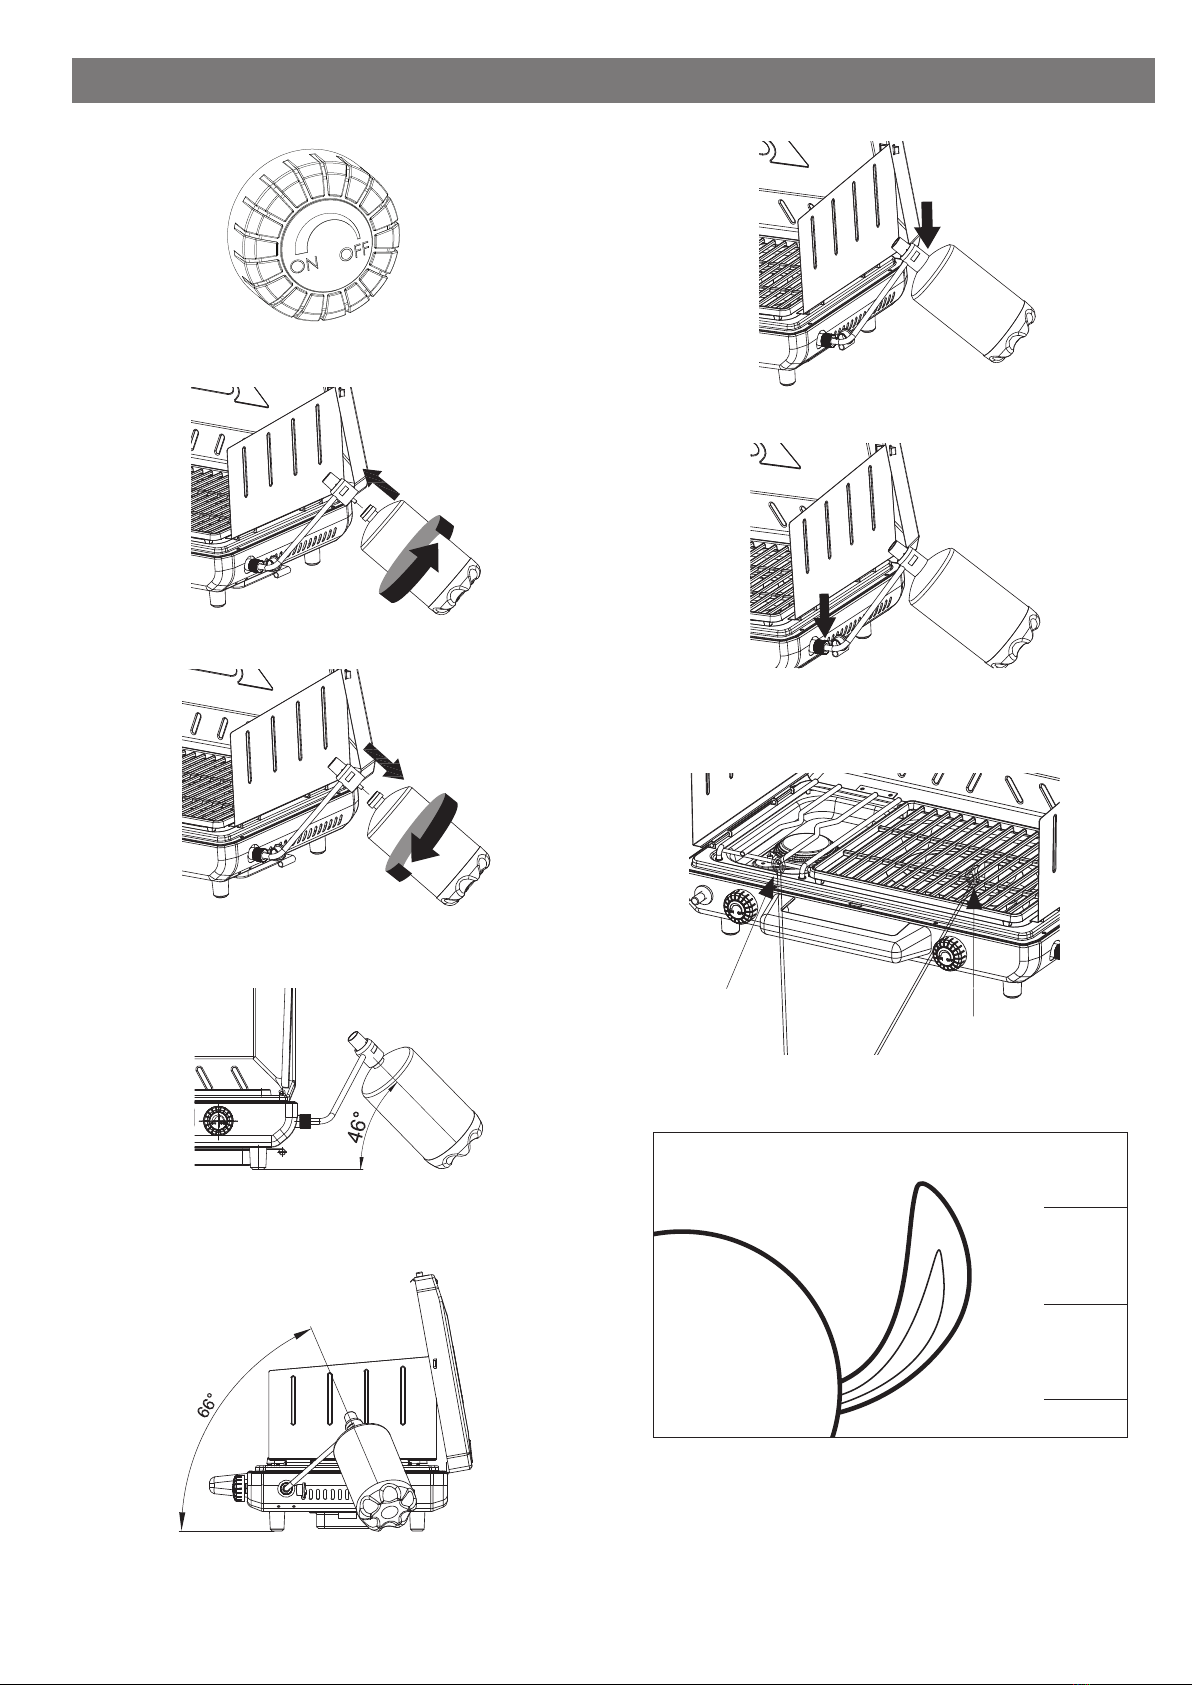
Operating Instructions........................ 8
Cleaning and Care ......................... 10
Limited Warranty .......................... 11
Troubleshooting ........................... 11
The use and installation must conform with local
codes or, in the absence of local codes, with either the
National Fuel Gas Code, ANSI Z223.1/NFPA 54, Natural
Gas and Propane Installation Code, CSA B149.1, or
Propane Storage and Handling Code, B149.2, or the
Standard for Recreational Vehicles, ANSI A 119.2/NFPA
1192, and CSA Z240 RV Series, Recreational Vehicle
Code, as applicable.
THIS INSTRUCTION BOOKLET CONTAINS IMPORTANT
SAFETY INFORMATION. PLEASE READ AND KEEP FOR
FUTURE REFERENCE.
If you are assembling this unit for someone else, give
this manual to him or her to read and save for future
reference.
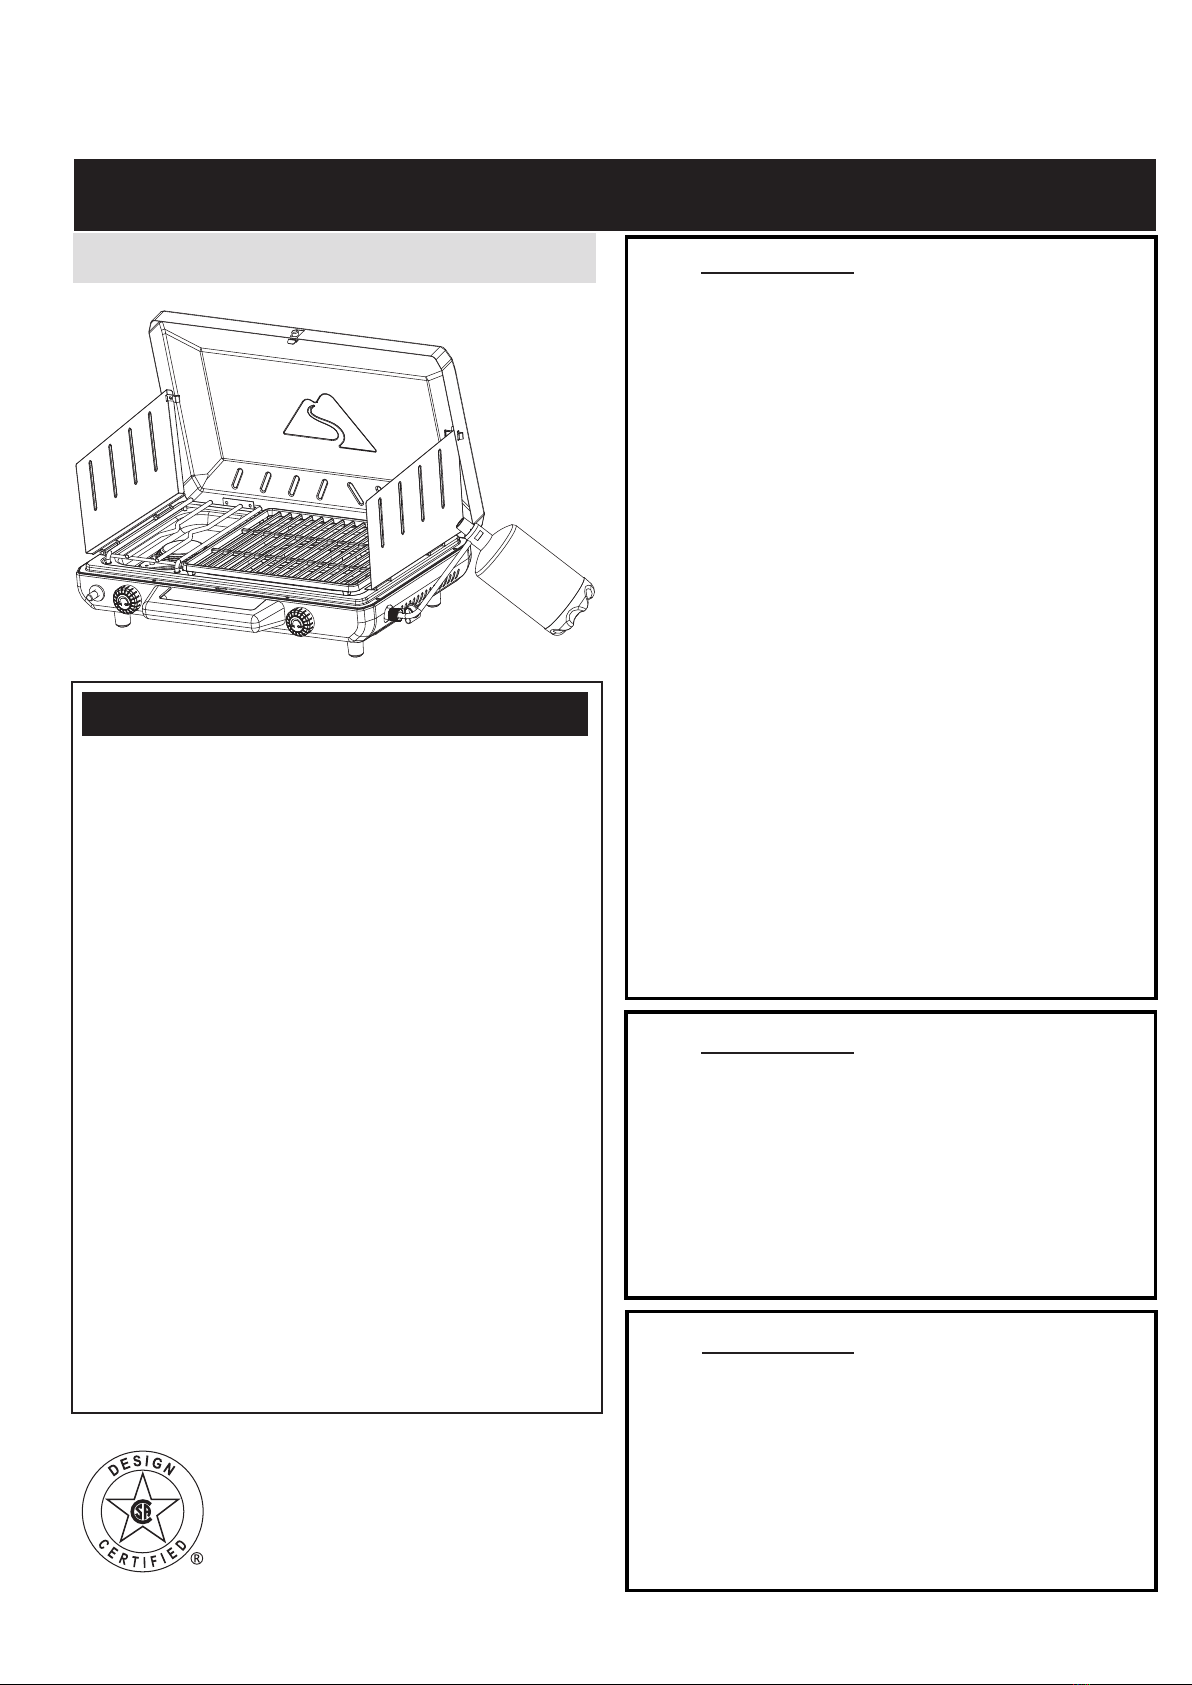
OWNER’SOWNER’S MANUALMANUAL
Outdoor LP Gas Camp Stove
Model No. GCT2220WModel No. GCT2220W
Manufactured in China for: RevoAce Inc. Limited
Hong Kong, China
1.833.908.2025 GCT2220W-OM-E-F100
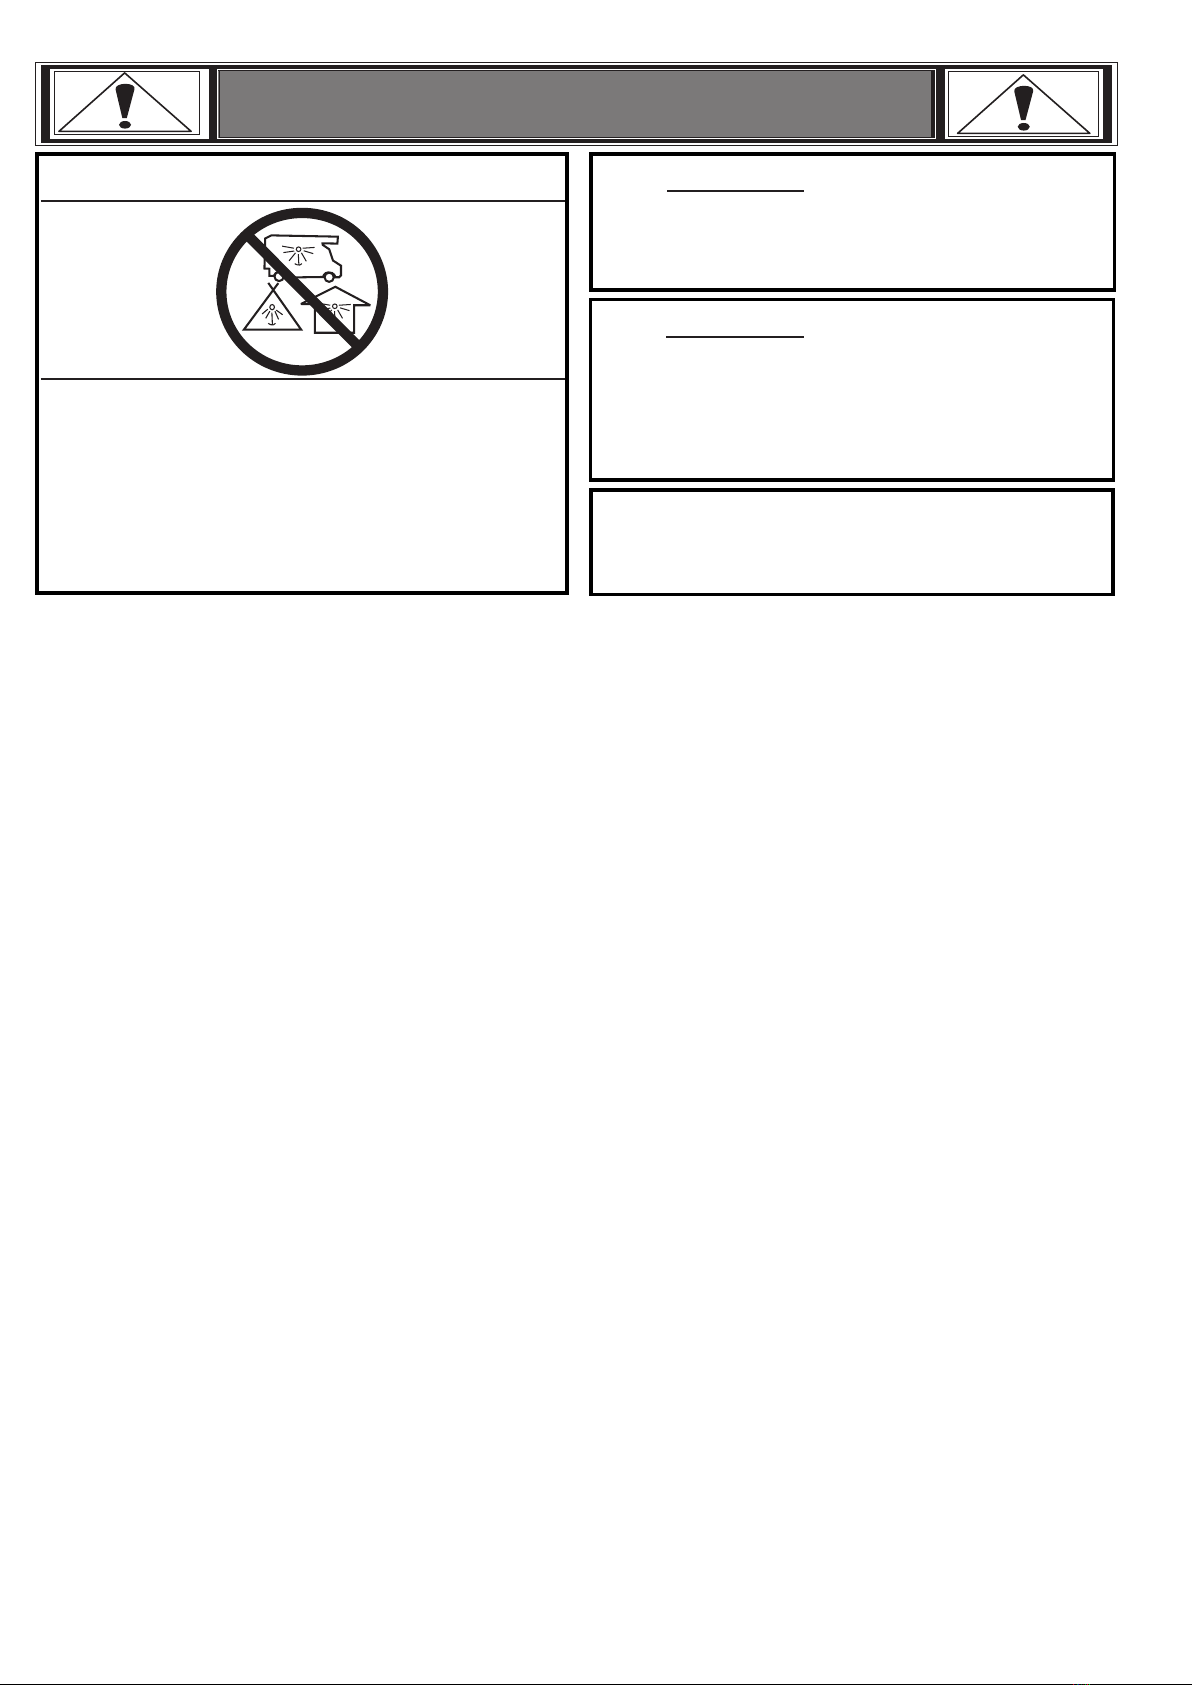
WWARNING
FIRE OR EXPLOSION HAZARD
If you smell gas:
1. Do NOT attempt to light appliance.
2. Make sure appliance is in the off
position.
3. Extinguish any nearby flame(s).
4. Shut off cylinder fuel supply valve
if so equipped, or if equipped with a
disposable fuel cylinder, disconnect
cylinder.
5. Leave the area immediately.
6. Allow gas to dissipate 5 minutes.
7. If gas smell has dissipated from the
area, of the appliance, and fuel supply,
follow gas connection procedures.
8. If you smell gas again, follow steps
1-6 and have appliance serviced.
Failure to follow these instructions
could result in fire or explosions, which
could cause property damage, personal
injury, or death.
WWARNING
Improper installation, use, adjustment,
alteration, service, or maintenance
can cause injury or property damage.
Refer to this manual. For assistance
or additional information consult a
qualified installer, service agency or gas
supplier.
WWARNING
This product can expose you to
chemicals, including carbon monoxide
and soot which are known to the State
of California to cause cancer, birth
defects, and other reproductive harm.
For more information go to www.
P65Warnings.ca.gov.

2
IMPORTANT SAFEGUARDS
WWARNING
FOR YOUR SAFETY:
Do NOT store or use gasoline or other liquids
with flammable vapors in the vicinity of this
or any other appliance.
WDANGER
CARBON MONOXIDE HAZARD
• This appliance can produce carbon monoxide
which has no odor.
• Using it in anenclosed space can kill you.
• Never use this appliance in an enclosed space
such as a camper, tent, car or home.
WDANGER
Do NOT leave this appliance unattended
while it is in operation.
WWARNING
FOR YOUR SAFETY:
For Outdoor Use Only (outside any enclosure)
WDANGER: Failure to follow the instructions, dangers, warning and cautions in this manual may result in
serious bodily injury or death, or in a fire or an explosion causing damage to property.
WWARNING:
WThis camp stove is for outdoor use only, and should not be used in a building, garage or any other enclosed
area.
WImproper installation, adjustment, alteration, service or maintenance can cause injury or property damage.
WRead the installation, operation and maintenance instructions thoroughly before installing or servicing this
equipment.
WDo NOT operate, light or use this appliance within eight feet of walls, structures or buildings.
WKeep all combustible items and surfaces at least 21 inches (53 cm) away from this camp stove at all times.
Do NOT use this camp stove or any gas product under any overhead or near any unprotected combustible
constructions.
WThis camp stove is NOT for commercial use. This lantern is safety certified for use in the United States and/or
Canada only. Do NOT modify for use in any other location. Modification will result in a safety hazard and will
void your warranty.
WThis camp stove is for use with liquid propane (LP) gas only. The conversion to or attempted use of natural
gas in this LP gas camp stove is dangerous and will void your warranty.
WLP Gas Characteristics:
a. LP gas is flammable and hazardous ifhandled improperly. Become aware of the characteristics before
using any LP gas product.
b. LP gas is explosive under pressure, heavier than air and settles and pools in low areas.
c. LP gas in its natural state has no odor.For your safety, an odorant is added that smells like rotten cabbage.
d. Contact with LP gas can cause freeze burns to skin.
WDo NOT store a spare LP cylinder within 10 feet (3.05 m) of this appliance.
WAn LP cylinder not connected for use should not be stored in the vicinity of this or any other appliance.
WLP gas tank needed to operate. Only tanks marked “propane” may be used.
WThe LP gas cylinder must be constructed and marked in accordance with the Specifications for LP-
gas Cylinders of the U.S. Department of Transportation (D.O.T.), Cylinders, Spheres and Tubes for the
Transportation of Dangerous Goods; or the National Standard of Canada, CAN/CSA-B339.
WLP gas tank must be arranged for vapor withdrawal.
WLP gas tank must remain upright or at a 46º angle. Do NOT use when laying LP gas tank flat, as this will cause
damage to your camp stove and void your warranty.

3
IMPORTANT SAFEGUARDS
WDented or rusted LP gas tanks may be hazardous and should be checked by your LP gas supplier prior to use.
WThe LP gas tank should NOT be dropped or handled roughly.
WLP gas tanks must be stored outdoors out of the reach of children and must not be stored in a building,
garage or any other enclosed area. Your tank must never be stored where temperatures can reach over 125°F.
WNever attempt to attach this camp stove to the self-contained LP gas system of a camper trailer, motor home
or house.
WDo NOT install or use in or on boats or recreational vehicles.
WThe use of alcohol, prescription or non-prescription drugs may impair the consumer’s ability to properly
assemble and safely operate the appliance.
WNever use charcoal, lighter fluid, lava rocks, gasoline, kerosene or alcohol with this product.
WYour camp stove has been checked at all factory connections for leaks. Recheck all connections, as
movement in shipping can loosen connections.
WCheck for leaks even if your unit was assembled for you by someone else.
WDo NOT operate if a gas leak is present. Gas leaks may cause a fire or explosion.
WYou must follow all leak-checking procedures before operating. To prevent fire or explosion hazard when
testing for a leak:
a. Always perform leak test before lighting this camp stove and each time the tank is connected for use.
b. No smoking. Do NOT use or permit sources of ignition in the area while conducting a leak test.
c. Conduct the leak test outdoors in a well-ventilated area.
d. Do NOT use matches, lighters or a flame to check for leaks.
e. Do NOT use this camp stove until any and all leaks are corrected.
WIf you are unable to stop a leak, disconnect the LP gas supply. Call a gas appliance serviceman or your local
LP gas supplier.
WDo NOT use in an explosive atmosphere. Keep camp stove area clear and free from combustible materials,
gasoline and other flammable vapors and liquids.
WIt is essential to keep this camp stove’s valve compartment, burners and circulating air passages clean.
Inspect camp stove before each use.
WDo NOT alter this camp stove in any manner.
WDoing so will void your warranty.
WDo NOT use this camp stove unless it is COMPLETELY assembled and all parts are securely fastened and
tightened.
WThis camp stove should be thoroughly cleaned and inspected before each use.
WUse only the regulator provided. The replacement regulator shall be that specified by the manufacturer.
WUse only RevoAce Inc. Limited factory-authorized parts.
WThe use of any part that is not factory-authorized can be dangerous.
WThis will also void your warranty.
WDo NOT touch metal parts of this camp stove until they have completely cooled to avoid burns, unless you are
wearing protective gear (pot holders, gloves, BBQ mittens, etc.).
WDo NOT install or use in or on boats or recreational vehicles (RV).
WDo NOT use camp stove in a vehicle trunk, station wagon, mini-van or sport utility vehicle (SUV).
WWhen cooking, fire extinguishing materials should be readily accessible. In the event of an oil/grease fire, do
NOT attempt to extinguish with water. Use type BC dry chemical fire extinguisher or smother with dirt, sand
or baking soda.
WDo NOT use this camp stove in high winds.
WNever lean over this camp stove when lighting.
WDo NOT use this camp stove if any part has been under water. Immediately call a qualified service technician
to inspect the appliance and to replace any part or control system and any gas control that has been under
water.

4
IMPORTANT SAFEGUARDS
WDo NOT leave a lit camp stove unattended, especially keep children and pets away from camp stove at all
times.
WDo NOT attempt to move this camp stove when in use. Allow this camp stove to cool before moving or
storing.
WStorage of this camp stove indoors is permissible only if the tank is disconnected, removed from this camp
stove and properly stored outdoors.
WDo NOT attempt to disconnect the gas regulator from the tank or any gas fitting while this camp stove is in
use.
WDisconnect LP gas tank when not in use.
WAlways use your camp stove on a hard, non-combustable, level surface. An asphalt or blacktop surface may
not be acceptable for this purpose.
WDo NOT use directly on wooden decks or wooden picnic tables.
WKeep all electrical cords away from a hot camp stove.
WThis camp stove is not intended for and should never be used as a heater.
WTOXIC fumes can accumulate and cause asphyxiation.
WAfter a period of storage and/or nonuse, check for leaks and burner obstructions.
WAlways use a meat thermometer to ensure food is cooked to a safe temperature.
WNever cover entire cooking area with aluminum foil.
WUse protective gloves when assembling this product.
WDo NOT force parts together as this can result in personal injury or damage to the product.
WThe minimum environmental temperature for safe storage and operation of the appliance is -18°C (-0.4°F).
WDeath, serious injury or damage to property may occur if the above is not followed exactly.

5
Parts List
Expanded View
1Cooking Grid A G2220-010
2Cooking Grid B G2220-020
3Control Knob (2)* G2220-030
4Regulator G2208-040
5Burner A* G1304-010
6Handle* G2220-040
7Burner B* G2220-050
8Grease Cup G2226-080
9Body Assembly* G2220-060
10 Feet (4)* G2220-070
11 Igniter* G2220-080
* Pre-assembled
1
2
3
3
4
6
5
7
9
8
11 10
10
10

6 Assembly Instructions
1
Unfold Wind Guard Side Panels
4
Open Wind Guard Side Panels
3
Press Button and Open Lid
2
Please have your owner’s manual and model number
available for reference.
Note: The model number can be found inside of the grill.
Assembly Tips:
1. Select an area where you will assemble this
product. To protect components, choose a smooth
surface that’s free of cracks or openings.
2. Spread out all parts.
3. Tighten all hardware connections by hand first.
Then, before completing each step, go back and
fully tighten all hardware. Be careful not to over-
tighten. That could damage surfaces or strip
threads.
4. For best results, complete each step in the order
presented.
To complete assembly you will need:
• (1) Leak Detection Solution (instructions on how
to make solution are included in “Operating
Instructions” section).
• (1) 14.1 oz or (1) 16.4 oz LP gas tank (not included).
Typical assembly is approximately 5 minutes.
DO NOT RETURN TO PLACE OF PURCHASE.

7
Remove Cooking Grid A and Regulator
5
Insert Cooking Grid
6
Attach Regulator
7

8
Checking for Leaks
Burner Connections
1. Make sure the regulator is securely fastened to the burner (Figure 7).
WWARNING:Failure to inspect this connection or follow these instructions could cause a fire or an explosion
which can cause death, serious bodily injury or damage to property.
2. If the burner/venturi tube does not rest flush to the regulator, please contact 1.833.908.2025 for assistance.
First Use
1. Make sure all labels, packaging and protective films have been removed from this camp stove.
2. Remove manufacturing oils before cooking on this camp stove for the first time, by operating this camp stove for at least 5 minutes on
“ON.” This will “heat clean” the internal parts and dissipate odors.
This camp stove is designed to operate with a one pound 7-3/8” high disposable / 14.1 oz. propane gas tank (DOT 39 Cylinder).
Do NOT ATTEMPT TO REFILL ANY ONE POUND(14.1 oz.) PROPANE GAS TANKS!
Operating Instructions
Connecting LP Gas Tank
1. Make sure the control knobs are in the “OFF” position (Figure 1).
2. Lubricate the threads of the regulator valve with petroleum jelly. Insert the gas tank into the regulator valve and hand-tighten firmly (Figure
2).
3. LP gas tank must be kept at a 46º angle (Figures 4).
4. Test for leaks.
WTo maximize use and prevent damage to this camp stove and its components, you must keep the LP gas
tank a 46º angle. Not doing so will void your warrantyest for leaks.
Disconnecting LP Gas Tank
1. Turn the control knob to the “OFF ” position (Figure 1).
2. Rotate LP gas tank counterclockwise until it is detached (Figure 3).
3. Store the LP gas tank in a proper location, per instructions on the LP gas tank.
Regulator / 1lb. LP Gas Tank Connection
1. Make 2-3 oz. of leak detection solution by mixing one part liquid dishwashing soap with three parts water.
2. Make sure control knob is “OFF” (Figure 1).
3. Spoon several drops of solution, or use squirt bottle, at the LP gas tank to regulator connection (Figure 6 & 7).
4. Inspect the solution at the connections, looking for bubbles.
a. If any bubbles appear, remove the LP gas tank and reconnect, making sure the connection is secure.
b. If you continue to see bubbles after several attempts, remove the LP gas tank per “Disconnecting LP Gas Tank” section, and contact
1.833.908.2025 for assistance.
c. If no bubbles appear after one minute, turn control knob to the “OFF” position, wipe away solution and proceed.
Lighting Instructions
WWARNING: Do NOT expose this camp stove to flammable vapors or liquids during lighting.
1. Make sure all labels, packaging and protective films have been removed from this camp stove.
2. Make sure there are no obstructions of airflow to the unit. Spiders and insects can nest within and clog the burner/venturi tube at the
orifice. A clogged burner tube can lead to a fire beneath the appliance.
3. Control knobs must be in the “OFF” position (Figure 1).
4. Attach the LP gas tank per the “Connecting LP Gas Tank” instructions.
5. Turn control knob counterclockwise to “ON”.
6. Press the igniter button quickly 3 to 4 times to light burner.
7. If ignition does not occur in 5 seconds, turn burner control knob “OFF,” wait 5 minutes and repeat lighting procedure.
8. Wearing heat-resistant gloves, position a long lit match or long lit butane lighter near the side of the burner (Figure 8).
9. After lighting, observe the burner flame. Make sure all burner ports are lit and flame height matches illustration (Figure 9).
WCAUTION: If burner flame goes out during operation, immediately turn the control knobs “OFF” and let the
gas clear for about 5 minutes before re-lighting.
10. Repeat steps 4-8 for second burner.

9
Operating Instructions (Continued)
Figure 1
Figure 2
Figure 3
Figure 4
Figure 5
Figure 6
Figure 7
Figure 8
Figure 9
Burner
Flame Slight
Yellow
Slight
Blue
Dark
Blue
Match
Match
Rotate knobs by
clockwise to stop
position (OFF)

10
Operating Instructions (Continued)
Turning Off
1. Turn control knobs to the “OFF” position.
2. Remove the LP gas tank per the “Disconnecting LP Gas Tank” instructions.
Cooking
1. Open lid and ignite the burner(s) per “Lighting Instructions” section.
2. Wear protective gloves to place pots and/or pans onto burner grid.
3. Wear protective gloves and use long-handle tongs to place food into pots and/or pans above the lit burner.
4. Adjust controls to desired temperature.
5. Cook until desired internal food temperature is achieved.
6. Turn camp stove off per “Turning Off” section.
WCAUTION: All cleaning and maintenance should be done when grill is cool and with the fuel supply
disconnected.
WCAUTION: Do NOT clean any camp stove part in a self-cleaning oven. The extreme heat will damage the
finish.
WCAUTION: Keep camp stove clear and free from combustible materials, gasoline and other flammable
vapours and liquids.
WCAUTION:Do NOT obstruct the flow of this combustion and ventilation air.
Notices
1. Abrasive cleaners will damage this product.
2. Never use oven cleaner to clean any part of camp stove.
Inspecting
This camp stove should be inspected on a regular basis to ensure product safety and longer product life.
WWARNING: Do NOT attempt to inspect this camp stove unless the flames are COMPLETELY out and unit is
cool to the touch.
1. Check burner to make sure it is secure.
2. Check burner/venturi tube to make sure it is clear and free of spider nests.
3. Check all gas connections for leaks.
4. Check components for any signs of damage or rust.
5. If damage to any component is detected, do NOT operate until repairs are complete.
Cleaning Surfaces
WWARNING: Do NOT attempt to clean this camp stove unless the flames are COMPLETELY out and unit is cool
to the touch.
1. Wipe surfaces clean with mild dishwashing detergent or baking soda mixed with water.
2. For stubborn stains, use a citrus-based degreaser and a nylon scrubbing brush.
3. Rinse clean with water.
4. Allow to air dry.
Cleaning and Care

11
Limited Warranty
RevoAce Inc. Limited warrants to the original retail purchaser of this product, and to no other person, that if this product is assembled,
maintained, and operated in accordance with the printed instructions accompanying it, then for a period of one (1) year from the date of
purchase, all parts in such product shall be free from defects in material and workmanship. RevoAce Inc. Limited may require reasonable
proof of your date of purchase. Therefore, you should retain your sales slip or invoice. This Limited Warranty shall be limited to the repair or
replacement of parts, which prove defective under normal use and service and which RevoAce Inc. Limited shall determine in its reasonable
discretion upon examination to be defective. Before returning any parts, you should contact RevoAce Inc. LimitedCustomer Service Department
using the contact information listed below. If RevoAce Inc. Limited confirms, after examination, a defect covered by this Limited Warranty in
any returned part, and if RevoAce Inc. Limited approves the claim, RevoAce Inc. Limited will replace such defective part without charge. If you
return defective parts, transportation charges must be prepaid by you. RevoAce Inc. Limitedwill return replacement parts to the original retail
purchaser, freight or postage prepaid.
This Limited Warranty does not cover any failures or operating difficulties due to accident, abuse, misuse, alteration, misapplication, improper
installation or improper maintenance or service by you or any third party, or failure to perform normal and routine maintenance on the
product as set out in this owner’s manual. In addition, the Limited Warranty does not cover damage to the finish, such as scratches, dents,
discoloration, rust or other weather damage, after purchase.
This Limited Warranty is in lieu of all other express warranties. RevoAce Inc. Limited disclaims all warranties for products that are purchased
from sellers other than authorized retailers or distributors, including the warranty of merchantability or the warranty of fitness for a particular
purpose.
RevoAce Inc. Limited ALSO DISCLAIMS ANY AND ALL IMPLIED WARRANTIES, INCLUDING WITHOUT LIMITATION THE IMPLIED WARRANTIESOF
MERCHANTABILITY AND FITNESS FOR A PARTICULAR PURPOSE. RevoAce Inc. Limited SHALL HAVE NO LIABILITY TO PURCHASER OR ANY
THIRD PARTY FOR ANY SPECIAL, INDIRECT, PUNITIVE, INCIDENTAL, OR CONSEQUENTIAL DAMAGES. RevoAce Inc. Limited further disclaims any
implied or express warranty of, and assumes no responsibility for, defects in workmanship caused by third parties.
This Limited Warranty gives the purchaser specific legal rights; a purchaser may have other rights depending upon where he or she lives.
Some jurisdictions do not allow the exclusion or limitation of special, incidental or consequential damages, or limitations on how long a
warranty lasts, so the above exclusion and limitations may not apply to everyone.RevoAce Inc. Limited does not authorize any person or
company to assume for it any other obligation or liability in connection with the sale, installation, use, removal, return, or replacement of its
equipment, and no such representations are binding on RevoAce Inc. Limited.
Cleaning Main Burner
1. Turn gas “OFF” at the control knobs and remove LP gas tank.
2. Remove regulator.
3. Remove cooking grid.
4. Clean inlet of burners with small bottle brush or compressed air.
5. Remove all food residue and dirt on burner surfaces.
6. Clean any clogged ports with a stiff wire (such as an opened paper clip).
7. Inspect burners for any damage (cracks or holes). If damage is found, replace with new burner(s) from the manufacturer.
8. Reconnect regulator.
9. Replace cooking grid.
10. Perform leak test.
Cleaning and Care (Continued)
Replacement Parts
For replacement parts, call 1.833.908.2025.
RevoAce Inc. Limited
Flat/RM 1204, Yu Sung Boon Bldg., 107-111
Des Voeux Road Central, Hong Kong
1.833.908.2025
Troubleshooting
Please call 1.833.908.2025.

12
Table of contents
Popular Stove manuals by other brands

Gasmate
Gasmate TRAVELMATE II CS403 quick start guide

MCZ
MCZ LINEA Comfort Air installation guide

Jolly Mec
Jolly Mec AMBRIA2 10 kW Instructions for installation, use and maintenance manual

Smeg
Smeg C7GMXI8-2 manual

Centrometal
Centrometal CentroPelet ZV16 Installation, use and maintenance instructions

Kozi
Kozi DV1-FS series owner's guide

Charnwood
Charnwood Country 8B Operating and installation instructions

Woodstock Soapstone
Woodstock Soapstone 209 owner's manual

Ravelli
Ravelli OLIVIA STEEL manual

Vermont Castings
Vermont Castings 3340 Homeowner's installation and operating manual

Olsberg
Olsberg Ipala Compact Series instruction manual

Nordpeis
Nordpeis Monaco C Low Base Left + Bench installation manual