INSTRUCTION MANUAL FOR DISHWASHERS
UK
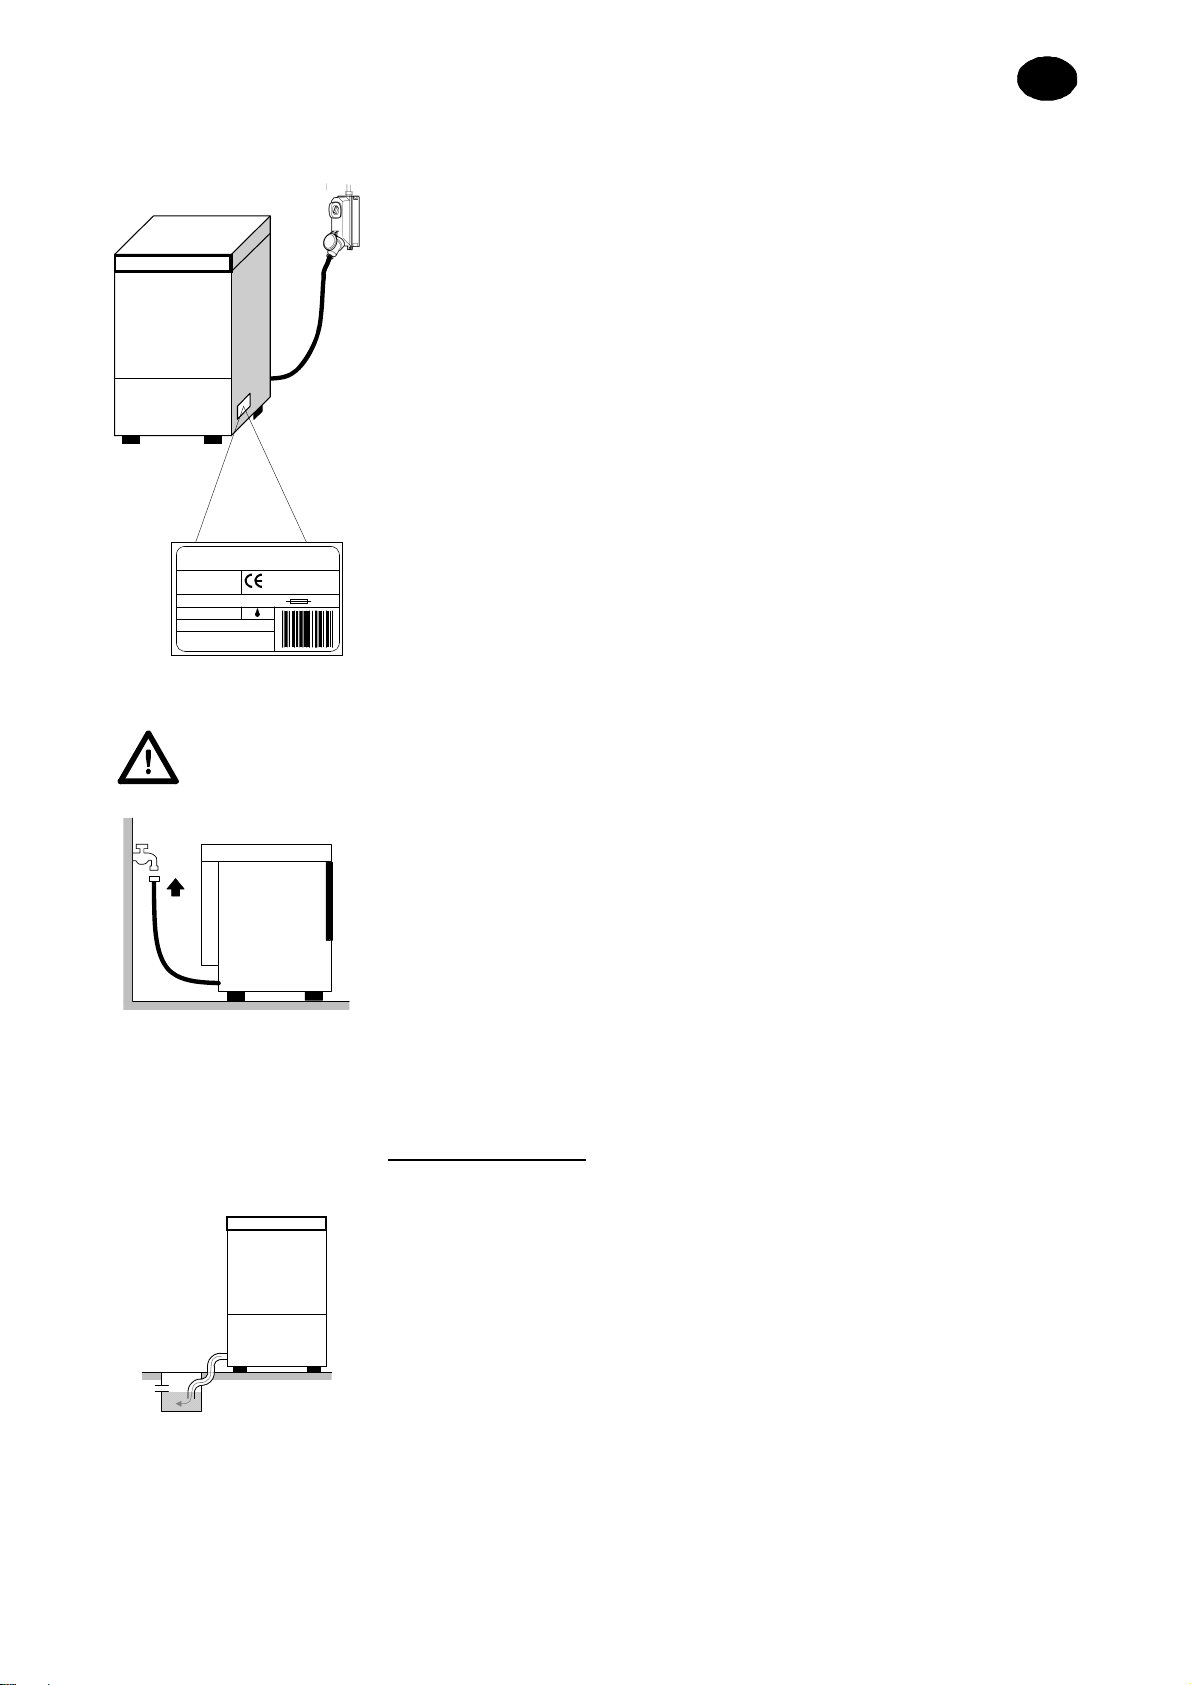
Max.
1 m
With discharge pump (available
on request)
•If the drain is not at a lower level than the base of the machine, you
can use the version equipped with a discharge pump (available on
request).
•In this case the maximum drain height is 1 m.
•Always check that the drain works properly and that it is not clogged.
•All other solutions must be previously agreed upon and approved by
the manufacturer.
2.6 Rinse aid and detergent
•Rinse aid is dispensed by the hydraulic dispenser installed standard on the machine.
•Dispensing of detergent is manual, even if installation of an automatic dispenser is always
recommended.
•Dispensing is established based on water hardness by the installation technician, who will also calibrate
the dispensers.
•The level of liquids in the container must be high enough that it can be drawn. It must never empty
completely, or be topped off with corrosive or impure products.
NEVER use CHLORINE or HYPOCHLORITE based detergents.
Chap 3 RISKS AND IMPORTANT WARNINGS
•This appliance is to be used only for the use for which it was expressly designed. All other uses are to be
considered unfit and therefore dangerous.
•The specialised personnel who will install the machine are obliged to appropriately instruct the
user on the appliance’s operation and any safety measures that are to be complied with, also by
providing practical demonstrations.
•Any type of service done on the machine, also in case of failure, must be performed only by the
manufacturer or by an authorised service centre and by qualified personnel, using only original spare
parts.
•Always disconnect or separate the machine from the electric and water networks before performing
maintenance, repairs or cleaning.
•Untrained personnel must NOT use the machine.
•The machine must NOT remain powered on when it is not in use.
•NEVER open the machine door quickly if it has not finished the cycle.
•NEVER use the machine without the factory-installed safety attachments.
•NEVER use the machine for washing object of a type, shape, size or material not guaranteed for
machine washing or not perfectly intact.
•NEVER use the appliance or its parts as a ladder or support for people, things or animals.
•NEVER overload the open door of front-loading machines, which are sized to support only the rack
loaded with kitchenware.
•NEVER immerse bare hands in the washing solutions.
•NEVER turn the machine over after installation.
THE FOLLOWING IS ALSO IMPORTANT:
•Never start a wash programme without the overflow in the tank.
•Before you drain the tank, make sure you shut off the machine.
•Never place magnetic objects near the machine, it may start even when the door is open.
•Do not use the upper part of the machine as a support surface.
•The machine may not be used by persons who are unauthorized or who have not been properly trained.
•The installation technician is required to check for proper earthing.
•When testing is complete, the installation technician must issue a written statement concerning correct
installation and testing in accordance with all standards and acceptable working practices.
3.1 Normal service conditions
Ambient Temperature : 40°Cmax /4°Cmin ( average 30°C)
Altitude : until 2000 metrical
Relative humidity : max 30% at 40°C / max 90% at 20°C
Transport and Storage : between 10°C and 55°C with peack until 70°C ( max 24 hrs )
Page 4 of 12