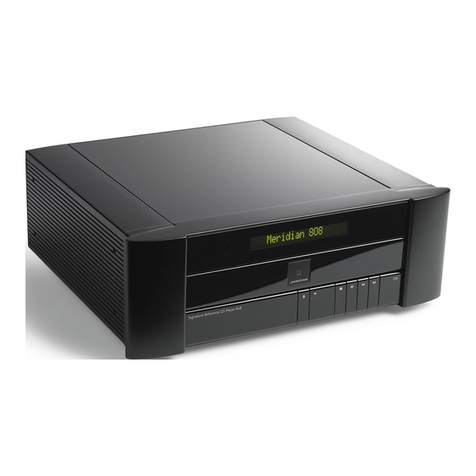
Roadmaster RM-MD112X User manual

Before operating this product please readall the operating and connectioninstructions in this manualBefore operating this product please readall the operating and connectioninstructions in this manual
Notes: Anychanges to thedesign and specificationsare not recommended.Notes: Anychanges to thedesign and specificationsare not recommended.
JPEG
MD11RT

Page 25 of25 pages
TECHNICAL SPECIFICATIONSTECHNICAL SPECIFICATIONS
Specifications:
- Ultra SlimDesign.
- Multimedia playerSupports: DVD, DVD-R,DVD-RW, DVD+R,DVD+RW, CD,CD-R, CD-RW,
VCD, SVCD, MP3and JPG picturedisks
- MPEG4 support:DivX 3.11/ 4.02 /5.02 / 5.03/ 5.05 /DivX Pro /XviD /Subtitles .srt.sub
- Electronic ShockProtection (ESP) andMechanical Shock Protection
- USB,SD cardhost
-
- PAL/NTSCselection
-
- Multi LingualOn Screen Display(OSD)
-
-
- Dimension: 355x 254 x65mm (W/H/D)
AV Inputvia RCAconnectors
Infra-red remote control
2 Integrated domelights with doorsensor connections
Multi-Language menu selection
Including
- Multimedia Player x1
- AV cables x1
- IR Remotecontrol Including batteries x1
- User Manual x1
-15 ~ 50
Specifications MultiMediaPlayer:
Power Consumption 12V DC(11-15V)/ 1.4A(Max.1.6A)
Weight 3KG
Dimension 355 x 254x 65mm (W/H/D)
TV Signal system PAL/NTSC/MULTI
Laser Semi-conductor laser,wave length 650nm,780nm
Frequency range 48KHz pulse modulation20Hz~22KHz
96KHz pulse modulation20Hz~22KHz
S/N 65dB
Audio dynamic range >85dB
Harmonic Distortion 0,01%
Input Sensitivity 500mv
Operation temperature 0~40
Storage Temperature
FM StereoTransmitter
High Carrier Frequency 2.3/2.8MHz
87.7MHz/88.4MHz/88.6MHz/89.4MHz/90.5MHz/91.5MHz
TABLEOF CONTENTSTABLEOF CONTENTS
PREPARATION BEFORE USINGTHE MultimediaPREPARATION BEFORE USINGTHE Multimedia 2
IMPORTANTSAFETY INSTRUCTIONIMPORTANTSAFETY INSTRUCTION 1
Unpacking and checkingthe contents 2
CONTROL REFERENCEGUIDECONTROL REFERENCEGUIDE 3
The Multimedia play 3
The 11inch TFTcolor LCD Monitor 4
The IR RemoteControl 5
BASIC OPERATIONSBASIC OPERATIONS 7
PAL-NTSC Selection 7
Disc loading 8
Pause / Stop/ Play 8
Select menu items 8
ADVANCEDOPERATIONADVANCEDOPERATION 8
Select a specificon-disc Menu section 8
Audio CD discs,track selection 9
Fast Forward 9
Fast Backward 9
Skip to thenext chapter ortrack 9
Skip to theprevious chapter ortrack 9
Select a track 9
Display the tracklist 9
Repeat 10
Select Subtitle Language 10
On Screen Display(OSD) 10
For DVD discs 10
For CD discs 11
ZOOM 11
Memory Play 12
Slow Play 12
SYSTEM SETTINGSSYSTEM SETTINGS 13
MP3/MPEG4 PLAYBACKMP3/MPEG4 PLAYBACK 21
Play mode 21
Other functions 22
COMPATIBLE DISKTYPESCOMPATIBLE DISKTYPES
24
TECHNICAL SPECIFICATIONSTECHNICAL SPECIFICATIONS 25
CONNECTIONCONNECTION 6
FM Frequency 11
23
INSTALLATIONINSTALLATION
TV mode 12

Page 24 of25 pages
COMPATIBLE DISKTYPESCOMPATIBLE DISKTYPES
Some DVD discsmay have specialrequirements for playing,with which thissystem may
not be compatible.Please refer tothe specifications onthe individual disc.
About 700MB- 300 minutes
DISC
TYPE
DVD
CD-DA
MP3
Content Size TotalPlay time
About 4.7GB - 2hrs.
(Single side &single layer)
About 8.5GB - 4hrs.
(Single side &double layer)
About 9.4GB - 4hrs.
(Double side &Single layer)
AUDIO/
VIDEO 12CM
About 17GB- 8hrs.
(Double side &double layer)
AUDIO 12CM About 700MB -74 minutes
MP3 AUDIO 12CM
Discs types
The Multimedia playercan play thefollowing types ofdiscs: DVD /CD / CD-R/
CD-RW /DVD-R / DVD-RW / DVD+R/ DVD+RW. Discs otherthan listed abovecannot
be played. Pleasedo NOTplay discs smallerthan 12CM orof odd shapes,only play
sound 12CM discs.
The Multimedia playeruses the NTSC/PAL colorsystems. It cannotplay discs
recorded with othersystems, such asSECAM.
Region code
The region codefor this playeris 0 whichindicate any region.
Copyright
According to therelated laws, DVDdiscs, without properauthorization, are notallowed
to be copied,broadcasted, cable broadcasted,or played publiclywith the Multimedia
player .
The Multimedia player incorporates copyright protectiontechnology that is
protected by methodof claims ofcertain U.S. patentsand other intellectualProperty
Rights owned bytheir rights owners.Reverse engineering ordisassembly is prohibited.
Dear Customer
We thankyou for purchasingthe Multimedia .We wishyou many pleasanthours of
watching DVD's orlistening to yourfavorite music. PersonalSafety has beentaken in
consideration in thedesign and manufacturingthis product, howeverany improper use
or operation mayresult in anelectrical shock, fireand/or any otherhazards. To prevent
these hazards itis strongly recommendedto read thismanual thoroughly andadhere to
the following precautions:
Important SafetyInstructionsImportant SafetyInstructions
NOTE
-Please dispose emptybatteries according theregulations in yourcountry
-All OnScreen Displays (OSD)and Pictures willbe based onthe English version.
-Design and Specificationsmay vary inthe manual fromthe actual productin use.
CAUTIONCAUTION
RISK OF ELECTRIC SHOCK
DO NOT OPEN
CAUTION:TO REDUCE THE RISK OFELECTRIC SHOCK, DO NOT
REMOVE COVER (OR BACK). NOUSER-SERVICEABLE
PARTS INSIDE. REFER SERVICING TO QUALIFIED SERVICE
PERSONNEL.
The lightning flashwith arrowhead
symbol within anequilateral triangle
is intended toalert the userto the
presence of uninsulateddangerous
voltage within theproduct s
enclosure that maybe of sufficient
magnitude to constitutea risk of
electric shock topersons.
The exclamation pointwithin an
equilateral triangle isintended to
alert the userto the presenceof
important operating andmaintena-
nce (servicing) instructionsin the
literature accompanying theapplia-
nce.
The unit employsa laser system.
Toensure proper useof this product.
Please read thisowner s manual
carefully and retainfor future reference.
Should the requiremaintenance, contact
an authorized servicelocation-see ser-
vice procedure.
Use of controls,adjustments or the
performance of proceduresother than
those specified hereinmay result in
hazardous radiation exposure.
Toprevent direct exposureto laser beam,
do not tryto open theenclosure. Visible
laser radiation maybe present whenthe
enclosure is opened.Do not stareinto
beam.
CAUTION:
WARNING:
FCC regulations statethat any changeor modification tothe equipment, notexpressly
approved by makeror its authorizedparties, could voiduser's authority tooperate
this equipment.
Page 1 of25 pages

INSTALLATIONINSTALLATION
1. Determine themounting location anddrill four mountingholes (See Fig.1).
2. Attachthe mounting bracketto the holeswith the tappingscrews ( 4X10).
4. Open themonitor to displaythe four screwholes.
5. Attachthe unit tothe bracket withthe mounting bolts(D 5X6).
7. When theinstallation has completed,you can alsoturn the displayupward or
downward to adjustthe viewing angle.(See the arrowheadsymbol in Fig.2).
Page 23 of 25 pages
PREPARATION BEFOREUSING THEMULTIMEDIAPLAYERPREPARATION BEFOREUSING THEMULTIMEDIAPLAYER
Unpacking andchecking thecontents
please check ifthe following itemsand accessories areincluded in thereceived package:
One Multimedia
Player
One IR-Remote Control
1x RCAAudio /Video cable. This User Manual.
CLEARCLEAR
DISPLAYDISPLAY SUBTITLESUBTITLE SLOWSLOW PROGRAMPROGRAM
USB/SDUSB/SD AUDIOAUDIO MUTEMUTE REPEATREPEAT
POWERPOWER CTRLCTRL
MONITOR MENUMONITOR MENU
SOURCESOURCE MENU PBCMENU PBC TITLETITLE EJECTEJECT
1144
33
22
5588
77
66
++
00
11
00//
00
11
99
ENTERENTER
SETUPSETUP ZOOMZOOM
++
__
V
O
L
V
O
L
FMFM
Page 2 of 25pages
Fig.1
Fig.2
SOURCE DOWN MENU UP
Mounting Bolts(D 5x6)
Mounting Bracket
Tapping Screws ( 4X10)

1) SINGLE (Allthe songs /videos will beplayed only once)
2) REPEAT ONE (The current playingsong / videowill be repeated)
3) REPEAT FOLDER (Only the songs/ videos ofthe current folderwill be repeated)
4) FOLDER (Onlyall the songs/ videos ofthis folder willbe played once)
5) SHUFFLE /RANDOM (The songs/ videos willbe played inrandom order)
When the discis playing, pressREPEATto select yourrepeat mode, theTV screen
will show:
Functions such asMUTE, VOLUME, PAUSE, PREVIOUS, NEXT, etc. arealso available
for MP3 /MPEG4 recorded discs.These operationsare the sameas playing anAudio
CD.
Other functions
Page 22 of25 pages
CONTROL REFERENCEGUIDECONTROL REFERENCEGUIDE
Page 3 of25 pages
The Multimedia Player
11
15 16 17
12 turn onDome light
13 Door Control
14 turn offDome light
15 RightAudio Input
16 LeftAudio Input
17 Composite Video Input
18 Infra RedSensor
19 USB
20 SD
1/9 Dome Light
2 Power
3 Play/Pause
4 Stop
5 Disc slot
6 Previous
7 Next
8 Eject
10 11Inch LCD Screen
11 Open
4
1 2 3 6 7 8 9
10
18
5
12
1314
SOURCE DOWN MENU UP
19
20

The 11 inchTFT colorLCD Monitor
1-
2- SRC
3- Adjust decrease
4- Menu Selection:Brightness, Saturation, Sharpness,Contrast, Reset
5- Adjust increase
6- Control Sensor PickUp
1 Press the[POWER] button topower on oroff theTFT colorLCD Monitor.
2 Press the[MENU] button totoggle between Brightness,Color, Contrast,Tint , and
adjust the levelwith the [ ] or [ ] button.
Note:
The TFTcolor LCD ismade of glassand liquid, donot apply pressureon the screen
to prevent breakageand poor imagequality.
Do not scratchthe screen surfacewith hard materialsand only cleanwith a softdry
cloth.
Page 4 of25 pages
Enter the PINnumbers with thenumber buttons ofthe remote controland pressPLAY,
enter the newpassword and pressPLAYagain, confirm yournew password and press
PLAYagain.
Important:Do not forgetthe newly enteredpassword, there isno way toretrieve the
(newly) entered password.
EXITSETUPMENUEXITSETUPMENU
With this selectionXyou exit thesystem
setup and returnto normal viewingof the
video.
MP3/MPEG4 PLAYBACKMP3/MPEG4 PLAYBACK
The Multimedia playeris able toplay discs (CD-R/ CD-RW)recorded with MP3/
MPEG4 audio andvideo files. Whena disc withMP3 or MPEG4files (including multiple
directories) is loadedin the systemthe following screenis displayed:
Togo to thepreferred music orvideo directory, press the arrows to scrollto your
selection and confirmyour choice bypressing thePLAYbutton. To select yourpreferred
song or videotitle, press the arrows to scrollto your selectionand confirm your
choice by pressingthe PLAYbutton. Your selected songor video willnow be played.
There arefour kinds ofplay modes availablewhen playing MP3/ MPEG4(.AV1) recorded discs:
Play mode
Page 21 of25 pages
1 2 63 4 5
SOURCE DOWN MENU UP

PREFERENCE PAGEPREFERENCE PAGE
SETPARENTALCONTROLSETPARENTALCONTROL
TV TYPE PALTV TYPE PAL
PBC OFFPBC OFF
PARENTALPARENTAL
DEFAULTDEFAULT
1 KIO SAF1 KIO SAF
2 G2 G
3 PG3 PG
4 PG 134 PG 13
5 PGR5 PGR
6 R6 R
7 NC177 NC17
8 ADULT8 ADULT
Set agecontrol grade:
For DVD discswith a ratingsystem progr
-ammed (for example:the NorthAmerican
CARA) parents canprohibit watching con
-tent that mightbe inadvisable forchildren.
Press the RIGHT arrow to enterthe
submenu. If youwant to changethe age
control grade presseither the UP or
DOWN arrow to scrollto the availablesel
-ections. Selection 1is Kid safe,selection
2is some guidanceadvisable, selection 3
is PG (Parentalguidance suggested, some
material may notbe suitable forchildren),
selection 4is PG13 (Parentsstrongly cau
-tioned, some materialmay be inappropr
-iate for childrenunder 13),selection 5is
PG-R (Restricted, under17 requires acco
-mpanying parent oradult guardian),sele
-ction 6is Restricted viewing,selection 7
is NC-17 (Noone 17 andunder admitted),
selection 8is forAdult Entertainment orX
rated movies andNO PARENTALis for
General Audiences (All Ages).
Hereafter a screenwill indicate toenter a
password, if theex-factory password has
never been modified,you can use[123456]
by pressing theaccording number buttons
on the remotecontrol. Select "YES"or
"NO" with eitherthe left orthe right arrow
key and pressPLAYto confirm.
PREFERENCE PAGEPREFERENCE PAGE
LOAD FACTORYSETTINGLOAD FACTORYSETTING
TV TYPE PALTV TYPE PAL
PBC OFFPBC OFF
PARENTALPARENTAL
DEFAULTDEFAULT RESETRESET
With this optionyou can selectto reset to
the factory presetvalues.
PREFERENCE PAGEPREFERENCE PAGE
SETPARENTALCONTROLSETPARENTALCONTROL
TV TYPE PALTV TYPE PAL
PBC OFFPBC OFF
PARENTALPARENTAL
DEFAULTDEFAULT
1 KIO SAF1 KIO SAF
2 G2 G
3 PG3 PG
4 PG 134 PG 13
5 PGR5 PGR
6 R6 R
7 NC177 NC17
8 ADULT8 ADULT
Set agecontrol grade:
For DVD discswith a ratingsystem progr
-ammed (for example:the NorthAmerican
CARA) parents canprohibit watching con
-tent that mightbe inadvisable forchildren.
Press the RIGHT arrow to enterthe
submenu. If youwant to changethe age
control grade presseither the UP or
DOWN arrow to scrollto the availablesel
-ections. Selection 1is Kid safe,selection
2is some guidanceadvisable, selection 3
is PG (Parentalguidance suggested, some
material may notbe suitable forchildren),
selection 4is PG13 (Parentsstrongly cau
-tioned, some materialmay be inappropr
-iate for childrenunder 13),selection 5is
PG-R (Restricted, under17 requires acco
-mpanying parent oradult guardian),sele
-ction 6is Restricted viewing,selection 7
is NC-17 (Noone 17 andunder admitted),
selection 8is forAdult Entertainment orX
rated movies andNO PARENTALis for
General Audiences (All Ages).
Hereafter a screenwill indicate toenter a
password, if theex-factory password has
never been modified,you can use[123456]
by pressing theaccording number buttons
on the remotecontrol. Select "YES"or
"NO" with eitherthe left orthe right arrow
key and pressPLAYto confirm.
PREFERENCE PAGEPREFERENCE PAGE
LOAD FACTORYSETTINGLOAD FACTORYSETTING
TV TYPE PALTV TYPE PAL
PBC OFFPBC OFF
PARENTALPARENTAL
DEFAULTDEFAULT RESETRESET
With this optionyou can selectto reset to
the factory presetvalues.
PASSWORD SETUP PAGEPASSWORD SETUP PAGE
PASSWORD MODEPASSWORD MODE
PASSWORD MODE ONPASSWORD MODE ON
PASSWORDPASSWORD ONON
OFFOFF
With this optionyou can selectto set your
password protectionON or OFF.
PREFERENCE PAGEPREFERENCE PAGE
SETPARENTALCONTROLSETPARENTALCONTROL
TV TYPE PALTV TYPE PAL
PBC OFFPBC OFF
PARENTALPARENTAL
DEFAULTDEFAULT
1 KIO SAF1 KIO SAF
2 G2 G
3 PG3 PG
4 PG 134 PG 13
5 PGR5 PGR
6 R6 R
7 NC177 NC17
8 ADULT8 ADULT
Set agecontrol grade:
For DVD discswith a ratingsystem progr
-ammed (for example:the NorthAmerican
CARA) parents canprohibit watching con
-tent that mightbe inadvisable forchildren.
Press the RIGHT arrow to enterthe
submenu. If youwant to changethe age
control grade presseither the UP or
DOWN arrow to scrollto the availablesel
-ections. Selection 1is Kid safe,selection
2is some guidanceadvisable, selection 3
is PG (Parentalguidance suggested, some
material may notbe suitable forchildren),
selection 4is PG13 (Parentsstrongly cau
-tioned, some materialmay be inappropr
-iate for childrenunder 13),selection 5is
PG-R (Restricted, under17 requires acco
-mpanying parent oradult guardian),sele
-ction 6is Restricted viewing,selection 7
is NC-17 (Noone 17 andunder admitted),
selection 8is forAdult Entertainment orX
rated movies andNO PARENTALis for
General Audiences (All Ages).
Hereafter a screenwill indicate toenter a
password, if theex-factory password has
never been modified,you can use[123456]
by pressing theaccording number buttons
on the remotecontrol. Select "YES"or
"NO" with eitherthe left orthe right arrow
key and pressPLAYto confirm.
PREFERENCE PAGEPREFERENCE PAGE
LOAD FACTORYSETTINGLOAD FACTORYSETTING
TV TYPE PALTV TYPE PAL
PBC OFFPBC OFF
PARENTALPARENTAL
DEFAULTDEFAULT RESETRESET
With this optionyou can selectto reset to
the factory presetvalues.
PASSWORD SETUP PAGEPASSWORD SETUP PAGE
PASSWORD MODEPASSWORD MODE
PASSWORD MODE ONPASSWORD MODE ON
PASSWORDPASSWORD ONON
OFFOFF
With this optionyou can selectto set your
password protectionON or OFF.
PASSWORD SETUP PAGEPASSWORD SETUP PAGE
CHANGE PASSWORDCHANGE PASSWORD
PASSWORD MODE ONPASSWORD MODE ON
PASSWORDPASSWORD CHANGECHANGE
Use this menuto change thefactory set
password [123456]
OLD PASSWORD
NEW PASSWORD
CONFIRM PWD
OK
Page 20 of25 pages
The IRRemote Control
Point the remotecontrol no more
than about 3~4meters (approx. 21
feet) from theremote control sensor
on the frontof the playerand keep
with in a 30 angle.
(1) Adjust Decrease
(2) Adjust Increase
(3) Title
(4) Eject
(5) Number buttons
(6) Clear
(7) Slow
(8) Program
(9) Mute
(10) Repeat
(11) Zoom
(12) play/pause
(13) RightArrow
(14) Stop&Return
(15) Fast Reverse
(16) Fast Forward
(17) Previous
(18) Next
(19) Monitor Menu
(20) Power
(21) Menu/PBC
(22) Source
(23)Subtitle
(24)Display
(25) Audio
(26) USB/SD
(27) UpArrow
(28) Setup
(29) Enter
(30) Left Arrow
(31) Down Arrow
(32) FM
(33) Volume-
(34) Volume+
Note:
The distance mayvary according tothe brightness ofambient light.
If the remoteis not usedfor an extendedperiod of time,remove the batteriesto prevent possible
damage from batteryleakage and corrosion.
Do not placeany objects betweenthe remote controlunit and thesensor on theunit.
Do not usethe remote controlunit, while simultaneouslyoperating the remotecontrol unit ofany
other equipment, theymay interfere resultingin improper operation.
The batteries normallylast for aboutone year althoughdepending how oftenthe remote control
is used. Ifthe remote controlunit isn't workingeven when itis operated nearThe Multimedia player,
replace one thebatteries with newbatteries of thesame make.
Incorrect use ofbatteries may causethem to leak,corrode or explode.
If leakage fromthe battery occurs,wipe the batteryliquid from thebattery compartment before
installing new batteries.
Make sure theIR sensor isnot obstructed bythe canvas carrybag.
Page 5 of25 pages
CLEARCLEAR
DISPLAYDISPLAY SUBTITLESUBTITLE SLOWSLOW PROGRAMPROGRAM
USB/SDUSB/SD AUDIOAUDIO MUTEMUTE REPEATREPEAT
POWERPOWER CTRLCTRL
MONITOR MENUMONITOR MENU
SOURCESOURCE MENU PBCMENU PBC TITLETITLE EJECTEJECT
1144
33
22
5588
77
66
++
00
11
00//
00
11
99
ENTERENTER
SETUPSETUP ZOOMZOOM
++
__
V
O
L
V
O
L
FMFM
11
33
44
55
66
77
88
99
1010
1111
1212
1313
1414
1515
1616
1717
1818
1919
2020
2121
2222
2323
2424
2525
2626
2727
2525
2929
3030
3131
3232
3333
3434
22

CONNECTION
CONNECTING THE UNITTO ANEXTERNAL DVDGAME USING THEA/V CABLE(NOT
INCLUDED)
DVD
GAME
Composite Video(YELLOW)
Right Audio (RED)
Left Audio (WHITE)
Page 6 of25 pages
CONNECTION
CONNECTING THE UNITTO ANEXTERNAL DVDGAME USING THEA/V CABLE(NOT
INCLUDED)
DVD
GAME
Composite Video(YELLOW)
Right Audio (RED)
Left Audio (WHITE)
Page 6 of25 pages
CONNECTION
CONNECTING THE UNITTO ANEXTERNAL DVDGAME USING THEA/V CABLE(NOT
INCLUDED)
DVD
GAME
Composite Video(YELLOW)
Right Audio (RED)
Left Audio (WHITE)
Page 6 of25 pages
COLOR SETTING SETUPCOLOR SETTING SETUP
HUEHUE
SHARPNESS MIOSHARPNESS MIO
BRIGHTNESS 00BRIGHTNESS 00
CONTRAST 00CONTRAST 00
GAMMA NONEGAMMA NONE
HUE 00HUE 00
SATURATION 00SATURATION 00
LUMADELAY 1 TLUMA DELAY 1 T
COLOR SETTING SETUPCOLOR SETTING SETUP
SATURATIONSATURATION
SHARPNESS MIOSHARPNESS MIO
BRIGHTNESS 00BRIGHTNESS 00
CONTRAST 00CONTRAST 00
GAMMA NONEGAMMA NONE
HUE 00HUE 00
SATURATION 00SATURATION 00
LUMADELAY 1 TLUMA DELAY 1 T
HUEHUE
HUEHUE 00
SATURATIONSATURATION
SATURATIONSATURATION 00
Youcan set theHue (for NTSC)to your
liking. PressPLAY/SAVE or the RIGHT
arrow to enterthe Hue control,then press
the UP or DOWN arrow to adjustthe
image. Press the LEFT arrow to go
back to themenu.
Youcan set theSaturation to yourliking.
Press PLAY/SAVE or the RIGHT arrow
to enter theSaturation control, thenpress
the UP or DOWN arrow to adjustthe
image. Press the LEFT arrow to goback
to the menu.
PREFERENCE PAGEPREFERENCE PAGE
SETTV STANDAROSETTV STANDARO
TV TYPE PALTV TYPE PAL
PBC OFFPBC OFF
PARENTALPARENTAL
DEFAULTDEFAULT
PALPAL
MULTIMULTI
NTSCNTSC
PREFERENCE PAGEPREFERENCE PAGE
SET PBC STATESET PBC STATE
TV TYPE PALTV TYPE PAL
PBC OFFPBC OFF
PARENTALPARENTAL
DEFAULTDEFAULT
ONON
OFFOFF
Select this menuitem to setup your
preferred video outputformat. PAL is
commonly used inEurope and NTSC
is commonly usedin the USAand Japan.
Select MULTIonly if yourTV supports
both formats, theoutput signal willfollow
automatically the videoformat on the
DVD disc.
For VCD andSVCD, this selectionturns
ON or OFF the Playback Control(PBC)
function. VCD orSVCD media havePBC
menu's that containsthe track list.The
default PBC stateis set toON. In OFF
mode, no trackscan be selected.
Page 19 of25 pages

BASIC OPERATIONSBASIC OPERATIONS
PAL-NTSCSelection
Toset upThe Multimedia playeraccording to theconnected TFTLCD monitor andvideo
signal system, toplay a DVDor any othervideo discs, followthese guidelines:
If the TFT LCDmonitor is NTSC,press the N/Pbutton onThe Multimedia
Player until yousee NTSC on yourscreen.
If theTFT LCDmonitor is PAL, select PAL bypressing theN/P button on the
Until you seePALon your screen:
If theTFT LCDmonitor supports bothPALand NTSC, selectMULTIbyPressing
TheN/Pbutton until yousee MULTI on yourscreen.
Disc loading
Load one discwith the labelside facing upwardsand make sureyou do nottouch the
data side withyour fingers.
Note:
Do not touchthe content sideof a disc
Do not stickany paper orstickers on adisc.
Do not forcethe disc inplace, it ispossible
Youdamage the discor the unititself, if adisc is
not placed correctlyon the guidesin the disc
tray.
Finger prints anddust on thedisc surface canaffect the soundand picture quality. Clean the
discs regularly witha soft cottoncloth from thedisc center tothe outside ofthe disc. Donot clean
in circular motions.
Do not useany kind ofsolvent, such asdiluting agent, gasoline,liquid detergent, andgasoline l
iquid detergent antistaticaerosol used forvinyl, this maycause serious discdamage.
Keep discs awayfrom direct sunlightor any heatsource
The Multimedia player is a precisiondevice. If theoptical pick-up lensand disc driveparts
become dirty orworn down, picturequality will becomepoor. To obtain aclear picture, regular
inspection and maintenanceare recommended every1,000 hours ofuse, depending onthe
operating environment.
Once the discis loaded, theunit will automaticallystart reading thedisk and itwill take
a few secondsto download thedisc initial data,thereafter the disctype will bedisplayed
in the leftupper corner ofthe LCD screenand the unitwill start playingthe disc.
Page 7 of25 pages
COLOR SETTING SETUPCOLOR SETTING SETUP
BRIGHTNESSBRIGHTNESS
SHARPNESS MIOSHARPNESS MIO
BRIGHTNESS 00BRIGHTNESS 00
CONTRAST 00CONTRAST 00
GAMMA NONEGAMMA NONE
HUE 00HUE 00
SATURATION 00SATURATION 00
LUMADELAY 1 TLUMA DELAY 1 T
COLOR SETTING SETUPCOLOR SETTING SETUP
CONTRASTCONTRAST
SHARPNESS MIOSHARPNESS MIO
BRIGHTNESS 00BRIGHTNESS 00
CONTRAST 00CONTRAST 00
GAMMA NONEGAMMA NONE
HUE 00HUE 00
SATURATION 00SATURATION 00
LUMADELAY 1 TLUMA DELAY 1 T
Youcan set theBrightness to yourliking.
Press PLAYor the RIGHT arrow to
enter the brightnesscontrol, then press
the UP or DOWN arrow to adjust
the image. Pressthe LEFT arrow to
go back tothe menu.
Youcan set theContrast to yourliking.
Press PLAYor the RIGHT arrow to
enter the brightnesscontrol, then press
the UP or DOWN arrow to adjust
the image. Pressthe LEFT arrow to
go back tothe menu.
BRIGHTNESSBRIGHTNESS
BRIGHTNESSBRIGHTNESS 00
CONTRASTCONTRAST
CONTRASTCONTRAST 00
COLOR SETTING SETUPCOLOR SETTING SETUP
GAMMAGAMMA
SHARPNESS MIOSHARPNESS MIO
BRIGHTNESS 00BRIGHTNESS 00
CONTRAST 00CONTRAST 00
GAMMA NONEGAMMA NONE
HUE 00HUE 00
SATURATION 00SATURATION 00
LUMADELAY 1 TLUMA DELAY 1 T
HIGHHIGH
MEDIUMMEDIUM
LOWLOW
NONENONE
COLOR SETTING SETUPCOLOR SETTING SETUP
LUMADELAYLUMADELAY
SHARPNESS MIOSHARPNESS MIO
BRIGHTNESS 00BRIGHTNESS 00
CONTRAST 00CONTRAST 00
GAMMA NONEGAMMA NONE
HUE 00HUE 00
SATURATION 00SATURATION 00
LUMADELAY 1 TLUMA DELAY 1 T 0 T0 T
1 T1 T
Gamma refers to theexponent between
video or pixelvalues and thedisplayed
brightness. You can setthe Gamma to
these choices andyour liking.
Luma DelayYoucan adjust theluminance
delay by selectingone of thesechoices to
best suit thebrightness of yourTV.
Page 18 of25 pages
SOURCE DOWN MENU UP

Pause /Stop /Play
When a discis playing pressthe PAUSE button on theremote control oron the
Multimedia player topause the session.Press thePLAY button on theremote
control or theMultimedia player toresume playing thedisc.
Press theSTOP button once onthe remote controlor TheMultimedia player to
stop playing adisc. Theunit will memorizethe position onthe disk andwill continue to
play from thatposition if thePLAY button on theremote control orThe Multimedia
player is pressed.
Press STOP STOP twice to completelystop playing adisc. When thePLAY button
on the remotecontrol or theMultimedia player ispressed hereafter,the unit willnot
resume playing fromthe position thedisc was interruptedat. Note:The Disc continuesto
spin for approximately4 minutes afterpressing the stopbutton.
Select menuitems
In either thedisc menu orthe setup menu:
(1) Press the / / / arrow buttons tomove between selectableitems.
(2) Press thePLAYbutton to confirmand/or execute aselection
When the DVDdisc contains anon-disc menu, youcan display andaccess this menu
by pressing eitherthe MENU button on theRemote Control. (Note:PBC must beturned
on.)
Select aspecific on-discMenu section
(1) Press theMENU button. You will nowsee the menuof the DVD(if available) and
the selection choicesin this menu.
(2) Press oneof the arrowbuttons to scroll
through the displayed(sub) menu items.Press PLAYto confirm theselection.
(3) Alternatively, use theNumber buttons tomake a selection.For example:To
select the 13thsong, press10+ then 3
Load anAudio disc, uponreading the disc,you can select/playsongs via thenumber
buttons. If thetrack number islower than 10,press a numberbutton 0 9to select the
desired track. Forexample: to selectthe 8th track,press number button8. To select track
numbers beyond 10,first press the10+ button, followedby a singledigit number button
0 9 Forexample: To select the12th song, pressbutton 10+ andthen press button2.
Audio CDdiscs, trackselection
Page 8 of25 pages
ADVANCEDOPERATIONADVANCEDOPERATION
3D PROCESSING PAGE3D PROCESSING PAGE
PRO LOGIC IIPRO LOGIC II
REVERB MODE OFFREVERB MODE OFF
REVERB MODEREVERB MODE
OFFOFF
CONCERTCONCERT
LIVING ROOMLIVING ROOM
HALLHALL
BATHROOMBATHROOM
CAVECAVE
ARENAARENA
CHURCHCHURCH
Select 3D PROCESSINGto set upyour
preferred 3D mode.Press PLAYto enter
this selection andto set upyour preferred
Audio mode fora better surroundeffect.
Press PLAY/SAVE or theRIGHT arrow
to enter thisselection.
VIDEO SETUP PAGEVIDEO SETUP PAGE
GOTO VIDEO SETUP PAGEGOTO VIDEO SETUP PAGE
COLOR SETTINGCOLOR SETTING
Select this menuitem to setup your Video
Quality modes. PressPLAYto enter this
selection.
HDCD SETUP PAGEHDCD SETUP PAGE
FILTER 1XFILTER 1X
FILTERFILTER
OFFOFF
1X1X
2X2X
Select HDCD toset up yourpreferred
Audio mode forHDCD. PressPLAYto
enter this selectionand to setup your
preferred filter modefor HDCD
(default is 1X).
1x = 48KSampling, 2x =96K Sampling
COLOR SETTING SETUPCOLOR SETTING SETUP
SHARPNESSSHARPNESS
SHARPNESS MIOSHARPNESS MIO
BRIGHTNESS 00BRIGHTNESS 00
CONTRAST 00CONTRAST 00
GAMMA NONEGAMMA NONE
HUE 00HUE 00
SATURATION 00SATURATION 00
LUMADELAY 1 TLUMA DELAY 1 T
HIGHHIGH
MEDIUMMEDIUM
LOWLOW
Youcan set thepicture sharpness tothese
choices. If avideo image islight, select the
LOW option. If avideo image isdark, select
the option.HIGH
Page 17 of25 pages

AUDIO SETUP PAGEAUDIO SETUP PAGE
ANALOGAUDIOSETUPANALOGAUDIOSETUP
EQUALIZEREQUALIZER
3D PROCESSING3D PROCESSING
HDCDHDCD
GOTO AUDIO SETUP PAGEGOTO AUDIO SETUP PAGE
Press PLAYto enter theAnalogAudio
setup page.The page hereunderwill
be shown:
EQUALIZER PAGEEQUALIZER PAGE
SOUND MODE OFFSOUND MODE OFF
BASS BOOST OFFBASS BOOST OFF
SUPER BASS OFFSUPER BASS OFF
TREBLE BOOST OFFTREBLE BOOST OFF
SELECT EQUALIZER TYPESELECT EQUALIZER TYPE
OFFOFF
ROCKROCK
POPPOP
LIVELIVE
DANCEDANCE
TECHNOTECHNO
CLASSICCLASSIC
SOFTSOFT
EQUALIZER Select this menuitem to
set up yourpreferred Equalizer mode.
Press PLAYto enter thisselection.
Youcan select oneof these preset
Equalizer modes toadjust the audio
signal to yourbest liking.
ANALOG AUDIO SETUP PAGEANALOG AUDIO SETUP PAGE
DOWNMIX STRDOWNMIX STR
SET DOWNMIX MODESET DOWNMIX MODE
LT/RTLT/RT
STEREOSTEREO
Set sound mixoutput mode:
press the RIGHT arrow to enterthe
sub-menu. If youwant analog stereo
signals, set thesound mode to
"STEREO",press the DOWN arrow
once to movethe selection to
"STEREO", than pressPLAY.
If you wantto have DolbyPro Logic
stereo (the decodedsignal will create
a 2ch realitysimulating effectvia the
R/L connectors),select "LT/RT", then
press PLAY.
EQUALIZER PAGEEQUALIZER PAGE
SOUND MODE OFFSOUND MODE OFF
BASS BOOST OFFBASS BOOST OFF
SUPER BASS OFFSUPER BASS OFF
TREBLE BOOST OFFTREBLE BOOST OFF
BASS BOOSTBASS BOOST
ONON
OFFOFF
EQUALIZER PAGEEQUALIZER PAGE
SOUND MODE OFFSOUND MODE OFF
BASS BOOST OFFBASS BOOST OFF
SUPER BASS OFFSUPER BASS OFF
TREBLE BOOST OFFTREBLE BOOST OFF
SUPER BASSSUPER BASS
ONON
OFFOFF
EQUALIZER PAGEEQUALIZER PAGE
SOUND MODE OFFSOUND MODE OFF
BASS BOOST OFFBASS BOOST OFF
SUPER BASS OFFSUPER BASS OFF
TREBLE BOOST OFFTREBLE BOOST OFF
TREBLE BOOSTTREBLE BOOST
ONON
OFFOFF
Youcan select oneof these modesto
adjust the Bassand Treblesignal to
your best liking.ON will switchthe
selected mode onand OFF willswitch
it back tonormal Audioplayback.
Note: Please beadvised that some-
times the BASSon anAudio CD or
DVD is alreadyvery low,using the
Bass Boost orSuper Bass canoverload
your speakers resultingin poor sound
quality.
Page 16 of25 pages
While the videois playing pressthe Fast ForwardFWD button on eitherthe
or the remotecontrol to playthe video inFast Forward (FFWD)
mode. Five different speeds areavailable and dependon the numberof times this
button is pressedin sequence.
Multimedia player
Fast Forward
2x 4x 8x 16x 32x Normal play (DVD)
2x 4x 8x 16x
32x
Normalplay (Other Discs)
While the videois playing pressthe Fast Backwardbutton REV on either the
R or theremote control toplay the videoin Fast Backward(FRWD)
mode. Five different speeds areavailable and dependon the numberof times this
button is pressedin sequence.
Multimedia player
Fast Backward
2x 4x 8x 16x 32x Normalplay (DVD)
2x 4x 8x 16x
32x
Normalplay (Other Discs)
When a DVDdisc is played,press theNEXT button on eitherthe remote controlor
The to skip tothe next chapter. When otherdiscs are played,
press this buttonto skip tothe next track.Note: Whether thisfunction works depends
on the disctype in use.
Multimedia player
Skip tothe nextchapter ortrack
When a DVDdisc is played,press thePREVIOUS button on eitherthe remote
control orThe to skip tothe previous chapter. When otherdiscs
are played, pressthis button toskip to theprevious track. Note:Whether this function
works depends onthe disc typein use.
Multimedia player
Skip tothe previouschapter ortrack
There aretwo options toselect a nexttrack.
1) Press eitherthe PREVIOUS or the NEXT button as describedabove.
2) Press oneor more ofthe NUMBER 0 9, 10+ buttonsto enter thedesired track
number to beplayed. When thescreen is displaying a then this function is
not available.This might haveone of thefollowing reasons:A) The tracks on
the disks arenot numbered; B)The enterednumber is incorrect;C) PBC is on
press the PBCbutton on theremote control toswitch PBC off.
Select atrack
With PBC switchedon and whilethe DVD discis played, pressMENU to display the
track list. Selecta track withthe up ordown arrow andpress PLAYto confirm your
track selection.
Display thetrack list
Page 9 of25 pages

When playing aDVD disc andyou have
selected ON, thenthe screen willshow
the angle mark.This willgive you the
possibility to viewmulti angle DVD's.
(whether this functionsworks, depends
on the disctype in use.)When you have
selected OFF, no anglemark will be
shown on thescreen.
Toselect the languagefor your OnScreen
Display (OSD) usethis menu item.There
are multiple languagesavailable.
GENERALSETUP PAGEGENERALSETUP PAGE
TV DISPLAY PSTV DISPLAY PS
ANGLE MARK ONANGLE MARK ON
OSD LANGUAGE ENGOSD LANGUAGE ENG
CAPTIONS OFFCAPTIONS OFF
SCREEN SAVER ONSCREEN SAVER ON
LASTMEMORY ONLASTMEMORY ON
CAPTIONSCAPTIONS
ONON
OFFOFF
GENERALSETUP PAGEGENERALSETUP PAGE
TV DISPLAY PSTV DISPLAY PS
ANGLE MARK ONANGLE MARK ON
OSD LANGUAGE ENGOSD LANGUAGE ENG
CAPTIONS OFFCAPTIONS OFF
SCREEN SAVER ONSCREEN SAVER ON
LASTMEMORY ONLASTMEMORY ON
SCREEN SAVERSCREEN SAVER
ONON
OFFOFF
ON: To display captions.(Subtitles)
OFF: Captions willnot be displayed.
(No Subtitles)
When there isno activity withthe Player
for some time,a screen saverwill start to
prevent damage tothe screen. SelectON
to activate thescreen saver functionor
select OFF to deactivate thisfunction
GENERALSETUP PAGEGENERALSETUP PAGE
TV DISPLAY PSTV DISPLAY PS
ANGLE MARK ONANGLE MARK ON
OSD LANGUAGE ENGOSD LANGUAGE ENG
CAPTIONS OFFCAPTIONS OFF
SCREEN SAVER ONSCREEN SAVER ON
LASTMEMORY ONLASTMEMORY ON
SETLASTMEMORYSTATESETLASTMEMORYSTATE
ONON
OFFOFF
ON: Each timewhen you turnoff theplayer, itwill memorize thelast play time.So if you
turn on theplayer the nexttime and thesame disc isplayed, it willresume play from
the last memorypoint.
OFF : Disable thelast memory function
Page 15 of25 pages
While a discis playing pressthe REPEATbutton to selectone of theavailable repeat
modes.
Repeat
1) ForDVD discs;
a. pressREPEATto repeat achapter
b. pressREPEATagain to repeata title
c. pressREPEATagain repeat all
d. pressREPEATagain to exitthe repeat mode.
2) Fornon-DVD discsand whenPBC is switched off;
a. pressREPEATto repeat atrack
b. pressREPEATagain to repeatthe whole disc
c. pressREPEATagain to exitthe repeat mode
Press theSUBTITLE button to selectthe caption languagee.g. English, Dutch,
Spanish, etc. Pressthe SUBTITLE button various timesuntil you haveselected
the desired languageavailable.
Select SubtitleLanguage
Note: Whether thisfunction works dependson the disctype in use.
Page 10 of25 pages
The DISPLAYbutton can bepressed on theremote control tocheck the playingtime
and the remainingtime for eachtitle/chapter/track. Also,it can displaythe remaining
time for thewhole discs.
Press theDISPLAYbutton once, thescreen will showthe elapsed timefor the
current title..
On ScreenDisplay (OSD)
For DVDdiscs
Press theDISPLAYbutton twice, thescreen will showthe remaining timefor title.
TITLE ELAPSED
T:01/01 C: 02/25
00:06:08
TITLE ELAPSED
T:01/01 C: 02/25
00:06:08
TITLE REMAIN
T:01/01 C: 02/25
1:30:08
TITLE REMAIN
T:01/01 C: 02/25
1:30:08

4:3LB Allowyou to seemovies in theiroriginal aspect
ratio. Theentire frame ofthe movie willbe displayed.
16:9 recorded movieswill occupy asmaller portion of
the screen andyou will seeblack margins aboveand
below the picture.
4:3PS Themovie will beshown full screenwithout any
black margins, butparts of theimage will becut of from
the right andleft side.
16:9 Allowyou to seemovies in theiroriginal aspect
ratio, when connectedto a widescreen TV. Theentire
frame of themovie will bedisplayed.
16:9 Note: dependingthe DVD screenformat (e.g. 2.35
:1), the widescreen setting maystill have blackmargins
above and belowthe picture.
Page 14 of25 pages
GENERALSETUP PAGEGENERALSETUP PAGE
TV DISPLAY PSTV DISPLAY PS
ANGLE MARK ONANGLE MARK ON
OSD LANGUAGE ENGOSD LANGUAGE ENG
CAPTIONS OFFCAPTIONS OFF
SCREEN SAVER ONSCREEN SAVER ON
LASTMEMORY ONLASTMEMORY ON
SETANGLE MARKSETANGLE MARK
ONON
OFFOFF
GENERALSETUP PAGEGENERALSETUP PAGE
TV DISPLAY PSTV DISPLAY PS
ANGLE MARK ONANGLE MARK ON
OSD LANGUAGE ENGOSD LANGUAGE ENG
CAPTIONS OFFCAPTIONS OFF
SCREEN SAVER ONSCREEN SAVER ON
LASTMEMORY ONLASTMEMORY ON
SET OSD LANGUAGESET OSD LANGUAGE
GERMANGERMAN
FRENCHFRENCH
ENGLISHENGLISH
SPANISHSPANISH
ITALIANITALIAN
PORTUGUESEPORTUGUESE
DUTCHDUTCH
DANISHDANISH
To check forexample the remainingtime when playingthe 2nd song,press theDISPLAY
button. Thescreen showsTC .This is thecurrent track played.
For CDdiscs
TC
T:04/10
00:03:08
TC
T:04/10
00:03:08
Page 11 of 25pages
Press theDISPLAYbutton twice andthe screen willshow the remainingtime for the
current track. TR
T:04/10
00:03:08
TR
T:04/10
00:03:08
Press theDISPLAYbutton for athird time andthe screen willshow the elapsedtime for
the current disc.
Press theDISPLAYbutton for a4th time andthe screen willshow the elapsedtime for
the current chapter.
FM Frequency
Push this buttonto select thefrequency and atthe same timethe monitor willshow you
which frequency youhave selected .So you canadjust the frequencyon the radio
according to thefrequency showed onthe monitor.
This featureis used tozoom-in and zoom-outthe video imageof the motionpictures or
still images whenplaying DVD discs.
ZOOM
There are 3levels of zoom-inavailable, pressing theZOOM button several timesto
increase the zoomfactor in thefollowing sequence:
Hereafter there arealso three levelsto zoom-out, pressthe ZOOM button several times
to decrease thezoom factor inthe following sequence:

SYSTEM SETTINGSSYSTEM SETTINGS
Current item
The explanation to
the current item.
SYSTEM SETTINGSSYSTEM SETTINGS
Current item
The explanation to
the current item.
GENERALSETUP PAGEGENERALSETUP PAGE
TV DISPLAY WideTV DISPLAY Wide
ANGLE MARK ONANGLE MARK ON
OSD LANGUAGE ENGOSD LANGUAGE ENG
CAPTIONS OFFCAPTIONS OFF
SCREEN SAVER ONSCREEN SAVER ON
LASTMEMORY ONLASTMEMORY ON
GOTO GENERALSETUP PAGEGOTO GENERALSETUP PAGE
Press SETUP on the RemoteControl to enterthe system settingmain menu.
On the RemoteControl, press eitherthe UP or DOWN or LEFT or RIGHT
arrow buttons tomove to thedesired menu itemand pressPLAYto select themenu item
GENERALSETUP PAGEGENERALSETUP PAGE
TV DISPLAY PSTV DISPLAY PS
ANGLE MARK ONANGLE MARK ON
OSD LANGUAGE ENGOSD LANGUAGE ENG
CAPTIONS OFFCAPTIONS OFF
SCREEN SAVER ONSCREEN SAVER ON
LASTMEMORY ONLAST MEMORY ON
SETTVDISPLAY MODESETTV DISPLAY MODE
4:3 PANSCAN4:3 PANSCAN
4:3 LETTERBOX4:3 LETTERBOX
16:916:9
Page 13 of25 pages
Press the RIGHT arrow button toenter the sub-menu.If you wantto set thescreen
to "WIDE", pressthe DOWN arrow twice tomove your selectionuntil the "WIDE"
item is selected,now pressPLAY.
Press SETUP to exit thesesystem settings
Set TV Displaymode to thecorrect ratio:
Note:three screen ratiomodes are available,16:9 WIDE, 4:3LB(Letterbox) and 4:3PS
(Pan Scan). Different disc formatswill display different images dependingthis
setting and thescreen size used..Hereunder is anexample of thedifferent
choices and therelation between thedisc format andscreen ratio. ofthe
different choicesand the relation
Press the / / / arrowbuttons to movethe zoomed pictureover your screen
(Panning).
Toreturn to normalscreen size, pressthe ZOOM for the 7thtime.
Page 12 of25 pages
The can memorize thelast stop pointand play formthis point
onwards when theunit is switchedon again orwhen play ispress again.
When playing, pressthe STOP button once tostop the playback.The
will memorize thecurrent position onthe disc. Pressthe PLAYbutton to start
playing from thelast memorized position.Pressing theSTOP button twice willclear the
memorized position fromthe memory andif play isresumed, the discwill be played
from the beginning.
Multimedia player
Multimedia player
Memory Play
While playing ,push [SLOW] to play filmslowly at different speed.Youcan play slow
forward or backward,four shift speedare available foreither of them.Push [SLOW]
once, the speeddecreases by oneshift , finallyit returns tonormal state.
Slow play:
Press [SOURCE] to enter the TV mode. Press [SETUP] to set the TV function. The
screen will display as below.
CHANNEL: 2
SKIP: OFF
BAND: VH
FINE: 0
AUTO SEARCH:OFF
CHANNEL: 2
SKIP: OFF
BAND: VH
FINE: 0
AUTO SEARCH:OFF
IIIIIIII
----------------------------------------------------
Then press [ ] or [ ] of direction key, and choose ON by direction key, the unit will search
automatically, after search it will save the TV program automatically and play the first searched
program.
You can tune finely by [LEFT] and [RIGHT] of the direction key.
You can choose TV program by [ ] and [ ] of direction key or number key. For example,
if you want to choose 18th CH, please push [10+], it will display [- -], then push [1] and [8].
Press [ ] or [ ] to choose the AUTO SEARCH: OFF.
CHANNEL: 2
SKIP: OFF
BAND: VH
FINE: 0
AUTO SEARCH:OFF
CHANNEL: 2
SKIP: OFF
BAND: VH
FINE: 0
IIIIIIII
----------------------------------------------------
AUTO SEARCH:OFF
TV mode:
Table of contents
