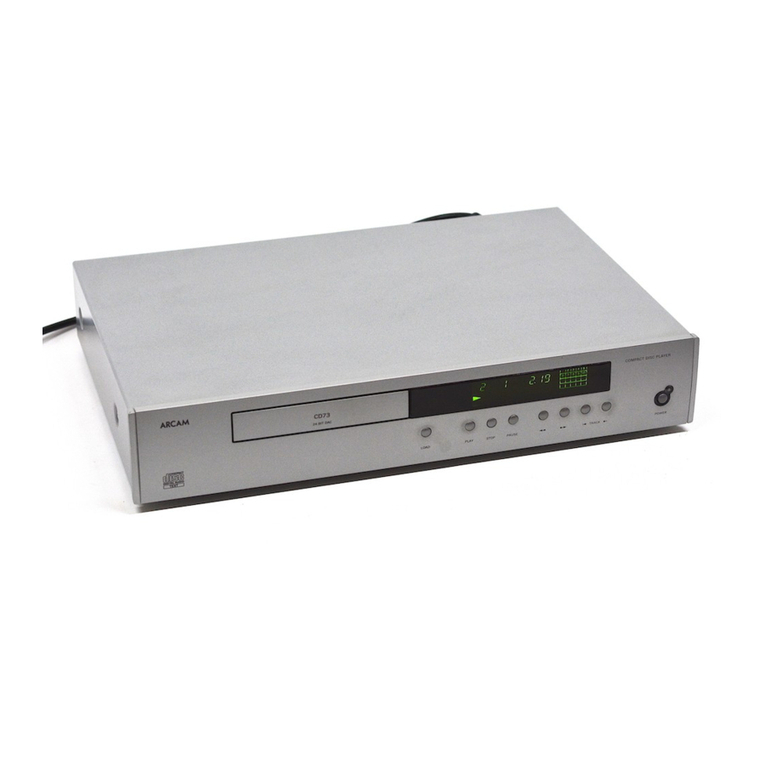
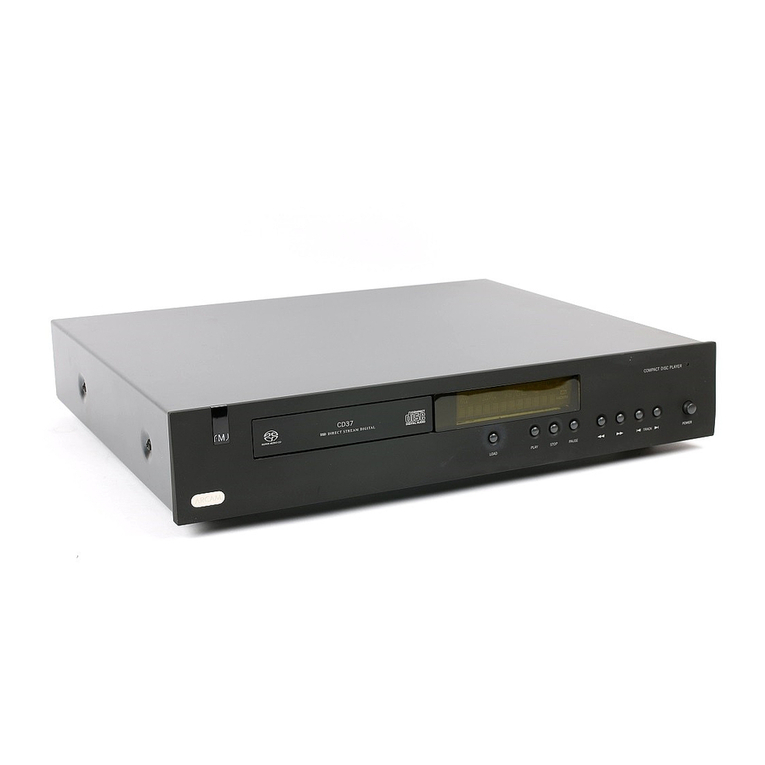
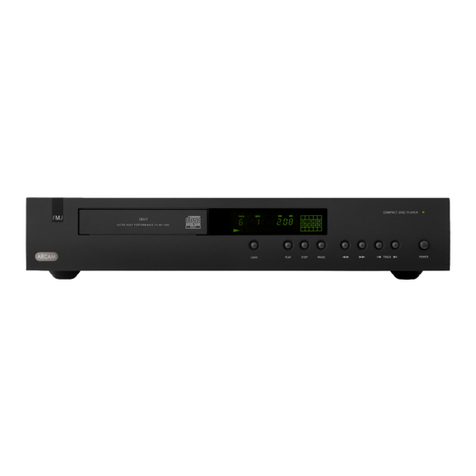
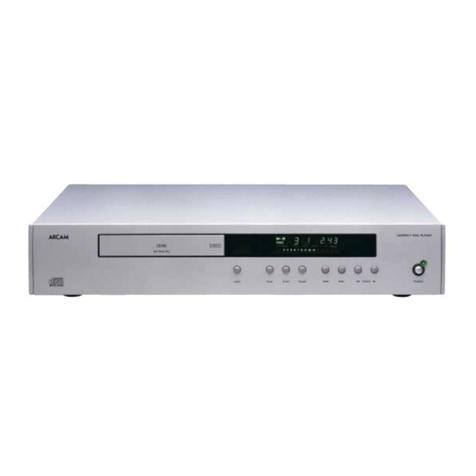
Arcam DiVA CD72 User manual

CD72
CD92
HANDBOOK
Arcam Compact Disc players
Lecteurs de CD Arcam
Arcam Compact Disc-Spieler
English
Français
Deutsch

CD72/92
2
CD72/92
2
Safety guidelines
Safety instructions
This product is designed and manufactured to meet strict
quality and safety standards. However, you should be aware of
the following installation and operation precautions:
1. Take heed of warnings and instructions
You should read all the safety and operating instructions
before operating this appliance. Retain this handbook for future
reference and adhere to all warnings in the handbook or on
the appliance.
2. Water and moisture
The presence of electricity near water can be dangerous. Do
not use the appliance near water – for example next to a
bathtub, washbowl, kitchen sink, in a wet basement or near a
swimming pool, etc..
3. Object or liquid entry
Take care that objects do not fall and liquids are not spilled into
the enclosure through any openings. Liquid filled objects such
as vases should not be placed on the equipment.
4. Ventilation
Do not place the equipment on a bed, sofa, rug or similar
soft surface, or in an enclosed bookcase or cabinet, since
ventilation may be impeded. We recommend a minimum
distance of 50mm (2 inches) around the sides and top of the
appliance to provide adequate ventilation.
5. Heat
Locate the appliance away from naked flames or heat
producing equipment such as radiators, stoves or other
appliances (including other amplifiers) that produce heat.
6. Climate
The appliance has been designed for use in moderate climates.
7. Racks and stands
Only use a rack or stand that is recommended for use with
audio equipment. If the equipment is on a portable rack it
should be moved with great care, to avoid overturning the
combination.
8. Cleaning
Unplug the unit from the mains supply before cleaning.
The case should normally only require a wipe with a soft, damp,
lint-free cloth. Do not use paint thinners or other chemical
solvents for cleaning.
We do not advise the use of furniture cleaning sprays or
polishes as they can cause indelible white marks if the unit is
subsequently wiped with a damp cloth.
9. Power sources
Only connect the appliance to a power supply of the type
described in the operating instructions or as marked on the
appliance.
10. Power-cord protection
Power supply cords should be routed so that they are not likely
to be walked on or pinched by items placed upon or against
them, paying particular attention to cords and plugs, and the
point where they exit from the appliance.
11. Grounding
Ensure that the grounding means of the appliance is not
defeated.
12. Power lines
Locate any outdoor antenna/aerial away from power lines.
13. Non-use periods
If the unit has a standby function, a small amount of current will
continue to flow into the equipment in this mode. Unplug the
power cord of the appliance from the outlet if left unused for
a long period of time.
14. Abnormal smell
If an abnormal smell or smoke is detected from the appliance,
turn the power off immediately and unplug the unit from the wall
outlet. Contact your dealer immediately.
15. Servicing
You should not attempt to service the appliance beyond that
described in this handbook. All other servicing should be
referred to qualified service personnel.
16. Damage requiring service
The appliance should be serviced by qualified service personnel
when:
A. the power-supply cord or the plug has been damaged, or
B. objects have fallen, or liquid has spilled into the
appliance, or
C. the appliance has been exposed to rain, or
D. the appliance does not appear to operate normally or
exhibits a marked change in performance, or
E. the appliance has been dropped or the enclosure
damaged.
Safety compliance
This product has been designed to meet the EN60065
international electrical safety standard.

CD72/92
3
English
Using this handbook
Contents
Safety guidelines 2
Safety instructions 2
Safety compliance 2
Using this handbook 3
Safety 3
Models covered 3
Installation 4
Positioning the unit 4
Connecting to other equipment 4
Connecting to a power supply 4
CD72 rear panel 4
CD92 rear panel 4
Using your CD player 5
CDs with text 5
Using the remote control 6
CR-314 remote control 6
Technical specification 7
Guarantee 8
On-line registration 8
This handbook has been designed to give you all the
information you need to install, connect, set up and use the
Arcam CD72 or CD92 compact disc players. The CR-314
remote control handset supplied with this equipment is also
described, as it applies to operating the CD players.
Safety
Safety guidelines are set out on the inside front cover of this
handbook.
Many of these items are common sense precautions, but for
your own safety, and to ensure that you do not damage the unit,
we strongly recommend that you read them.
Models covered
This handbook covers two CD players:
CD72
CD92
These use the same basic chassis and mechanics and the
controls are identical. They differ in the audio path electronics
used. The CD72 can be upgraded to CD92 specification by
installing the appropriate Arcam upgrade kit. Please consult
your Arcam dealer.
CD72 player
This has a Delta-Sigma DAC (Digital to Analogue Converter) with
24-bit filtering.
CD92 player
The CD92 incorporates the unique dCS Ring DAC™which
delivers state-of-the-art performance from its revolutionary
24-bit technology.
This new DAC is the result of a partnership between two
British companies –Arcam and dCS (Data Conversion Systems
Ltd), the world’s leading supplier of professional audio ADCs
and DACs. Ring DAC technology exhibits exceptionally linear
response when decoding digital audio data, with the ability to
resolve the finest acoustic details recorded on a compact disc.
In the CD92, 24-bit digital filtering is provided by the Pacific
Microsonics digital filter, which also performs HDCD®(High
Definition Compatible Digital) decoding of suitably encoded
CDs. The sonic performance of the CD92 makes it one of the
very best CD players currently available.

CD72/92
4
Installation
Positioning the unit
Always place the CD player on a level, firm surface. Placing
your player on a set of dedicated sorbothane isolation feet
will isolate the unit from its surroundings as well as absorbing
the vibrations created within the player itself. You will generally
hear some sonic improvements, which makes this an extremely
cost-effective upgrade.
Connecting to other equipment
Interconnect cables
Interconnecting cables are not supplied with this CD player. We
recommend high quality cables as inferior quality cables will
degrade the sound quality of your system. Please contact your
Arcam dealer for details of suitable cables.
Audio outputs
Connect these to your amplifier’s CD or any other line-level
input using suitable high quality interconnect cables. Ensure
that the left and right audio outputs from the CD player are
connected to the same left and right inputs on your amplifier.
CD92 only: The second set of sockets can be used to
connect to a second amplifier set up for multi-room use.
Coaxial digital output
Use this socket if you are using a separate digital to analogue
converter (DAC) or digital recorder. Connect to the DAC or
recorder’s digital input using a suitable 75Ωscreened cable.
CAUTION: Never connect the digital output socket to a
conventional audio input.
Optical digital output
Use this socket if you are using a separate DAC or digital
recorder with an optical connection. Connect using a suitable
optical cable.
Remote input connection
It is not necessary to make any connection to this socket in
normal use. This connection is for ease of installation to multi-
room remote control systems and is suitable for modulated
IR commands. Contact your multi-room installer for more
information.
Connecting to a power supply
Wrong plug?
Check that the plug supplied with the unit fits your supply and
that your mains supply voltage agrees with the voltage setting
(120V or 230V) indicated on the rear panel of the unit.
If your mains supply voltage or mains plug is different, consult
your Arcam dealer or Arcam Customer Support on +44
(0)1223 203203.
Mains lead
The appliance is normally supplied with a moulded mains plug
already fitted to the lead. If for any reason the plug needs to
be removed, it must be disposed of immediately and securely,
as it is a potential shock hazard when inserted into the mains
socket. Should you require a new mains lead, contact your
Arcam dealer.
Plugging in
Push the plug (IEC line socket) of the power cable supplied with
the unit into the socket (POWER INLET) in the back of the unit.
Make sure it is pushed in firmly.
Put the plug on the other end of the cable into your power
supply socket and switch the socket on.
POWER INLET
230V
2143
REMOTE
IN
AUDIO OUTPUT
R L
CO-AXIAL OPTICAL
DIGITAL OUTPUTS
5
POWER INLET
230V
213
REMOTE
IN
CO-AXIAL OPTICAL
DIGITAL OUTPUTS
54
AUDIO OUTPUTS
12
L
R
CD72 rear panel (part) CD92 rear panel (part)
1Power inlet, with voltage indicator
2Coaxial digital output
3Optical digital output
4Single audio output
5Remote input
1Power inlet, with voltage indicator
2Coaxial digital output
3Optical digital output
4Twin audio outputs
5Remote input

CD72/92
5
English
Using your CD player
POWER 1
Press this button to switch the CD player on and off. When first
powered up with no CD installed the display shows:
--NO DISC--
LOAD 2
To install a CD, press LOAD (or OPEN on the remote control).
The CD tray opens –it accepts 12cm and 8cm discs. Place
the CD in the tray with the label facing uppermost. Press LOAD
again (or press PLAY, or gently push the tray in 5mm) to close
the tray. You will see the total number of tracks and total disc
time, for example…
8 52.19
TRACK INDEX MIN SEC
112345
678
The display returns to ‘0’after a few seconds. The disc is now
ready to play.
PLAY 3
Press to play the CD. To restart from track 1, press STOP and
then PLAY.
Make sure your amplifier’s input source selector is set to the
correct input.
STOP 4
Press to stop the CD playing. The display shows ‘0’and the
number of tracks.
PAUSE 5
Press to pause the disc (interrupt play).
Press PAUSE again, or PLAY to resume play from the same
point.
SEARCH 6
Press to search backwards, or to search forwards
for a particular passage within the currently playing track. If the
player is in ‘PAUSE’mode the search is made at high speed
with the sound muted.
SKIP TRACK 7
To start a CD with a track other than the first, press or
to locate the desired track.
To select another track during play, press or . The
track is played automatically after selection. Pressing once
returns to the start of the current track. To select the previous
track, press twice quickly. To go back two tracks, press
three times, and so on.
HDCD indicator (CD92 only) 8
The presence of an HDCD-encoded disc is recognised
automatically by the CD92 and indicated by a green LED in
the display window.
CDs with text
Load
You will see the total number of tracks and the total disc time
with ‘CD TEXT’illuminated in the display. The artist and album
title scrolls across the display before returning to show the
artist and total number of tracks.
ANASTACIA
TRACK INDEX MIN SEC
CD TEXT
12345
678910
11 12
Play
The track number is briefly displayed, followed by the track title
scrolling across the display. The display returns to showing the
track number and time.
Track selection
When a new track is selected, the track number is briefly
displayed, followed by the track title scrolling across the
display. The display returns to showing the track number and
time.
POWER
COMPACT DISC PLAYER
TRACK
PAUSESTOPPLAYLOAD
71
653248
NOTE: The track title is always displayed when a track is
selected, either for playing or programming.
The artist is always displayed when the disc is stopped.
The TITLE button turns the text display off.
The text display supports English only.

CD72/92
6
Using the remote control
CR-314
RPT CLEAR 0PROG
A-B 789
DISP 456
CD
DVD 123
OK
OPEN
MUTE
P
MODE
CD/DVD REMOTE
CD DVD
SUBT
ZOOM AUDIO MEM RTN
ANGLE SETUP STATUS SRCH
MENU
TITLE
CR-314 Remote Control
Note that greyed-out buttons on the remote control are DVD-
specific and are not used with the CD player.
CD/DVD
Ensure that CD mode is selected using the CD/DVD
toggle button. The ‘CD’LED above the CD/DVD
button is lit briefly when CD mode is selected.
DISP (display)
Turns the display on or off. Turning the display off generally
produces a slight improvement in sound quality.
A–B
This button enables you to repeat any section of music within
a track. Whilst the disc is playing, press the A–Bbutton at the
start of the section you wish to repeat. ‘REPEAT’is shown on
the display and the letter ‘A–’ flashes. Press the button a second
time when you reach the end of the section you wish to repeat.
The ‘A–B’letters stop flashing and remain lit. This section will
repeat until you press or or . The forward search button
() moves forward within the selected loop.
RPT (repeat)
To repeat the entire CD or a pre-programmed selection of tracks
press RPT once: ‘REPEAT’lights on the display. To repeat a
particular track, select that track and then press RPT twice so
that ‘REPEAT 1’is shown on the display. If you now select a
different track, that track is repeated instead.
To cancel the repeat function press RPT a third time.
CLEAR
If you make a mistake whilst programming you can delete
the last entered track by pressing CLEAR. To delete all
the programmed tracks, press CLEAR repeatedly until ‘0’is
displayed.
To exit the program facility, press PROG.
TITLE
Press TITLE once to display the remaining time of the currently
playing track. Press again to display the time remaining of
the disc. Press a third time to turn the text display on.
Press TITLE again and the display reverts to its original setting,
showing the time elapsed for the current track.
For CDs with text, pressing TITLE once while the disc
is loaded but not playing displays the artist’s name.
Pressing TITLE a second time displays the total number of
tracks and the total playing time.
0–9 keypad
This allows direct access to individual tracks on the disc. To
select a track, press the corresponding keypad button and then
press . For tracks greater than 9, enter the digits in sequence.
For example, to play track 15, press and hold 1until the number
on the display moves to the left, then press 5.
PROG (Program)
You can program a selection of up to 24 tracks from a
disc to play in any order. Select a track by using the
and buttons, then press PROG to program the track into
memory (‘PROGRAM’appears on the display to indicate that you
have started programming a sequence). Repeat these steps to
program the remaining tracks in your selection. Alternatively,
press PROG once and enter your track selection using the 0–9
keypad.
The display shows the track numbers programmed, the total
length of the programmed sequence and the number of tracks
programmed (shown by a number below the word ‘STEP’).
Each time you enter a track the number below ‘STEP’increments
by one and flashes until you press PROG to confirm. If you fail to
press PROG within about five seconds the display stops flashing
and you will have to reselect the track.
Press to play the program. Press again to replay the entire
sequence from the start. Press and hold CLEAR to erase the
programmed sequence. Press PROG again to exit the program
facility: the display flashes ‘CONTINUE’and shows ‘0’.
MUTE
Stops sound to the speaker outputs of certain Arcam amplifiers.
Volume +/–
Adjusts the volume on Arcam remote-controllable amplifiers.
Note that the volume (+/–) controls and MUTE button have
no effect on the audio output level of the CD players.
NOTE: Remember to install the two AAA batteries supplied
before trying to use your remote control.
Do not place anything in front of the display area on the
CD player (where the IR receiver is located), or the remote
control may not work.
OPEN
Opens and closes the CD tray
Search and Skip Track
Search backwards and forwards;
Skip track backwards and forwards (see page 5)
Playback control
Pause, Play and Stop (see page 5)
P MODE
Press once to shuffle play CD tracks (i.e. play them in
a random order). Press again to cancel shuffle play.
CD72/92
7
English
Digital to Analogue conversion
CD72: 24-bit multilevel Delta-Sigma DAC
CD92: High resolution proprietary multi-bit current output
digital to analogue conversion. 24-bit dCS Ring DAC plus
HDCD
Laser pick-up 3 beam
Laser wavelength 780nm
Numerical aperture 0.45
Dynamic range 106dB
Signal to noise ratio (CCIR) >100dB
Harmonic distortion (0dB, 1kHz) <0.005%
Frequency response (±0.5dB) 5Hz–20kHz
Output level (0dB) 2.3Vrms
Output impedance
CD72 120Ω
CD92 50Ω
Minimum recommended load 5kΩ
Technical specification
Physical
Dimensions W430 x D290 x H84mm
Weight
CD72 4.6kg nett/6.1kg packed
CD92 5.6kg nett/7.1kg packed
Power consumption 32VA maximum
Digital output connection 75Ωco-axial
optical TOSLINK
Supplied accessories
Mains lead
CR-314 remote control
2 x AAA batteries
E&OE
Continual improvement policy
Arcam has a policy of continual improvement for its products.
This means that designs and specifications are subject to
change without notice.
Radio interference
The CD72 and CD92 players are digital audio devices which
have been designed to very high standards of electromagnetic
compatibility.
Both CD players and DACs generate, and can radiate RF (radio
frequency) energy. In some cases this can cause interference
with FM and AM radio reception. If this is the case, keep the CD
player and its connecting cables as far from the tuner and its
aerials as possible. Connecting the CD player and the tuner to
different mains sockets can also help to reduce interference.
EC COUNTRIES -–These products have been designed to
comply with directive 89/336/EEC.
USA –These products comply with FCC requirements.
Laser radiation
If an Arcam CD player is operated whilst the outer casing is
removed, invisible laser radiation could cause eye damage.
For more details about HDCD and HDCD recordings please visit
the Pacific Microsonics website at www.hdcd.com or contact
them at:
Pacific Microsonics Inc., 2560 Ninth Street, Suite 219, Berkeley
CA 94710, USA.
NOTE: All specification values are typical unless otherwise
stated.

CD72/92
8
Worldwide Guarantee
This entitles you to have the unit repaired free of charge, during
the first two years after purchase, at any authorised Arcam
distributor provided that it was originally purchased from
an authorised Arcam dealer or distributor. The manufacturer
can take no responsibility for defects arising from accident,
misuse, abuse, wear and tear, neglect or through unauthorised
adjustment and/or repair, neither can they accept responsibility
for damage or loss occurring during transit to or from the
person claiming under the guarantee.
The warranty covers:
Parts and labour costs for two years from the purchase date.
After two years you must pay for both parts and labour costs.
The warranty does not cover transportation costs at any time.
Claims under guarantee
This equipment should be packed in the original packing
and returned to the dealer from whom it was purchased, or
failing this, directly to the Arcam distributor in the country of
residence.
It should be sent carriage prepaid by a reputable carrier -–
NOT by post. No responsibility can be accepted for the unit
whilst in transit to the dealer or distributor and customers are
therefore advised to insure the unit against loss or damage
whilst in transit.
For further details contact Arcam at:
Arcam Customer Support Department,
Pembroke Avenue, Waterbeach, CAMBRIDGE
CB5 9PB, England.
Telephone: +44 (0)1223 203203
Fax: +44 (0)1223 863384
Problems?
Always contact your dealer in the first instance.
If your dealer is unable to answer any query regarding this
or any other Arcam product please contact Arcam Customer
Support on +44 (0) 1223 203203 or write to us at the above
address and we will do our best to help you.
Guarantee
On-line registration
You can register your Arcam product on line at:
www.arcam.co.uk/reg

CD72/92
9
Français
Normes de sécurité
Cet appareil a étéconçu et fabriquéconformément aux
normes de qualitéet de sécuritéles plus strictes. Vous
devez cependant prendre les précautions suivantes lors de son
installation et de son utilisation :
1. Avertissements et consignes
Il est conseilléde lire les consignes de sécuritéet d’utilisation
avant de mettre le lecteur CD en marche. Conservez ce
manuel pour pouvoir vous y référer par la suite et respectez
scrupuleusement les avertissements figurant dans ce manuel
ou sur l’appareil lui-même.
2. Eau et humidité
L’installation d’un appareil électrique àproximitéd’une source
d’eau présente de sérieux risques. Ne pas utiliser l’appareil à
proximitéd’un point d’eau - par exemple près d’une baignoire,
d’un lavabo, d’un évier, dans une cave humide ou àcôtéd’une
piscine, etc.
3. Chute d’objets ou de liquides
Veiller àne pas laisser tomber d’objets ni couler de liquides à
travers l’une des ouvertures de l’enceinte. Ne pas placer d’objet
contenant du liquide, vase par exemple, sur l’appareil.
4. Ventilation
Eviter de placer l’appareil sur un lit, un canapé, un tapis ou
une surface similaire de faible densité, ou dans une bibliothèque
ou un meuble fermé, qui risquerait de ne pas être ventilé
correctement. Pour permettre une ventilation appropriée, il est
conseilléde prévoir au minimum un espace de 50 mm (2
pouces) de chaque côtéet au-dessus de l’appareil.
5. Echauffement
Ne pas placer l’appareil près d’une flamme nue ou de tout
appareil produisant de la chaleur (radiateur, poêle ou autre).
Cette règle s’applique également aux autres amplificateurs.
6. Conditions climatiques
Cet appareil est conçu pour fonctionner dans des climats
modérés.
7. Etagères et supports
Utiliser uniquement des étagères ou des supports pour
équipements audio. Si le CD 72 oùle CD 92 est montédans
un rack de transport, le déplacer avec précaution, pour éviter
tout risque de chute.
8. Nettoyage
Débrancher l’appareil du secteur avant de le nettoyer.
Pour le nettoyage, n’utiliser qu’un chiffon doux, humide et
non pelucheux. N’utiliser ni diluant pour peinture, ni solvant
chimique.
L’emploi de sprays ou de produits de nettoyage pour meubles
est déconseillé, car le passage d’un chiffon humide risquerait
de laisser des marques blanches indélébiles.
9. Alimentation
Brancher l’appareil uniquement àune source d’alimentation du
type mentionnédans le manuel d’utilisation ou indiquésur
l’appareil lui-même.
Consignes de sécurité
10. Protection des câbles d’alimentation
Veiller àce que les câbles d’alimentation ne se trouvent pas
dans un lieu de passage ou bloqués par d’autres objets. Cette
règle s’applique plus particulièrement aux prises et câbles
d’alimentation et aux sorties du lecteur CD.
11. Mise àla masse
S’assurer que l’appareil est correctement mis àla masse.
12. Câbles haute tension
Eviter de monter l’antenne extérieure de l’appareil àproximité
de câbles haute tension.
13. Périodes de non-utilisation
Si l’appareil possède une fonction de mise en veille, un léger
courant continuera de circuler lorsqu’il sera réglésur ce mode.
Débrancher le cordon d’alimentation de la prise secteur si
l’appareil doit rester inutilisépendant une période prolongée.
14. Odeur suspecte
Arrêter et débrancher immédiatement l’appareil en cas de
fumée ou d’odeur anormale. Contacter immédiatement votre
revendeur.
15. Entretien habituel
Ne pas tenter d’effectuer d’autres opérations que celles
mentionnées dans ce manuel. Toute autre opération d’entretien
doit être effectuée par un personnel qualifié.
16. Entretien par un personnel qualifié
Votre appareil doit être entretenu par du personnel qualifié
lorsque :
A. le cordon d’alimentation ou la prise a étéendommagé(e),
ou
B. des objets sont tombés ou du liquide a coulédans
l’appareil, ou
C. l’appareil a étéexposéàla pluie, ou
D. l’appareil ne semble pas fonctionner normalement ou
présente des altérations dans son fonctionnement, ou
E. l’appareil est tombéou l’enceinte a étéendommagée.
Respect des consignes de sécurité
Cet appareil a étéconçu pour répondre àla norme
internationale de sécuritéélectrique EN60065.

CD72/92
10
Ce manuel a étérédigépour vous fournir toutes les informations
dont vous avez besoin pour installer, brancher, régler et utiliser les
lecteurs de CD Arcam CD72 et CD92. Il décrit également le boîtier
de télécommande CR-314 fourni avec l’appareil, tel qu’il doit être
utiliséavec les lecteurs de CD.
Sécurité
Les consignes de sécuritéfigurent au verso de la couverture de
ce manuel.
Bien que bon nombre d’entre elles fassent appel au simple bon
sens, il est conseilléde les lire pour votre propre sécuritéet pour
éviter d’endommager l’appareil.
Modèles traités
Ce manuel traite deux lecteurs de CD :
CD72
CD92
Ces modèles utilisent le même châssis et la même mécanique
de base et leurs commandes sont identiques. Ils diffèrent par
l’électronique de leur chemin audio. Le CD72 peut être mis àniveau
aux spécifications du CD92 par installation du kit de mise àniveau
Arcam adéquat. Veuillez consulter votre revendeur Arcam.
Lecteur CD72
Ce lecteur comporte un convertisseur DAC Delta-Sigma (Digital to
Analogue Converter) avec filtrage 24 bits.
Lecteur CD92
Le CD92 intègre la fonction unique dCS Ring DAC™qui, grâce à
sa technologie 24 bits révolutionnaire, permet d’offrir des résultats
de pointe.
Ce nouveau convertisseur DAC est le fruit du partenariat de deux
entreprises britanniques –Arcam et dCS (Data Conversion Systems
Ltd), leader mondial des ADC et des DAC audio professionnels. La
technologie Ring DAC fournit une réponse linéaire exceptionnelle
lors du décodage des données audio numériques, avec possibilité
de résoudre les détails acoustiques les plus fins enregistrés sur
un CD
Sur le CD92, le filtrage numérique 24 bits est assurégrâce au filtre
numérique Pacific Microsonics, qui réalise également le décodage
HDCD®(High Definition Compatible Digital) des CD codés de
manière compatible. Ses performances soniques font du CD92
l’un des meilleurs lecteurs de CD actuellement disponibles sur le
marché.
Utilisation de ce manuel
Table des matières
Consignes de sécurité9
Normes de sécurité9
Respect des consignes de sécurité9
Utilisation de ce manuel 10
Sécurité10
Modèles traités 10
Installation 11
Mise en place de l’AVR 100 11
Branchement àd’autres appareils 11
Branchement àune alimentation électrique 11
Panneau arrière du CD72 11
Panneau arrière du CD92 11
Utilisation de votre lecteur de CD 12
CD avec texte 12
Utilisation de la télécommande 13
Télécommande CR-314 13
Spécifications techniques 14
Garantie 15
Enregistrement en ligne 15

CD72/92
11
Français
Mise en place de l’AVR 100
Poser votre lecteur de CD sur une surface plane et
ferme. Le fait de placer le lecteur sur des pieds dédiés
d’isolation en sorbothane permettra d’isoler l’appareil de son
environnement et d’absorber les vibrations engendrées dans le
lecteur proprement dit. Cela vous permettra probablement de
constater une amélioration de la qualitédu son, pour un coût
extrêmement réduit.
Branchement àd’autres appareils
Câbles de branchement
Les câbles de branchement ne sont pas fournis avec ce lecteur
de CD. Nous recommandons l’utilisation de câbles de haute
qualité. En effet, des câbles de qualitéinférieure risquent de
dégrader la qualitésonore de votre système.
Sorties audio
Branchez ces sorties au CD de votre amplificateur ou àtoute
autre entrée de niveau de ligne àl’aide de câbles compatibles
de branchement de haute qualité. Assurez-vous que les sorties
audio du lecteur de CD sont branchées aux entrées de
l’amplificateur en respectant la polarité.
CD92 uniquement : Le second jeu de prises permet le
branchement àun second amplificateur réglépour l’utilisation
dans plusieurs pièces.
Sortie numérique coaxiale
Utilisez cette prise si vous utilisez un convertisseur DAC
(numérique/analogique) ou un lecteur numérique séparé.
Effectuez le branchement sur l’entrée numérique du DAC ou de
l’enregistreur àl’aide d’un câble filtréadéquat 75Ω.
ATTENTION : Ne branchez jamais la prise de sortie
numérique dans une entrée audio ordinaire.
Sortie numérique optique
Utilisez cette prise si vous utilisez un convertisseur
DAC (numérique/analogique) ou un enregistreur dotéd’une
connexion optique. Effectuez le branchement àl’aide d’un câble
optique adéquat.
Connexion d’entrée de la télécommande
En utilisation normale, il n’est pas nécessaire de connecter
cette prise. Cette connexion sert àfaciliter l’installation de
systèmes de télécommande dans plusieurs pièces et est
compatible avec les commandes IR modulées. Pour plus
d’informations, contactez votre installateur.
Branchement àune alimentation
électrique
La prise est-elle bonne ?
Vérifier que la prise fournie avec le récepteur correspond à
votre alimentation et que la tension du secteur correspond au
réglage prédéfini (120V ou 230V) indiquésur le panneau arrière
de l’AVR 100.
Si vous disposez d’une tension d’alimentation secteur ou d’une
fiche secteur différente, consultez votre revendeur Arcam ou le
support client Arcam au +44 (0)1223 203203.
Câble de liaison au secteur
L’appareil est habituellement fourni avec une fiche secteur
moulée déjàmontée sur le câble. Si vous devez pour
une raison quelconque retirer la prise, débarrassez-vous
en immédiatement en la jetant en lieu sûr. En effet, son
branchement dans la prise murale pourrait provoquer une
électrocution. Si vous avez besoin d’un nouveau câble de
liaison au secteur, contactez votre revendeur Arcam.
Branchement
Enfoncez la fiche (prise de ligne IEC) du câble d’alimentation
livréavec l’appareil dans la prise (AC INLET) située àl’arrière
de ce dernier. Vérifiez qu’elle est branchée àfond.
Introduisez la prise située àl’autre extrémitédu câble dans
votre prise d’alimentation secteur, et mettez cette dernière
sous tension.
1Prise d’alimentation, avec indicateur de tension
2Sortie numérique coaxiale
3Sortie numérique optique
4Sortie audio unique
5Entrée de la télécommande
1Prise d’alimentation, avec indicateur de tension
2Sortie numérique coaxiale
3Sortie numérique optique
4Sorties audio jumelles
5Entrée de la télécommande
Panneau arrière du CD72 (partie) Panneau arrière du CD92 (partie)
POWER INLET
230V
2143
REMOTE
IN
AUDIO OUTPUT
R L
CO-AXIAL OPTICAL
DIGITAL OUTPUTS
5
POWER INLET
230V
213
REMOTE
IN
CO-AXIAL OPTICAL
DIGITAL OUTPUTS
54
AUDIO OUTPUTS
12
L
R
Installation

CD72/92
12
POWER 1
Appuyez sur ce bouton pour mettre le lecteur de CD sous/hors
tension. Lors de la première mise sous tension sans CD
installé, vous verrez ceci :
--NO DISC--
LOAD 2
Pour installer un CD, appuyez sur LOAD (ou sur OPEN sur
la télécommande). Le plateau àCD s’ouvre –il accepte les
disques 12cm et 8cm. Placez le CD sur le plateau, face
imprimée vers le haut. Appuyez de nouveau sur LOAD (ou
sur PLAY, ou enfoncez délicatement le plateau de 5mm) pour
fermer le plateau. Vous voyez ‘DISC’apparaître sur l’afficheur,
avec le nombre total de pistes et la durée totale du disque,
par exemple…
8 52.19
TRACK INDEX MIN SEC
112345
678
Au bout de quelques secondes, l’afficheur indique de nouveau
‘0’. Le disque est àprésent prêt àêtre lu.
PLAY 3
Appuyez sur ce bouton pour lire le CD. Pour recommencer
depuis la piste 1, appuyez sur STOP, puis sur PLAY.
Assurez-vous que le sélecteur de source d’entrée de votre
amplificateur est réglésur l’entrée qui convient.
STOP 4
Appuyez sur ce bouton pour arrêter la lecture du CD.
L’afficheur indique ‘0’et le nombre de pistes.
PAUSE 5
Appuyez sur ce bouton pour mettre le disque en pause
(interrompre la lecture).
Appuyez de nouveau pour reprendre la lecture àpartir du
même point.
SEARCH 6
Appuyez sur pour rechercher en arrière, ou sur
pour rechercher en avant, un passage particulier de la piste
en cours de lecture. Si le lecteur est en mode ‘PAUSE’la
recherche se fait àgrande vitesse et le son est coupé(vous
n’entendez rien).
TRACK 7
Pour lancer un CD àpartir d’une piste autre que la première,
appuyez sur ou sur pour rechercher la piste souhaitée,
puis appuyez sur PLAY.
Pour sélectionner une autre piste pendant la lecture, appuyez
sur ou sur pour rechercher la piste souhaitée. Une fois
la piste sélectionnée, le lecteur la lit automatiquement. Appuyez
une fois sur pour revenir au début de la piste en cours. Pour
sélectionner la piste précédente, appuyez sur deux fois très
rapidement. Pour revenir en arrière de deux pistes, appuyez sur
trois fois, et ainsi de suite.
Indicateur HDCD (CD92 seulement) 8
Le CD92 reconnaît automatiquement la présence d’un disque
codéen HDCD. Elle est indiquée par un voyant vert dans la
fenêtre d’affichage.
CD avec texte
Load
Vous verrez apparaître sur l’afficheur le nombre total de pistes
et la durée totale du disque, avec ‘CD TEXT’. Le nom de l’artiste
et le titre de l’album défilent sur l’afficheur avant d’afficher à
nouveau le nom de l’artiste et le nombre total de pistes.
ANASTACIA
TRACK INDEX MIN SEC
CD TEXT
12345
678910
11 12
Play
Le numéro de la piste est affichébrièvement, suivi du titre de
la piste qui défile sur l’afficheur. L’afficheur montre ànouveau le
numéro de la piste et sa durée.
Sélection de la piste
Lorsqu’une nouvelle piste est sélectionnée, son numéro est
affichébrièvement, suivi de son titre qui défile sur l’afficheur.
L’afficheur montre ànouveau le numéro de la piste et sa durée.
REMARQUE: lorsqu’une piste est sélectionnée, son titre est
toujours affiché, que ce soit en lecture ou en programmation.
Le nom de l’artiste est toujours affichélorsque le disque est
arrêté.
Le bouton TITLE éteint l’afficheur texte.
Les textes de l’afficheur sont en anglais uniquement.
Utilisation de votre lecteur de CD
POWER
COMPACT DISC PLAYER
TRACK
PAUSESTOPPLAYLOAD
71
653248

CD72/92
13
Français
Utilisation de la télécommande
CR-314
RPT CLEAR 0PROG
A-B 789
DISP 456
CD
DVD 123
OK
OPEN
MUTE
P
MODE
CD/DVD REMOTE
CD DVD
SUBT
ZOOM AUDIO MEM RTN
ANGLE SETUP STATUS SRCH
MENU
TITLE
Télécommande CR-314
Vous remarquerez que sur le schéma, les boutons grisés
sont spécifiques au DVD et ne sont pas utilisés sur le lecteur
de CD.
CD/DVD
Assurez-vous que le mode CD est sélectionnéàl’aide du bouton
bascule CD/DVD. Le voyant ‘CD’situéau-dessus du bouton CD/DVD
s’allume brièvement lorsque vous sélectionnez le mode CD.
DISP (affichage)
Allume ou éteint l’afficheur. Le fait d’éteindre l’afficheur produit
généralement une légère amélioration de la qualitédu son.
A–B
Ce bouton permet de répéter la section musicale de votre choix
sur une piste donnée. Tandis que le disque est en cours de lecture,
appuyez sur le bouton A-B au début de la section àrépéter.
‘REPEAT’apparaît sur l’afficheur et la lettre ‘A-’clignote. Appuyez
une seconde fois sur le bouton lorsque vous arrivez àla fin de la
section àrépéter. Les lettres ‘A-B’arrêtent de clignoter et restent
allumées. Cette section se répète jusqu’à ce que vous appuyiez
sur , sur ou sur . Le bouton de recherche avant ( )
permet d’avancer àl’intérieur de la boucle sélectionnée.
RPT (répétition)
Pour répéter la lecture de la totalitédu CD ou d’une
sélection préprogrammée de pistes, appuyez une fois sur RPT.
‘REPEAT’s’allume sur l’afficheur. Pour répéter une piste donnée,
sélectionnez-la et appuyez deux fois sur RPT pour faire apparaître
‘REPEAT 1’sur l’afficheur. Si maintenant vous sélectionnez une
autre piste, c’est cette dernière qui sera répétée.
Pour annuler la fonction de répétition,
appuyez une troisième fois sur RPT.
CLEAR (effacement)
Si vous commettez une erreur de programmation de votre
lecteur, vous pouvez supprimer la dernière piste entrée
en appuyant sur CLEAR. Pour supprimer toutes les pistes
programmées, appuyez sur CLEAR plusieurs fois, jusqu’à ce
que ‘0’s’affiche.
Pour sortir de la fonction programme, appuyez sur PROG.
PMODE
Appuyez une fois sur ce bouton pour lire les pistes CD dans
un ordre aléatoire. Appuyez encore une fois pour annuler cette
lecture aléatoire.
Pavénumérique 0 à9
Ce pavépermet d’accéder directement et individuellement à
une piste du disque. Pour sélectionner une piste, appuyez sur
le bouton correspondant, puis sur . Pour les numéros de
piste supérieurs à9, entrez les chiffres l’un après l’autre.
Par exemple, pour lire la piste 15, appuyez sur le bouton 1
et maintenez-le enfoncéjusqu’à ce que le chiffre indiquésur
l’afficheur se déplace vers la gauche, puis appuyez sur 5.
PROG (Programme)
Vous pouvez programmer jusqu’à 24 pistes sur un même
disque, àlire dans l’ordre de votre choix. Sélectionnez une
piste en utilisant les boutons : et , puis appuyez
sur PROG pour programmer la piste en mémoire (‘PROGRAM’
apparaît sur l’afficheur pour indiquer que vous avez commencéà
programmer une suite de pistes). Répétez cette procédure pour
programmer les autres pistes de votre sélection. Vous pouvez
aussi appuyer une fois sur PROG et entrer votre sélection de
piste en utilisant le pavénumérique 0–9.
L’afficheur indique les numéros des pistes programmées, la
longueur totale de la séquence programmée et le nombre
de pistes programmées (indiquépar un nombre qui figure
au-dessous du mot ‘STEP’).
Chaque fois que vous saisissez une piste, le nombre qui figure
au-dessous du mot ‘STEP’s’incrémente d’une unitéet clignote
jusqu’à ce que vous confirmiez en appuyant sur PROG. Si vous
n’appuyez pas sur PROG dans les cinq secondes, l’afficheur
cesse de clignoter et vous devez sélectionner la piste de
nouveau.
Appuyez sur pour lire le programme. Appuyez de nouveau sur
pour relire la séquence dans sa totalitéàpartir du début.
Maintenez la touche CLEAR enfoncée pour effacer la séquence
programmée. Appuyez de nouveau sur PROG pour sortir de la
fonction programmation: ‘CONTINUE’clignote dans l’afficheur et
‘0’s’affiche.
MUTE (coupure du son)
Coupe le son émis vers la sortie haut-parleurs de certains
amplificateurs Arcam.
Volume +/–
Permet de régler le volume des amplificateurs Arcam contrôlés
par télécommande.
Vous remarquerez que les commandes de réglage du volume
(+/–) et le bouton MUTE sont sans effet sur le niveau de sortie
audio des lecteurs de CD.
REMARQUE : Avant d’utiliser votre télécommande, pensez
àinstaller les deux piles AAA qui vous ont étélivrées avec !
Ne placez rien devant l’afficheur du lecteur de CD (oùse
situe le récepteur d’infrarouges). Sinon, la télécommande
ne fonctionnera pas.
OPEN
Permet d’ouvrir et de fermer le plateau àCD
Recherche et défilement des pistes
Recherche avant ou arrière des pistes ;
Défilement avant ou arrière des pistes (voir page 12)
Commandes de lecture
Pause, lecture et arrêt (voir page 12)
TITLE
Appuyez une fois sur le bouton TITLE pour faire apparaître le
temps de lecture restant sur la piste en cours. Appuyez de
nouveau pour afficher le temps de lecture restant sur le disque.
Appuyez une troisième fois pour allumer l’afficheur texte.
Appuyez de nouveau sur TITLE pour rétablir l’affichage initial, à
savoir le temps écoulésur la piste en cours.
Pour les CD avec texte, appuyez une fois sur TITLE pour afficher
le nom de l’artiste quand le disque est chargésans être en
lecture. Appuyez sur TITLE une deuxième fois pour afficher le
nombre total de pistes et la durée totale de lecture.

CD72/92
14
Conversion numérique/analogique
CD72 : DAC Delta-Sigma multiniveaux 24 bits
CD92 : Système exclusif de conversion numérique/
analogique de la sortie de courant multi-bits àhaute
résolution. DAC dCS Ring DAC 24 bits plus HDCD
Lecteur laser 3 faisceaux
Longueur des ondes laser 780nm
Ouverture numérique 0.45
Plage dynamique 106dB
Taux signal sur bruit (CCIR) >100dB
Distorsion harmonique (0dB, 1kHz) <0.005%
Réponse de fréquence (±0.5dB) 20Hz–20kHz
Niveau en sortie (0dB) 2,3Vrms
Impédance en sortie
CD72 120Ω
CD92 50Ω
Charge minimum recommandée 5kΩ
Spécifications techniques
Caractéristiques physiques
Dimensions L430 x P290 x H84mm
Poids
CD72 4,6kg net/6,1kg emballé
CD92 5,6kg net/7,1kg emballé
Consommation de courant 32VA maximum
Branchement de sortie Coaxial 75R
numérique TOSLINK optique
Accessoires fournis
Câble de liaison au secteur
Télécommande CR-314
2 x piles AAA
E&OE
REMARQUE : Sauf mention contraire, toutes les valeurs
spécifiées sont des valeurs typiques.
Engagement d’amélioration continue
Arcam s’engage àaméliorer continuellement ses produits. Ceci
signifie que les dessins et spécifications peuvent faire l’objet de
modifications sans préavis.
Interférences radio
Les lecteurs CD72 et CD92 sont des dispositifs audio
numériques qui ont étéconçus pour répondre aux normes les
plus strictes en matière de compatibilitéélectromagnétique.
Les lecteurs de CD et les DAC génèrent et peuvent émettre
une énergie RF (radiofréquence). Dans certains cas, cela peut
provoquer des interférences avec la réception des ondes radio
FM et AM. Dans ce cas, éloignez autant que possible le lecteur
de CD et ses câbles de connexion du tuner et de ses câbles
d’antenne. Le fait de brancher le lecteur de CD et le tuner sur
des prises secteur différentes peut également permettre de
réduire les interférences.
PAYS DE LA CE –Ces produits ont étéconçus pour répondre à
la directive 89/336/EEC.
USA –Ces produits sont conformes aux exigences de la FCC.
Rayonnement laser
En cas d’utilisation d’un lecteur de CD Arcam sans son
enceinte, les rayons laser peuvent endommager les yeux.
Pour obtenir de plus amples informations sur les
enregistrements HDCD et HDCD, veuillez visiter le site Web
de Pacific Microsonics, www.hdcd.com, ou contactez cette
sociétéàson adresse :
Pacific Microsonics Inc., 2560 Ninth Street, Suite 219,
Berkeley CA 94710, USA.

CD72/92
15
Français
Garantie mondiale
Cette garantie vous autorise àfaire réparer gratuitement votre
récepteur chez un distributeur Arcam agréé durant les deux
premières années suivant l’achat, àcondition que l’appareil ait
àl’origine étéachetéchez un revendeur ou un distributeur
Arcam. Le fabricant ne peut engager sa responsabilitéen
cas de défauts découlant d’un accident, d’une mauvaise
utilisation, d’une utilisation intensive, d’une usure normale, d’une
négligence ou d’un réglage ou d’une réparation non autorisée.
Il ne peut également pas non plus engager sa responsabilité
pour tout dommage ou toute perte survenant pendant le
transport du matériel sous garantie.
La garantie couvre :
Le coût des pièces et de la main d’œuvre pendant deux ans
àcompter de la date d’achat. Passédeux ans, ces frais
incombent au client. La garantie ne couvre jamais les frais de
transport.
Réclamations acceptées au titre de la garantie
L’appareil doit être réexpédiédans son emballage d’origine et
renvoyéau revendeur auquel il a étéacheté, ou directement au
distributeur Arcam dans le pays de résidence du client.
Il doit être envoyéen port prépayépar l’intermédiaire d’un
transporteur réputé-–PAS par la poste. Aucune responsabilité
n’est acceptée pendant le transport de cet équipement au titre
de la garantie ; en outre, il est conseilléaux clients de prendre
les assurances nécessaires contre les pertes et dommages
subis lorsque l’appareil est en transit.
Pour toutes informations complémentaires, veuillez
contacter
Arcam Customer Support Department,Pembroke Avenue,
Waterbeach, CAMBRIDGE CB5 9PB, Grande Bretagne.
Téléphone: +44 (0)1223 203203
Fax: +44 (0)1223 863384
Problèmes ?
Contactez toujours votre revendeur dès qu’un problème se
produit.
Si votre revendeur ne peut pas répondre aux questions
concernant ce récepteur ou tout autre produit Arcam,
contacter notre Service Client Arcam au +44 (0) 1223 203203
ou écrire àl’adresse ci-dessus, afin que nous puissions traiter
votre problème au mieux.
Garantie
Enregistrement en ligne
Vous pouvez enregistrer votre produit Arcam àl’adresse
suivante :
www.arcam.co.uk/reg

CD72/92
16
Sicherheitsanweisungen
Dieses Gerät wurde unter Berücksichtigung strikter Qualitäts-
und Sicherheitsbestimmungen entworfen und gefertigt. Sie
sollten jedoch bei der Installation und dem Betrieb folgende
Vorsichtsmaßnahmen treffen:
1. Beachten Sie die Warnungen und Anweisungen
Vor der Inbetriebnahme dieses Gerätes sollten Sie die
entsprechenden Sicherheits- und Betriebsanweisungen lesen.
Heben Sie dieses Handbuch gut auf, und beachten Sie die
enthaltenen Warnungen sowie die Hinweise auf dem Gerät.
2. Wasser und Feuchtigkeit
Das Betreiben von elektrischen Geräten in der Nähe von
Wasser kann gefährlich sein. Verwenden Sie das Gerät nicht in
einer feuchten Umgebung (z.B. in der Nähe von Badewannen,
Waschbecken, Swimming Pools oder in einem feuchten Keller).
3. Eindringen von Gegenständen oder Flüssigkeiten
Achten Sie darauf, dass keine Gegenstände oder Flüssigkeiten
in die Öffnungen des Gerätes geraten. Sie sollten keine mit
Flüssigkeit gefüllten Behälter (z.B. Blumenvasen) auf dem Gerät
abstellen.
4. Belüftung
Stellen Sie das Gerät nicht auf ein Bett, ein Sofa, einen
Teppich oder eine andere weiche Oberfläche, oder in
ein abgeschlossenes Bücherregal bzw. einen Schrank, da
hierdurch die Belüftung beeinträchtigt werden könnte. Es wird
empfohlen, einen Mindestabstand von 50 mm um die Seiten-
und Oberkanten des Gerätes freizuhalten.
5. Wärme
Stellen Sie das Gerät nicht in der Nähe von offenem Feuer oder
Wärme abgebenden Geräten wie Heizkörpern, Herden oder
anderen Elektrogeräten (z.B. anderen Verstärkern) auf.
6. Klima
Das Gerät wurde für den Betrieb in gemäßigten Klimazonen
ausgelegt.
7. Racks und Regale
Benutzen Sie nur Racks und Regale, die für die Verwendung
mit Audiogeräten geeignet sind. Bewegen Sie die Anlage sehr
vorsichtig, wenn sie sich auf einem fahrbaren Regal befindet,
um ein Umfallen zu vermeiden.
8. Reinigung
Ziehen Sie vor dem Reinigen des Gerätes den Netzstecker.
In den meisten Fällen reicht es aus, wenn Sie das Gehäuse
mit einem weichen, fusselfreien und angefeuchteten Tuch
abwischen. Verwenden Sie keine Verdünner oder andere
chemische Lösungsmittel.
Von der Verwendung von Polituren oder Möbelsprays wird
abgeraten, da diese Substanzen weiße Spuren hinterlassen
können, wenn das Gerät danach mit einem feuchten Tuch
abgewischt wird.
Sicherheitsrichtlinien
9. Stromversorgung
Verwenden Sie nur eine Stromquelle, die den Hinweisen im
Handbuch oder auf dem Gerät entspricht.
10. Schutz der Netzkabel
Verlegen Sie die Netzkabel nicht frei im Raum. Achten Sie
darauf, dass sie nicht geknickt oder gedehnt werden und
dass keine Gegenstände darauf zu stehen kommen. Gehen
Sie besonders sorgfältig mit Kabelenden an Steckern und
Gerätebuchsen um.
11. Erdung
Achten Sie darauf, dass die Erdung des Gerätes nicht
beeinträchtigt wird.
12. Stromleitungen
Bringen Sie Außenantennen nicht in der Nähe von
Stromleitungen an.
13. Nichtnutzung
Ist die Anlage mit einem Standby-Modus ausgestattet, fließt in
diesem Modus ein geringer Strom durch das Gerät. Ziehen Sie
den Netzstecker, wenn Sie das Gerät für längere Zeit nicht
nutzen.
14. Seltsamer Geruch
Sollten Sie einen ungewöhnlichen Geruch bemerken oder Rauch
am Gerät entdecken, schalten Sie es aus und ziehen Sie den
Netzstecker. Wenden Sie sich dann sofort an Ihren Arcam-
Händler.
15. Wartung
Sie sollten nicht versuchen, das Gerät selbst zu warten. Führen
Sie nur die in diesem Handbuch beschriebenen Maßnahmen
aus. Überlassen Sie die Wartung des Gerätes einem Fachmann.
16. Zu behebende Schäden
Das Gerät sollte von einem Fachmann gewartet werden, wenn:
A. das Netzkabel oder der Netzstecker beschädigt wurde,
oder
B. Gegenstände in das Gerät gefallen oder Flüssigkeiten
eingedrungen sind, oder
C. das Gerät Regen ausgesetzt war, oder
D. das Gerät nicht ordnungsgemäß funktioniert oder einen
erheblichen Leistungsabfall aufweist, oder
E. das Gerät fallen gelassen wurde oder das Gehäuse
beschädigt ist.
Einhaltung von Sicherheitsbestimmungen
Dieses Gerät entspricht der internationalen Sicherheitsnorm für
Elektrogeräte EN60065.

CD72/92
17
Deutsch
Dieses Handbuch enthält die Informationen, die Sie zum
Installieren, Anschließen, Einrichten und Betreiben der
CD-Spieler CD72 und CD92 von Arcam benötigen. Die im
Lieferumfang enthaltene Fernbedienung CR-314 wird ebenfalls
beschrieben.
Sicherheit
Auf der Innenseite des Deckblattes finden Sie die
Sicherheitsrichtlinien.
Vieles davon scheint zwar offensichtlich, Sie sollten die
Hinweise aber trotzdem lesen, damit das Gerät nicht
beschädigt wird.
Modelle
Dieses Handbuch behandelt zwei CD-Spieler:
CD72
CD92
Das Gehäuse, die Mechanik und die Bedienelemente der
beiden Geräte sind identisch. Sie unterscheiden sich in der
verwendeten Elektronik für Audio-Signalwege. Der CD72 kann
mit einem entsprechendem Upgrade-Kit von Arcam zur CD92-
Spezifikation aufgerüstet werden. Näheres erfahren Sie bei
Ihrem Arcam-Händler.
CD72
Dieser CD-Spieler ist mit einem Delta-Sigma-DAC (Digital-/
Analogwandler) mit 24-Bit-Filter ausgestattet.
CD92
Der CD92 ist mit dem einzigartigen dCS Ring DAC™
ausgerüstet, der durch seine revolutionäre 24-Bit-Technologie
absolute Spitzenleistung bringt.
Dieser neuartige DA-Wandler ist ein Ergebnis der
Zusammenarbeit zweier britischer Unternehmen: Arcam
und dCS (Data Conversion Systems Ltd), dem weltweit
führenden Anbieter von AD-/DA-Wandlern für den professionellen
Audiobereich. Die Ring-DAC-Technologie zeigt eine
außergewöhnlich lineare Wiedergabe beim Dekodieren der
digitalen Audiodaten, wobei auch die feinsten akustischen
Details der CD-Aufnahme nicht verloren gehen.
Der CD92 ist mit einem 24-Bit-Digitalfilter von Pacific
Microsonics ausgestattet, der auch CDs im Format HDCD®
(High Definition Compatible Digital) dekodieren kann. Durch sein
Leistungvermögen durchbricht der CD92 eine Schallmauer –
definitiv einer der besten CD-Spieler, die zur Zeit auf dem Markt
erhältlich sind!
Hinweise zum Handbuch
Inhalt
Sicherheitsrichtlinien 16
Sicherheitsanweisungen 16
Einhaltung von Sicherheitsbestimmungen 16
Hinweise zum Handbuch 17
Sicherheit 17
Modelle 17
Installation 18
Aufstellen des Geräts 18
Anschließen anderer Geräte 18
Anschließen der Stromversorgung 18
Rückseite des CD72 18
Rückseite des CD92 18
Bedienung des CD-Spielers 19
CDs mit Text 19
Die Fernbedienung 20
Modell CR-314 20
Technische Daten 21
Garantie 22
Online-Registrierung 22

CD72/92
18
POWER INLET
230V
2143
REMOTE
IN
AUDIO OUTPUT
R L
CO-AXIAL OPTICAL
DIGITAL OUTPUTS
5
POWER INLET
230V
213
REMOTE
IN
CO-AXIAL OPTICAL
DIGITAL OUTPUTS
54
AUDIO OUTPUTS
12
L
R
Rückseite des CD72 (Teil) Rückseite des CD92 (Teil)
1Netzanschluss mit Spannungsanzeige
2Koaxialer Digitalausgang
3Optischer Digitalausgang
4Einzelner Audioausgang
5Eingang für die Signale der Fernbedienung
1Netzanschluss mit Spannungsanzeige
2Koaxialer Digitalausgang
3Optischer Digitalausgang
4Doppelter Audioausgang
5Eingang für die Signale der Fernbedienung
Aufstellen des Gerätes
Stellen Sie den CD-Spieler auf eine ebene, stabile
Oberfläche. Durch die Verwendung von speziellen Sorbotan-
Dämpfungsfüßen wird der CD-Spieler gegen das Umfeld
isoliert. Gleichzeitig absorbieren sie die Schwingungen, die im
Gerät selbst erzeugt werden. Dies trägt in der Regel zu einer
Verbesserung des Klangbildes bei, was dieses Zubehör zu
einer lohnenden Anschaffung macht.
Anschließen anderer Geräte
Verbindungskabel
Verbindungskabel gehören nicht zum Lieferumfang dieses
CD-Players. Wir empfehlen die Verwendung qualitativ
hochwertiger Kabel, da geringerwertige die Klangqualität Ihres
Systems beeinträchtigen. Ihre Arcam-Fachhändler berät Sie
gerne.
Audio-Ausgänge
Verbinden Sie diese Ausgänge mit dem CD-Eingang
(oder einem anderen Hochpegel-Eingang) des Verstärkers.
Verwenden Sie dafür hochwertige Verbindungskabel. Achten
Sie darauf, dass die linken und rechten Audio-Ausgänge
des CD-Spielers mit den entsprechenden Eingängen des
Verstärkers verbunden werden.
Nur CD92: Der zweite Anschlussbuchsensatz kann für die
Verbindung mit einem zweiten Verstärker (z.B. für einen
anderen Raum) verwendet werden.
Koaxialer Digitalausgang
Verwenden Sie diesen Anschluss für den Betrieb eines
separaten Digital-/Analogwandlers (DAC) oder Digitalrekorders.
Verbinden Sie den Ausgang über ein passendes,
abgeschirmtes 75 Ohm-Kabel mit dem Digitaleingang des DAC
bzw. Rekorders.
Installation
Optischer Digitalausgang
Verwenden Sie diesen Anschluss für den Betrieb eines
separaten DAC oder Digitalrekorders mit optischem Anschluss
über eine passendes optisches Kabel.
Eingang für Fernbedienungssignale
Im normalen Betrieb benötigen Sie diesen Anschluss nicht.
Diese Buchse ist für den Anschluss an Multi Room-Systeme
mit Fernbedienung gedacht und ist für modulierte IR-Signale
geeignet. Ausführliche Informationen erhalten Sie bei Ihrem
Fachmann für Multi Room-Installationen.
Anschließen der Stromversorgung
Falscher Netzstecker?
Prüfen Sie, ob der Netzstecker zu Ihrer Stromversorgung
passt und die Netzspannung mit der Einstellung auf der
Geräterückseite (120 oder 230 V) übereinstimmt.
Wenn Ihre Netzspannung nicht übereinstimmt oder Ihr
Netzstecker nicht passt, wenden Sie sich an Ihren Arcam-
Händler oder den Arcam-Kundendienst unter +44 (0)1223
203203.
Netzkabel
Das Gerät wird normalerweise mit einem verschweißten
Netzstecker am Stromkabel ausgeliefert. Wenn der Stecker
aus einem bestimmten Grund vom Kabel gelöst wird, muss er
umgehend fachgerecht entsorgt werden, da er sonst in einer
Steckdose einen Stromschlag verursachen kann. Sollten Sie ein
neues Stromkabel benötigen, wenden Sie sich an Ihren Arcam-
Händler.
Anschließen
Drücken Sie den IEC-Stecker des mitgelieferten Netzkabels fest
in die Netzbuchse an der Geräterückseite (AC INLET).
Stecken Sie das andere Ende des Netzkabels in eine
Netzsteckdose.
ACHTUNG: Verbinden Sie die Digitalausgangsbuchse
nie mit einem konventionellen Audioeingang.

CD72/92
19
Deutsch
Bedienung des CD-Spielers
POWER 1
Zum Ein- und Ausschalten des CD-Spielers. Wenn Sie das Gerät
zum ersten Mal ohne eingelegte CD einschalten, sehen Sie
folgende Anzeige:
--NO DISC--
LOAD 2
Um eine CD einzulegen, drücken Sie LOAD (bzw. OPEN auf
der Fernbedienung). Das CD-Fach (für CDs mit 12 und 8
cm Durchmesser) wird geöffnet. Legen Sie die CD mit der
Beschriftung nach oben ein. Drücken Sie zum Schließen des
Faches LOAD bzw. PLAY, oder schieben Sie das Fach vorsichtig
5 mm nach innen. Im Display wird „DISC”sowie die Gesamtanzahl
der Titel und die Gesamtspieldauer angezeigt, z.B.:
8 52.19
TRACK INDEX MIN SEC
112345
678
Das Display zeigt nach einigen Sekunden wieder „0”an. Die CD
kann jetzt abgespielt werden.
PLAY 3
Drücken Sie diese Taste zum Abspielen der CD. Wenn Sie die
CD von Titel 1 wieder starten wollen, drücken Sie STOP und
dann PLAY.
Achten Sie darauf, dass der Eingangswahlschalter am
Verstärker auf den korrekten Eingang gestellt ist.
STOP 4
Drücken Sie diese Taste zum Anhalten der Wiedergabe. Im
Display wird „0”und die Anzahl der Titel angezeigt.
PAUSE 5
Drücken Sie diese Taste, um die Wiedergabe der CD zu
unterbrechen.
Durch erneutes Drücken wird die Wiedergabe an der gleichen
Stelle fortgesetzt.
SEARCH 6
Drücken Sie für die Rückwärtssuche nach einer
bestimmten Stelle innerhalb des aktuellen Titels bzw. für
die Vorwärtssuche. Wenn sich das Gerät im Pausenmodus
befindet, wird die Suche mit hoher Geschwindigkeit ausgeführt,
und der Ton ist stumm geschaltet.
SKIP TRACK 7
Wenn Sie die Wiedergabe mit einem anderen Titel als dem
ersten starten wollen, drücken Sie bzw. , bis der
gewünschte Titel angezeigt wird, und dann PLAY.
Wenn Sie während der Wiedergabe einen anderen Titel
auswählen wollen, drücken Sie bzw. . Die Wiedergabe
des Titels wird sofort nach dessen Auswahl gestartet. Durch
einmaliges Drücken der Taste wird zum Beginn des
aktuellen Titels zurück geschaltet. Drücken Sie zum Auswählen
des vorherigen Titels zweimal hintereinander. Drücken Sie
zum Zurückspringen um zwei Titel dreimal , usw.
HDCD-Anzeige (nur CD92) 8
Eine HDCD-kodierte CD wird vom CD92 automatisch erkannt.
Ist eine solche CD eingelegt, leuchtet eine grüne LED im
Display-Fenster, um dies anzuzeigen.
CDs mit Text
Laden
Im Display leuchtet „CD TEXT“auf und die Gesamtanzahl
der Titel und die Gesamtspieldauer werden angezeigt. Zuerst
läuft der Name des Interpreten gefolgt vom Titel des Albums
über das Display, anschließend werden wieder der Name des
Interpreten sowie die Gesamtanzahl der Titel angezeigt.
ANASTACIA
TRACK INDEX MIN SEC
CD TEXT
12345
678910
11 12
Wiedergabe
Nachdem die Titelnummer kurz eingeblendet wird, läuft der
Titel über das Display. Anschließend erscheint wieder die
Titelnummer und Spieldauer.
Titelauswahl
Bei Auswahl eines neuen Titels wird die Titelnummer kurz
eingeblendet und der Titel läuft über das Display. Anschließend
erscheinen wieder Titelnummer und Spieldauer im Display.
POWER
COMPACT DISC PLAYER
TRACK
PAUSESTOPPLAYLOAD
71
653248
HINWEIS: Bei Auswahl eines Titels für die Wiedergabe oder
zum Programmieren einer Sequenz wird immer der Name
des Titels eingeblendet.
Wenn Sie die Wiedergabe anhalten, wird immer der Name des
Interpreten angezeigt.
Sie können die Textanzeige mit Hilfe der Taste TITLE deaktivieren.
Die Textanzeige unterstützt nur Englisch.

CD72/92
20
Die Fernbedienung
CR-314
RPT CLEAR 0PROG
A-B 789
DISP 456
CD
DVD 123
OK
OPEN
MUTE
P
MODE
CD/DVD REMOTE
CD DVD
SUBT
ZOOM AUDIO MEM RTN
ANGLE SETUP STATUS SRCH
MENU
TITLE
Modell CR-314
Beachten Sie, dass sich die in der Darstellung grau
hinterlegten Tasten auf DVD beziehen und für den CD-Player
keine Funktion haben.
CD/DVD
Achten Sie darauf, dass der CD-Modus über den Schalter
CD/DVD ausgewählt ist. Die LED „CD”über der Taste CD/DVD
leuchtet kurz auf, wenn der CD-Modus ausgewählt wird.
DISP (Display)
Dient zum An- und Abschalten des Displays. Durch
das Abschalten des Displays wird im Allgemeinen
eine leichte Klangverbesserung erreicht.
A–B
Mit dieser Taste können Sie einen beliebigen Teil eines
Titels wiederholen. Drücken Sie die Taste A–Bwährend der
Wiedergabe am Beginn des Abschnitts, den Sie wiederholen
möchten. Im Display erscheint REPEAT und ein blinkendes
„A-”. Drücken Sie die Taste ein zweites Mal, wenn das Ende
des Abschnitts erreicht ist, den Sie wiederholen möchten. Die
Zeichen „A-B”blinken nicht mehr, sondern leuchten ständig. Der
Abschnitt wird solange wiederholt, bis Sie die Taste , oder
drücken. Die Taste für die Vorwärtssuche ( ) bewirkt eine
Vorwärtsbewegung innerhalb der ausgewählten Schleife.
RPT (repeat)
Drücken Sie diese Taste einmal, um die gesamte CD oder
eine vorprogrammierte Auswahl von Titeln zu wiederholen. In
der Anzeige erscheint REPEAT. Um einen bestimmten Titel zu
wiederholen, wählen Sie ihn aus, und drücken Sie zweimal auf
RPT. In der Anzeige erscheint dann REPEAT 1.
Wenn Sie jetzt einen anderen Titel auswählen, wird dieser
anstelle des anderen wiederholt. Um die Wiederholfunktion
abzubrechen, drücken Sie die Taste RPT ein drittes Mal.
CLEAR (Löschen)
Wenn Ihnen bei der Programmierung ein Fehler unterläuft,
können Sie den letzten eingegebenen Titel mit der Taste CLEAR
löschen. Drücken Sie zum Löschen aller programmierten Titel so
oft CLEAR, bis „0“angezeigt wird.
Um die Programmierfunktion zu verlassen, drücken Sie PROG.
PMODE
Durch einmaliges Drücken wird die Zufallswiedergabe von
CD-Titeln (Wiedergabe in zufälliger Reihenfolge) gestartet.
Durch nochmaliges Drücken der Taste schalten Sie die
Zufallswiedergabe aus.
Nummernblock
Dient zum direkten Aufrufen einzelner Titel auf der CD. Drücken
Sie zum Auswählen eines Titels die entsprechende Taste auf
dem Nummernblock und dann . Geben Sie für Titelnummern
größer als 9 die Ziffern nacheinander ein. Um z.B. den Titel
Nr. 15 zu spielen, drücken Sie die 1so lange, bis die Zahl
im Display erscheint und nach links rückt, und drücken Sie
anschließend 5.
PROG (Programm)
Sie können den CD-Spieler so programmieren, dass bis zu 24 Titel
in beliebiger Reihenfolge abgespielt werden. Wählen Sie mit Hilfe
der Tasten : und einen Titel aus und drücken Sie PROG, um
den Titel in den Speicher zu programmieren (im Display erscheint
PROGRAM, um anzuzeigen, dass mit der Programmierung einer
Sequenz begonnen wurde). Wiederholen Sie diese Schritte, um die
restlichen Titel zu programmieren. Sie können Sie Sequenz auch
programmieren, indem Sie PROG einmal drücken und die Titel
dann mit Hilfe des Nummernblocks eingeben.
Im Display erscheinen die programmierten Titelnummern, die
Gesamtlänge der programmierten Sequenz sowie die Anzahl der
programmierten Titel (eine Zahl unter dem Wort STEP).
Jedes Mal, wenn Sie eine Titelnummer eingeben, wird die Zahl
unter STEP um eins erhöht. Sie blinkt, bis Sie zur Bestätigung
PROG drücken. Wenn Sie die Taste PROG nicht innerhalb von
etwa fünf Sekunden drücken, blinkt die Anzeige nicht mehr, und
Sie müssen den Titel erneut auswählen.
Drücken Sie , um die programmierten Titel abzuspielen. Wenn
Sie die Taste erneut drücken, wird die gesamte Sequenz
von Anfang an wiederholt. Drücken Sie CLEAR und halten Sie
die Taste gedrückt, um die programmierte Sequenz zu löschen.
Um die Programmierfunktion zu verlassen, drücken Sie PROG
erneut: Im Display blinkt „CONTINUE“und es wird „0“angezeigt.
MUTE
Schaltet die Lautsprecherausgänge bestimmter Arcam-
Verstärker ab (Stummschaltung).
+/–(Lautstärke)
Steuert die Lautstärke fernbedienbarer Arcam-Verstärker.
Beachten Sie, dass die Tasten für Lautstärke (+/–)
und Stummschaltung (MUTE) keinen Einfluss auf die
Ausgangslautstärke von CD-Spielern haben.
HINWEIS: Vergessen Sie nicht, vor dem Einsatz der
Fernbedienung die beiden mitgelieferten AAA-Batterien
einzulegen!
Stellen Sie keine Gegenstände vor die Anzeige des
CD-Players, in der sich der IR-Empfänger befindet, damit
die Fernbedienung einwandfrei funktioniert.
OPEN
Zum Öffnen und Schließen des CD-Faches
Track suchen und überspringen
Vorwärts und Rückwärts suchen
Track vorwärts und rückwärts überspringen (siehe Seite 19)
Wiedergabesteuerung
Pause, Wiedergabe und Stop (siehe Seite 19)
TITLE (Titel)
Drücken Sie die Taste einmal, um die verbleibende Spielzeit für
den aktuellen Titel anzuzeigen. Durch nochmaliges Drücken zeigen
Sie die verbleibende Spieldauer der gesamten CD an. Wenn Sie die
Taste ein drittes Mal drücken, aktivieren Sie die Textanzeige.
Wenn Sie die Taste TITLE nochmals drücken, wird die
ursprüngliche Anzeige des Displays (mit der abgespielten Zeit
des aktuellen Titels) wiederhergestellt.
Wenn Sie bei CDs mit Text während des Ladevorgangs,
noch vor der Wiedergabe, die Taste TITLE einmal drücken,
wird der Name des Interpreten angezeigt.
Wenn Sie TITLE ein zweites Mal drücken,
werden die Gesamtanzahl der Titel und die
Gesamtspieldauer eingeblendet.
Other manuals for DiVA CD72
5
This manual suits for next models
1
Table of contents
Languages:
Other Arcam CD Player manuals

Arcam
Arcam Alpha 9 User manual

Arcam
Arcam DiVA CD62 User manual

Arcam
Arcam DiVA CD72 User manual

Arcam
Arcam Alpha cd player User manual

Arcam
Arcam Alpha MCD User manual

Arcam
Arcam CD23 User manual

Arcam
Arcam CD37 User manual

Arcam
Arcam ALPHA ONE User manual

Arcam
Arcam FMJ CD37 User manual

Arcam
Arcam DiVA CD62 User manual

Arcam
Arcam ALPHA ONE User manual

Arcam
Arcam Alpha 9 User manual

Arcam
Arcam DiVA CD82 User manual

Arcam
Arcam CD5 User manual

Arcam
Arcam DiVA CD72 User manual

Arcam
Arcam CD37 User manual

Arcam
Arcam CDS27 User manual

Arcam
Arcam DiVA CD73 User manual

Arcam
Arcam Delta 70.2 User manual

Arcam
Arcam DiVA CD72 User manual