Rozone PCS25 Smartwasher User manual

PCS25 & PCS28
Smartwasher™
Operating Manual
Rozone Ltd Queen Street, Darlaston, Wednesbury, West Midlands WS10 8JB
Tel: +44 (0)121 526 8181 Fax: +44 (0)121 526 8182

Please read and comply with these
instructions prior to the initial operation of
your appliance. Retain these operating
instructions for future reference or for
subsequent possessors. In case of
transport damage inform vendor
immediately.
Environmental Protection
Proper Use
Function
Safety Instructions
Machine Components
Start Up
Operation
Shutting Down
Maintenance and Care
Disposal Information
Spare Parts
Warranty
CE Declaration
Troubleshooting
P.A.T. Testing
Electric Circuit Diagrams
WEE Producer Registration Number:-
WEE/JG0549ZR/PRO
The device is meant for manually cleaning
parts with a maximum weight of 100kg.
- The cleaning solution SW offered
for this device and the
corresponding microbe filter mats
should be used for the device to
function properly.
- The use of other detergents can
hamper or prevent the bio-
degradation of grease and oil.
- Don not fill with solvents,
inflammable or explosive liquids.
- The device must be installed on a
firm ground.
- The device is not meant for
disposing of used oil. If large
quantities of oil, petrol, engine oil,
anti-frost agents or similar
substances enter the device this
can hamper the bio-degradation of
oil/grease by the microbes.
- The device is not meant for
cleaning painting tools.
The microbes are first introduced to
the system in the filter mat and are
then transported by the liquid cleaning
solution through the filter mat into the
base unit.
The cleaning solution in the base unit
is heated by the heater element and
transported by the pump to the
cleaning tools. The cleaning solution
must be heated for the microbes to
function properly.
The cleaning tools can be controlled
via the corresponding shut-off valves.
Solid dirt particles washed into the
sink are captured in the filter basket in
Contents
Environmental Protection
Please do not release engine oil, fuel
oil, diesel and petrol into the
environment. Protect the ground and
dispose of used oil in an
environmentally clean manner.
Please dispose of used filter mats and
cleaning solutions according to the
local regulations for special wastes
(see “Instructions for disposal”)
Proper Use
Please do not let mineral oil
contaminated waste water reach soil,
water or the sewage system.
Please dispose of used filter mats
according to the local regulations for
waste containing mineral oil.
Function

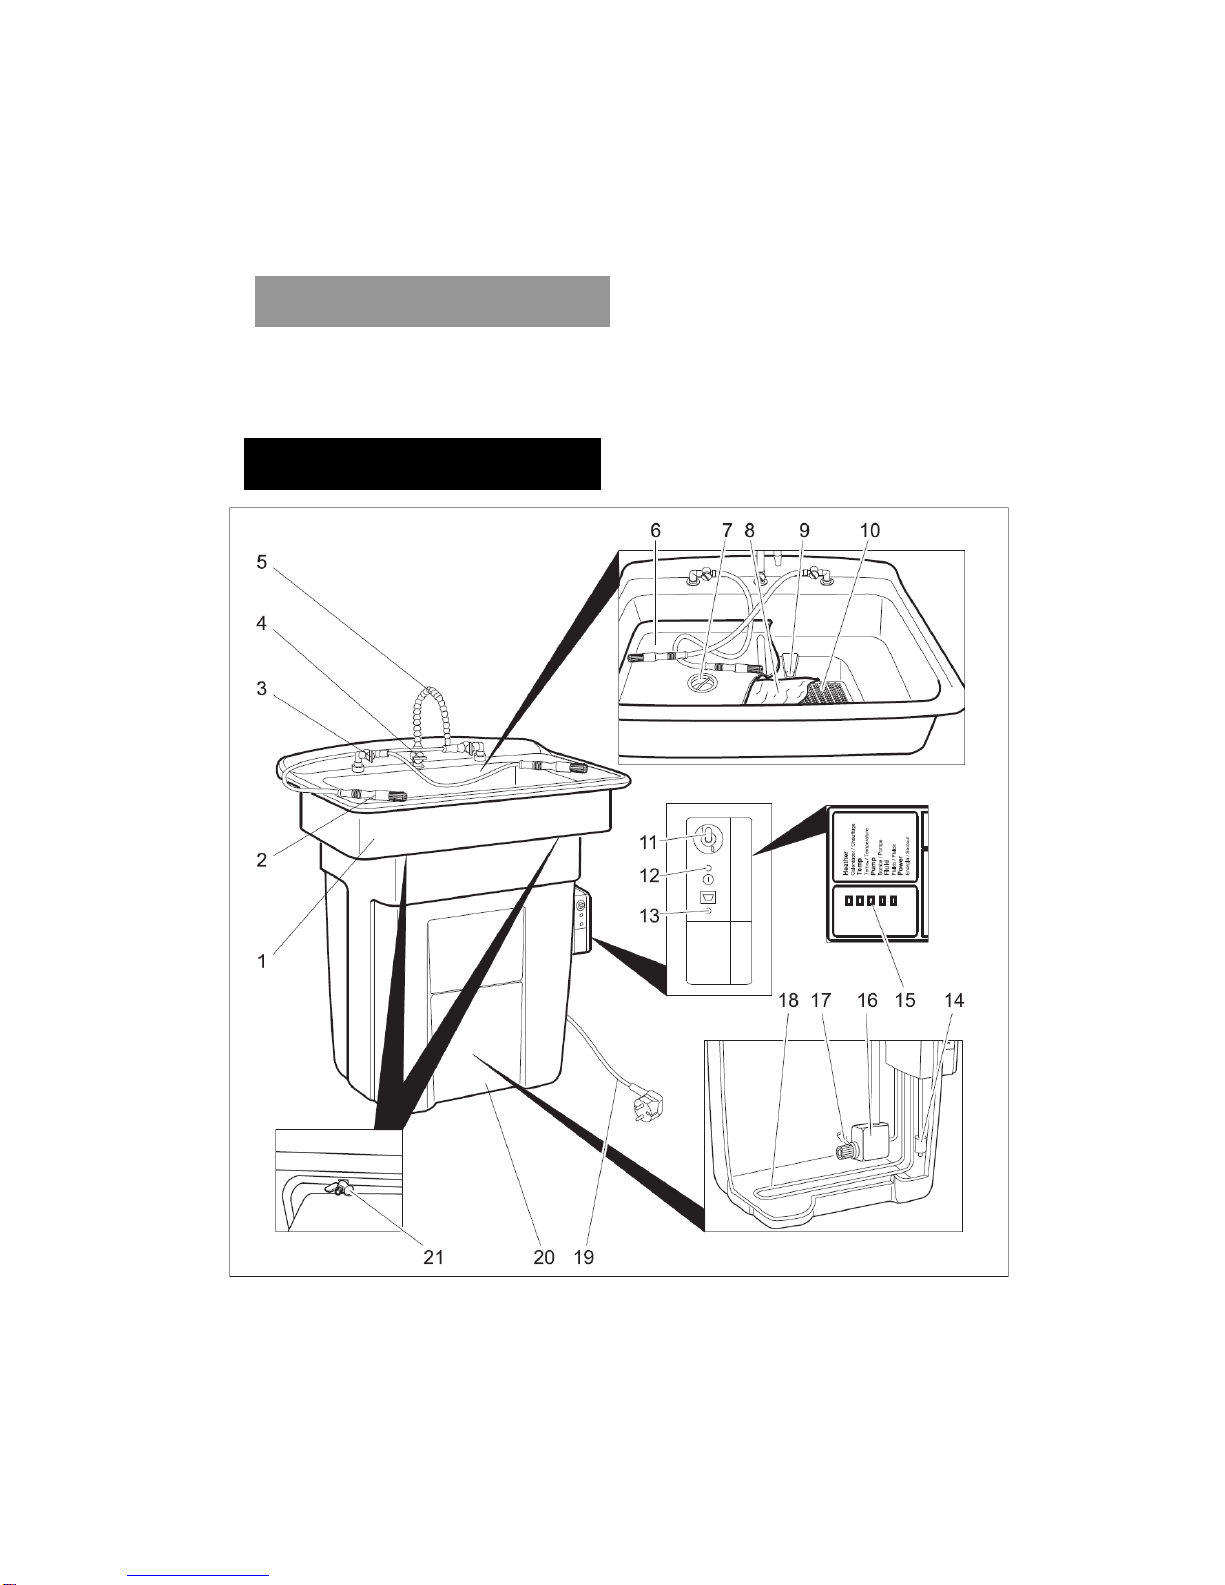
the rinsing tray and in the underlying
filter mat.
Grease and oily dirt is rinsed into the
base unit and is then degraded by the
microbes into carbon dioxide and
water.
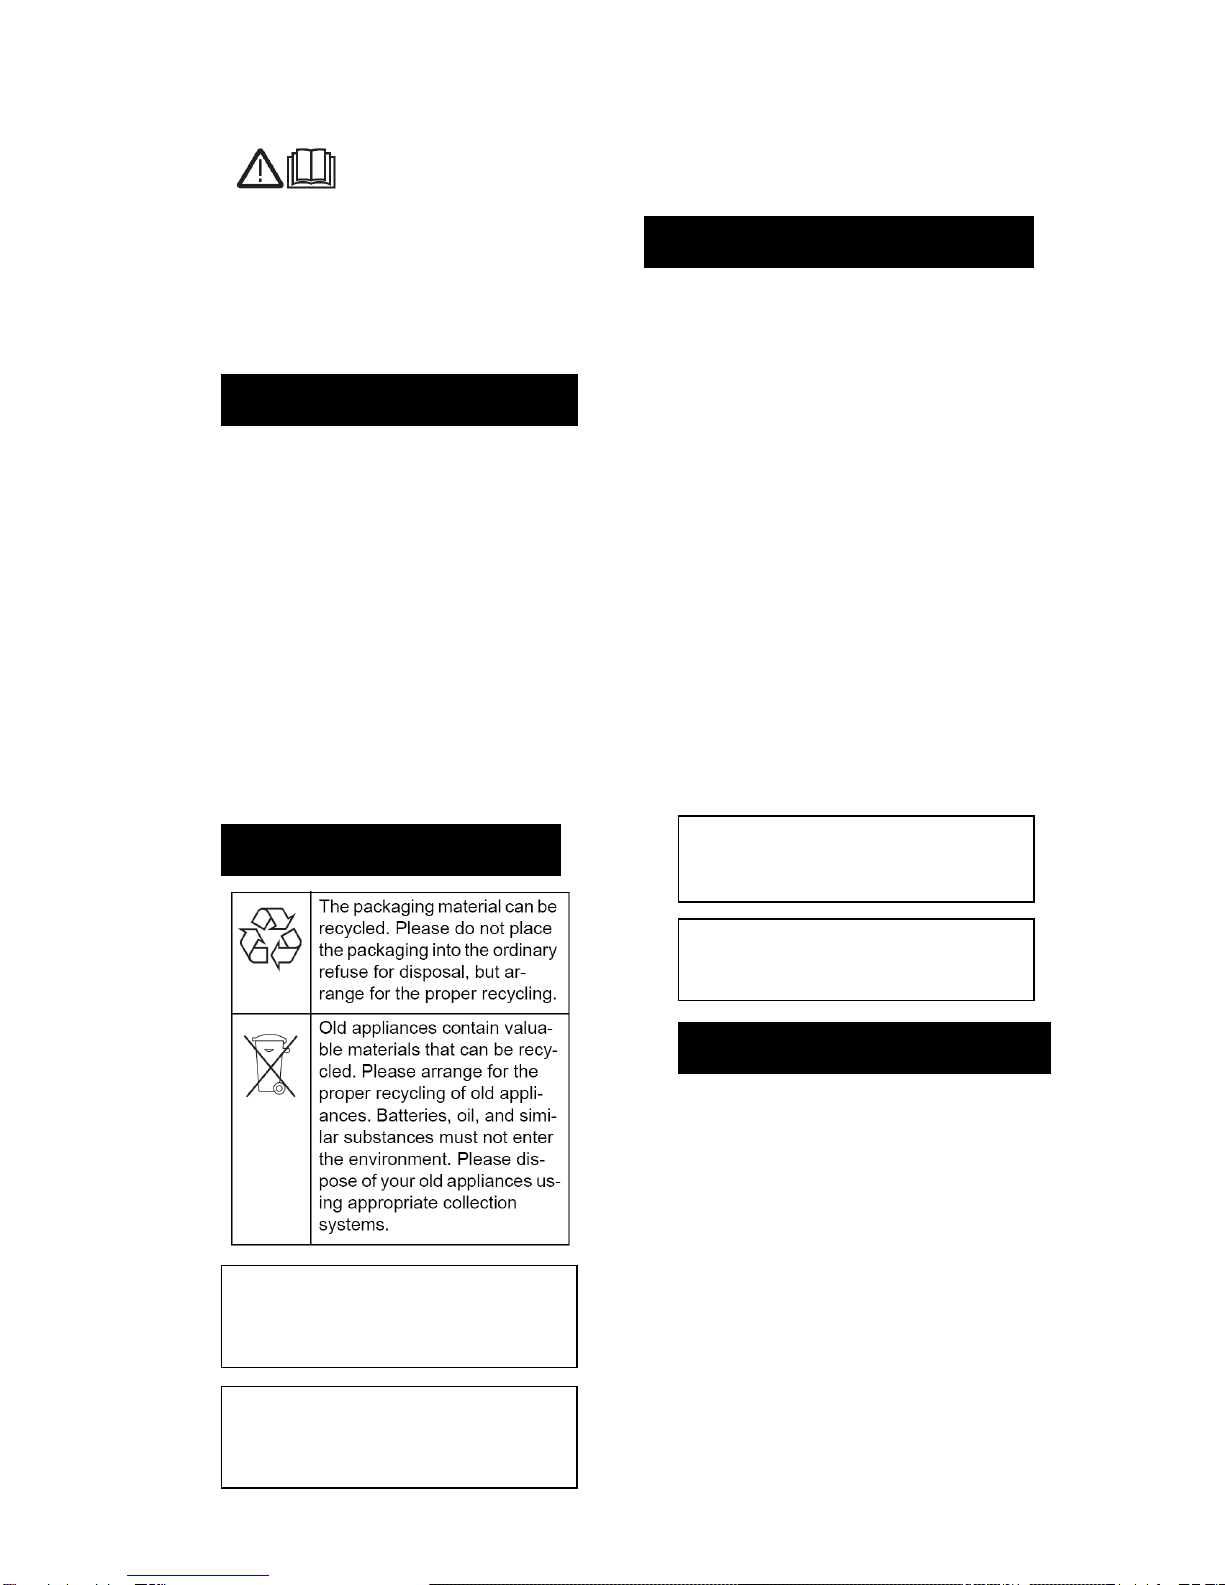
- Please read the operating
instructions for your machine
before using it, and pay particular
attention to the following safety
instructions.
- Warning and information plates on
the machine provide important
directions for safe operation.
- In addition to the information
contained in the operating
instructions, all statutory safety
and accident prevention
regulations must be observed.
- The voltage indicated on the type
plate must correspond to the
voltage of the electrical source.
- Safety class 1 –Appliances may
only be connected to sockets with
proper earthing.
- It is recommended that you
connect this device to a socket
that has a 30mARCD device to
guard against earth leakage faults.
- Please use the mains cable fitted
by the manufacturer; the same is
also applicable when you replace
the cables.
- Never touch the mains plug with
wet hands.
- Make sure that the power cord or
extension cables are not damaged
by running over, pinching,
dragging or similar. Protect the
cable from heat, oil and sharp
edges.
- The extension cable must have a
conductor cross section area of
2.5mm and be protected against
spraying water. The connection
must not lie in water.
- If the power cord is replaced the
control box cover must be
correctly refitted to ensure that it is
water tight.
- The machine must be checked
prior to use to ensure that it is in
proper working order and is
operating safely.
- The machine must not be used in
hazardous locations.
- The appliance must be sited on
stable ground.
- All electrical equipment in the
working area must be protected
against any spraying cleaning
solution.
- Please wear appropriate safety
gear when using the machine-
such as safety goggles and
protective gloves.
- Do not use the Smartwasher™ to
clean materials containing
asbestos or other hazardous
substances such as pesticides.
- Only use the cleaning solutions
approved by the manufacturer.
- If the cleaning solution comes into
contact with the eyes, please rinse
the eyes thoroughly with water. If
swallowed please consult a doctor
immediately.
- The operator must use the
machine properly as instructed in
this manual. The operator must
pay attention to any surrounding
hazards and consider those
working around him when using
the Smartwasher™.
- The machine should only be used
by people who have been
instructed in how to use it
properly. The Smartwasher™
must not be operated by children.
- Never leave the machine
unattended when the cleaning
solution is running through the tap.
Turn off the Smartwasher™ and
unplug the connection to the electrical
socket. Then empty the machine if you
need to move or transport the
Smartwasher™. Only transport when
empty.
- Switch off the Smartwasher™ and
unplug from mains socket before
carrying out any maintenance on
the machine.
- Please wear appropriate safety
gear such as safety goggles and
gloves.
Safety Instructions
Power Connection
Application
Proper Use
Moving or Transporting
Maintenance

- Maintenance work should only be
carried out by an approved
customer service expert.
- Mobile appliances used for
commercial purposes are subject
to safety inspections.
Only use accessories and spare parts
which have been approved by the
manufacturer. This ensures that the
Smartwasher™ operates correctly and
safely.
1. Sink Top
2. Flo-Thru Brush
3. Female Valve
4. Male Valve
5. Nozzle Kit
6. False Bottom / Sink Tray
7. Stainless Steel Basket Filter
8. Filter Mat with Microbes
9. Overflow Hole
10. Filter Support Grid
11. Pump “On/Off” Switch
12. Green Power Indicator Light
13. Red Low Fluid Indicator Light
14. Fluid Level Sensor Probe
15. LED Pump
16. Pump
17. Filter
18. Heater Element
19. Power Cord
20. Base Unit
21. Wing Nut (Only in Supersink
Model)
Accessories and Spare Parts
Machine Components

- Situate the Smartwasher™ on flat
stable ground.
- Place the black plastic filter
support grid into the sinktop.
- Unpack the filter mat and place it
on top of the filter support grid with
the blue side facing down and the
white side visible facing upwards.
- Place the black sink tray on top.
- Insert the stainless steel basket
filter into the opening in the middle
of the sink tray.
- Pour 80 litres of cleaning solution
slowly into the sink.
Warning!
Adding any other cleaning solutions
can deactivate the microbes and the
bio-remediation of grease and oil will
be affected resulting in the
Smartwasher™ not working effectively
or properly.
- Plug into the mains socket and
switch on electrical supply.
- The Smartwasher™ will begin to
heat up the cleaning solution to its
optimal working temperature of
approximately 38°c.
Cleaning is a manual operation using the
flo-thru brush in the Smartwasher™
sinktop.
- Wear safety goggles and
protective gloves.
- Place the dirty parts in the sink
tray (maximum weight 100kg)
- Switch the “Pump On/Off” switch
to “On”
- Open the shut off valve of the
desired tool. You can use both the
nozzle and the flo-thru brush at
the same time for maximum
cleaning effect if desired.
- When cleaning is finished switch
the “Pump On/Off” switch to “Off”
Note
The pump automatically switches off after
10 minutes. Flick the “Pump On/Off”
switch off and on to restart the pump.
Please ensure that the pump is switched
off after cleaning operation is complete as
this will save unnecessary loss of cleaning
solution through evaporation.
- Switch the “Pump On/Off” switch
to “Off”.
Note
In order for the bioremediation process to
occur the temperature of the cleaning
solution must be maintained at 38°c for the
microbes to operate at their optimal level.
Therefore the power supply to the
Smartwasher™ must not be switched off
at night or at weekends. The
Smartwasher™ must remain on at all
times.
If there is a power failure or the machine is
switched off for a considerable length of
time and the cleaning solution is allowed
to go cold, new microbes will need to be
added to the cleaning solution.
- Replace the filter mat (see section
“Maintenance and Care/Monthly”)
- If the machine is off for several
weeks then pour a bottle of
Microbe Booster Solution into the
Smartwasher™.
- Check that the green power light
is on.
- Check to see if the red “Low Fluid”
indicator light is on.
- If the “Low Fluid” light is on, pour
20 litres of cleaning solution into
the Smartwasher™ sink.
Note
Do not overfill the Smartwasher™. If the
“Low Fluid” red indicator light is on the
heater element in the base unit will be
switched off and the cleaning solution will
begin to lose temperature. Therefore it is
important to top up the fluid as soon as
possible to keep the microbes at their
optimum working temperature.
- Change the filter mat.
- First remove the sink tray.
- Wring out the old filter mat into the
sink.
- Please dispose of used filter mat
according to local authority
Start Up
Operation
Shutting Down
Restarting
Maintenance and Care
Daily
Monthly

regulations for waste containing
mineral oil. (see “Instructions for
Disposal”)
- Place new filter blue side down,
white side up onto the filter
support grid.
- Replace the sink tray.
Annual maintenance check on machine
recommended.
If a cleanout and change of fluid is
required please follow correct procedure.
For a Supersink model Smartwasher™
- Ensure the machine is switched
off and unplugged from the mains.
- Unscrew the wing nuts and
remove the sink top.
- Remove dirty solution from the
base unit and dispose of waste
according to local authority
regulations.
- Rinse/jetwash the base unit in an
appropriate wash area ie.
equipped with an interceptor.
- Replace sinktop and tighten wing
nuts checking that the hose pipes
are all connected.
- Remove sink tray.
- Place new filter mat on filter
support grid –blue side
down/white side up.
- Replace sink tray.
- Pour 80 litres of new cleaning
solution into the sink.
For Standard model Smartwasher™
- Ensure the machine is switched
off and unplugged from the mains.
- Lift off the sink top.
- Remove dirty solution from the
base unit and dispose of waste
according to local authority
regulations.
- Rinse/jetwash the base unit.
- Replace sinktop checking that the
hose pipes are all connected.
- Remove sink tray.
- Place new filter mat on filter
support grid –blue side
down/white side up.
- Replace sink tray.
- Pour 80 litres of new cleaning
solution into the sink.
The following EC waste codes are
applicable to the filter mats and cleaning
solution.
Filter Mat FL-3
130899
Oil Waste a.n.g.
SW-3i Cleaning
Solution
SW-6 Cleaning
Solution
070601
Watery Wash
Liquids
Microbe Booster Liquid
161002
Watery Liquid
Waste
- Only use accessories and spare
parts which have been approved
by the manufacturer. This ensures
that the Smartwasher™ operates
correctly and safely.
- For information on spares and
accessories contact Rozone Ltd.
We will repair all machine appliance
failures within the warranty period free of
charge, provided that the failure is caused
by faulty parts or defects in fabrication.
In the event of a warranty claim please
contact your dealer.
Yearly
Disposal Information
Spare Parts
Warranty

We hereby declare that the machines
stated below comply with the relevant
basic health and safety requirements of
the EU Directive, both in their basic design
and construction and in the version put
into circulation by us. This declaration
shall cease to be valid if the machine is
modified in any way without prior approval.
Product: Machine designed
for Partscleaning using water
based cleaning solutions.
Type: PCS25 Smartwasher™
PCS28 Supersink
Smartwasher™
Relevant 2006/95/EC
EU Directives: 2004/108/EC
Applied EN55014-1:2006
Harmonized EN55014-
2:1997+A1:2001
Standards: EN12921-1
EN12921-2
EN60335-1
EN61000-3-
2:2000+A2:2005
EN61000-3-3:1995
+A1:2001+A2:2005
Applied
National -
Standards
The undersigned act on behalf and under
the power of attorney of the company
management.
CE Declaration

Troubleshooting
Fault
Possible Cause
Solution
By Whom
No lights on
No power to the
machine
Check electrical
mains
Electrician
Poor cleaning result
Microbes have been
destroyed
Replace filter mat
Operator
Too much oil has
been put into the
machine –it is not a
waste oil dump
Add a bottle of
Microbe Booster
Operator
High consumption of
fluid
Fluid is being carried
off in the cavities of
parts being washed
Let the cleaned parts
drain off
Operator
Fluid is being taken
out for benchtop
cleaning elsewhere
in the works
Make provision for
extra fluid
requirement
Operator
Evaporation –
machine situated
near an open roller
shutter door
Move machine to a
warmer position
Operator
Flow Thru brush has
been allowed to
hang over the side of
the sink
Check for fluid on
the floor around the
machine
Operator
Device leaking
Check machine for
leaks
Operator
Evaporation - gap
between the sink
and the base
Check that the sink
is sitting properly on
top of the base
Operator
No flow of fluid
Closed tap on both
nozzle and brush
Open taps
Operator
Insufficient cleaning
solution in the tank
Add fluid until the
red indicator light
goes off
Operator
10 minute pump
timer has expired
Flick the ON/OFF
switch off and on to
restart flow
Operator
Pump has failed
Replace the pump
Service Engineer
Hose is blocked or
has become
disconnected
Check hose
connection from the
pump to the nozzle
or to the tap for
blockages or leaks
Operator
Low fluid indicator
light is on despite
having adequate
fluid
Level sensor probe
has got stuck
Dislodge weight on
sensor level probe. If
light remains on call
customer service /
service/repair
Operator
Cleaning Solution is
backing up and not
draining from sink
Stainless steel filter
basket is blocked
Clean debris from
mesh basket
Operator
Filter mat is covered
in sludge and
therefore
impenetrable
Replace filter mat
Operator
Cleaning Solution is
cold
Check Low Fluid
Indicator light.
If light is on add 20L
cleaning solution
Operator
Cleaning Solution is
discoloured
Cleaning Solution
will become dark in
colour due to dyes in
oils and greases
washed off from the
dirty parts;
This is normal and
will not affect the
cleaning power
N/A

The Smartwasher™ machine is of a
CLASS 1 construction and due to the
weight of the machine when full should be
classed as stationary. We recommend a
minimum time of 12 months for combined
testing and inspection and monthly for the
formal visual inspection.
Lift the sink and place out of the way,
allowing access to the heater element.
Place the earth clamp of the P.A.T. tester
onto the heater element and take readings
as normal (use the 25amp setting for this
test). The heater effectively earths the fluid
in the base of the machine.
A 500v Insulation test should not be
carried out on this machine due to the
electronic nature of the control circuit
board. This is with reference to the
codes of practice:- Sections 8.1.3b and
15.3b
This test may be carried out in the normal
manner on the differential leakage setting
on the tester. We have found this to be the
most effective.
P.A.T. Testing
Earth Continuity
Earth Leakage

This manual suits for next models
1