S.E.M. Fusion Z-7799 User manual

Website: www.semaudiolabs.com
Email: info@semaudiolabs.com
QUICK START GUIDE
FUSION: Z-7799

CONTENTS:
x7
- Main unit
- Wireless Subwoofer & Speaker (x 2)
- iPod Docking Platform
- iPod Docking Cavity
- Remote Control
- Power Adaptor
SET UP:
Welcome to the S.E.M. Audio Laboratories community. Thank you for selecting one of our
milestones and embracing a lifestyle choice of quality and design. This quick start guide will
get you up and running quickly. For more information about this and other products, please
refer to the extended guide or visit www.semaudiolabs.com.
The following items can be found inside your product gift box.
Follow the below steps to get started.
- UNIT (DECK):
Plug the tail end of the adapter into the DC-Jack (socket) on the side of the unit. Insert the plug of the AC-adaptor
into the wall AC-socket.
This unit is designed to be “On” or in “Standby Mode” at all times. During standby, the unit focuses on being
environmentally friendly through minimal electricity usage and consumes less the 2W of power.
- UNIT (SUBWOOFER):
This set works on normal household AC-Power.
Make sure the Voltage of the set matches your local voltage, then insert the Plug of the AC-Cord into a wall-outlet or
extension with AC-Power.
This unit is designed to be “On” or in “Standby Mode” at all times. During standby, the unit focuses on being
environmentally friendly through minimal electricity usage and consumes less the 2W of power.

KEY CONTROLS:
Use the Function key to toggle between different sources from which you would like to have desired playback.
- FUNCTION KEY:
- SPEAKER:
Unwrap the speaker-cords of both speaker-boxes.
Please notice that each speakers cord consists of 2 wires.
Insert the "clear" wire of the left speaker-box into the "red" ( + ) speaker connector.
Insert the "black" wire of the left speaker-box into the "black" ( - ) speaker connector.
When connecting the speaker wires, ensure the “clear” and “black” wire pair are both in the “L” or “R” side
matching.
Place the speaker boxes as far apart as possible for best sound effect.
- REMOTE:
The remote comes with a battery built-in from the get-go. Gently pull out the plastic ‘Tab’ from the battery
compartment at the rear of the remote to begin wireless communication between the remote and unit.
- iPod:
Plug the tail end of the dock adapter into the DC-Jack (socket) on the side of the unit. Insert the plug of the AC-
adaptor into the wall AC-socket.
Unwrap the iPod dock to connect the cord to the main unit (Docking socket).
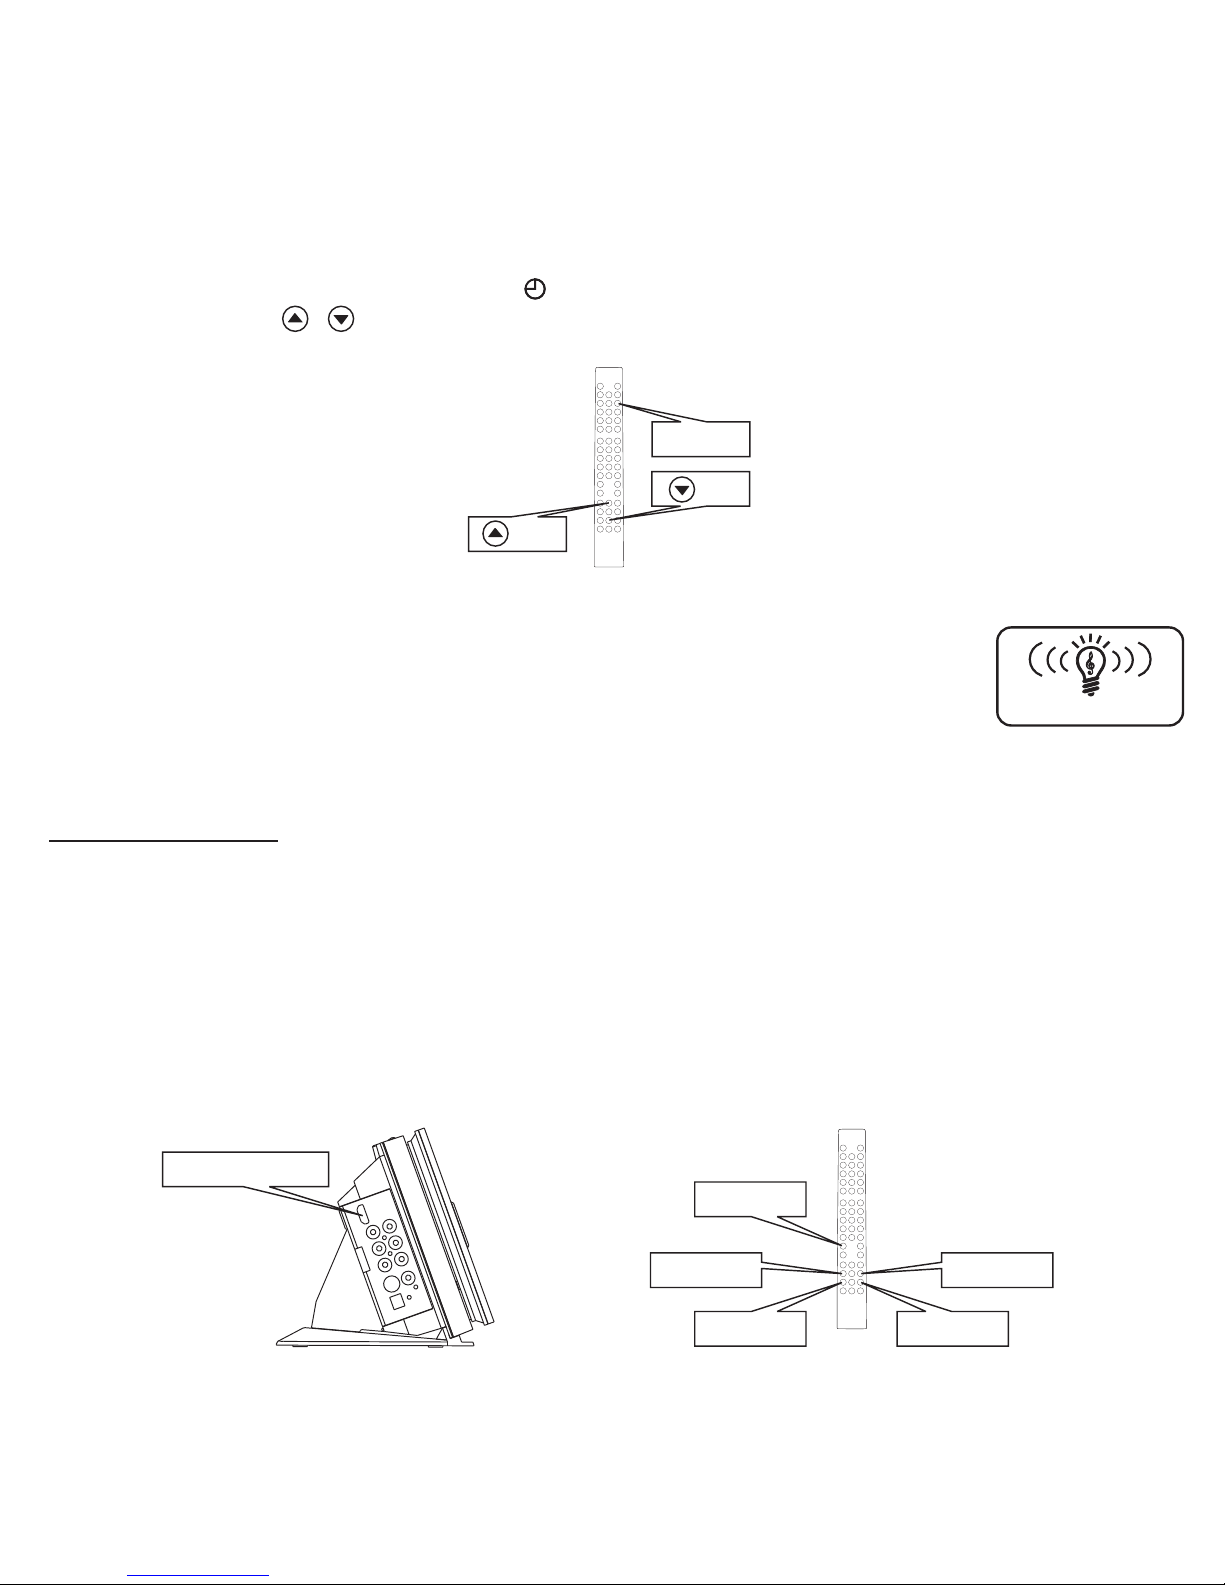
SET CLOCK TIME:
It is important to first set the clock time, which shall be essential when utilizing the alarm timer feature.
To set the time, switch the unit to “Standby” mode (display light dimmed).
Press and hold the ‘Clock’ key for 2 seconds to access the clock settings.
Use the navigational, ‘ /’, keys to select clock settings and the ‘Clock’ key to confirm selection.
TUNER DISC USB AUX DISC
iPod
CARD
Standby
Clock Set
Key
Key
- ALARM SETTING:
This unit’s On/Off timer is of great use as a morning alarm.
Press and hold the ‘Alarm’ key until the symbol is viewable on the LCD display.
Use the navigational, ‘ /’, keys to select the timer on/off settings and the ‘Alarm’ key to confirm selection.
You can have playback of your favorite song/movie from DVD/CD/USB/SD/Radio/iPod sources for your morning
alarm.
DVD PLAYBACK
This unit allows playback of DVD discs in FULL HD 1080P, via an HDMI connection to relay the video to your
external monitor/television. The deck also has a host of additional connections, including those for component and
Aux-in/out cables, to allow for alternative formats and additional flexibility with existing home systems, screens and
monitor.
For playback from DVD or CD-Audio/MP3 discs, insert the respective disk and press the function key until the LCD
display shows “DVD” mode.
Playback from the disc should begin automatically, whilst the ‘Play/Pause’, ‘Next/Back’ and ‘Tune Up/Tune down’
keys can be used to navigate the chapters or tracks on the disc and control playback.
The unit also allows for a host of options, including subtitles, audio language, A-B repeat, chapter playback
programming and many for. For these, please refer to the extended user manual.
Alarm
- LIGHTCURRENT©:
Lightcurrent© is a key technology incorporated in this unit, allowing for safe invisible infrared
light to wirelessly transmit count. It functions much like a light-bulb, doing away with the need
for line-of-sight, covering a wide area range and eliminating radio frequency
emissions/interference. The docking plat form transits an uncompressed audio signal in all
directions, which bounces off walls, ceilings, and even furniture in you environment, eventually
reaching (at the speed of light) the wireless 2.1 channel speaker system, - providing the luxury
of cordless, uncompressed, noise-free, uninterrupted audio with unmatched sound quality.
LightCurrent©
Play/Pause
HDMI Out Socket
Back/Mem-
Tune Down Tune Up
Next/Mem+
Key
Key

iPod:
*For extended details and additional functions, please refer to the instruction manual accompanied with the unit.
- STEP 1:
Choose the dock adaptor that fits your iPod.
Your iPod fits snugly into the correct dock adaptor.
Connect and Turn on both the unit and the iPod.
Use the Play/Pause, Next and Previous keys to control playback from the iPod
Use the menu key to navigate the available iPod menu's (such as playlist, artist song, video or others depending on
your iPod). Use the 'next/prev/up/down' key's or jog wheel to scroll within menu's and submenu's. Then press the
'select/enter' key to confirm highlighted section.
- STEP 2:
Fit the dock adaptor to the dock, then dock your iPod.

Table of contents
Other S.E.M. Stereo System manuals


