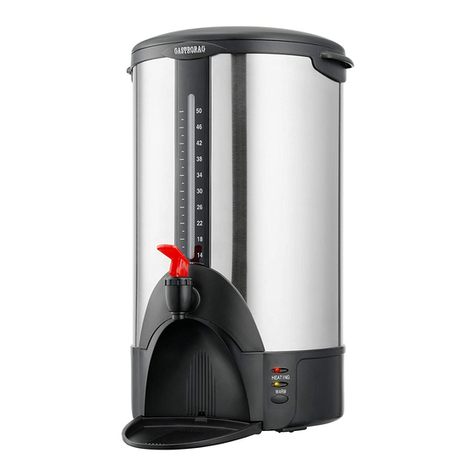
Salton CU-60 User manual

Model: CU-60
COFFEE URN
Booklet Cafetière 3/7/01 10:58 Page 8

IMPORTANT SAFEGUARDS
When using electrical appliances, basic safety precautions should
always be followed including the following:
1. Read all instructions.
2. Do not touch hot surfaces. Use handles or knobs.
3. To protect against electrical hazards, do not immerse cord, plugs,
or the appliance in water or other liquid.
4.
Close supervision is necessary when any appliance is used by or near children.
5. Unplug from outlet when not in use and before cleaning. Allow to cool
before putting on or taking off parts, and before cleaning the appliance.
6. Do not operate any appliance with a damaged cord or plug or after the
appliance malfunctions, or has been damaged in any manner. Return
appliance to Salton for examination, repair or adjustment. See Warranty.
7. The use of accessories or attachments not recommended by Salton
may cause hazards.
8. Do not use outdoors.
9. Do not let cord hang over edge of table or counter, or touch hot surfaces.
10. Do not place on or near a hot gas or electric burner, or in a heated oven.
11.
Extreme caution must be used when moving an appliance containing hot liquids.
12. Do not leave unit unattended while in use.
13. Ensure that the Cover is securely in place before brewing and when serving
coffee. When placing the Cover on the Body of the Coffee Urn, make sure
that one Locking Tab is facing the front and the other is facing the back
of the Coffee Urn. Grasp the Glass Knob carefully and turn the Cover
clockwise until the Locking Tabs are fully engaged inside the handles
of the Coffee Urn.
14. Scalding may occur if the Cover is removed during the brewing cycle.
When removing the Cover from the Body, grasp the Glass Knob carefully
and turn the Cover counterclockwise to unlock the Cover. NOTE: During
and after brewing, the Glass Knob will be hot. Always use a pot holder or
oven mitt to remove or replace the Cover.
2
SAVE THESE INSTRUCTIONS
Booklet Cafetière 3/7/01 10:58 Page 9


GROUNDED PLUG
To reduce the risk of electric shock this appliance has a grounded plug.
(2 blades and 1 pin) If the plug does not fit fully into the electrical outlet contact
a qualified electrician. Do not modify the plug in any way or use an adaptor.
DESCRIPTION OF PARTS
1. Glass Knob
2. Cover
3. Spreader
4. Basket
5. Body
6. ‘On’ Indicator Light
7. Base
8. Locking Tab
9. Spring
10. Pump Tube
11. Washer
12. Heat Well
13. ‘Ready’ Indicator Light
BEFORE FIRST USE
Wash cover and all internal parts in warm soapy water or in the dishwasher
to remove any residue left over from the manufacturing process. Wash the
inside of the Body with warm soapy water, rinse and dry. NEVER IMMERSE
THE BODY IN WATER OR ANY OTHER LIQUID. Wipe outside surface with a
damp cloth and dry.
3
1
8
9
10
11
12
13
2
3
4
5
6
7
Booklet Cafetière 3/7/01 10:58 Page 10

INSTRUCTIONS FOR USE
1. Remove the Cover by grasping the Glass Knob, turning it counterclockwise
until the Locking Tabs completely clear the handles on each side of the
Body and lifting up. Take out the Basket, Spreader and Tube assembly.
2)
Fill the Body with fresh cold tap water for the required number of cups.
See the markings on inside of the Body. DO NOT MAKE LESS THAT THE
MINIMUM NUMBER OF 20 CUPS OF MORE THAN THE MAXIMUM OF 60 CUPS.
3) Wet the Basket to help keep small particles of coffee grinds from sifting
through. Add either regular or percolator grind coffee to the basket using
a standard dry measuring cup and tablespoon. The following chart
suggests the amount of coffee for regular brew. The amount of coffee
can be varied to suit your taste; use less for weaker coffee and more
for stronger coffee.
4.
Place the Spring (large end up) on the Pump Tube. Add the Basket then the
Spreader. Hold the top of the Pump Tube and place in the Body so that the
Washer at the bottom of the Pump Tube is properly seated in the Heat Well.
5. Place the Cover on the Body so that the Locking Tabs are on the front and
back of the Coffee Urn. Grasp the Glass Knob and turn clockwise so that the
Locking Tabs are fully engaged inside the Handles on both sides. NEVER PLUG
IN THE COFFEE URN WITHOUT THE COVER IN PLACE OR WITHOUT THE
LOCKING TABS COMPLETELY ENGAGED INSIDE THE HANDLES.
4
20 1 cup + 2 tbsp. – 1-1/3cups
280 ml – 335 ml
30 1-3/4cups – 2 cups
430 ml – 500ml
40 2-1/3cups – 2-1/2cups
585 ml – 625 ml
50 3 cups – 3-1/4cups
750 ml – 814 ml
60 3-2/3cups – 3-3/4cups
920 ml – 930 ml
Cups
(5 oz. – 140 ml) Amount of Coffee
Booklet Cafetière 3/7/01 10:58 Page 11

6. Plug the Coffee Urn into a grounded 120 volt AC wall outlet. The red ‘On’
light will illuminate and the coffee brewing will begin. The coffee perco-
lating action can be seen through the Glass Knob. DO NOT PLUG IN THE
COFFEE URN WHEN THERE IS NO LIQUID INSIDE.
7. When brewing cycle is complete, the percolating stops and the green
‘Ready’ light illuminates indicating that the coffee is ready to serve.
The Coffee Urn automatically switches to ‘keep warm’ and the coffee will
remain hot as long as the Coffee Urn is plugged in. If the brewed coffee
is to be kept hot for a long period of time, the coffee basket, spreader
and pump tube should be removed as soon as the brewing is complete
so bitter oils from the coffee grounds do not affect the flavour of the
coffee. USE A POT HOLDER OR OVEN MITT AS THE GLASS KNOB AND
INTERNAL PARTS WILL BE HOT.
8. Disconnect plug from wall outlet. Let cool before washing.
TO MAKE ADDITIONAL COFFEE: rinse the Coffee Urn and parts with cold
water and repeat steps 1 through 7.
TO REHEAT COFFEE, remove the Basket, Spreader and Tube. Lock the Cover
in place and plug the unit in for 20 – 60 minutes
depending on the amount of coffee to be reheated. DO
NOT REHEAT IF LEVEL OF COFFEE IS LESS THAN THE 20
CUP MARK ON THE INSIDE OF THE BODY.
5
Booklet Cafetière 3/7/01 10:58 Page 12

CARE AND CLEANING
1. Unplug unit from wall outlet and allow to cool.
2. Remove cover and all internal parts. NOTE: Internal parts, coffee grounds
and coffee may still be hot.
3.
Wash the inside of the coffee urn with warm soapy water. DO NOT IMMERSE
BASE IN WATER OR ANY OTHER LIQUID. Rinse and dry thoroughly. Wipe the
outside with damp cloth and dry with a soft towel.
4. Wash the Pump Tube, Spring, Basket and Spreader in warm soapy water
or in the dishwasher. When washing the Pump Tube make sure that the
Washer that is underneath the bottom of the Pump Tube remains loose.
If coffee grounds are trapped in this area then hold the Pump Tube under
running water or clear grinds with a toothpick.
5. If the Glass Knob needs cleaning, remove by holding the Glass Knob
in one hand and twisting the metal nut on the inside of the cover
counterclockwise. (NOTE: If the metal nut is difficult to twist off try wrapping
a wide elastic band around the metal nut to help secure a good grip.)
Wash the Glass Knob and nut with a non-abrasive cleaner. NOTE: If the
Glass Knob is still hot do not place in cold water. To replace the Glass
Knob, align the tabs on the Glass Knob with the notches in the hole of
the Cover and screw on the nut clockwise. Do not over-tighten.
6. After repeated use, there may be some coffee stains and accumulation of
oils that my cause a bitter taste. Periodically use a commercially prepared
descaler and follow package directions. DO NOT use abrasive cleansers
or pads on the Coffee Urn or its any of its parts.
7. Store the Coffee Urn with the Cover off.
6
Booklet Cafetière 3/7/01 10:58 Page 13

A short power cord is provided to reduce the hazards of becoming entangled
in or tripping over a longer cord. Extension cords are available and may be
used if care is exercised in their use. If an extension cord is used, the marked
electrical rating of the extension cord should be at least as great as the electrical
rating of the appliance.
LIMITED WARRANTY
SALTON warrants that this appliance shall be free from defects in material and
workmanship for a period of one year from the date of purchase. During that period
these defects will be repaired or the product will be replaced at SALTON's option
without charge. This warranty covers normal domestic usage and does not cover damage
which occurs in shipment or failure which results from alteration, accident, misuse, abuse,
glass breakage, neglect, commercial use, or improper maintenance.
TO RETURN FOR SERVICE
1. Securely package and return the product PREPAID to:
SALTON CANADA, 81A Brunswick, Dollard-des-Ormeaux, Quebec, H9B 2J5
2. Be sure to enclose your name, address, postal code and description of defect.
3. To ensure prompt "In-Warranty" service, be sure to include a proof of
purchase. We recommend you take the necessary precaution of insuring
the parcel.
4. For repairs not covered by the Warranty, you will be advised of the cost
of repair in advance, and upon receipt of your cheque or money order,
the repairs will be completed and the product returned to you.
7
SALTON CANADA
81A Brunswick
Dollard-des-Ormeaux
Quebec Canada H9B 2J5
Booklet Cafetière 3/7/01 10:58 Page 14
Table of contents