1English
CONTENTS
HOW TO READ THIS MANUAL ............................................................. i
QUICK SEARCH BY OPERATION ........................................................ 6
CHECKING THE INCLUDED ACCESSORIES .................................... 11
How to use the accessories .......................................................... 13
ABOUT THE CARD ............................................................................. 14
Media cards that can be used with this camera ............................ 14
What “card” means in this manual ................................................ 14
GETTING THE MOST OUT OF YOUR CAMERA ............................... 15
High-quality images with “Full High Definition*” ............................ 15
Includes SIMPLE mode for quick-and-easy operation................... 16
Image stabilizer for sharp pictures................................................. 16
Capture clear images of the targeted subject ................................ 17
Eye-Fi smart ................................................................................. 17
SYSTEM MAP ..................................................................................... 18
SETUP
PARTS NAMES ................................................................................... 19
CHARGING THE BATTERY PACK ..................................................... 21
Charging the battery pack ............................................................. 22
INSTALLING THE CARD ..................................................................... 24
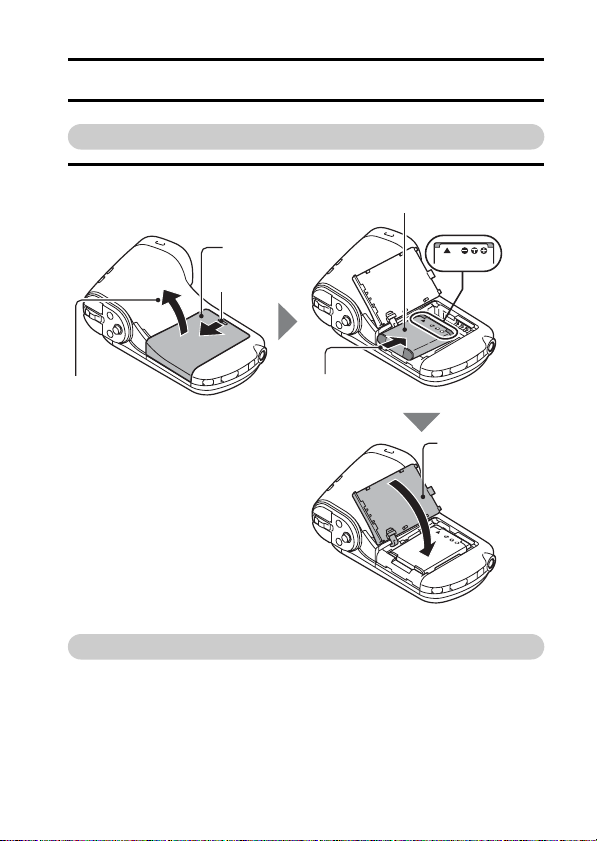
INSTALLING THE BATTERY PACK .................................................... 26
About the temperature alert icon \ .......................................... 28
TURNING THE CAMERA ON AND OFF ............................................. 29
Turning on the camera .................................................................. 29
Turning off the camera .................................................................. 29
Turning on the camera when the power save (sleep)
mode is active .......................................................................... 30
DATE AND TIME SETTING ................................................................. 32
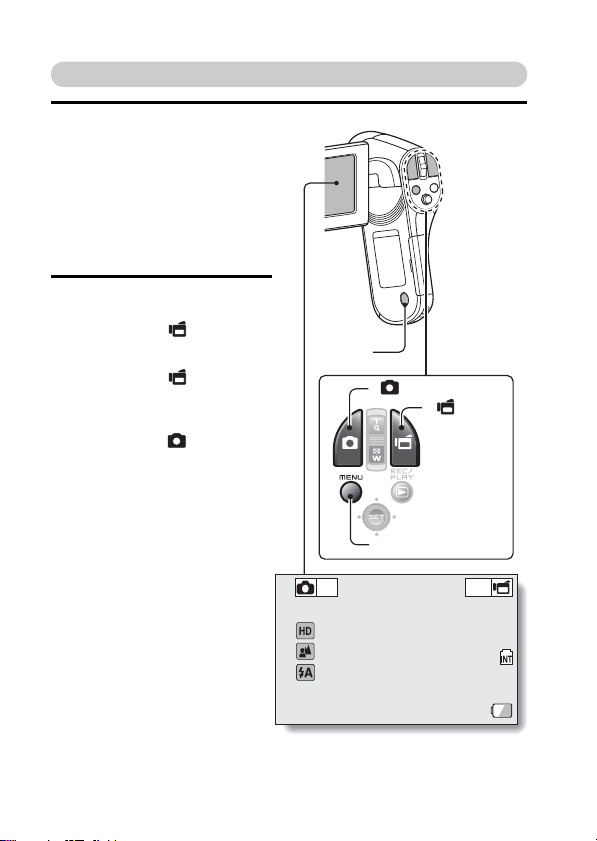
SWITCHING BETWEEN THE RECORDING MODE AND
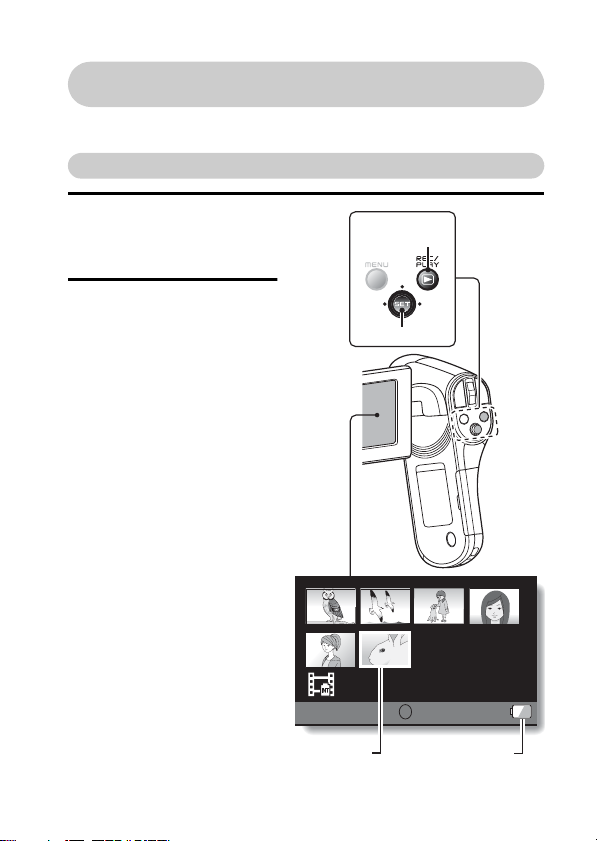
PLAYBACK MODE .......................................................................... 35
SWITCHING THE OPERATING MODE .............................................. 36
Switching between the SIMPLE and NORMAL modes ................ 36
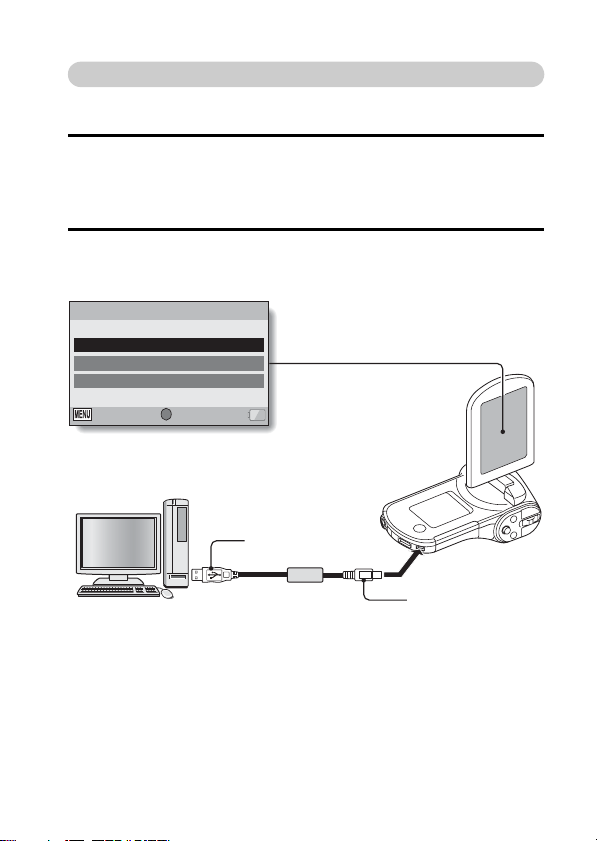
Accessing/exiting the SIMPLE/NORMAL Mode Menu Screen ..... 37
Overview of the SIMPLE Mode Setting Screen ............................ 41
Overview of the NORMAL Mode Setting Screen .......................... 45