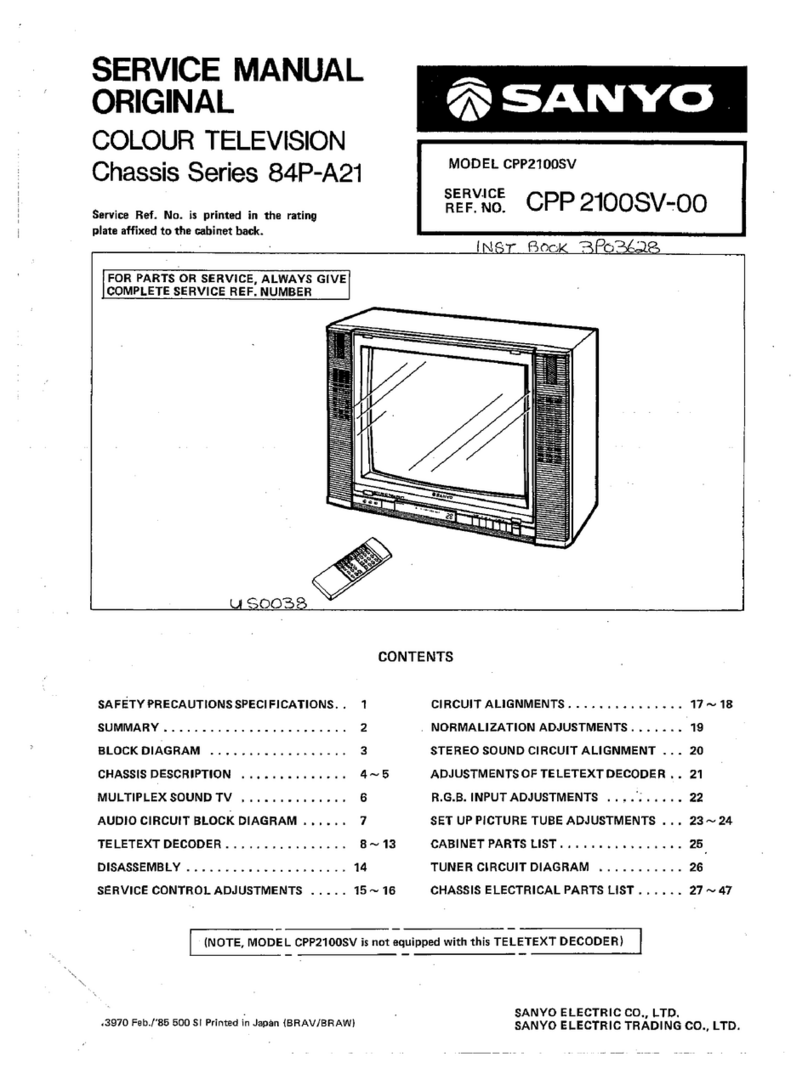
Sanyo CPP2510 User manual

Instruction
Manual Colour
Television Model
~~~2510.
CPP2510TX
CPP2910
CPP2910TX
STEREO
SURROUND
TELETEXT*
S-TERMINAL
i
*
Model
cpPz5101cPP2910
-
Notequipped with the Teletext Decoder.
Ootional Teletext Decoder
Type
No.
TX-231.

Introduction
Hi-Fi
Stereo
Sound
Circuit
with
Sur-
round
Circuit.
It's easy to enjoy TV and video sound with the Surround
effect.
-
Surround
Svnern
WheretoPlace the TVfor the best Surround Effect
Donotplacefurniture orotherobjectsanycloserthan
30
cm
from thesidesof theTV. Placingobjects directly nexttothe
sides ofthe TV will block the sound from the speakers.
It
isa goodideatoplacethe
TV
in
acorner oftheroom. This
allows the walls to serve as reflectors to achieve a greater
Surround effect.
.
This
AV
Television
Allows
Free
System
Expansion
S-terminalis provided.
CENELEC standard 21-pin terminals is provided.
Two videolaudio inputs and one audio output enable easy
VTR
connectionfor tape playback and editing.
Choose
From
Two
Viewing
Angles
placethen,
-CI.
Approx.
1.5'
Or
extend
the
as
it
is
for
a
1.5"
slant.
to
make the
screen
perpendicular.
!
L
Usinathe
To
extend
TO
contract
Electric Mains
The
TV
receiver is manufactured to utilize an AC VOLTAGE
SOURCE of
240
Volts, 50Hz.
SafeNPrecaution
When the
N
receiver is notto be usedfor an extended period
of time,
it
is advisable to disconnect the AC power cordfrom
theACoutlet.
WARNING
To preventfire or shock hazard, do notexpose the unittorain
or moisture.
Highvoltagesare usedinthe operation ofthis
TV
set.
Do notremovethe backfrom your set. Refer servicingto quali-
fied service personnel.
Aerial Connection
Connect the cablewith a plugfrom a UHF (orVHF) aerialto
the 1r aerialsocketonthecabinet back.
I
lraerialsocket
0
Forallaerialcircuitproblemspleaseconsult your localdealer.
;
~dju;tors ZPuIl
i
!
j
Be
careid
not
to
ovecadiust and cause
the
TV
to
tip
oveiiorward.

Controls
Opening the Control
Press
the
triangular
mark
to
open.
Mains ONIOFF Switch
Remote Control Detector
Standby and Power lndicato~
'J
AUDIO (Lllnput Jack (AV11
~~~~~p~~~~~~(AV11
1
1
2lemory
AUDIO (RlInputJack (AV1) PICTURE SELECT
Dubbing Switch SOUND SELECT
1
3peration of the Receiver
:witching on/off
AUTO
SHUT
OFF
Toturnonthew: This
TV
setincorporates theAUTO SHUTOFFfunction.
Press MainsONIOFFswitch
0.
Evenif theTV Is left on after you have gone tosleep, the
TV
set changes tothe standby mode within
10
minutes
:
To
turn
offthe
W:
aftera!! broadcastshaveended.
Press the Power ONIOFF button
aD
onthe remote control
1
transmitter, andthe
N
changestothe standby mode. During Note: AUTO SHUT OFF also functions for the AV mode even
rhe standby mode, the standby and power indicator illumi- whenthere is nosignal beingtransmitted.
nates morebrightlythan duringthe power-ON mode. The remainingtime forAUTO SHUT OFF is displayed on
Pressthis button
aD
toturn of the unit for short periods thescreen.
of the time.
To turnonthe
TV
from thestandby mode:
.Press one of these button. Power ONIOFF
F
(Remotecontroltransmitter) Remainingtime
ProgrammeSelector
(Remotecontroltransrnitterl
Volume
@
Programmeselection
'To cutoff themainspowercompletely:
JTj
Press the right side
(+)
of the programme selector
@
of the
1
cressthe MainsONIOFF switcho.
TV
set, andthe
TV
setwillstep uptothe nextstation, i.e;
1,
2,
~
3
...
29,VCR1, VCR2,VCR3,1,2,3
...
nportant! Be suretoset the Mains ONIOFF switch
0
to the
~
Press the left side (-I, and the
TV
set will step down to the
off position, ifthe powerfailure occurs while view- previousstation.
I
ing.
-2-

(Operation
of
the
Receiver)
Soundadjustments
To adjust thesoundvolume:
Press
+
or-volume
0
button.
1
A
SOUND
111111111-------
To adjustthe bass,treble, balanceandthe depthofsurround
effect:
Selectthe controlfunctionbypressingSOUND
SELECT@
button.
EachtimeSOUND SELECT@ buttonispressed,thecon-
trol function changes as follows:
SOUND VOLUME SURROUND
LEVEL
Note: "SURROUND LEVEL" willbe skippedwhenthe Sur-
round effectisturned off.
4djustthe bass, treble, balance orthedepthof surroundef-
fect by pressingVolume
@
button.
Pictureadjustments
ielect the picture control function by pressing PICTURE
ELECT
@
button.
Each time PICTURE SELECT
@
button is pressed, the
control function changes as follows:
11111,111-------
1111111111------
1,111111.-------
COLOUR BRIGHTNESS CONTRAST
FINETUNING VIDEO TONE
@...
NNIDEOSelector
To watch the television programmesleave this switch inthe
TV
mode. WhenthisswitchissettotheVIDEOmodeyou can
enjoythe playbackfromthe VCR or other AV equipmentcon-
nectedto the AV inputterminals.
Eachtimethe TVIVIDEO Selector
@
is pressed, the AV posi-
tion changes as follows:
O....
Memory
0
This function lets you store the settings (for colour, bright-
ness, contrast, video tone, sound volume, bass, treble,
balanceand Surroundeffect)inmemoryfor bothpictureand
the sound. Simply adjust the picture and sound as desired.
then press the Memory
0
0
button. To recall these levels
from memory, pressthe Normalization
+-t
fD
buttonon
the remote controlunit.
When Memory button
is
pressed. "NORMAL"
is
displayed.
I
NORMAL
---++---
I
Q)....
HeadphoneJack
n
Insert the headphones plug into this jack to listen to either
stereo or monauralsound via a headphonesset.
Note: No sound willbe heardfrom the speakers when the
headphonesplugisconnectedto this
jack.
idjustthe colourintensity, brightness, contrastvideotone
E
or fine tuning by pressingVolume
@
button.

Remote Control Operation
Programme Selector TVIVIDEO Selector
Channel Scanning
Vain ONIOFFswitch of the TVset must be in"ON" position
*;efore remotecontrol operation is possible.
Joint transmitter towardstheTV set, thenpressthe appropri-
irefunction buttonfor the following controls.
....
Power
ONIOFF
Press this buttontoswitch
TV
set on.
To switch
TV
set off, press again.
....
Programme selection
a
e.g. Toselect programme number
17,
press
"1."
button and
then press"7" button withinfiveseconds.
To select programmenumber
27,
press
"2-"
button and
then press"7" bunon withinfiveseconds.
You can select any desired programme number directly
from standby mode.
e.g. To directly select programme number
2
from stand-
by mode, press the
"2"
button. The set is then
switchedon, andthepictureof programmenumber
2
appears.
To directlyselect programme number 16fromstand-
by mode, press the
"I-"
button (after which the
Standbyand Power indicatorflashesl, thenpressthe
"6" button.Thesetisthenswitchedon, andthepic-
ture ofprogrammenumber 16 appears.
Picture adjustments
0
Toadjustthe colour intensity:
Press@ (Colour)button.
J.
Press
A
orVvolume
0
button
0
Toadjustthebrightness:
Press
-0.
(Brightness)button.
J.
Press
A
orVvolumebutton.
1
@
COLOUR
.111,..,.-------
BRIGHT
111.111111------
0
Toadjustthe picturecontrast:
Press
(3
(Contrast)button.
J.
Press
A
or
V
volume button.
I
0
CONTRAST
,,111.1,,-------

(Remote Control Operation)
Finetuning
Press
<
>
(Finetuning) button.
C
Press
A
or volume bunon.
quency.
Note: Normallyfinetuningis notrequiredforthis
TV.
However,
insomecase (suchas radiointerference)picturemaybe-
come more clear by detuning from the best tuned fre-
In such case, you can use this fine tuning to eliminate
someinterferencebeatpattern.
Soundadjustments
To adjustthesoundvolume:
Press
A
(up) or
'l
(down)
volume0button.
To adjustthe bass, treble, balanceandthedepthof surround
effect:
Selectthecontrol function by pressingAUDIO SELECT@
button.
Eachtime AUDIO SELECT@ button ispressed, thecon-
trolfunction changes as follows;
--...-..+-...,..-
--------
+..,
.-..-
-.------
+
----..--
BASS TREBLE BALANCE
A
SOUND
SURROUND
LEVEL
mmw*m----
SOUND VOLUME SURROUND
LEVEL
Note: "SURROUND LEVEL" willbeskipped when thesur-
round effet isturned off.
4
Adjustthe bass, treble, balanceorthedepthof surround ef-
fect by pressingVolume
0
button.
@...
SurroundON/OFF
To enjoy the surround effect, pressthe Surround ONIOFF
@
button.
To cancelthe effect, press this button again.
Surround OFF Surround ON
@...
StereoIMono
v
STEREO
. .
Whenreceivingthe stereo broadcast,
)r
IS
d~splayed.
Ifthesoundof astereobroadcastisnotcleardueto interfer-
enceor poor reception,selectthe MONOpositionby press-
ingthis button.
Inthe AV mode, select either STEREO or MONO to match
thestereo or monauralconditionoftheaudio signalcoming
from an external source, eg.
a
VCR,
A.
V.
equipment, or
othercomponent by pressing StereoIMonoSwitch.
STEREO MONO
@...
BilingualAIB
When receiving the bilingual broadcast,
MA'NiA'
is dis-
played.
)Id
You canselectthe mainor sub language withthis button.
IntheAV mode, eachtime BilinaualA/Bbuttonispressed, the
-
audio channel changes as follows:
LEFT (A)--RIGHT(B)
@....Sound mute
Should you wish to mute the
sound 1e.g. While talking on the
telephone), pressthis buttononce.
To switch the sound back on,
pressitagain.
(D...
Normalization
-+C
Pressthis buttontorecallthepic-
ture and sound settings which
you stored usingthe Memory
0
button.
A
SOUND
MUTE
@....
ChannelScanning
0
Press Channel Scanning bunon@to searchfor aprogramme.
The channel positionsareautomaticallyscanned, and the chan-
nelscanningwill stop at the positionwhere
it
began.To stop at
the positionyouwant, pressthis buttonagain.

(Remote Control Operation)
After a set time has elapsed, the power of the
TV
receiver is
switchedoffautomatically.
*
Each time Off timer button
(D
is pressed, the set time
changesasfollows:
4
30 minutes 60 minutes
1
120minutes 90 minutes
I
Withthe off timer beingset andthechanneldisplayreset, the
I
I
remainingtime is displayed by pressingthe off timer button
again.
When the button is pressed again withinthree seconds after
1
the buttonwas first messedinabove manner, the time isset
toan uppertimewhichis mostclosetothe remainingtime.
,
Just one minute before switching off, "-01" and programme
numberyouare watchingare displayedonthescreen.
The timer setting will be cancelled if the power is switched
I
Off.
1
@....
Recall
0
IS
To displaythe on-screen indications, press this button.
1
The display disappearsafter five seconds.
1
Note: When this buttonis pressed for morethan
2
seconds.
The following is displayed and the unit enters SELF
DEMO mode. This modeisfor useinstorefrontdemon-
strations.
Ithas no effect on TV operation.
I
SELF DEMO.
SELF DEMO.
mode
OK
-
MEMORY
CANCEL
-
RECALL
To cancelthe SELF DEMO mode, pressthe Recall IS
@
buttononce again.
If the Memory
0
0
button is pressed inthe SELF DEMO
mode,theself-demonstrationwiilbegin. You canalso cancel
theSELF DEMO modemidwaythroughplaybypressingthe
Recall
0
IS
@
button.
VCR USE
Note: This remotecontroltransmitter has been designed es-
peciallyto be usedinconjunctionwithselectedSANYO
VCR's.
Some SANYOVCR's mayhavetheirownfunctions, so
please refer to the individual instruction booklet when
usingthis remotecontrolwith SANYOVCR's to ensure
compatibility.
PLAY
POWER ONIOFF
FASTiCUE
PAUSEISTILL
STOP
POWER ONIOFF BUTTON
Use to turn VCR poweron and off.
PLAY
BUTTON
Use to playbackthe tape.
STOP BU7TON
Useto stop the movement of thetape.
FASTICUE
Useto advancethetapeatfast speed, or inorderto playback
the tapeat fast speed.
REWINDIREVIEW
Use to rewind the tape, or in order to playback the tape in
reverse at fast speed.
PAUSEISTILL
Usetotemporarilystop (Pause)
the
tapewhen recording, or in
order to see a stillimageduring playback.
CH
UP DOWN A/'(
Use to changethe programming positionfor the VCR.
RECORD
Use to recordon the tape.
Press and hold down the RECORD button, then press the
PLAY button.
BatteryInstallation(RemoteControlTransmitter)
Removethe batterycover bysliding.
Installtwo
"AA"
1.5
volt batteries so that the
"+"
and
"-"
marks onthe batteries matchthe
"+"
and
"-"
marks inside
the unit.
Closethe batterycover.
Note: Replacethe batterieswhenthe
TV
setis showingthefol-
lowingsymptoms:
Operation is unsteady or erratic, sometimes the
TV
set
does not work with transmitter. Discharged batteries
may leak and damage the unit.The normallife of batter-
-6-
iesshouldbefrom ninetotenmonths.
-
.
~
~
.
-~

he-Setting of Stations
Upto32broadcaststationsinyourreceptionarea can bestoredinthe e~dctronicmemory.
There are twoways of presettingas follows:
Automatic presetting
-
the basic way
All receivablechannelsare automaticallytuned inand memo-
rizedinconsecutiveprogrampositions.
Note: Programme position
1
to 29 can be automatically
preset. VCR?,VCR2 andVCR3 positionscannotbeau-
tomatiocally preset.
Manual presetting
Usetopresetareceivablechannelinany desired programpo-
sition, e.g. thepositionwiththesame numberas the channel.
/
Automatic presetting
1. Selectany programmepositionfrom 1to 29.
(Automatic presetting is not possible from the VCR1,
VCR2 orVCR3 position.)
2. Press
PRESET
button.
3. Press TUNING
(+
)
@
button.
~han(eel band
VL:
low
VHF band
VH:
high VHF band
U:
UHF band
The channels are presetinconsecutive postions beginning
fromthe programposition
"I".
After all availablechannels (position
1
to 29)have been
preset, the unitreturnstothe postion
"1".
Note: To cancel automatic presetting midway, press the
Recall
a
IS
@
button.
(
Manualpresetting
1
1.
Press PRESET
@
button.
2. Press PRESET buttonagain.
3. Press the programme selector
@
or to selectthe desired
programmeposition.
PRESET
,,,-------------
4.
PressBANDselector toselect
j
the channelband.
When BAND selector ispressed, the frequency will be set to
the lowestfrequency inthe set band.
ChannelsbandVL, VH and U are forthe following channel
groups.
Band
I
VHF Low Channels 0. 1. 2.
3.
4,
5
Band Ill VHF HighChannels 5A.
6,
7,
8.
9,
10, 11
Band U UHF Channels 28 to 69
5.
Press and hold Tuning
@
(+
1
or
(-
buttonuntilthe desiredsta-
tion appears.
,,,,,,----------
The number
of
uprightsegments
increasesfor a higher-frequency
channel.
6. Press
v
(Memory)button
0.
7.
Repeatsteps 3 to 6 for other desired channels.
8. Press PRESET
0
or IS
(Recall)
@I
button.
This completesthe presetting.
Memory
Copy
This
TV
tuning system has
another advanced feature called
"memory copy".
For example, if you wish to copy the TV channel in the
programmeposition
"2"
intothe programmeposition
"6:
1. Select the programmeposition
"2".
2. Press PRESET
0
button.
3. Press PRESET
0
buttononce again.
4.
Press
"6"
buttonof the programmeselector
a
.
5.
Press
0
(Memory1button
@.
6.
Press PRESET
0
or
a
IS(Recall)button
(D.

(Pre-Setting of Stations)
1
InsertingChannels
]
The following example shows how to insert Channel-D of
programme position
"4"
into programme position "2".
I
\Programme
!I
I
Position
I
1.
Select programme position
"4"
(Channel-Dl
2.
Press PRESET
@
button.
3. Press PRESET
@
buttononce again.
4.
Press "2" button of the Programme Selector
a
5.
Pressandholddownthe TVIVIDEO selector@, then press
the
(+I
Programme Selector
@.
1
6.
Press the PRESET
@
or Recall /S
@
button.
Channel-D of programme position
"4"
is nowinsertedinto
programme position
"2".
Inthis exampie, the channels from Channel-B (programme
position
"2")
onward will be shifted successively into the
next highest programme position.
I
r-----1
Channel-A
,
Channel-D
I
Channel-8 Channel-C
i4Llt-J-l-2
I
I
L-----A
I
Channel-D
Note: You cannot insert a channel which would cause the
channelinprogrammeposition"29" toshifttoahigher
programme position. You also cannot insert channels
into the VCR1, VCR2, or VCR3 position. When the
above procedure is done, the position indicators will
flash inred.
I
Deleting Channels
I
Thefollowing example shows howto delete Channel-8 from
programme position "2".
f
"~rogramme
I
DELETE
Position
I
I
1.
Select programme position
"2"
(Channel-El.
2. PressPRESET
@
button.
3. Press PRESET
@
buttononce again.
4.
Pressand hold downtheTVIVIDEOselector@, thenpress
the
I-)
Programme Selector
@.
5.
Press PRESET
@
or IS(Recall)
@
button.
Channel-8 of programme position
"2"
is now deleted.
=In this example, the channels from Channel-8
(programme position
"2")
onward will be shifted suc-
cessively intothenext lowest programme position.
Note: Channel deletion is notpossibleinthe VCR1, VCR2 or
VCR3 position.
Whenthe above procedure isdone, thepositionindica-
tor fVCR1, VCR2, or VCR31will flash in red.

Automatically adjust for displays in English, German, Swedish, French and
.
TELETEXT
USE
Itasaninaccordancewith thetelevision broadcast signals.
ModelCPP2510/CPP2910-Not equippedwith
the
Teletext Decoder. It is not necessary to go back to the index page each time;
(OptionalTeletext DecoderType
NO.
TX-231.1 within any one serviceyoucan change directfrom ane page to
another. After anew page has beenentered, the previouspage
is displayeduntilthe new page is received. On receptionof the
new page, the roiling page number stops, showing the re-
auestedoaaenumber.
SIZE
NIMIWTEXTO
€3
Q
PAGEALT
HOLD
@
Switching
to
theTeletext Mode
Press the TVIMlXrrEXT button, then thescreenchanges as
follows:
p-
Backtowprogramme.
d
PageSelection
Whenteletextmodeisfirst selected, the index page (p. 100)
isautomatically obtained. The requested page is obtained
by simply pressingthree number buttons insequence. For
example,
if
youwishto lookatpage
151,
pressingthe num-
ber, (11, (5)and
(I)
inturn.
As each commandisaccepted, the page numberatthe left-
handendof the header will be built up, digit by digit, untilit
iscomplete.
After thefinal entry has been registered, rolling page nurn-
hersare presenteduntilthe requestedpage is received. As
soon as the two groups of numbers coincide, the informa-
tioncontainedon page 151appears.
Other pages of the same service can be obtained in this
manner, usingthe appropriatenumber.
.
-
Note: ifthe new pageisaNEWSFLASHor SUBTITLEpage, the
television video is automatically turned on, and the
newsflash or subtitleisdisplayedinaboxwithin the pic-
ture. Conversely, ifthe old pagewas a newsflashor sub-
title page, and newpage isnot, then the pictureisturned
off.
f
1
P1 TELETEXT PlOO Wed 16 Aug 18:48:22
T
\
P15 TELETEXT PlOO Wed
16
Aug 18:48:24
T
\
PI51 TELETEXT P144 Wed 16 Aug 18:48:27
VIEWING
N
WHILE SEARCHING FOR A PAGE
Insome cases itcan take some time to look for a page. Inthe
interval you can view
TV
by pressing the CANCEL button.
When the page arrives, the page number will appear on the
normal TV picture. Press TVIMIXfTEXT button to display the
page.
Note: When you press the CANCEL button, the green
5"
mark is displayed at the top right of the screen. Whilst
this
"7"
markisdisplayedyoucan notselect anotherTV
R
Sub-coded page access
For Teletext information which is longer than one page it
may take some time for the automatic changing of sub
pagesto reachthesub pageyourequire.
It
is possible,how-
ever, to enter the sub-page you require and then continue
watchingthe normaltelevision pictureuntilthe correctsub-
pageisreached.
A.
8.
C.
D.
E.
F.
Note:
Select the required page using the page selection
button.
Press the TIMUSUB button. The sub code digits
"----"
will bedisplayedinthetop left of the screen.
Enterthedesiredsub-pagenumber.
For example,
if
you select sub-page 10 you must press
0.0,l and0bunon.
Press the CANCEL to return to normal television pro-
gramme.
Whenthecorrectsub-pageis reachedthepage number
will appear on the normal television picture.
Press the TVIMiXrrEXT button to display the stored
page.
To clearthesub-codedpageyou mustenter
a
new page
number,ortheTIME1SUBbutton.
It is not possible to select another television station
duringasub-pageaccessoperation.

(TELETEXT
USE)
PageAlternate
@&
Press the PageAlternate bunon and the
TV
setwill
alternately select the previous page and the present page.
For example, now you are watching "page
300"
but you
watched "page 200" previously. Ifyou pressthe Page Alter-
natebutton, "page 200" appears.
-
s
Updated
Pages
There are pages which are updated as events progress,
such as sports results, news reports and traffic information.
Ifyou have selected one of the above pagesfrom the list of
contents and you want to view television but still be kept
informed about the other events, pressthe CANCELbutton.
The page will disappear and the TV station which will
broadcast this will appear in the screen.
As
soon as this
page is updated, the page number will appear on the nor-
mal
TV
picture. To display the updated page on the screen
press the NIMIWTEXT button. The page will disappear
whenthe CANCELbuttonis pressedagain.
Note:
It
is not possible to select another
TV
station during
an UPDATE. You should first switch back to
TV
re-
.
ception by pressing the NIMIWTEXT button. YOU
can, however, change both the picture and sound
settings.
/
H
HOLD
@
Some pages contain more information than can be dis-
LargeCharacters
(SIZE)
Q
Normally small characters are used inteletext mode, butin
some circumstances the 'doubleheight' facility may be use-
ful; whenthe viewer issome distance fromthe receiver, for
example. Eitherthe top or bottomhalf ofthedisplay can be
expanded by pressingthe SIZE button. Whenthis button is
pressed for the first time, the top half of the display is ex-
panded. If
it
is pressed once again, the bottom half of the
display isexpanded.
Toreturnthe display to normal-sized characters, this bunon
shouldbepressedagain.
Iftelevision mode isselected while largecharacters are be-
ing displayed, small characters will be displayed when the
systemisnextreturnedtoteletext mode.
.
-
playedon the screensimultaneously and aretherefore sub-
divided into a series of two or more sub-pages. The first
sub-pageofaseries offoursub-pages, forexample, hasthe
indication 114 displayed atthe top rightof the screen (below
thetime).
These sub-pages are 'rotated', that is,each sub-page is dis-
played for a certain time (determined by the broadcasting
authorities) before being replaced bythe nextsub-page. If
it
is desired to halt this rotation and retains a particular sub-
page, the HOLDbunonshouldbe pressed.ThewordHOLD
then appear onthetopofthescreen.
This command stops the reception of teletext data and can
be used to prevent the updating of pages whenever re-
quired.
Normaloperation is restored by pressingthe HOLD bunon
again orenteringanewpage number.
'HOLD
TELETEXT PI73
Wed
16
Aug
10:56:05'
114
-10-
INDEX
When this button is pressed in teletext mode, several
teletextfunctions are reset: the page memory is cleared, the
command Time Page
ON
(T. PAGE) is cancelled, and the
teletext decoder isset upto display the index page (P100).
REVEAL
a
Some pages have partof the display concealed: a quiz page
with concealed answers, for example. The command
REVEALdisplays the concealed text as longas REVEALbut-
tonremainsdepressed.

(TELETEXT
USE)
Time
Coded
Pages
(TIMUSUB)
@
Time coding enables theviewerto put into storeaspecific
page of informationready for viewing at a pre-determined
time.
IMPORTANTNOTE
With present transmissions this facility is limited to the
'Alarm Clock' pages. Please refer to the transmitted index
fortheappropriatepagenumber.
The requiredpage isselectedinthe usual manner and then
the commandT. PAGE (TimePage On) is entered. The time
,~~~
~~.~
~
~~
~
thatthe requestedpageshouldbereceivedisthen entered
on the screen using the number keys two digits for hours
andtwo digitsfor minutes. usingthe
24
hourclocksystem.
The character
7'
precedesthe time digits to indicatethat a
time code and notthe actual code is being displayed, also
the four digits flash. After the time code has been entered
rolling page numbers are presented. The cancel button is
then pressedand the receiver revertsto picture. When the
pre-settime is reachedthe page numberwill appear in the
top left corner of the screen and the data can be seen by
pressing cancel again. To clear thetime code from theT.V.
memory, press TlMElSUB
@
button again. (Time Page
m.
itis importantto rememberthat once the time coding has
beensetandthe textcancelledpressing any buttonson the
handset other than the Brightness, Colour, Volume and
Mutemay upsetthe pre-settime.
,,
,
.,.,
~
,~...
TIME
If the time is required while
a
programme is beingviewed
presstheTlMElSUB
@
button.
Providingthatthe channelbeingviewed isalsotransmitting
teletext, the time will appear
at
the top righthandof the sc-
reenfor five seconds. The digitsdisplayedrepresenthours1
minuteslseconds.

CONNECTING OTHER EQUIPMENT
Audio Monitor Out Connection
Morepowerfulsound can be enjoyed by usingyour audio ap-
paratus.
Connectthe audio signalsource from audio-monitor-outter-
minalto the line-inor aux terminal of the audio apparatus.
Connecting tothe
AV2
Input Jack
Connecttothe video and audio outputsof aVTR, video disc
player, etc. Tapes and discs can be played back.
All sound volume can be
controlled using the TV's re-
mote Controlunit.
I
.
UsetheTVIVIDEO
selector
O
to switch
totheAV2 position for
watching.
A&
recordingisalsopossi-
bie usingthis terminal.
Wththis connection method
vou
can
eniov Surround
,--
-~
sound using <he speakers
of
vouraudioapparatusandthe
TV speakers.
j
Audio out
-
-
A!
LINE INor
To
the amp's
-
a
AUX
e
e
I I
p~
Ifthe audio signalfromthe VCR isstereo, be sure to connect
the right and left channels to the respective right and left
Audio-interminals.
Ifthe external audiosignalisamonauralone, connect
it
tothe
leftterminal of Audio-in. Then selectthe monaural mode and
the audio channel in the TV set with the remote control
StereolMonobutton
(D
or BilingualA18 button
@.
Mini-component stereos, etc.
External Speaker Connection
S-VHS VCR Connections.
S-VHS VCR is designed with a highly advancedtechniques.
So the visual quality of S-VHS VCR is betterthan the other
popularVHS VCR.
S-VHS VCR can be enjoyed by using S-terminal.
(REAR PANELI
I
Speaker selector
(Settothe "EXTERNAL' position
when externalspeakers are used.
This will
cut
the sound of the
[REAR PANELI
II
internal
TV
soeakers.1
Speaker
cabinet
(8
ohm, MAX. 5W1
18
ohm, MAX. 5W1
You can also enjoy Surroundsoundthrough connected ex-
ternalspeakers.

(CONNECTING OTHER EQUIPMENT)
Connectingtothe FrontPanel
AVl
Input
Jack
It
isconvenienttousetheAV1 inputjack onthefront panelfor
equipmentthat is often connected and disconnected.
ITV
front panelterminals)
MSX
personalcompute!
(withvideo output1
8mm video
movie
camera
Use
the
NNIDEO
selector
to
switchto the AV1 positionfor
watching.
Video Dubbing
The AV1 inputjack on the front panel
is
bridgedwith 21-pin
terminalonthe rear panel, so youcanconnecttwoVCRs, one
to the front panel and one to the rear panel, and dub tapes
while monitoringthem onthe TVscreen.
\
IV
front panelterminals)
to
the on posmon.
VCR for playback
Video
out
Prerecordedvideo
cassette
ITV rear panel terminals)
VCR for recording
The image can be monitored
on
the TV
screen as soonas dubbingbegins.
UsetheTVNIDEOselectoretoswitchto
the AV1 positionfor watching.
Adjustments to the TV picture or sound
volume will have noeffect onthe dubbing
operation.
Use
of
the 21-pin Terminal
A
personalcomputer, VCR, Video disc player or other AV ap-
paratus can be connectedto the 21-pin socket on the rear
panelof the TV set.
I
RGB
----
When the 21-pinterminal is usedfor connection of video
equipment, audio equipment or
a
personalcomputer, note
the following points.
museof video equipment
For playback of VCR'tapes or video discs, use equipment
which has an Bpin input function signal. When equipment
which does not have this function signal is used, press
TVNIDEO Selector
@
to select 'AV1" mode.
When equipment which hasthis function signal is used, the
TV set is autornat~callyswitched to "AV1" mode, and the
remotecontrol transmitter cannot be used for TVNIDEO
switch.
For VCR recording, the presence or absence of the function
signal has no effect.
Use of personalcomputer
The penonalcomputer must be the type which has an 8-pin
function signal and
a
16-pinfast signal (TVIRGBswitching).
When usingthe RGB input signal from a personalcomputer
etc., which isnotequipped withthe controlsignals (pin-8and
pin-161, as described below, you mastset and select the RGB
positionfor personal computer use.
'Setting the RGB Position*
1. Select "VCR3" position.
2.
Press and hold Recall
a
IS
@
button for more than
2
VCR3
-
RGB
seconds.
Blank video
cassette
RGB
ON
-
MEMORY
RGB
OFF
-
RECALL

(CONNECTINGOTHER EQUIPMENT)
Specifications
3. Press Memory
40
button of the
N
set. Power source AC 240Volts, 50Hz.
STEREO
Television system BIG
WY((
.i!
Colour system PAL
*Cancelling the RGB Position* Channel coverage VHF: 0-11, 5A
UHF: 28-69
1. Select "RGB" position.
2. Press and hold Recall IS
@
buttonfor morethan 2 seconds. Aerial input impedance 75ohms
3. Press Recall
a
IS
(g
button once again.
The specification of the 21-pin connector is
as
foilowr:
Pin
No.
Signal
1 Audio output (rightchannel1 0.5 Vrmrlupper
1
kohm
2
Audio input (rightchannel) 0.5 Vrmrlupper 10kahm
3 Audio output (left channel1 0.5 Vrmrlunder
1
kohm
4 Earth laudiol
5 Eanh ibluel
6
Audio input (leftchanneil 0.5 Vrmrlupper 10 kohm
7 Blue I81inpur 0.7 Vp.p/75 ohm
8
Function witching (video in1ext.i
L:
0
-
2V.
H:
10
-
12V
9
Earth (green1
rn
."
11
Green
IGI
input 0.7 Vpp175 ohm
12 Earth liedl
Earth
Red (Rlinput
0.7
Vp-p175ohm
Fax
blanking
L:
0
-
0.4V.
H:
1
-
3V
Earth (video)
Earrh
Videolsync output 1 Vpp/75 ohm
Videahync input 1Vp.p/75 ohm
Earth (care1
1
a
AV
Connection
to
the
Aerial
Socket
TheA.V. apparatus canalso be connectedto the aerialsocket
I
of your
TV
receiver. Inthis case, it is advisable to select the
1
VCR1", "VCRZ" or "VCR3" position for the best picture by
1
pressing
"0"
keyofthe programmeselector.
Each time
"0"
key is pressed, VCR Position changes as
,
follows:
PictureTube
110 degree 110 degree
deflection deflection
Audio output (Peak music power output1
Ext. terminals Video input:
Phonojack
x
2 (1.0 Vp-p, 75 ohm)
S-terminal
x
1 (DIN4-pin, separate
YIC signal input1
Audio input:
Phonojack IRIL)
x
2
(436mVrms,
morethan 40K ohm)
Audio output (AudioMonitor Out):
Phonojack IRILI
x
1 (436mVrms,
less than 600ohm)
RGB terminal
CENELEC standard 21-pinterminal
Externalspeaker terminals
8 ohm, Output max. 5W
Power consumption
/
117W
1
125W
I
Weight
1
kg
/
40kg
1
Dimensions
I
Specificationssubject to change without notice.
I
C
ilote: VCR Positionisspecially designedfortheplaybackof the
AV equipments. The picture of theVCR playbackingmay
bedistortedinother position.
-
For further details concerning this connection and adjust-
ment, refer to the operating instructions for the AV equip-
ment.
-
14
-
595(W)
x
541(H)
x
450(D)mm 682(W)x 600(H)
x
495(Dlmm

Part
Na
4AA6P100242-- E2YY (A4-A)
SANYO
Electric
Co..
Ltd.
This manual suits for next models
3
Table of contents
Other Sanyo TV manuals

Sanyo
Sanyo AVM-27D6 User manual

Sanyo
Sanyo DS32224 Operation and maintenance manual

Sanyo
Sanyo CE28CH3-C User manual

Sanyo
Sanyo DS31520 User manual

Sanyo
Sanyo PDP-42XR8DA User manual

Sanyo
Sanyo CE28WN5-B User manual

Sanyo
Sanyo CP28WF2 User manual

Sanyo
Sanyo CZP2510TX User manual

Sanyo
Sanyo CE14A1-E User manual

Sanyo
Sanyo 14MT1 User manual

Sanyo
Sanyo C25PG51 User manual

Sanyo
Sanyo DS25520 User manual

Sanyo
Sanyo AVM-2751S User manual

Sanyo
Sanyo FVE3963 User manual

Sanyo
Sanyo FVM4612 User manual

Sanyo
Sanyo CP21SE1K(S) User manual

Sanyo
Sanyo CZP2515V User manual

Sanyo
Sanyo CPP3011V User manual

Sanyo
Sanyo CP32WF2 User manual

Sanyo
Sanyo C21LB25S User manual