Skamotec 225 Installation Kit
Please review the following information before starting.
All the material you require to build your fireplace enclosure is constructed from
Skamotec 225.
We have simplified things by providing the following:
Tool & hardware requirements
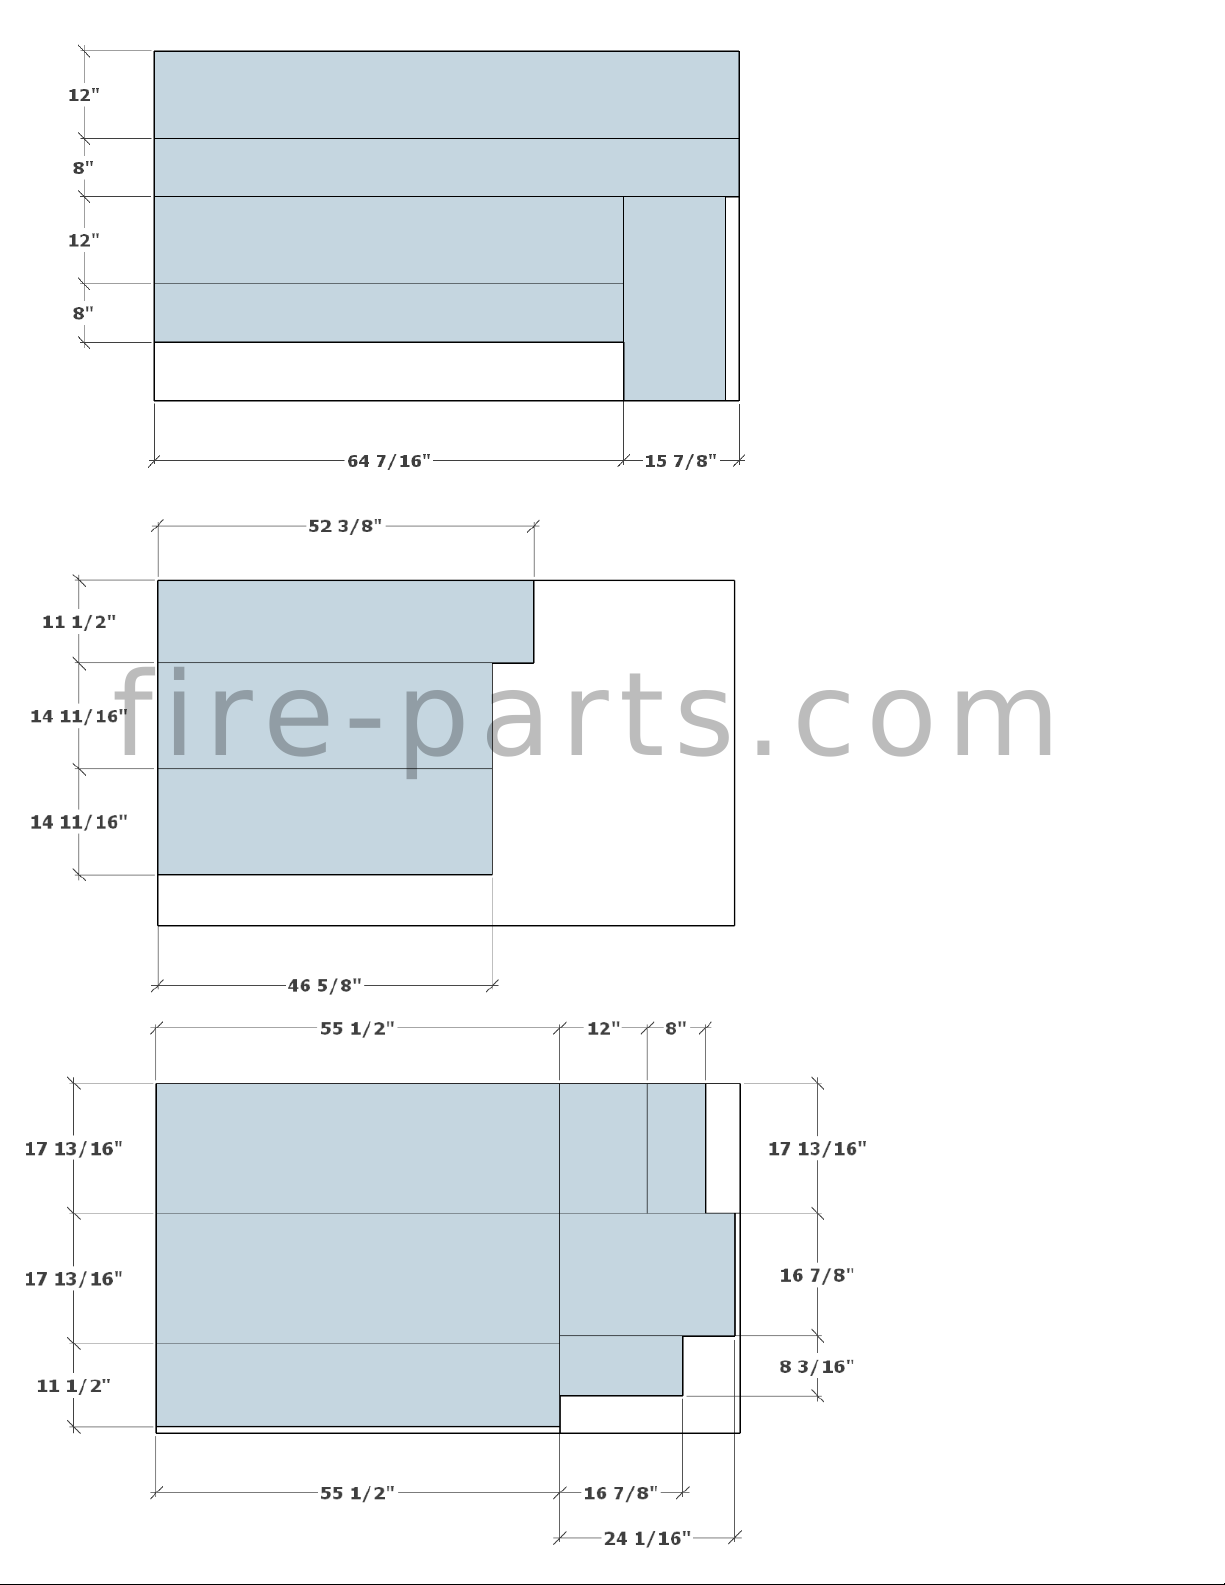
Material cut-list
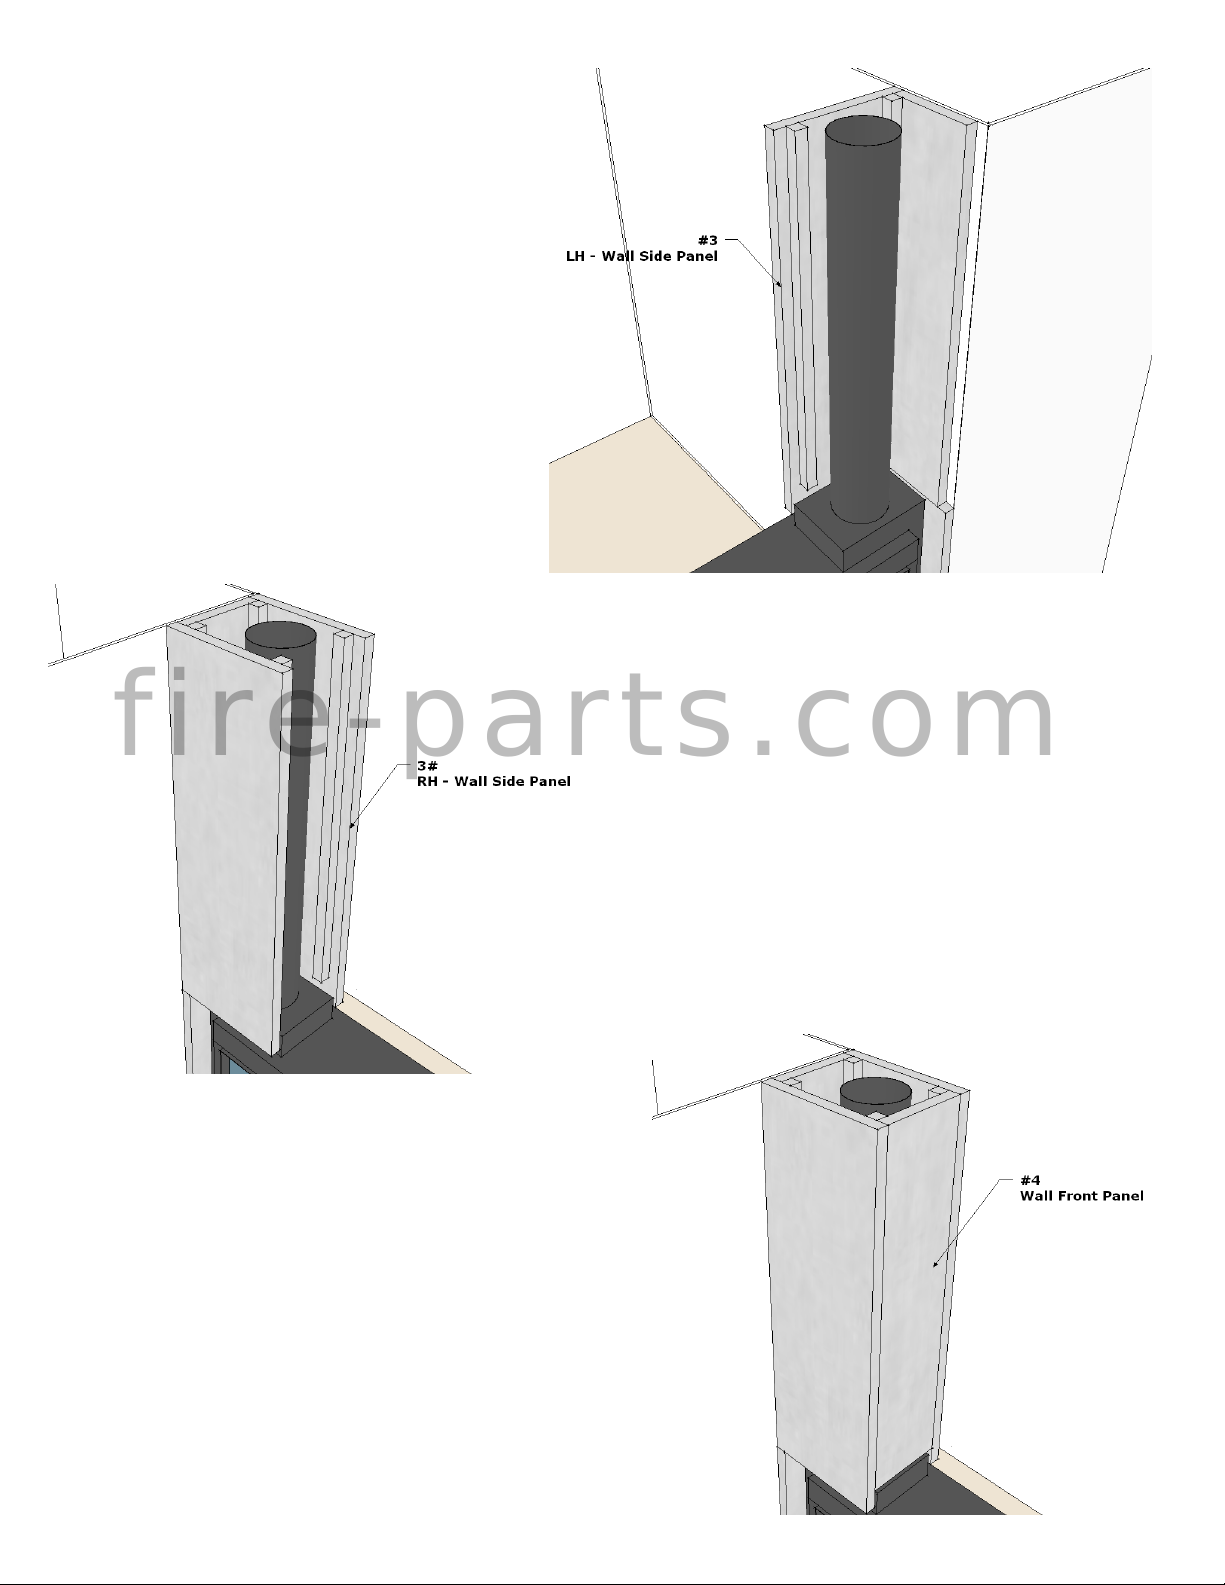
Assembly instructions
Tools and Hardware Required
Tools
Screws
#8 x 2-1/2” coarse thread construction screws
Note: Use a fastener spacing of 6” – 8” with an minimum edge distance of 3/4” - 1”
Adhesives
Recommended construction adhesives:
(US) Loctite - PL® Premium® 3X
(Canada) LePage - PL® Premium® 3X
Key Installation Points
All joints shall be attached using 2-1/2” construction screws & construction adhesive.
All Skamotec 225 surfaces must be moistened with water before assembly. This is to
prevent the adhesive from drying out too quickly & adhering incorrectly
Always maintain a minimum of 1/8” clearance from window frame. Always maintain a
minimum of 1/8"clearance from the Wall Standoff (framing the glass panel) and 2" from all other
surfaces. See Lucius installation manual for more details and all of the clearance requirements.
Do not fasten any part of Skamotec 225 to the fireplace


 user manual")


