Seiki SB36K1U User manual

USER MANUAL
SB36K1U
Read the User Manual carefully before using the Player and keep it for
further reference.
En
Blu-ray Disc Player


1
English
CONTENTS
CONTENTS
Important Safety Warnings 2
Precautions 4
Preparations 5
What’s included
About Discs
Front/Rear View
Remote Control
Connections 9
Connecting to a TV
Connecting to a digital audio system
Connecting to Internet
Playing a Disc 11
Getting Started
Using the Title Popup Menu
Using the DVD Menus
Using the OSC (on-screen control) Menu
Displaying the Disc Information
Resuming Playback from the Point Where Playback Stopped
Fast Forward/Reverse
Skipping Chapters
Repeat
A-B Repeat
Program Playback
Random Playback (for CD, DVD only)
Zoom Playback
Setting PIP (BD only)
Creating and Using Bookmarks (for DVD & BD only)
Selecting Specic Title/Chapter/Track/Time to Start Playback
Selecting the Audio Language
Selecting the Subtitle Language
Selecting the Camera Angle
Playing An Audio CD/Music File Disc
Adjusting the Setup items 16
General Settings
Display Settings
Audio Settings
Specications 20
Limited Warranty 21
2
English
IMPORTANT SAFETY WARNINGS
IMPORTANT SAFETY WARNINGS
TO REDUCE THE RISK OF ELECTRIC SHOCK, DO NOT REMOVE COVER (OR BACK). NO USER-
SERVICEABLE PARTS INSIDE. REFER SERVICING TO QUALIFIED SERVICE PERSONNEL.
The lighting ash and
Arrowhead within the triangle
is warning sign alerting you
of dangerous voltage inside
the product.
CAUTION: TO REDUCE THE RISK OF
ELECTRIC SHOCK, DO NOT REMOVE
COVER (OR BACK) NO USER
SERVICEABLE PARTS INSIDE. REFER
SERVICING TO QUALIFIED SERVICE
PERSONNEL.
The explanation point within
the triangle is a warning sign
alerting you of important
instructions accompanying
the product.
WARNING:
• To avoid re and electric shock, do not expose the device to rain or moisture.
• To avoid electric shock, do not open the shell; only ask qualied personnel to repair.
• Please replace the AC power line only at the special maintenance center.
• To prevent the battery or the device installed with battery from overheating avoid heat sources, such as
sunlight, re or similar.
CAUTION:
• Changes or modications not expressly approved by the party responsible for compliance could void
user’s authority to operate the equipment.
• The chemical apparatus in the player is harmful to eyes. Do not open the shell because the laser beam
of the Blu-ray Disc/DVD player is harmful to eyes.
• Only ask qualied personnel to repair the player.
The device is classied as class 1 laser product, the sign of which is printed on the back of the player.
SAFETY INSTRUCTIONS
• Read these instructions.
• Keep these instructions.
• Heed all warnings.
• Follow all instructions.
• Do not use this apparatus near water.
• Clean only with dry cloth.
• Do not block any ventilation openings. Install in accordance with the manufacturer’s instructions.
• Do not install near any heat source, such as radiator, heat registers, stoves or other apparatus (including
ampliers) that produce heat.
• Do not defeat the safety purpose of the polarized or grounding plug. A polarized plug has two blades
with one wider than the other. A grounding plug has two blades and a third grounding prong. The wide
blade or the third prong is provided for your safety. If the provided plug does not t into your outlet,
consult an electrician for replacement of the obsolete outlet.
• Protect the power cord from being walked on or pinched particularly at the plugs, convenience
receptacle, and at the point where they exit from the apparatus.
• Only use attachments/accessories specied by manufacturer.
• Only use the cart, stand, tripod, bracket, or table specied by manufacturer or sold with
the apparatus. Be cautious when moving the cart/apparatus combination to avoid injury
from tip-over.
• Unplug the apparatus during lightning storms or when unused for long periods of time.
• Refer all servicing to qualied personnel. Servicing is required when the apparatus has been damaged
in any way, such as the power supply cord or plug is damaged, liquid has been spilled, or objects have
fallen into the apparatus, or the apparatus has been exposed to rain or moisture, does not operate
normally, or has been dropped.

3
English
Copyrights and Trademarks
European Community.
DVD Video is a trademark of DVD Format/Logo Licensing Corporation.
Blu-ray DiscTM, Blu-RayTM, Blu-Ray 3DTM, BONUSVIEWTM, and the
logos are trademarks of the Blu-ray Disc Association.
Manufactured under license from Dolby Laboratories. “Dolby” and the
double-D symbol are trademarks of Dolby Laboratories.
This product incorporates High-Denition Multimedia Interface (HDMI)
technology. HDMI, the HDMI logo and High-Denition Multimedia
Interface are trademarks or registered trademarks of HDMI Licensing
LLC in the United States and other countries.
Class 1 Laser Product
This product utilizes a laser. Use of controls or adjustments or performance
of procedures other than those specied herein may result in hazardous
radiation exposure.
This symbol indicates that this product incorporates double insulation
between hazardous mains voltage and user accessible parts.
Notice:
• The player operates at AC 100V-240V, 50Hz/60Hz. Please check whether the local power supply
complies with the operating voltage of the player.
• Keep the player away from water and moisture, and do not put any containers with liquid (e.g. vase) on
the player.
• Install the player properly and ensure that it is possible to pull out the AC power line from the outlet
immediately in case of failure.
Description of function that requires network connection (the “function” hereinafter)
• You agree with all terms and conditions (including but not limited to the terms and conditions in the
websites and contents of third party suppliers) of using this function.
• Using this function is also subject to the service of your network supplier and its terms, as well as your
network environment.
Name and Content of Toxic and Hazardous Substances or Elements
Part name
Toxic and Hazardous Substances or Elements
Lead
(Pb)
Mercury
(Hg)
Cadmium
(Cd)
Hexavalent
chromium
(Cr(VI))
Polybrominated
biphenyls
(PBB)
Polybrominated
diphenyl ethers
(PBDE)
Mounting base x● ● ● ● ●
Shell x● ● ● ● ●
Optical unit x●x● ● ●
Drive unit x● ● ● ● ●
Accessories
(cable, mouse,
remote control,
etc.)
x● ● ● ● ●
●: indicates that the content of toxic and hazardous substances and elements in this part is below the
limit regulated in SJ/T11363-2006.
x: indicates that the content of toxic and hazardous substances and elements in certain homogeneous
material of this part exceeds the limit regulated in SJ/T11363-2006.
IMPORTANT SAFETY WARNINGS

4
English
PRECAUTIONS
Security
• Before operation, check if the voltage of this player is in line with the local voltage.
• Hold the plug to disconnect the player from the mains outlet. Do not pull the power cord.
• The player is not disconnected from the AC power source as long as it is connected to the mains
outlet, even if the player itself has been turned off.
• Disconnect the plug as soon as liquid or objects enter this player. Discontinue use of this player until
it has been tested and veried by a qualied service technician.
• Do not open the cabinet as laser rays employed by this player may damage eyes. Any servicing
should be done by qualied service personnel.
Placement
• Put this player where ventilation is good enough to prevent overheating.
• Never put this player in direct sunlight or near heat sources.
• Put this player horizontally; never put any heavy objects on it.
• Do not put this player in a location subject to excessive dust.
Cleaning
• Use a soft cloth with a little neutral detergent to wipe the cabinet, panel and controls. Never use
abrasive paper, polishing powder, solvent like alcohol or gasoline to clean this player.
Handling Disc
• To keep the disc clean, do not touch the playside of the disc.
• Do not attach paper or tape to the disc.
• Keep the disc away from direct sunlight or heat sources.
• Store the disc in a disc case after playback.
Cleaning Disc
• Before playback, wipe the disc outward from the centre with a clean cloth.
• Do not use any type of solvent such as thinner, benzene, commercially available cleaners or
antistatic spray.
Manufactured under license from Dolby Laboratories.Dolby and the double-D symbol are trademarks of
Dolby Laboratories.
PRECAUTIONS
5
English
PREPARATIONS
PREPARATIONS
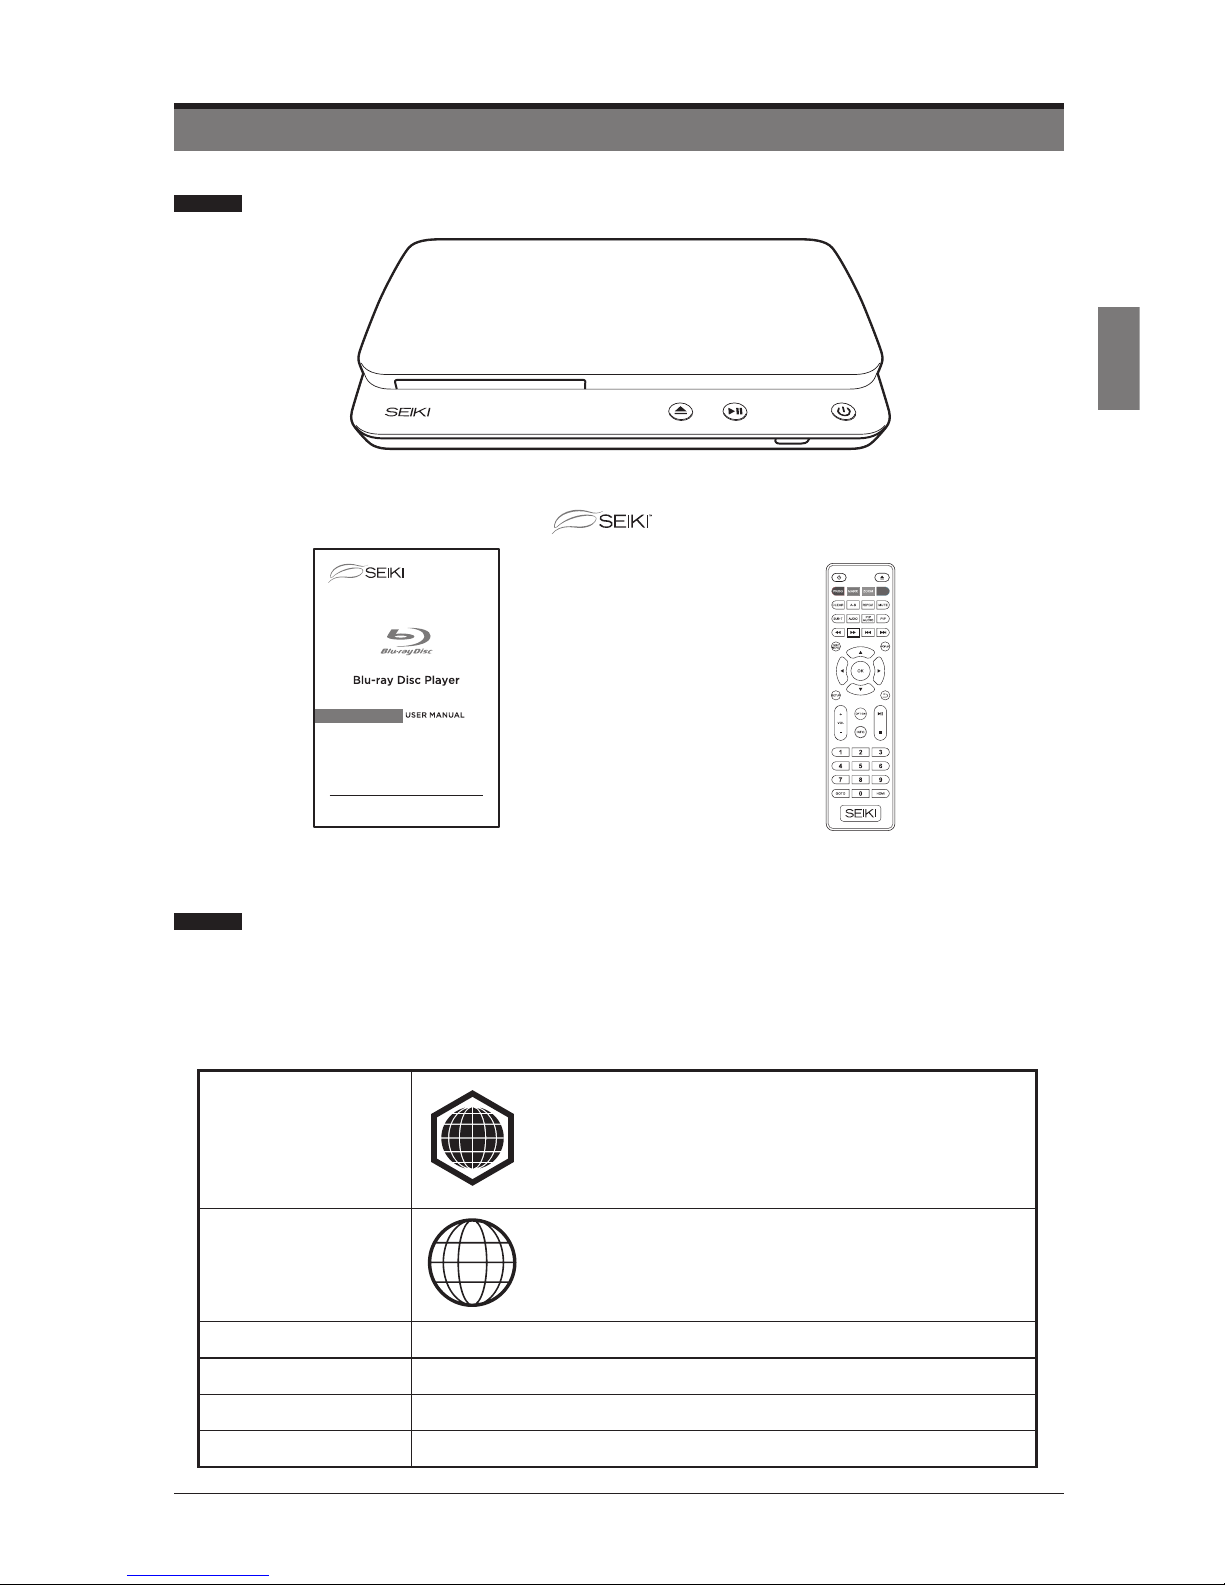
What’s included
About Discs
Both the players and the discs are coded by region. The disc and player code must match in
order to play the disc in the player. (The region code for this player is labeled on the rear panel
of the player).
Discs can be played in this Blu-ray player.
BD-Video
Region Code B: Europe, Greenland, French
colonies, the Middle East, Africa, Australia and New
Zealand.
DVD-Video Region Code 2: Japan, Europe, Egypt,South Africa,
the Middle East.
DVD-R/+R DVD Video
DVD-RW/+RW DVD Video
VCD VCD / SVCD
CD-R/CD-RW MP3/JPEG/MKV Format Files
User Manual with Warranty Card
Blu-ray Disc Player
Remote Control
SB36K1U
B
2

6
English
Front / Rear View
PREPARATIONS
21 3 4 5
1. Disc Tray
Open to load a disc.
2. Eject button
Press to open or close the DISC Tray.
3. PLAY/PAUSE button
Press to PLAY or PAUSE the loaded disc.
4. IR (Infrared Receiver)
Receive IR signals from the remote control.
5. ON/OFF button
Illuminates WHITE when the player is on; Illuminates RED when the player is off.
6. Composite Video Out
Connect to the composite VIDEO input socket on the TV or other external devices.
7. Coaxial Digital Audio Out
Connect to the Digital Audio Power Amplier.
8. Power Cord
Connect to the Power Supply.
9. HDMI
Connect to the HDMI socket on the TV or other external devices for best quality picture or
sound.
10. RCA Stereo Audio Out (L/R)
Connect to the AUDIO (L/R) input sockets on the TV or other external devices.
11. Network Port
Connect to the Broadband Router/Modem.
12. USB Port
For service use only.
6 7
8 9 10 11 12

7
English
PREPARATIONS
Remote Control
1. Press and slide the back cover to open the battery
compartment of the remote control.
2. Insert two AAA size batteries. Make sure to match the (+) and
(-) ends of the batteries with the (+) and (-) ends indicated in
the battery compartment.
3. Close the battery compartment cover.
Notes:
• Remove the batteries from the remote control when not in use for a long period of time.
• Do not install new batteries with used ones and do not mixture different types of batteries.
• Dispose of batteries in accordance with local regulations.
2
6
4
10
8
14
12
16
1
5
3
9
7
13
11
15
7. A-B
Repeat a selected section.
8. REPEAT
Select to repeat the current track,
chapter or entire disc.
9. CLEAR
Clear number entered by the number
keypad.
10. MUTE
Mute and restore the sound.
11. AUDIO
Select available audio settings on the
loaded disc.
12. PIP AUDIO
Audio language of the PIP video.
13. SUBTITLE
Select available subtitle settings on the
loaded disc.
14. PIP
Picture in picture, view multiple videos
simultaneously on supported disc.
15. /
Adjust the speed to play the loaded disc.
16. /
Skip between chapters or tracks on the
loaded disc.
1.
Turn the player on or to standby.
2.
Open or close the DISC TRAY.
3. BOOKMARK (green button)
Press to bookmark a specic time on the
loaded disc. Then press and hold it to
pop up the bookmark list.
4. ZOOM (yellow button)
Press to zoom in/out the image.
5. PROGRAM (red button)
Program the disc to play chapters or
tracks in a specied order.
6. Blue button
No function.

8
English
PREPARATIONS
17. DISC MENU
Return to the main menu of the loaded
DVD.
18. POPUP
View the popup/title menu on supported
discs.
19.
Allow you to navigate the OSD menus
and adjust the system settings to your
preference.
20. OK
Conrm the selection in the OSD menus.
21. SETUP
Access the setup menu.
22.
Return to the previous viewing menu.
23. OPTION
Press to view and set up the On-screen
controls.
24.
Press once to pause, and press it
again to resume normal playing.
25. VOL +/-
Adjust the volume.
26.
Stop the loaded disc during playback.
27. INFO
Display the present information of the
playing video.
28. 0-9
Number keypad.
29. GOTO
Press to view the present information
of the playing disc and set up to go to a
specied track or time on the loaded disc.
Method: press the GOTO button to enter
the interface, press the / key to
select time or chapter and press OK to
enter desired node; press the / key
to enter numbers directly and press OK
to conrm and go to search node.
30. HDMI
Press to select different resolutions.
18
20
30
28
29
23
27
17
2221
24
26
25
19

9
English
CONNECTIONS
Do not connect the AC power cord until all the connections are complete.
Be sure to make connections rm to avoid hum and noise.
Refer to the User Manual for detailed connection procedures to make sure the TV, Amplier
and other devices are connected to the Blu-Ray Player correctly.
Connecting to a TV
Case 1: Connecting to a TV with an HDMI cable-Best Quality
1. Using an HDMI cable, connect the HDMI OUT socket of the player to the HDMI IN socket
of the TV.
2. Turn on the player and the TV.
3. Select correct input source (e.g. HDMI) on the TV.
Note: An HDMI cable outputs digital video/audio, so you don’t need to connect an audio cable.
Case 2: Connecting to a TV with RCA video/audio cables -Good Quality
1. Using video/audio cables, connect the VIDEO OUT (yellow)/AUDIO OUT (red and white)
sockets of the player to the VIDEO IN (yellow)/AUDIO IN (red and white) sockets of the
TV.
2. Turn on the player and the TV.
3. Select correct input source (e.g. AV) on the TV.
CONNECTIONS
10
English
CONNECTIONS
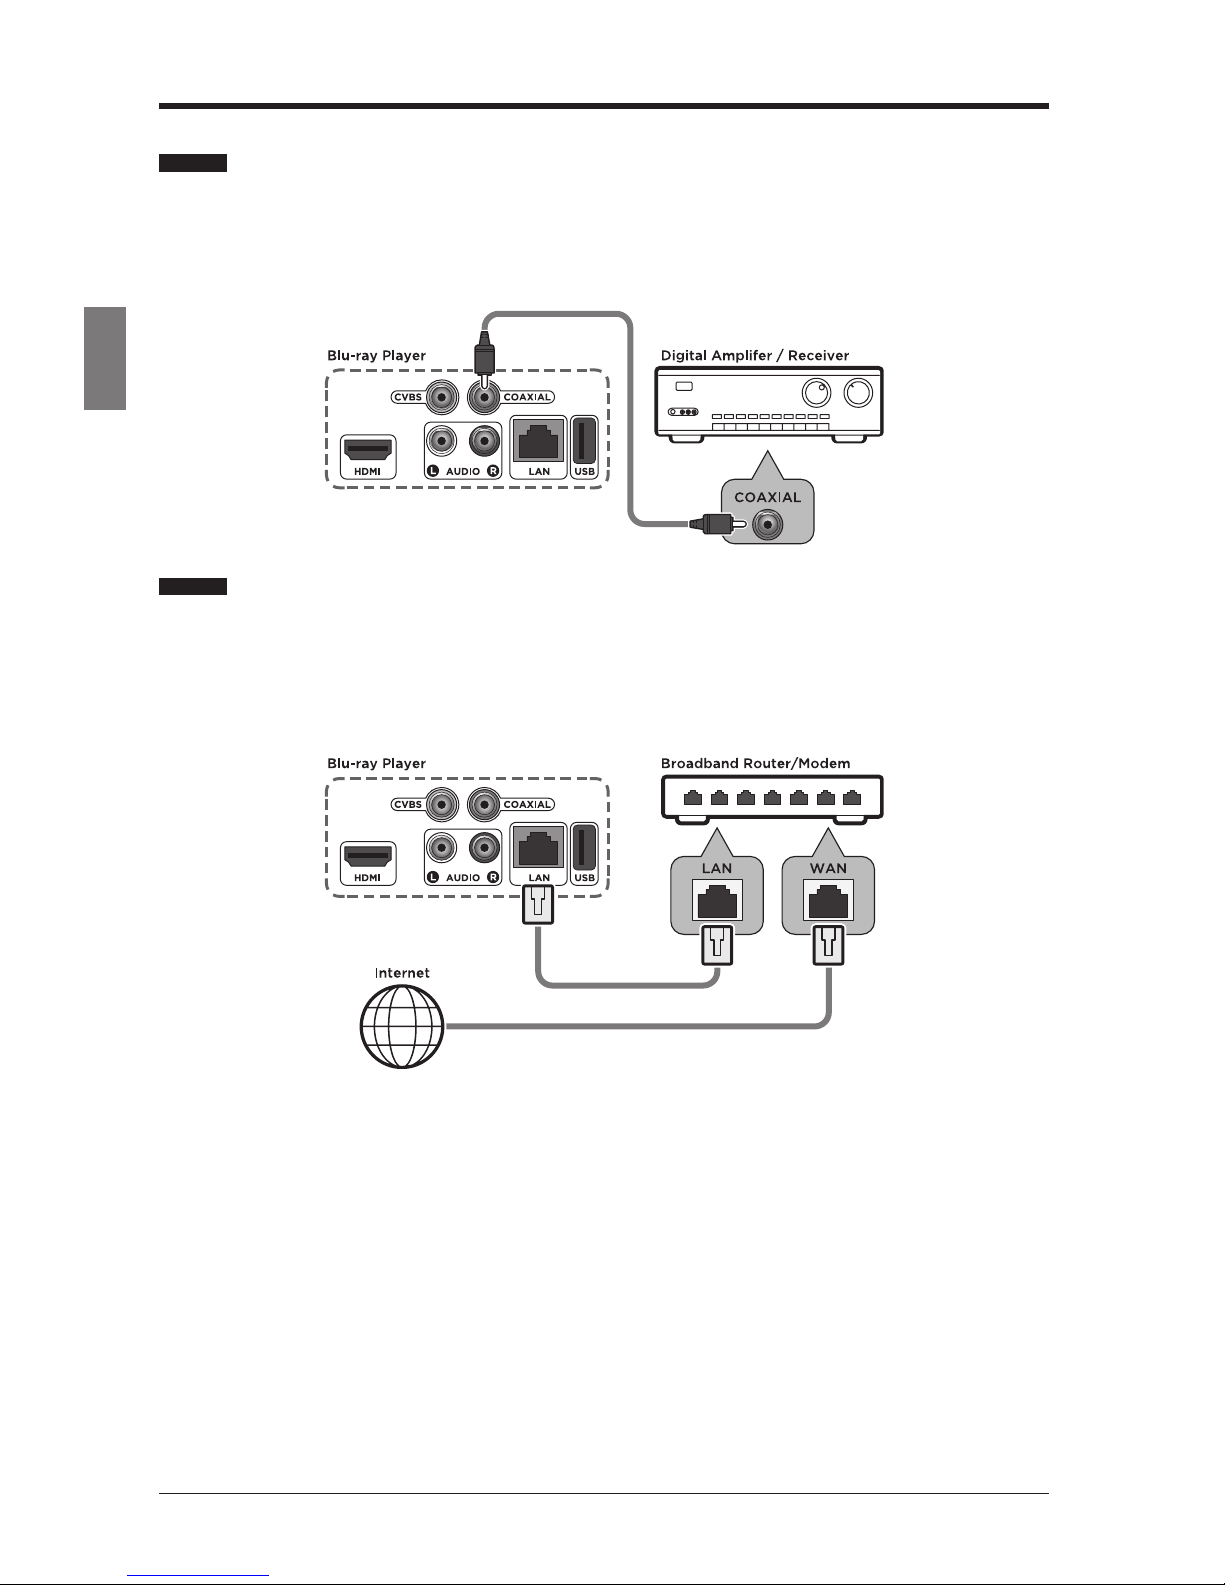
Connecting to a digital audio system
1. Using the digital audio cable, connect the COAXIAL socket of the player to the COAXIAL
IN socket of the Digital Amplier.
2. Turn on the player and the Amplier.
3. Select correct external input on the Amplier.
Connecting to Internet
1. Using the network cable, connect the LAN socket of the player to the LAN socket of the
Broadband Router/Modem.
2. Turn on the player and the Amplier.
3. Select correct external input on the Amplier.

11
English
PLAYING A DISC
PLAYING A DISC
Some playback operations of Blu-ray Disc, DVDs and VIDEO CDs may be intentionally xed
by software producers. Since this player plays Blu-ray Disc, DVDs and VIDEO CDs according
to the disc contents the software producers designed, some playback features may not be
available. Also refer to the instructions supplied with the discs.
Getting Started
Turn on the power of the TV, amplier and any other devices which are connected to the Blu-
ray player. (Change the VIDEO mode to suit the Blu-ray player, and check that the AUDIO
input is correct.)
1. Press the button to turn the player on.
2. Press the button to open the DISC TRAY.
3. Load a disc into the DISC TRAY with label side up.
4. Press the button to close the DISC TRAY.
5. The player will read and play the loaded disc automatically.
6. Press the button to playback.
NOTE: Some discs contain their own menus, such as a guidance which describes the
contents of the disc or a selection menu for scene, sound, language and other
customized settings. Depending on the disc, the menu content may differ.
Using the Title Popup Menu
1. Press the TITLE POPUP button to display the Title Popup menu during playback.
2. Press the buttons to make the desired selections, and then press the OK
button.
Using the DVD Menus
1. Press the DISC MENU button to display the DVD menu during playback.
2. Press the buttons to make the desired selections, and then press the OK
button.
12
English
PLAYING A DISC
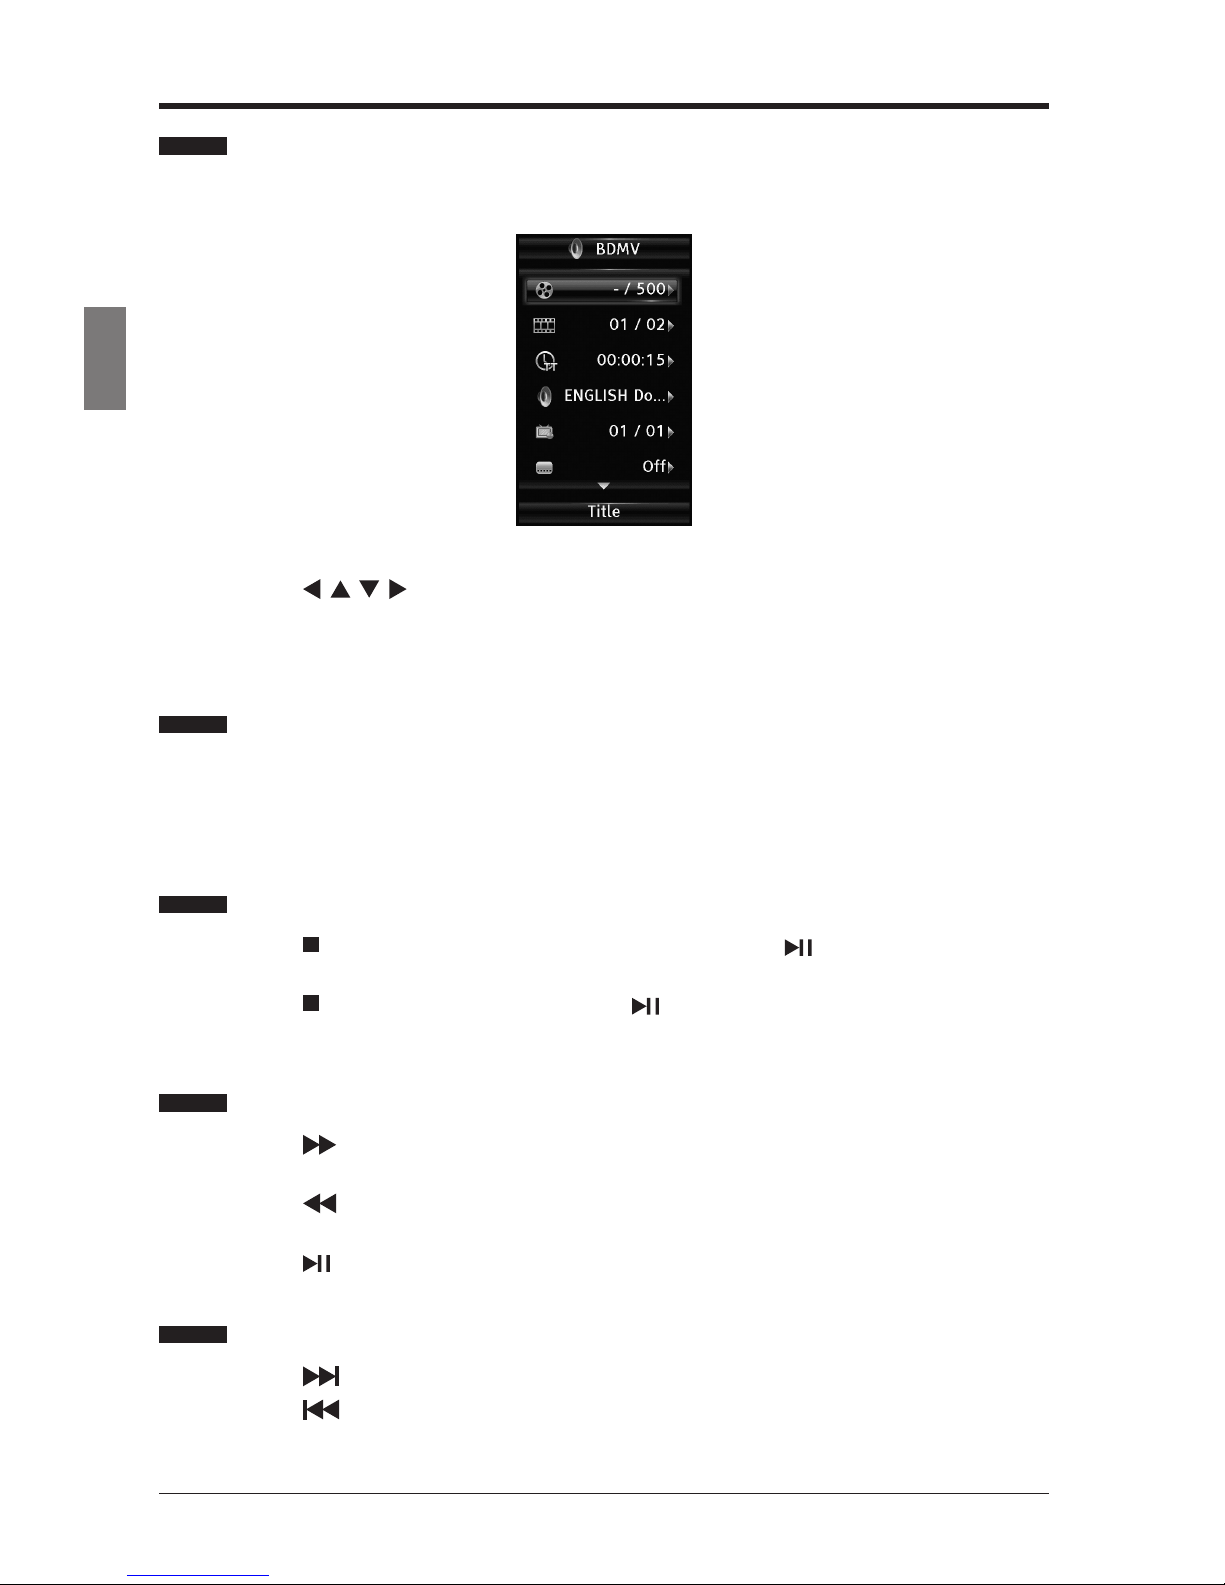
Using the OSC (on-screen control) Menu
Some basic operations can be done through the on-screen controls, such as selecting the
desired title, chapter, audio language etc.
1. Press the OPTION button to display the on-screen control menu during playback.
2. Press the buttons to make the desired selections, and then press the OK
button.
3. Press the OPTION button again to exit the menu.
Displaying the Disc Information
You can check the disc information during playback.
1. Press the INFO button to show the disc information (Disc type, total chapters, current
chapter, repeat mode, elapsed time etc.)
2. Press the INFO button again to exit the display.
Resuming Playback from the Point Where Playback Stopped
1. Press the button once during playback, and then press the button. Playback will
start from the point where the previous playback session was stopped.
2. Press the button twice, and then press the button. Playback will start from the
beginning of the loaded disc.
Fast Forward/Reverse
1. Press the button repeatedly to speed up forward ×1/×2/×3/×4/×5/PLAY during
playback.
2. Press the button repeatedly to speed up backward ×1/×2/×3/×4/×5/PLAY during
playback.
3. Press the button to return to normal playback speed.
Skipping Chapters
1. Press the button to move to the next chapter during playback.
2. Press the button once to move to the beginning of the current chapter. One more
press makes it move to the beginning of the previous chapter.
13
English
PLAYING A DISC
Repeat
1. Press the REPEAT button to select the repeat mode. A single title, chapter, track or the
entire disc can be played back repeatedly.
• BD: Repeat CH / Repeat TT / Repeat Off.
• DVD: Repeat CH / Repeat TT / Repeat All/ Repeat Off.
• CD/VCD: Repeat Track / Repeat All / Repeat Off.
A-B Repeat
You can dene a section to be played back repeatedly.
1. Press the A-B button to select the starting point (A) during playback.
2. Press the A-B button again to select the ending point (B). The selected section will be
played back repeatedly.
3. Press the A-B button again to cancel repeat playback and return to normal play.
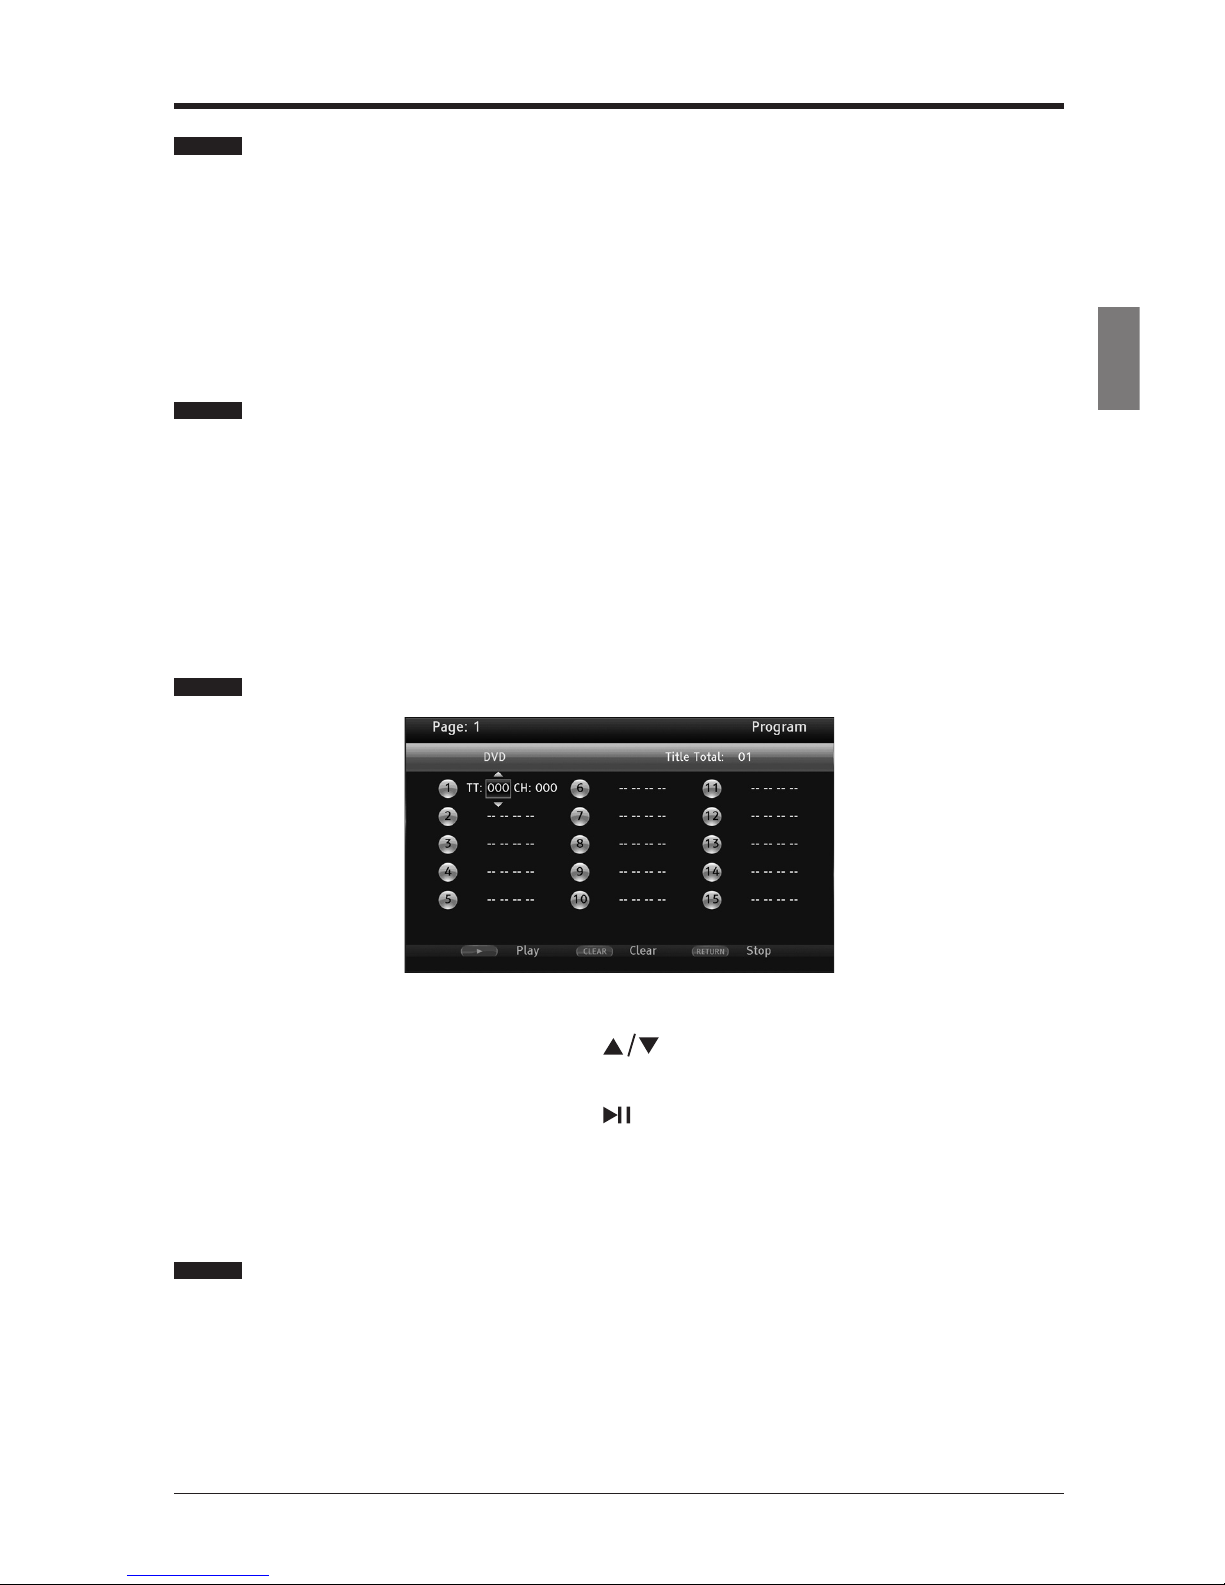
Program Playback
1. Press the PROG button to display the program menu.
2. Press the OK button and then press the buttons to select the desired title, chapter
or track number.
3. Press the OK button and then press the button to start playback in the programmed
order.
4. Press the CLEAR button to delete the entered program.
Random Playback (for CD, DVD only)
1. Press the OPTION button to enter the on-screen controls, then press ▲/▼ to select the
random mode: Random CH/ Random TT/ Random All/ Normal and then random playback
will start automatically.
Note: Random playback is not available during program playback.
14
English
Zoom Playback
Images can be zoomed in or zoomed out on the screen to your preference.
1. Press the ZOOM button repeatedly to cycle the zoom mode: ZOOM 2 /ZOOM 3 /ZOOM 4
/ ZOOM 1/2, ZOOM 1/3, ZOOM1/4, OFF.
2. Press the buttons to move the enlarged or shrunken image.
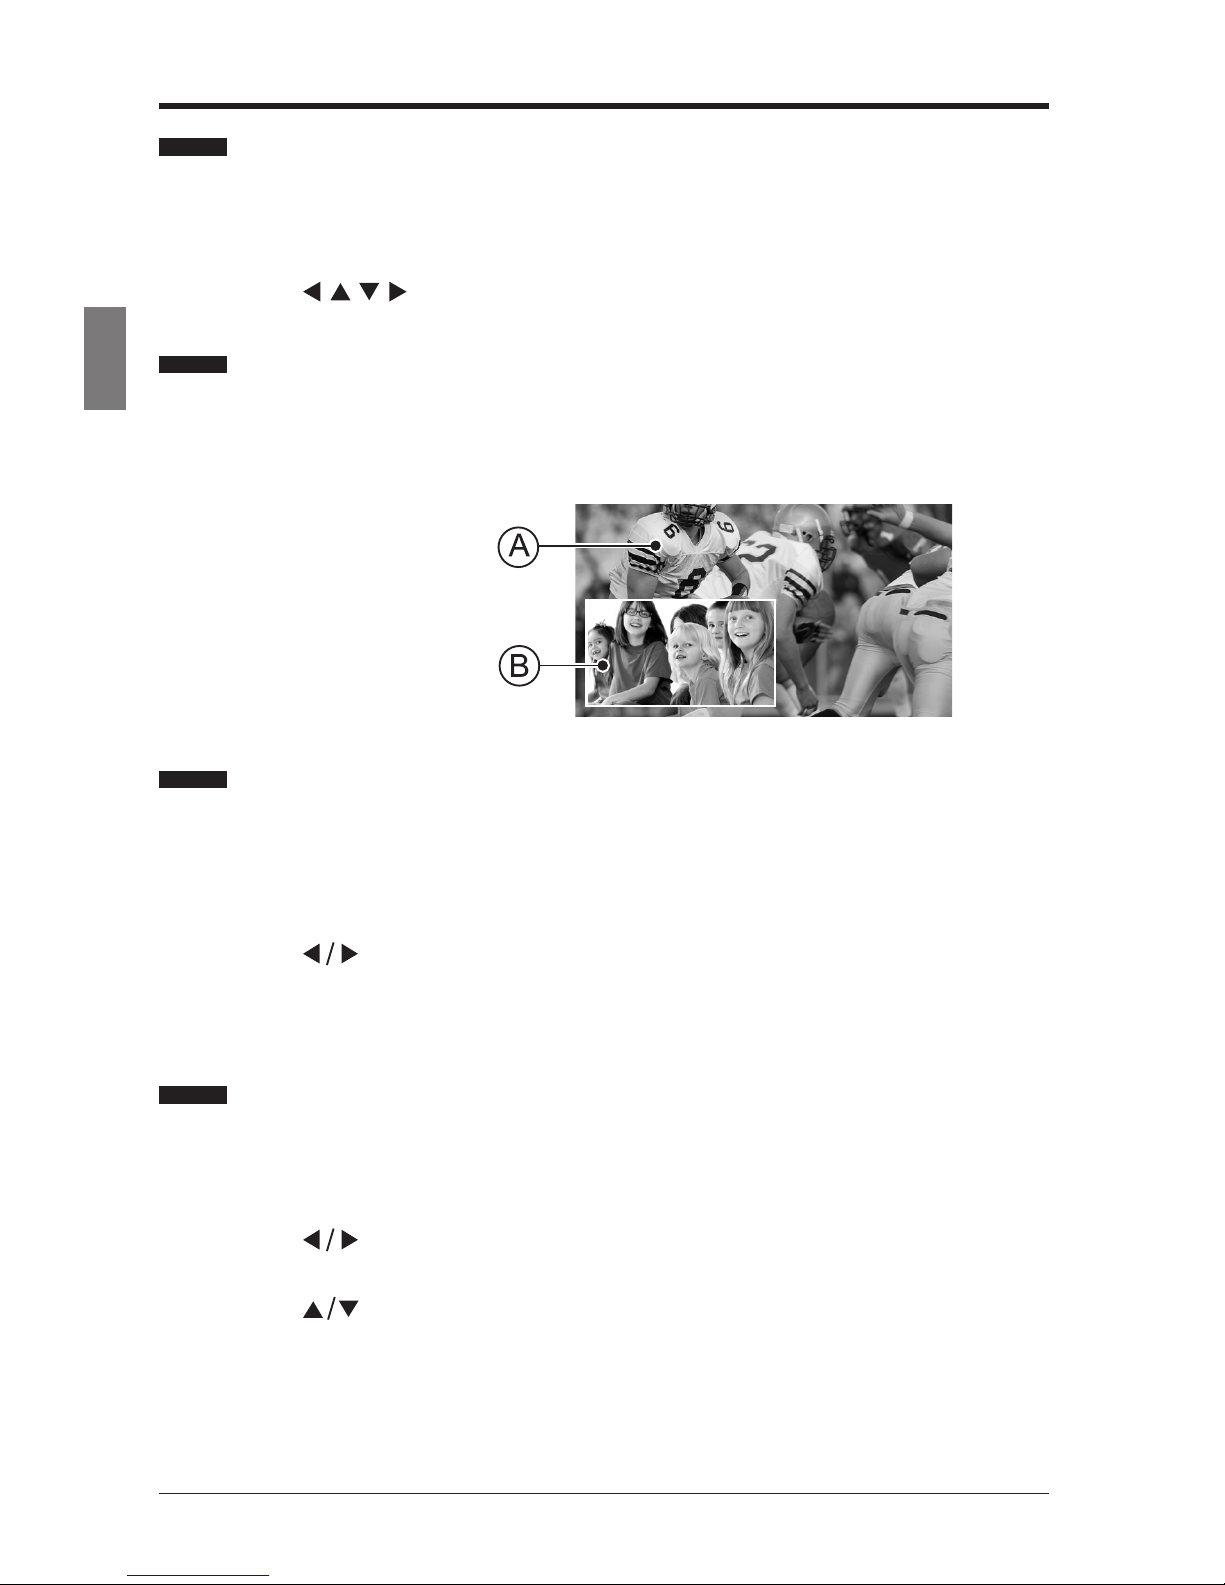
Setting PIP (BD only)
PIP, picture in picture, which allows you to view additional content (such as commentaries,
interviews, rehearsals etc.) in a small screen window while the movie is playing. This function
is only available if the disc has the PIP feature.
Main Playback Window
PIP Window
Creating and Using Bookmarks (for DVD & BD only)
1. Press the MARK button to mark the current point during playback. You can create 12
bookmarks altogether.
2. Press and hold the MARK button for more than 5 seconds to display the saved bookmark
menu.
3. Press the buttons to select the desired bookmark and then press the OK button to
start playback.
4. Press the CLEAR button to delete the saved bookmark.
Selecting Specic Title/Chapter/Track/Time to Start Playback
You can check the information about the disc and select specic title, chapter, track or time to
start playback.
1. Press the GOTO button during playback to display the editable menu.
2. Press the buttons to select Title, Chapter, Track, or Playing Time and then press
the OK button.
3. Press the buttons to make the desired selections, and then press the OK button to
start playback.
PLAYING A DISC

15
English
PLAYING A DISC
Selecting the Audio Language
The Blu-ray player has a function which allows you to select the desired audio language and
active the secondary audio language.
1. Press the AUDIO button repeatedly to select the desired audio language during playback.
2. Press the PIP AUDIO button to select the audio language for PIP.
Selecting the Subtitle Language
The Blu-ray player has a function which allows you to select the desired language for subtitles.
1. Press the SUB-T button repeatedly to select the desired subtitle language during
playback.
• The subtitle language can be changed if the subtitles are recorded in multiple
languages on the disc being played.
Selecting the Camera Angle
The Blu-ray player has a function which allows you to select the desired camera angle.
1. Press the OPTION button to enter the on-screen controls, then press ▲/▼ to select the
desired camera angle during playback.
Playing An Audio CD/Music File Disc
1. Load an audio CD or Music le-recorded disc.
• For an Audio CD, the player will play the tracks in order automatically.
• For a Music le disc, Press the buttons to select the desired music le and
then press the OK or button to start playback.
2. For playing back music les, refer to pages 11-15.
Note:Display menu varies between discs, so refer to the manual accompanying the disc.
16
English
ADJUSTING THE SETUP ITEMS
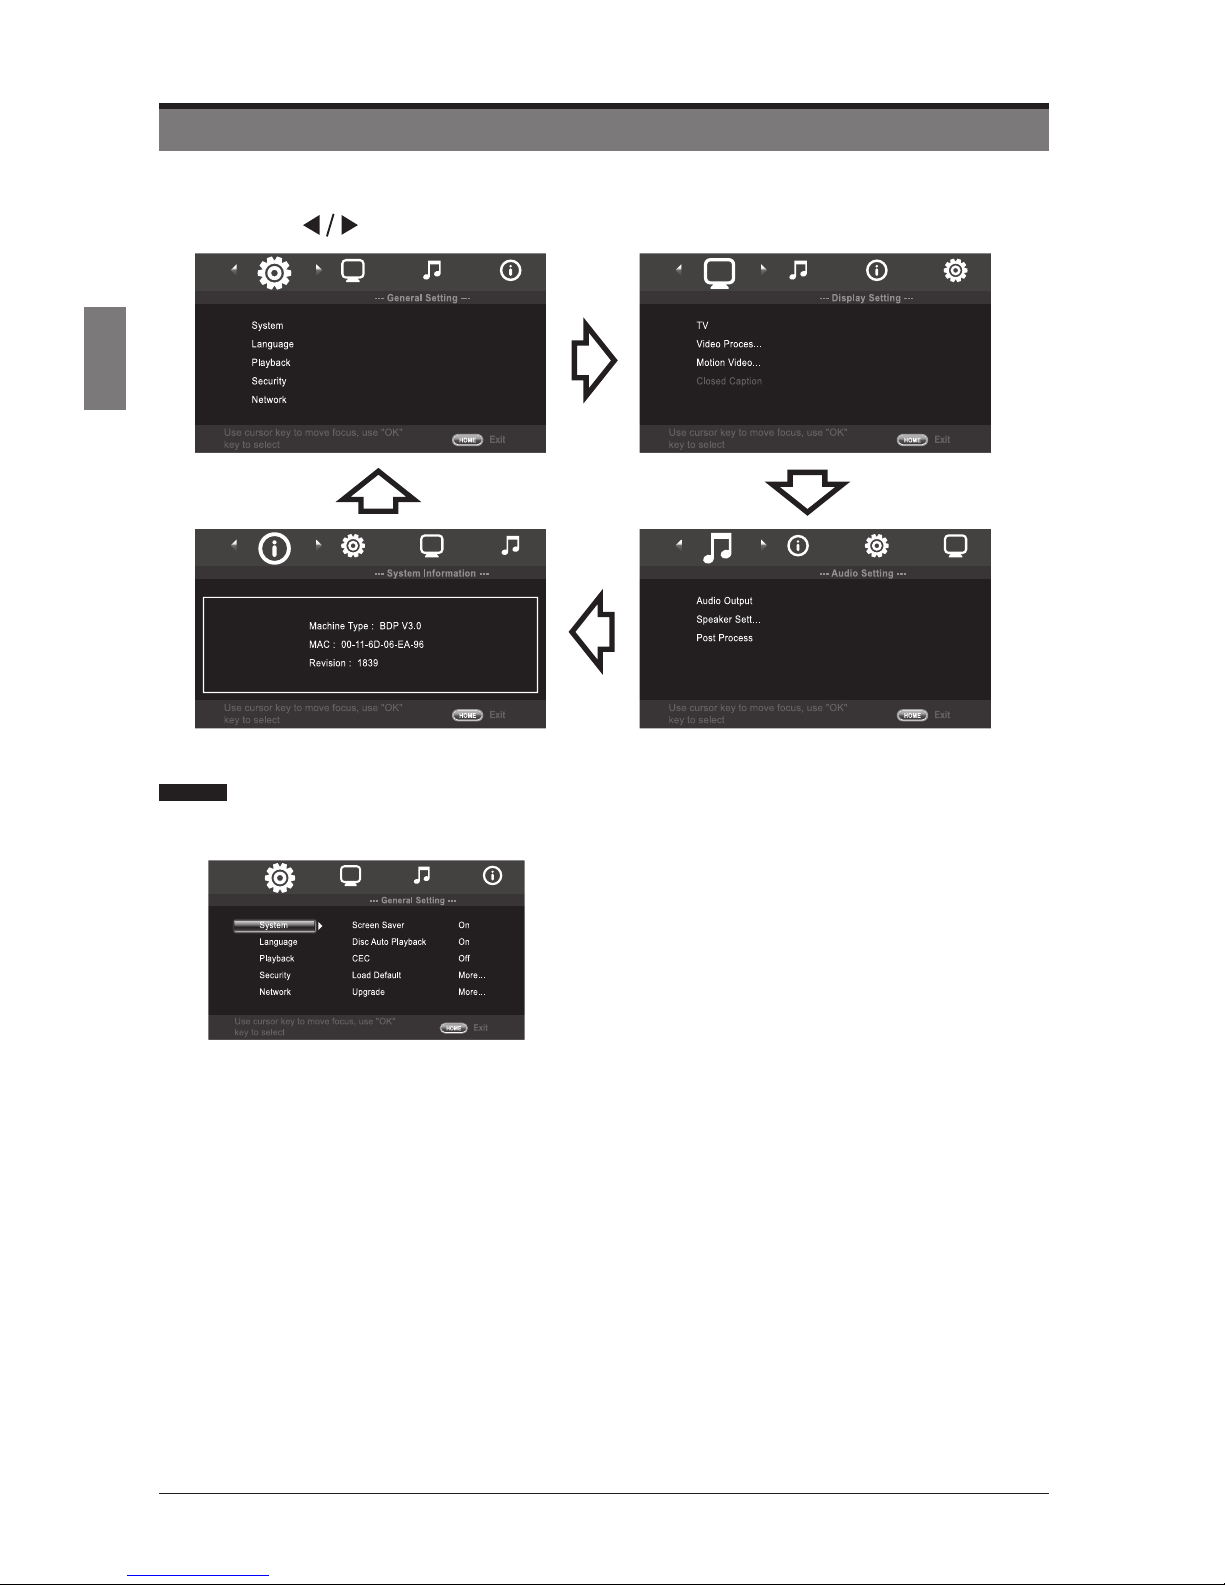
ADJUSTING THE SETUP ITEMS
• Press the SETUP button on the remote control to display the setup menu.
• Press the buttons to navigate and select the desired menu.
General Settings
1. System
• Screen Saver: Select to turn On/Off screen
saver.
• Disc Auto Playback: Select to turn On/Off disc
auto playback.
• CEC (Consumer Electronics Control): Users
can control compatible devices that are connected
to the HDMI input.
• Load Default: Restore the player to its default
settings.
• Upgrade:
a. Disc: upgrade from the disc containing the
upgrade le.
b. USB Storage: upgrade from the USB storage
device containing the upgrade le.
c. Network: Upgrade through network containing
the upgrade le.
• BUDA: Display the BUDA information: BUDA
information / BUDA setup.
Notes:
• To prevent possible damage of this player do not take out the disc, remove the USB
device, or turn off the power during the update process.
• Unnecessary updates are not encouraged, malfunction might occur.

17
English
2. Language
• OSD: Select the on-screen-display (OSD)
language: English/Español/Deutsch/French/
Portugues/ 日本語 / 简体中文 / 繁體中文 .
• Menu: Select the language for disc menu.
• Audio: Select the language for disc audio.
• Subtitle: Select the language for disc subtitle.
3. Playback
• Closed Caption: Select to turn On/Off Closed
Caption function.
• PIP Mark: Select to turn On/Off Picture in Picture
Mark function.
• Secondary Audio Mark: Select to turn On/Off
Secondary Audio Mark function.
• Last Memory: Turn On/Off to the memory of the
last playback.
4. Security
• Change Password: Use numeric buttons to
input the old password and then input the new
4-digit password. Re-enter new password for
conrmation (the default password is “0000”).
• Parental Control: Allow you to choose a level
to restrict playback of discs containing rating
restrictions (Off/KID SAFE/G/PG/PG13/PGR/R/
NC-17/ADULT). Enter the 4-digit password to
access the parental control menu to set the level.
• Country Code: Select the correspondent option
according to your own country.
5. Network
• Interface: Connect to Ethernet.
• Information: Display the information of the
present network: Interface/Address Type/IP
Address/Subnet Mask/ Default Gateway/DNS1/
DNS2.
• Connection Test: Test whether the present
network is ok or not.
• IP Setting: Adjust the IP information: Auto/
Manual.
• BD-Live Connection: Select the BD-live
Connection mode:Permitted/Partial permitted/
Prohibited.
ADJUSTING THE SETUP ITEMS

18
English
Display Settings
1. TV
• TV Screen: Depending on the TV’s aspect ratio,
you may want to adjust the screen setting.
Standard video (4:3) on a wide-screen TV (16:9)
16:9 Full: The image lls the
entire screen, but it stretches
horizontally.
16:9 Normal: Full image shows
on the screen with black bars
on both sides.
Wide-screen video (16:9) on a standard screen TV (4:3)
4:3 Pan & Scan: The image
lls the entire screen, but it
cuts off the left and right.
4:3 Letterbox: Wide-screen
image shows on the screen
with black bars on the top and
bottom.
• Resolution: Auto, 480i/576i, 480P/576P, 720P,
1080i, 1080P, 4K2K.
Note: If the connected TV does not support the selected
resolution, a warning message will be displayed. Please
press the HDMI button repeatedly to lower resolution until
the picture appears.
• TV System: NTSC / PAL / Multi.
• Color Space: RGB / YCbCr / YCbCr422 / Full RGB.
• HDMI Deep Color: The picture output from the
HDMI: 30 bits / 36 bits / 48 bits / Off.
2. Video Process
• Video Adjust: Adjust the brightness, contrast,
hue, and saturation of the playing video.
• Sharpness: Adjust the sharpness of video:
High / Middle / Low.
3. Motion Video Process
• Video Mode: Select the video mode: Standard /
Vivid / Cinema / Custom.
• Noise Reduction: Reduce the noise level of the
connected device: 0/1/2/3.
ADJUSTING THE SETUP ITEMS
Table of contents
Other Seiki Blu-ray Player manuals


