Curtis Mathes BLU-RAY DISC CMMBX72 User manual

This manual contains important information for the setup and
operation of your new Curtis Mathes Blu-ray Disc player. Keep
this manual handy during setup and troubleshooting to help you
connect your Blu-ray player to your TV and other AV equipment
and to help you answer any operating questions you may have.
CMMBX72 Operating Manual

A message from Curtis Mathes
Congratulations on purchasing your new Curtis
Mathes CMMBX72 Blu-ray player. This disc
player lets you enjoy HD films and experience a
new level of picture detail and color. Advanced
Blu-ray playback technology gives you crisp
clear images, while added picture quality
adjustments allow you to customize your
viewing and listening experience. Please enjoy
your new Curtis Mathes Blu-ray player to its
optimum performance by purchasing discs
formattedwith blu-ray technology.
For your convenience...Please contact your
authorized Curtis Mathes service partner.
Contact Curtis Mathes Support for this product
at the Worldwide Web:
http://www.curtismathes.com/support
or call us toll-free at 1-887-444-8998.
I

Key features of your new
Blu-ray Disc Player
About the use of this user's manual
Blu-ray Disc Features
1) Be sure to be familiar with safety instructions before using this product.
2) If a problem occurs, check the Troubleshooting.
Blu-ray Discs can store 25GB (single layer) or 50 GB (dual layer) on a single side disc - about 5 to 10 times the
capacity of a DVD. Blu-ray Discs also support the highest quality HD video available in the industry (up to 1920 x
1080 at 40 Mbit / sec) - Large capacity means no compromise on video quality. Furthermore, a Blu-ray Disc has
the same familiar size and look as DVD.
* The following Blu-ray Disc features are disc dependant and will vary.
Appearance and navigation of features will also vary from disc to disc.
Not all discs will have the features described below.
Video highlights
The BD-ROM format for movie distribution support three highly advanced video codecs, including AVC, VC-1,
and MPEG-2.
HD video resolutions are also available:
1920 x1080 HD
1280 x 720 HD
For High-Definition Playback
To view high-definition contents in BD discs, an HDTV (High Definition Television) is required. Some discs may
require using the player's HDMI OUT to view high-definition content. The ability to view high-definition content
on BD discs may be limited depending on the resolution of your TV.
・
・
1

Safety Information
The exclamation point within
the triangle is a warning sign
alerting you of important
instructions accompanying the
product.
Please read the manual carefully before using this DVD player, and keep it safe for future reference.
WARNING
TO REDUCE THE RISK OF ELECTRIC SHOCK, DO NOT REMOVE THE COVER (OR BACK).
NO USER - SERVICEABLE PARTS ARE INSIDE. REFER SERVICING TO QUALIFIED SERVICE PERSONNEL.
In order to prevent the risk of fire or electric shock, do not expose the machine to rain or any moisture. Do not
open the case of the unit because of the risk of electric shock. Repair work must be undertaken by qualified
personnel.
If the unit is moved from a cold to warm environment condensation may develop on the lens of the laser. To
ensure correct operation switch the unit off and leave it for one hour before using.
This DVD player has a laser system.
Please note that hazardous radiation leakage may be caused if the player is misused in anyway. Do not defeat
the safety interlocks.
Do not open the case of the player. The laser light will become visible when the case is opened.
This machine may malfunction if it is modified or repaired by unauthorized persons.
・
Warning
Caution
Caution
Warning
・
The apparatus shall not be exposed to dripping or splashing and no objects filled with liquids, such as vases,
shall be placed on the product.
Must be shown how can operate the product via the MODE and Vol+ and Vol- button for the unit complete the
function.
CLASS 1 LASER PRODUCT
Use of controls, adjustments or performance of procedures other than those specified herein may result in
hazardous radiation exposure.
・
RISK OF ELECTRIC SHOCK
DO NOT OPEN
CAUTION
To reduce the risk of electric shock, do
not remove the cover (or back) no
user - serviceable parts are inside. refer
servicing to qualified service
personnel.
CLASS 1
LASER PRODUCT
The lightening fl ash and
Arrowhead within triangle is
a warning sign alerting you of
dangerous voltage inside the
product.
2

Safety Information
Caution
Laser radiation when open. Do not stare into beam.
THIS PRODUCT UTILIZES A LASER. USE OF CONTROLS OR ADJUSTMENTS OR PROCEDURES OTHER THAN THOSE
SPECIFIED HEREIN MAY RESULT IN HAZARDOUS RADIATION EXPOSURE.
DO NOT OPEN COVER AND DO NOT REPAIR YOURSELF. REFER SERVICING TO QUALIFIED PERSONNEL.
Important Safety Instructions
Read these operating instructions carefully before using the unit. Following all the safety instructions listed
below. Keep these operating instructions handy for future reference.
PRECAUTIONS
1) Read these instructions.
2) Keep these instructions.
3) Heed all warnings.
4) Follow all instructions.
5) Do not use this apparatus near water.
6) Clean only with dry cloth.
7) Do not block any ventilation openings. Install in accordance with the manufacturer's instructions.
8) Do not install near any heat sources such as radiators. heat registers. Stoves. or other apparatus (including
amplifiers) that produce heat.
9) Do not defeat the safety purpose of the polarized or grounding-type plug. A polarized plug has two blades
with one wider than the other. A grounding type plug has two blades and a third grounding prong. The wide
blade or the third prong are provided for your safety. If the provided plug does not fit into your outlet,
consult an electrician for replacement of the obsolete outlet.
10) Protect t he Dower cord from being walked on or pinched particularly at plugs. Convenience receptacles,
and the point where they exit from the apparatus.
11) Only use attachments/accessories specified by the manufacturer.
12) Use only with the cart. stand. tripod. bracket. or table specified by the manufacturer. or sold with the
apparatus. When a cart is used. use caution when moving the cart / apparatus combination to avoid injury
from tip-over.
13) Unplug this apparatus during lightning storms or when unused for long periods of time.
14) Refer all servicing to qualified service personnel. Servicing is required when the apparatus has been
damaged in any wav. such as power-supply cord or plug is damaged, liquid has been spilled or objects have
fallen into the apparatus, the apparatus has been exposed to rain or moisture, does not operate normally, or
has been dropped.
Handling Cautions
Before connecting other components to this Blu-ray Disc Player, be sure to turn them all off.
Do not move the Blu-ray Disc Player while a disc is being played, or the disc may be scratched or broken, the
Blu-ray Disc Player internal parts may be damaged.
Do not put a flower vase filled with water or any small metal objects on the Blu-ray Disc Player.
Be careful not to put your hand into the disc tray.
・
・
・
・
Apparatus shall not be exposed to dripping or splashing and no objects filled with liquids such as vases,
shall be placed on the apparatus. Maintain well-ventilated conditions around the product. Do not place on
bed, sofa, or anything that blocks ventilation.
3

Safety Information
・
・
・
・
・
・
・
・
・
Do not place anything other than the disc in the disc tray.
Exterior interference such as lightning and static electricity can affect normal operation of this Blu-ray Disc
Player. If this occurs , turn the Blu-ray Disc Player off and on again with the POWER button, or disconnect and
then reconnect the AC power cord to the AC power outlet. The Blu-ray Disc Player will operate normally.
Be sure to remove the disc and turn off the Blu-ray Disc Player after use.
Disconnect the AC power cord from the AC outlet when you don't intend to use the Blu-ray Disc Player for long
periods of time.
Clean the disc by wiping in a straight line from the inside to outside of the disc.
Do not to expose the player to dripping or splashing liquids.
When the AC plug is connected to a wall outlet, the player will still draw power (standby mode) when it is turn
off.
Maintenance of Cabinet
For safety reasons, be sure to disconnect the AC power cord from the AC outlet.
Do not use benzene, thinner, or other solvents for cleaning.
Wipe the cabinet with a soft cloth.
4

Table of Contents
5
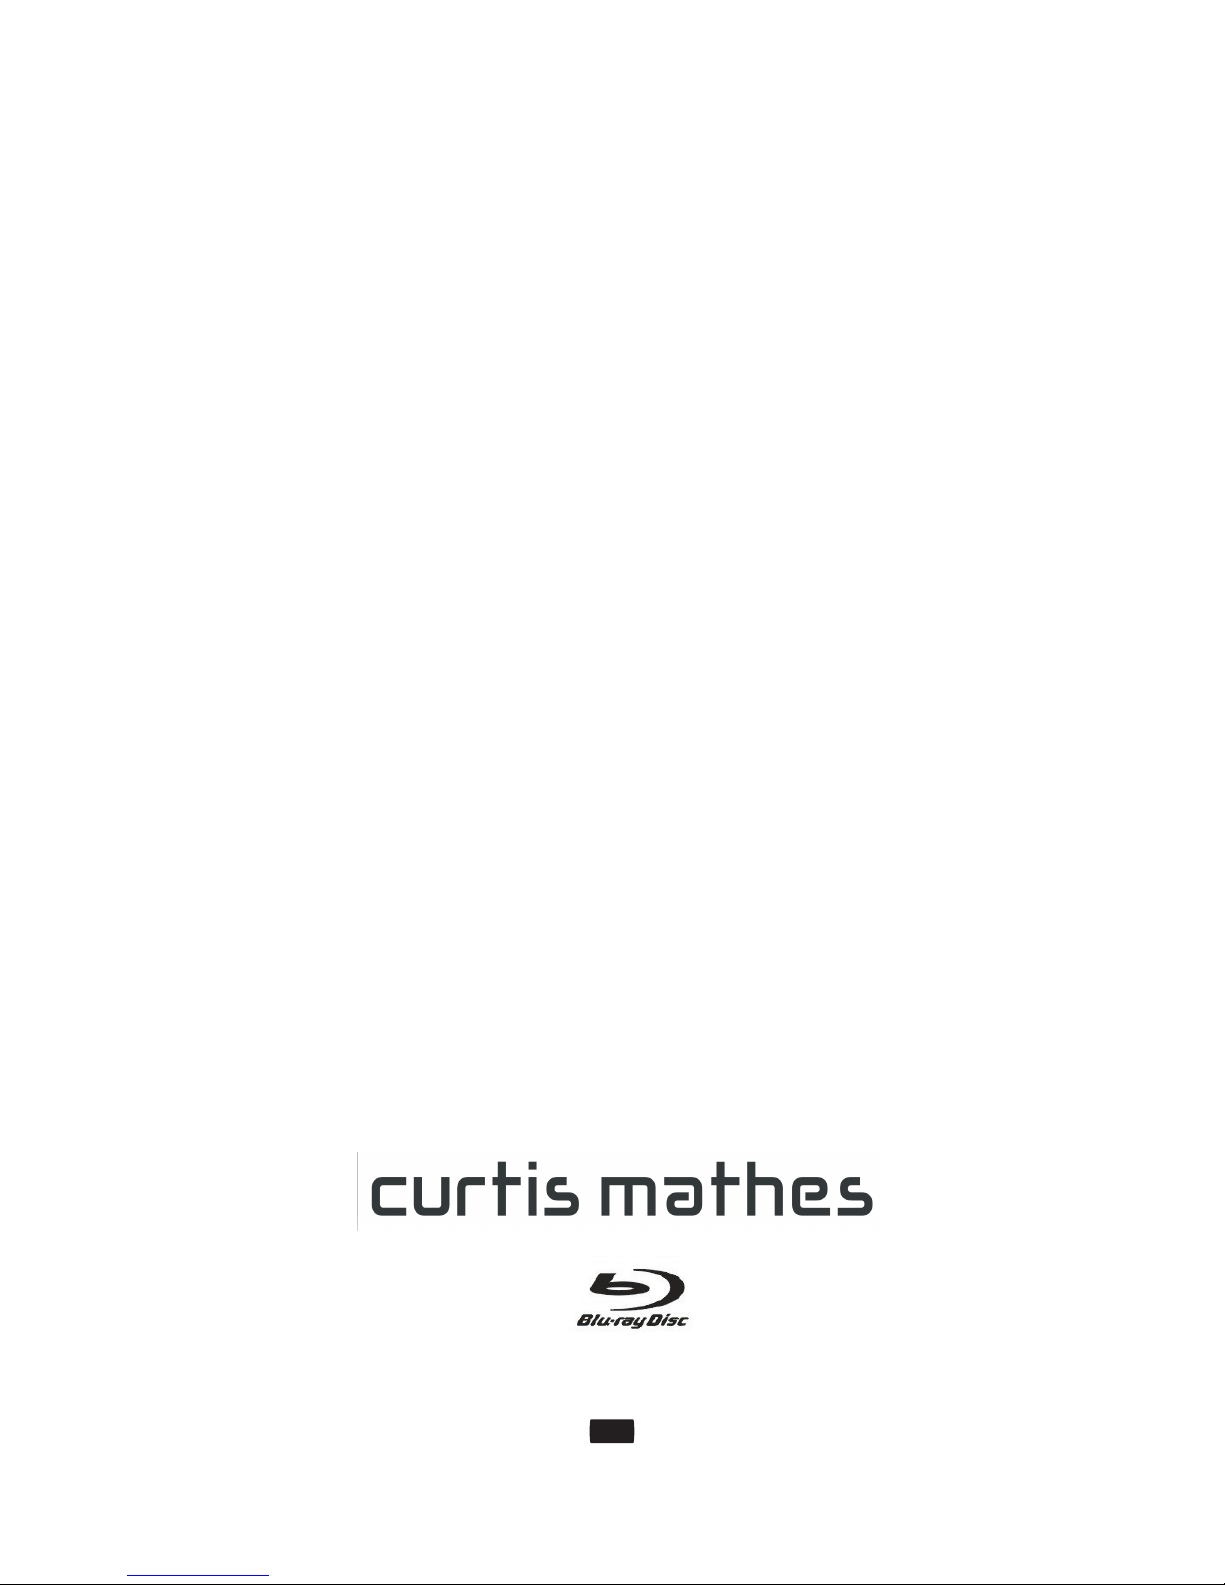
A Message from Curtis Mathes
Key features of your new Blu-ray
Safety Information
Getting Started
Remote Control
Connections
.........................i
.....................1
Disc Player...........................................................1
About the use of this user's manual................1
Blu-ray Disc Features.........................................1
Video highlights.................................................1
For High-Definition Playback...........................1
.............................................2
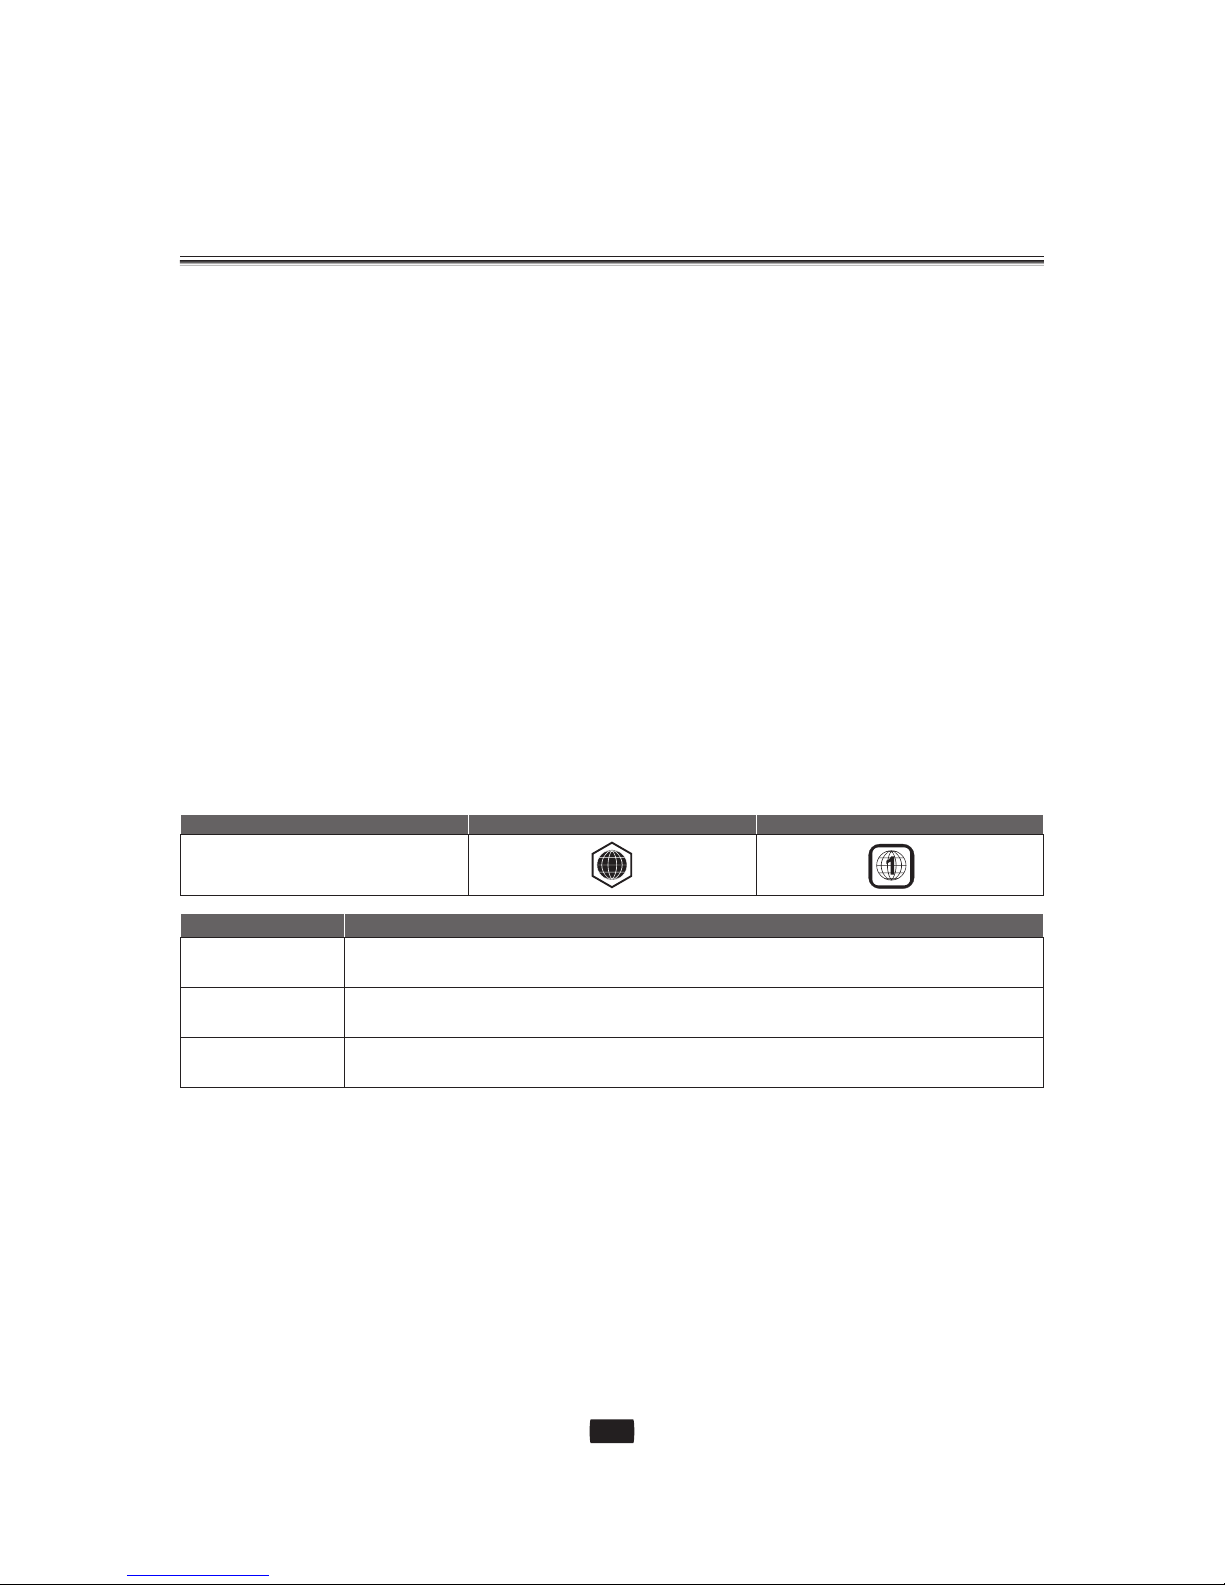
Precautions......................................................3-4
...................................................6
Front Panel........................................................11
Front Panel Display..........................................11
Rear Panel.........................................................12
Accessories.......................................................12
.........................................13-14
Buttons and Functions.............................15-17
.....................................................18
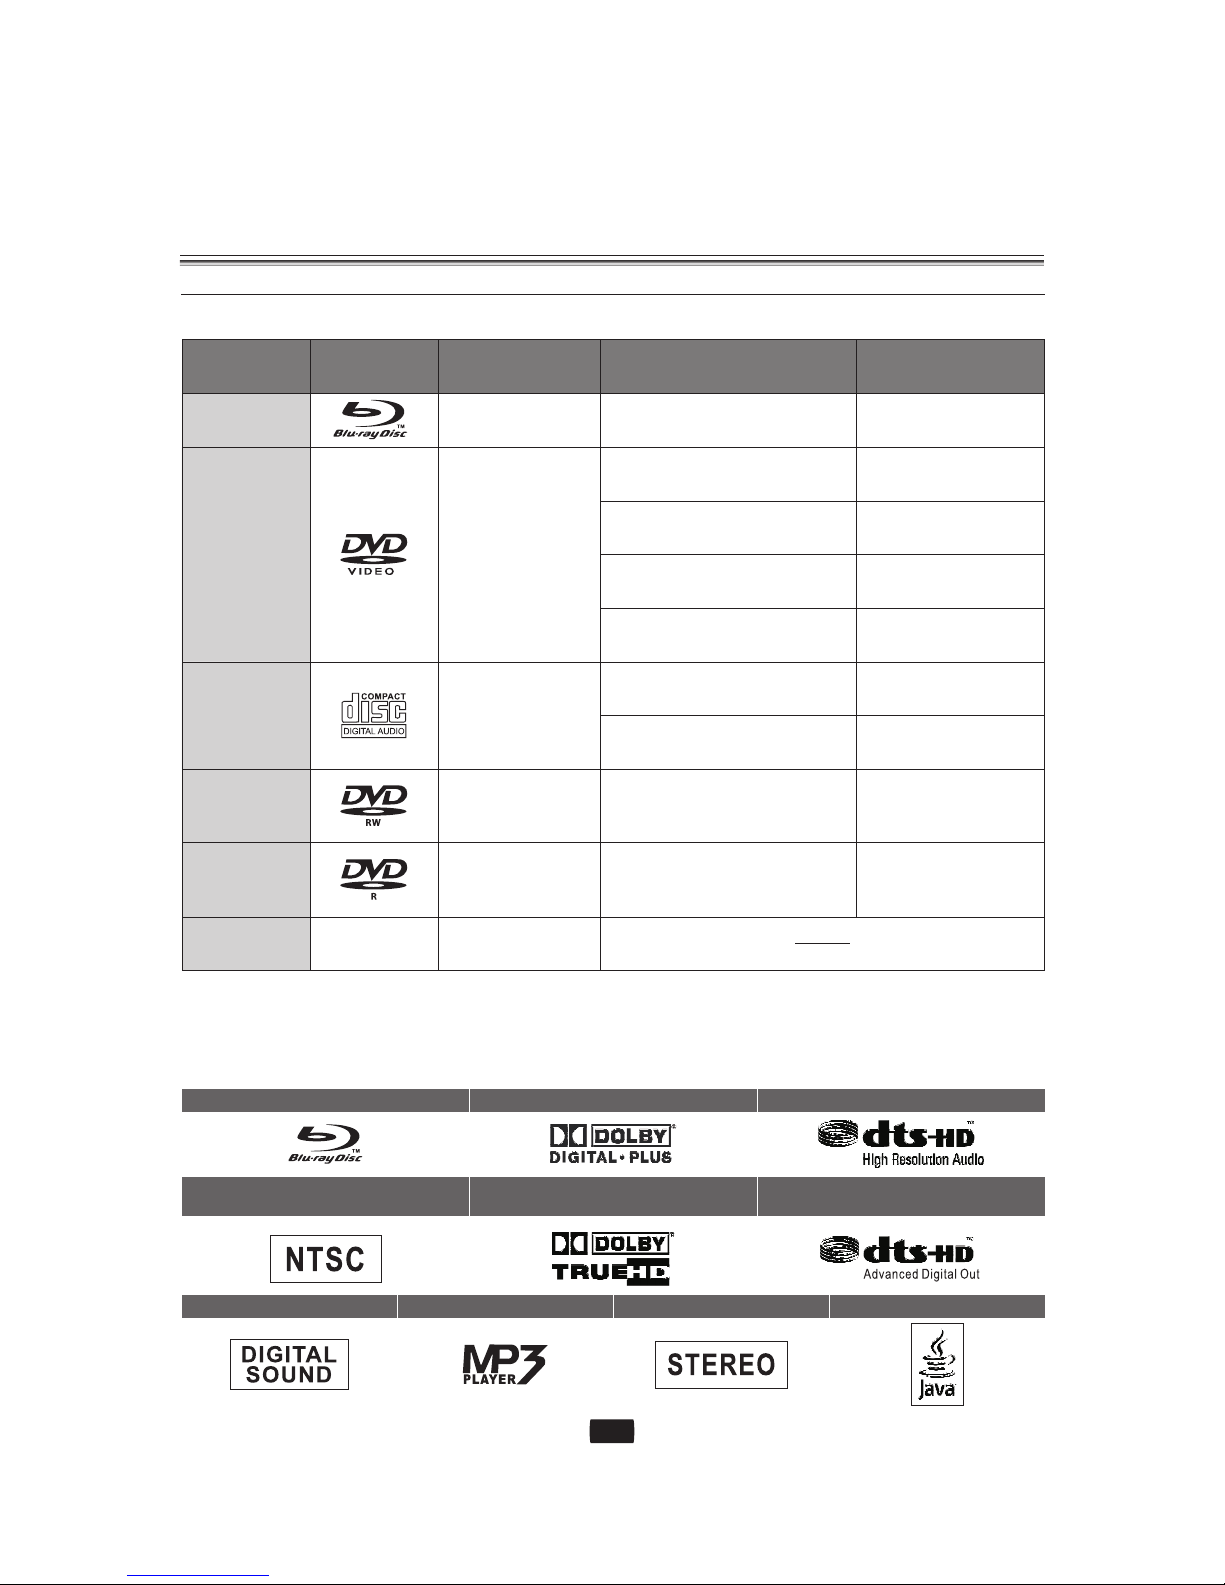
Disc Type and Characteristics.......................6-7
Disc Types............................................................8
Disc Format.....................................................8-9
Disc S tora g e&Ma nagem ent.. ..... ..... ..... ..... .9-10
........................................................11
Connecting to a TV with an HDMI Cable......18
Connec t ing to a TV with a DV I Cable.... . .20
Connecting to an Audio System
(2 ChannelAmplifier)......................................24
Connecting to an Audio System
(5.1 ChannelAmplifier)...................................25
Connecting to an Audio System
Description
Connecting to a TV (Component).................21
Connecting to a TV ( S-Video)........................22
Connecting to a TV (Video)............................23
( DOLBY Digital, DTS Amplifier).....................26
Basic Functions of Your Blu-ray
Disc Player.........................................................27
Before Playing..................................................27
On-Screen Menu Navigation.........................28
Playing a Disc....................................................28
Skipping Tracks................................................29
Slow Motion Play/Step Motion Play.............29
....................................................30
Reset Settings..................................................30
Firmware Upgrade..........................................31-32
System Information........................................33
Setting Up the Video Display.........................34
Picture Aspect..................................................34
Resolution.........................................................35
Resolution According to the Output Mode.........35-36
Setting Up the Audio Options.......................37-38
Setting Up the Language Options................39
Setting Up the Parental Lock.........................40-41
............................................42
Using the Display Function............................42
Using the Top Menu & Pop Menu..................43
Repeat Play........................................................44
Selecting the Audio Language......................44
Selecting the Subtitle Language..................44
Changing the Camera Angle..........................45
............................................46
Playing an Audio CD (CD-DA).........................46
Playing an MP3.................................................46
Audio CD (CD-DA)/MP3 Screen Elements...........46
(Used For Audio)..............................................47
Repeat Audio CD (CD-DA) & MP3..................47
..............50
.........................................51-52
....................................................53
System setup
Watching a Movie
Listening to Music
Watching Video (from video disk or USB)
Troubleshooting
Specifications
Viewing Pictures................................................48
About the Play List..............................................48
How to Create a Play List...................................48
About the Title List...........................................49
Buttons on the Remote Control
Listening to Music............................................49

Getting Started
DISC TYPE AND CHARACTERISTICS
Disc types that can be played
Disc Types Disc Logo Recorded content Disc Shape Max. Playing minute
BD-ROM
DVD-VIDEO
AUDIO-CD
DVD-RW
(V mode and
finalized only)
DVD-R
(V mode and
finalized only)
CD-R/-RW
DVD-RW/-R
AUDIO+VIDEO
AUDIO
JPEG
MP3
AUDIO+VIDEO
AUDIO+VIDEO
AUDIO+VIDEO
Single sided (25GB/50GB)
Single sided (5 inches)
Double sided (5 inches)
Single sided (3 1/2 inches)
Double sided (3 1/2 inches)
Single sided (5 inches)
Single sided (3 1/2 inches)
5 inches (4.7GB)
5 inches (4.7GB)
Playing time depends
on the Title
240
480
80
160
74
20
480
(EX: Extended Play)
480
(EX: Extended Play)
・
・
Disc types that can be played
This player is compatible with the NTSC color system only.
PAL discs will not play.
Blu-ray Disc Dolby Digital Plus DTS-HD High Resolution Audio
NTSC broadcast system in U.S.A,
Canada, Korea, Japan Dolby TrueHD DTS-HD Advanced Digital Out
Digital Audio MP3 Stereo Java
6

Getting Started
Discs that cannot be played
Blu-ray Discs with a region code other than "Region A".
BD-R, BD-RE
HD DVD Disc
DVD-Video with a region number other than "1" or "ALL".
DVD-RAM
3.9GB DVD-R Disc for Authoring.
DVD-RW (VR mode)
DVD-ROM / PD / MV-Disc, etc
CVD / CD-ROM / CDV / CD-G / CD-I / LD
[NOTE]:
Some commercial discs and DVD discs purchased outside your region may not be playable with this product.
When these discs are played, either "No disc." or "Please check the regional code of the disc." will be displayed.
If a DVD-R / -RW disc has not been recorded properly in DVD video format, it will not be playable.
The unit cannot play CD-R / -RW and DVD-RW / -R recorded content such as divx, avi, mpg, mov, wma.
Region Code
Both the Blu-ray Disc Player and the discs are coded by region. These regional codes must match in order to play
the disc. If the codes do not match, the disc will not play.
The Region Number for this Blu-ray Disc Player is described on the rear panel of the Blu-ray Disc Player.
[NOTE]:
Playback may not work for some types of discs, or when specific operations, such as angle change and
aspect ratio adjustment, are being performed. Information about the disc is written in detail on the box. Please
refer to this necessary.
Do not allow the disc to become dirty or scratched. Finger prints, dirt, dust, scratches or deposits of cigarette
smoke on the recording surface may make it impossible to use the disc for playback.
Discs with PAL programs recorded on them cannot be played using this product.
When a BD-Java title is played, loading may take longer than a normal title, or some functions may perform
slowly.
・
・
・
・
・
・
・
・
・
・
・
・
・
・
・
・
Disc Type Blu-ray DVD-Video
Region code A
BD Region code Area
A
B
C
North America, Central America, South America, Korea, Japan, Taiwan, Hong Kong and
South East Asia.
Europe, Greenland, French territories, Middle East, Africa, Australia and New Zealand.
India, China, Russia, Central and South Asia.
7

Getting Started
Disc Types
Disc Format
BD-ROM
Blu-ray Disc Read Only Memory. A BD-ROM disc contains pre-recorded data. Although a BD-ROM may contain
any form of data, most BD-ROM discs will contain movies in High Definition format, for playback on Blu-ray Disc
Players. This can play back pre-recorded BD-ROM discs.
DVD-Video
A digital versatile disc (DVD)can contain up to 135-minutes,8 audio languages and 32 subtitle languages. It is
equipped with MPEG-2 picture compression and Dolby Digital surround, allowing you to enjoy vivid and clear
theatre quality images.
When switching from the first layer to the second layer of a dual-layered DVD Video disc, there may be
momentary distortion in the image and sound. This is not a malfunction of the unit.
Once a DVD-RW/-R recorded in Video Mode is finalized, it becomes DVD-Video.Pre- recorded (pre-stamped)
commercial DVDs with movies are also referred to as DVD-Videos. This unit can play back pre-recorded
commercial DVD discs (DVD Video discs) with movies.
Audio CD
An audio disc on which 44.1kHz PCM Audio is recorded.
This unit can play back CD-DA format audio CD-R and CD-RW discs.
This unit may not be able to play some CD-R or CD-RW discs due to the condition of the recording.
CD-R/-RW
Use a 700MB (80 minutes) CD-R/-RW disc. If possible, do not use a 800MB (90 minutes) or above disc, as the
disc may not play back.
If the CD-R/-RW disc was not recorded as a closed as a closed session, you may experience delays when playing
back the beginning of the disc or all recorded files may not play.
Some CD-R/-RW discs may not be playable with this unit, depending on the device which was used to burn
them. For contents recorded on CD-R/-RW media from CDs for your personal use, playability may vary
depending on contents and discs.
DVD-R Disc Playback
Once a DVD-R recorded in Video Mode is finalized, it becomes DVD-Video.
This unit can play back DVD-R discs recorded . It may not be able to play some DVD-R discs depending on the
disc and the condition of the recording.
DVD-RW Disc Playback
Playback can be performed with DVD-RW discs in the Video Mode and finalized only.
Once a DVD-RW recorded in Video Mode is finalized, it becomes DVD-Video. Ability ro play back may depend
on recording conditions.
Using MP3 disc
CD-R/-RW,DVD-RW/-R recorded with UDF,ISO9660 or JOLIET format can be played back.
Only MP3 files with the ".mp3" or ".MP3" extension can be played.
Playable bit-rate range is from 56Kbps to 320 Kbps.
・
・
・
・
・
・
・
・
・
・
・
・
・
・
・
・
8

・
・
・
・
・
・
・
・
・
・
・
・
・
・
・
・
・
・
・
・
・
・
Playable sample-rate is 16KHz to 48KHz.
The unit can handle a maximum of 1500 files and folders under a parent folder. For MP3 files recorded with a
VBR (Variable Bit Rates), the sound may cut in and out.
Using JPEG disc
CD-R/-RW,DVD-RW/-R recorded with UDF,ISO9660 or JOLIET format can be played back.
Only JPEG files with the ".jpg", ".JPG", ".jpeg" or "JPEG" extension can be displayed.
Progressive JPEG is supportde.
DVD-RW/-R(V)
This is a format that used of recording data on a DVD-RW or DVD-R disc. The disc can be played by this Blu-ray
disc player once it has been finalized.
If a disc that has been recorded in video Mode by a different maker's recorder but has not been finalized, it
cannot be played by this Blu-ray disc player.
Disc Handing
Use discs with regular shapes. If an irregular disc(a disc a special shape)is used, this Blu-ray disc player may be
damaged.
Holding discs
Avoid touching the surface of a disc where recording is performed.
Blu-ray Discs
If the player is not used for a long period of time, remove the Blu-ray
Disc from the player and store it in its case.
Be careful not to leave fingerprints or scratches on the surface of the
Blu-ray Disc.
DVD-RM and DVD-R
Clean with an optional PD disc cleaner (LF-K200DCA1 where available).
Do not use cleaners or cloths for CDs to clean DVD-RW/-R discs.
DVD-Videao,Audio-CD
Wipe off dirt or contamination on the disc with a soft cloth.
Cautions on handing discs
Do not write on the printed side with a ball-point pen or pencil.
Do not use record cleaning sprays or antistatic. Also, do not use volatile chemicals, such as benzene or
thinner.
Do not apply labels or stickers to discs.(Do not use discs fixed with exposed tape adhesive or leftover peeled-
off stickers.)
Do not use scratch-proof protectors or covers.
Do not use discs printed with label printers available on the market.
Do not load warped or cracked discs.
Disc Storage
Be careful not to harm the disc because the data on these discs is highly vulnerable to the environment.
Do not keep under direct sunlight.
Keep in a cool ventilated area.
Store vertically.
Disc Storage&Management
Getting Started
9

Getting Started
・
・
Keep in a clean protection jacket.
If you move your Blu-ray disc player suddenly from a cold place to a warm place, condensation may generate
on the operating parts and lens and cause abnormal disc playback. If this occurs, do not connect the plug to
the power outlet and wait for two hours. Then insert the disc and try to play back again.
10

888:88:88
Description
Front Panel
123 4 56
78
Turns the Blu-ray disc player on and off.
Open and closes the disc tray.
Press to play a disc or pause the playback.
Press to go to previous list / track / chapter.
Press to go to next list/track/chapter.
Stops disc playback.
Opens to accept a disc.
Front Panel Display
7
68
59
Disc type indicators.
Playback indicator.
Pause .
Rotates when the disc is spinning.
Playing time / clock / current status indicator.
indicator
DVD / Indicator
Rotation
Repetition Playback Indicator
DTS
DOLBY Digital
CD / BD
PLAYBACK Indicator
PAUSE Indicator
Chapter Indicator
Operating
Indicator
Indicator
1
2
3
4
5
6
7
8
9
( )
( / ) Play / Pause Button
( ) Previous Button
( ) Next Button
( ) Stop Button
( ) Remote Control Sensor
Disc Tray
Power Button
( ) Open / Close Button
888:88:88
1
2
3
4
5
6
7
8
1 2 4
3
11

Description
Rear Panel
1 3 5 6 72 4
HDMI OUT
VIDEO OUT
S-VIDEO OUT
COMPONENT VIDEO OUT
OPTICAL OUT
AUDIO OUT
5.1 CH AUDIO OUT
FAN
AC INLET
COAXIAL OUT
1
2
3
4
5
6
7
8
9
Use the HDMI cable, connect this HDMI output terminal to
the HDMI input terminal on your TV for the best quality picture.
Connects to the input of external equipment using a video
cable.
Connects to the input of external equipment using an
S- Video cable.
Connects to equipment having component video input.
Connects to an amplifier having a digital coaxial audio input
jack.
Connects to an amplifier having a digital optical audio input
jack.
Connects to the audio input of external equipment using audio
cables.
Connects to a 5.1CH analog input on an A/V amplifier.
The fan always revolves when the power is on. Ensure a minimum of 4
inches of clear space on all sides of the fan when installing the product.
AC100~240V 50/60Hz
Accessories
Remote control Batteries Audio cable HDMI Cable User's manual Warranty card
Remote Control............................1 Batteries............................1
Audio Cable.................................1 HDMI Cable........................1
User's manual..............................1 Warranty Card.....................1
910
10
8
12

888:88:88
Remote Control
Loading Batteries
1. Push downward and outward the
leaf spring to remove the battery
compartment cover.
2. Insert two size AAA batteries
according to the "+" and "-"
markings.
3. Close the cover.
[NOTE]:
A. Do NOT mix different types together, or old batteries with new batteries.
B. While the remote controller will not be used for an extended period of time, remove the batteries to prevent
possible corrosion.
C. To prevent corrosion resulting in damage, remove exhausted batteries immediately.
Where the remote exhausted batteries immediately. Where the remote controller doesn't appear to operate
normally, replace both of the batteries.
D. Typical life for the batteries provided with this product is about 6 months. The life expectance may vary
according to the use status.
Point the remote controller toward the remote sensor on your DVD home theatre center. Upon receipt of the
signal from the remote controller, the equipment will operate accordingly. The description in this manual is
based on the buttons on the equipment. You may use the counterparts on the remote controller to do the same
[NOTE]:
A. Do not place this equipment in a place exposed to direct sunlight or strong light source like inverting
fluorescent light, or else it may interfere with correct operation of the remote controller.
B. When other similar remote controller is used in the same room, or when this product is used near other
equipment using infrared ray, interference with the operation of this remote controller may occur.
C. Do not place any object on the remote controller or else it may cause unintentional depression of the buttons
and waste the batteries unnecessarily.
D. The front of the chassis should not be glazed with color glass, or else ti may cause interference with normal
operation of the remote controller.
E. Any barrier between the remote controller and remote sensor will inactivate any operation of the remote
controller.
F. The operating range between the remote controller and the equipment shall be no more than 5 meters (16
feet). When the operating range becomes shorter, replace the batteries with new ones..
Operating with the Controller
About: 5m
300
300
13

Remote Control
STANDBY Button
NUMBER Button
TOP MENU Button
PLAY Button
AUDIO Button
RED Button
PAUSE/STEP Button
SUBTITLE Button
SLOW Button
GREEN Button
ENTER / DIRECTION Buttons
( )
OPEN/CLOSE Button
ZOOM Button
POP MENU Button
RETURN Button
BLUE Button
YELLOW Button
RESOLUTION Button
ANGLE Button
INFO Button
SEARCH Button
PIP Button
REPEAT Button
SETUP Button
TITLE Button
STOP Button
FORWARD SKIP Button
REVERSE SKIP Button
FORWARD SEARCH Button
REVERSE SEARCH Button
MUTE Button
14

Remote Control
Regarding The Battery
If the remote does not operate properly:
Check the polarity + - of the batteries (Dry-Cell).
Check if the batteries are drained.
Check if remote sensor is blocked by obstacles.
Check if there is any fluorescent lighting nearby.
Dispose of batteries according to local environmental regulations. Do not put them in the household trash.
・
・
・
・
STANDBY Button
NUMBER Buttons
RESOLUTION Button
INFO Button
ANGLE Button
OPEN/CLOSE Button
MUTE Button
PLAY Button
SLOW Button
PAUSE / STEP Button
AUDIO Button
SUBTITLE Button
TOP MENU Button
ENTER / DIRECTION
Buttons ( )
Power On/Off
Digital button, for item
selection & programming
Change the resolution of
output
Confirm selection / For
directions selection
Displays current setting or
disc status
Multi-angle optional playing
Mute on/off
Play
Pause /Step
Slow play
Select the subtitle language
Stereo / Left audio output
/ Right audio output switch
Open/Close the disc tray
Display the disc root menu
SETUP Button
RETURN Button
REPEAT Button
REVERSE SKIP Button
REVERSE SEARCH
Button
TITLE Button
POP MENU Button
FORWARD SKIP
Button
FORWARD SEARCH
Button
STOP Button
ZOOM Button
SEARCH Button
PIP Button
Reverse play
Return selection
Return to last item or
chapter in playing mode
Allows you to repeat a
title, chapter, track or disc.
Return to the main menu
in playing mode
Enter setup menu
Display the disc menu
Play next item or chapter in
playing mode
Stop
Fast forward play
Zoom in or off
Search a chapter or time to
start playing
BUTTON INTRO BUTTON INTRO
15

Remote Control
BUTTON FOR BD-R FOR DVD FOR CDDA FOR ISO
Power On/Off
Change the resolution of output
Change angle Not supported
Digital button, for item selection & programming Not supported
Confirm selection / For directions selection
Playing the disc or resume playing if in paused mode
Step status if in paused mode / Paused if in playing mode
Change audio stream Not supported
Mute on/off
Select the subtitle language Not supported
Slow play
Open/Close the disc tray
Displays The status of player, Elapsed time
of dis playing, Current title /chapter,
Frequency or Bitrate
c
Displays Track
number, duration,
elapsed time
Displays File name,
file size, format,
duration, elapsed time
STANDBY Button
RESOLUTION Button
ANGLE Button
NUMBER Buttons
TOP MENU Button
ENTER / DIRECTION
Buttons ( )
PLAY Button
PAUSE / STEP Button
AUDIO Button
MUTE Button
SUBTITLE Button
SLOW Button
OPEN/CLOSE Button
INFO Button
16

Remote Control
BUTTON FOR BD-R FOR DVD FOR CDDA FOR ISO
Search a chapter or time to start playing
Allows you to repeat disc, track or random
Allows you to repeat off, title or chapter
Adjust basic functions such as brightness, contrast, hue, saturation... this takes effect
only when playing video
Zoom in or off
Display pop-up menu
during playback
Go to the root of
Title
Return invalid
Stop playing disc
temporarily, press
Stop again to return
to Main Menu, or hit
Play to resume
playing disc
Stop playing disc permanently to return to
Main Menu
Stop playing the
current file and
return to file browser
Jump to next chapter or next track or next file in isodisc
Jump to previous chapter or next track or previous file in iso disc
Forward at x8, x16, x32 or x48 speed.
Jump to next chapter or next track or next file in iso disc
SEARCH Button
PIP Button
REPEAT Button
SETUP Button
ZOOM Button
TITLE Button
POP MENU Button
RETURN Button
STOP Button
FORWARD SKIP
Button
REVERSE SKIP
Button
FORWARD SEARCH
Button
REVERSE SEARCH
Button
17

HD MI
HDMI
Connections
This section involves various methods of connecting the Blu-ray disc player to other external components.
1. Using an HDMI-HDMI cable connect the HDMI OUT terminal on the rear of the Blu-ray disc player to the HDMI
IN terminal of your TV.
2. Press the input selector on your TV remote control until the HDMI signal from the Blu-ray appears on your TV
screen.
If you have set the remote control to properly operate with your TV , press the TV INPUT SEL.button on the
remote control and select HDMI as the external source of the TV.
[NOTE]:
If the HDMI cable is connected or removed during playback of a CDDA, MP3 or JPEG file, the player will stop
playing.
The player's video output will automatically change to HDMI mode when connecting an HDMI cable while
power is on).
Depending on your TV, certain HDMI output resolutions may not work.
Please refer to the use's manual of your TV.
Connecting to a TV with an HDMI Cable
HDMI auto detection function
[NOTE]:
・
・
HD MI
HDMI
HDMI Cable
TV
18
Table of contents
Other Curtis Mathes Blu-ray Player manuals