Sencor SPT-600 User manual

USER’S MANUAL
NÁVOD K OBSLUZE
NÁVOD NA OBSLUHU
FELHASZNÁLÓI KÉZIKÖNYV
INSTRUKCJA OBSŁUGI
MICRO MUSIC SYSTEM
HUDEBNÍ MIKROSYSTÉM
HUDOBNÝ MIKROSYSTÉM
ZENEI MIKRORENDSZER
MIKROSYSTEM MUZYCZNY
SPT-600


EN - 3
TO PREVENT FIRE OR SHOCK HAZARD. DO NOT EXPOSE THIS APPLIANCE TO RAIN OR
MOISTURE.
THIS APPLIANCE SHALL NOT BE EXPOSED TO DRIPPING OR SPLASHING WATER AND THAT
NO OBJECT FILLED WITH LIQUIDS SUCH AS VASES SHALL BE PLACED ON APPARATUS.
The exclamation point within
an equilateral triangle is
intended to alert the user to
the presence of important
operating and maintenance
(servicing) instructions in the
literature accompanying the
appliance.
CAUTION
RISK OF ELECTRIC
SHOCK DO NOT OPEN
WARNING: TO REDUCE
THE RISK OF ELECTRIC
SHOCK, DO NOT REMOVE
COVER (OR BACK). NO
USER-SERVIC-ABLE PARTS
INSIDE. REFER SERVICING
TO QUALIFIED SERVICE
PERSONNEL.
The lightning flash with
arrowhead symbol, within an
equilateral triangle, is
intended to alert the user to
the presence of unisulated
Ādangerous voltage” within
the product’s enclosure that
may be of sufficient
magnitude to constitute a
risk of electric shock to
people.
1. Read these instructions.
2. Keep these instructions.
3. Heed all warnings.
4. Follow all instructions.
5. Do not use this apparatus near water.
6. Clean only with dry cloth.
7. Do not block any ventilation openings. Install in accordance with the manufacturer's
instructions.
8. Do not install near any heat sources such as radiators, heat registers, stoves, or other
apparatus (including amplifiers) that produce heat.
9. Do not defeat the safety purpose of the polarized or grounding-type plug. A polarized plug
has two blades with one wider than the other. A grounding type plug has two blades and a
third grounding prong. The wide blade or the third prong are provided for your safety. If
the provided plug does not fit into your outlet, consult an electrician for replacement of the
obsolete outlet.
10. Protect the power cord from being walked on or pinched particularly at plugs, convenience
receptacles, and the point where they exit from the apparatus.
11. Only use attachments/accessories specified by the manufacturer.
12. Use only with the cart, stand, tripod, bracket, or table specified by the manufacturer, or
sold with the apparatus. When a cart is used, use caution when moving the cart/apparatus
combination to avoid injury from tip-over.

EN - 4
Unplug this apparatus during lightning storms or when unused for long periods of time.
Refer all servicing to qualified service personnel. Servicing is required when the apparatus
has been damaged in any way, such as power-supply cord or plug is damaged, liquid has
been spilled or objects have fallen into the apparatus, the apparatus has been exposed to
rain or moisture, does not operate normally, or has been dropped.
Grounding or Polarization - This product may be equipped with a polarized alternating-
current line plug (a plug having one blade wider than the other). This plug will fit into
the power outlet only one way. This is a safety feature. If you are unable to insert the plug
fully into the outlet, try reversing the plug. If the plug should still fail to fit, contact your
electrician to replace your obsolete outlet. Do not defeat the safety purpose of the
polarized plug.
Alternate Warnings - This product is equipped with a three-wire grounding-type plug, a
plug having a third (grounding) pin. This plug will only fit into a grounding-type power
outlet. This is a safety feature. If you are unable to insert the plug into the outlet, contact
your electrician to replace your obsolete outlet. Do not defeat the safety purpose of the
grounding-type plug.
Ventilation - Slots and openings in the cabinet are provided for ventilation and to ensure
reliable operation of the product and to protect it from overheating, and these openings must
not be blocked or covered. The openings should never be blocked by placing the product on
a bed, sofa, rug, or other similar surface. This product should not be placed in a built-in
installation such as a bookcase or rack unless proper ventilation is provided or the
manufacturer's instructions have been adhered to.
The MAINS plug or an appliance coupler is used as the disconnect device, the disconnect
device shall remain readily operable.
13.
14.
15.
16.
17.
Class ll equipment symbol
This symbol indicates that the unit
has a double insulation system.
CAUTION: USE OF ANY CONTROLS, ADJUSTMENTS, OR PROCEDURES OTHER THAN
THOSE SPECIFIED HEREIN MAY RESULT IN HAZARDOUS RADIATION
EXPOSURE

EN - 5
Unit Functions
23
56 7
8
9
1011121314
15
16
17
18
10. Button
11. Button
12. VOLUME Control
13. REPEAT/X-BASS Button
14. SOURCE Dock
15. EJCET Button
16. PROGRAM Button
17. TIMER Button
18. STANDBY Button
1. Speakers
2. IR Sensor
3. LCD Display
4. CD Tray
5. BAND/ID3 Button
6. iPod Dock
7. FLASH USB Slot
8. ALBUM/PRESET -/+ Button
9. Button
41 1

EN - 6
19 212223 24
Remote Control
1. STANDBY/ON Button
2. ST/MONO Button
3. SOURCE Button
4. REPEAT/PTY Button
5. INTRO Button
6. PRESET/ALBUM Button
7. MUTE Button
8. VOL- Button
9. /BAND Button
10. Button
11. BASS Button
12. TIMER Button
13. SLEEP Button
14. TREBLE Button
15. Button
16. PLAY/PAUSE Button
17. VOL + Button
18. PRESET/ALBUM Button
19. SELECT Button
20. RANDOM/RDS Button
21. PROG./CLK Button
22. MENU Button
23. SNOOZE Button
1
2
3
4
5
6
7
8
9
10
11
12
22
21
20
19
18
17
16
15
14
13
23
19. DC Adapter Jack
20. HEADPHONE Jack
21. AUX OUT Jack
22. AUX IN Jack
23. AM ANTENNA Socket
24. FM ANTENNA Socket
20

EN - 7
Remote Control
Battery Installation
Battery Replacement
If the distance required between the remote control unit and main unit decreases, the battery is
exhausted. In this case, replace the battery with a new one.
Precautions concerning batteries
Do not heat or disassemble batteries and never dispose of old batteries by throwing them in a fire.
The remote control battery is already installed at the factory. When the remote control stops
operating, replace the battery with a new one.
Open the battery door.
Insert a ಯCR2032ರ3-volt lithium battery. Make sure the polarity
(the + and - side of the battery) is correct.
Close the battery door.
3
2
1
CR2032
1
2
3
The provided Remote Control Unit allows the unit to be operated from a distance.
When operating the remote control unit, point it towards the remote sensor on the front panel of the
unit.
Even if the remote control unit is operated within the effective range (5m), remote control operation
may be impossible if there are any obstacles between the unit and the remote control.
If the remote control unit is operated near other products which generate infrared rays, or if other
remote control devices using infrared rays are used near the unit, it may operate incorrectly.
Conversely, the other products may also operate incorrectly.

EN - 8
Getting started
Compatible iPod Software
Make the following settings on your
iPod/iPhone’s menu to output video to a
TV via this system’s dock.
In the [Video] menu, select [Video
Settings]. Set [TV OUT] to [On] or [Ask].
If you have set [TV OUT] to [Ask], your
iPod/iPhone prompts you each time you
play a video to specify whether to output it
to a TV.
The unit comes mounted with an adapter for
iPod/iPhone with color display (40GB, 60GB),
“60GB (color) + Photo 40GB/60GB”.
To play your iPod/iPhone through the unit, you
have first to check if the factory mounted
adapter fits your model of iPod/iPhone. If it does
not, you have to replace it with a correct one, as
explained below.
Use a commercially available adapter to play
iPod/iPhone with dock connector (with four
buttons under the display).
Docking an iPod/iPhone to this system
iPod/iPhone video output
1. Remove the adapter from the Dock of
the unit.
Hold the left and right sides of the adapter
and gently pull it up.
2. Choose the Dock adapter that fits your
iPod/iPhone.
“nano” for 1st and 2nd generation iPod
nanos.
“iPhone / Classic 160GB” for iPhones and
160 GB iPod Classic models.
“20GB + U2” for 20 GB iPods with Click
Wheels, U2 Special Edition iPods, 30 GB
iPods with video and 80 GB iPod Classic
models.
3. Insert the adapter into the Dock of the
unit.
Fit the front edge of the adapter into the
Dock, and then press the back edge of the
adapter into the Dock until a slight “click” is
heard indicating the adapter is inserted
correctly.
When you need to remove the adapter, hold
the left and right sides of the adapter and
gently pull it up.
In case your iPod/iPhone will not work with the
unit or with the remote control unit, software
update may solve the problem.
Visit the Apple website and download the
latest iPod/iPhone Software.
If you output video to a TV from your
iPod/iPhone, the video is not displayed on
the iPod/iPhone’s screen.
iPod touch does not contain this menu.
You will have to specify whether to a
output video to a TV each time you play it.
NOTE:
If you specify [Slide to power off] on your
iPod touch, you cannot use the alarm even
if the iPod touch is docked to this system.
To use the alarm on your iPod touch, do
not select [Slide to power off]. (The screen
can be turned off without any problem.)
If Video is displayed on your iPod touch’s
screen, you cannot use the alarm even if
the iPod touch is docked to this system.
To use the alarm on your iPod touch,
select any item other than Video.
Using the alarm on your iPod touch
“60GB (color) + Photo 40GB / 60GB” for
40 GB iPods with Click Wheels, iPods with
color displays, 60 GB iPods with video and
160 GB iPod Classic models.

EN - 9
Basic Operation
Mute
To mute the sound temporarily, press the
MUTE button.
1. Press the STANDBY button on unit or
STANDBY ON on remote control.
2. Select a source by pressing the
SOURCE button.
To listen to an external source connected
to the AUX IN jack, select AUX.
In iPod and AUX modes, the display
always shows the clock.
3. Play the source and adjust the volume
using the VOLUME control or buttons.
While muting is engaged, “MUTING”
appears on the display.
If you change the volume during the
muting, the mute will be canceled.
Sleep Timer
Repeatedly pressing the SLEEP button
permits setting an interval (from 90 down to
15 minutes) after which you want the unit to
automatically turn off and shift into Standby
mode.
(off)
120 90 ĂĂĂ15
The sleep indicator SLEEP appears on
the display
If you want to check the remaining time,
press the SLEEP button once. The
remaining time will be displayed for a few
seconds.
Tone Control
1. Press the BASS or TREBLE button.
The level can be adjusted from –4 to +4.
To adjust the level of low frequency sound
range, press the REPEAT/X-BASS button
long on the unit or BASS button on the
remote.
To adjust the level of high frequency
sound range, press the TREBLE button.
2. Within 3 seconds, press the VOLUME
buttons to change the setting.
Intro
Press the INTRO button during stop mode
to playback the first 10 seconds of each
title
Press the INTRO button again and the unit
plays the current selected track.

EN - 10
Listening to iPod
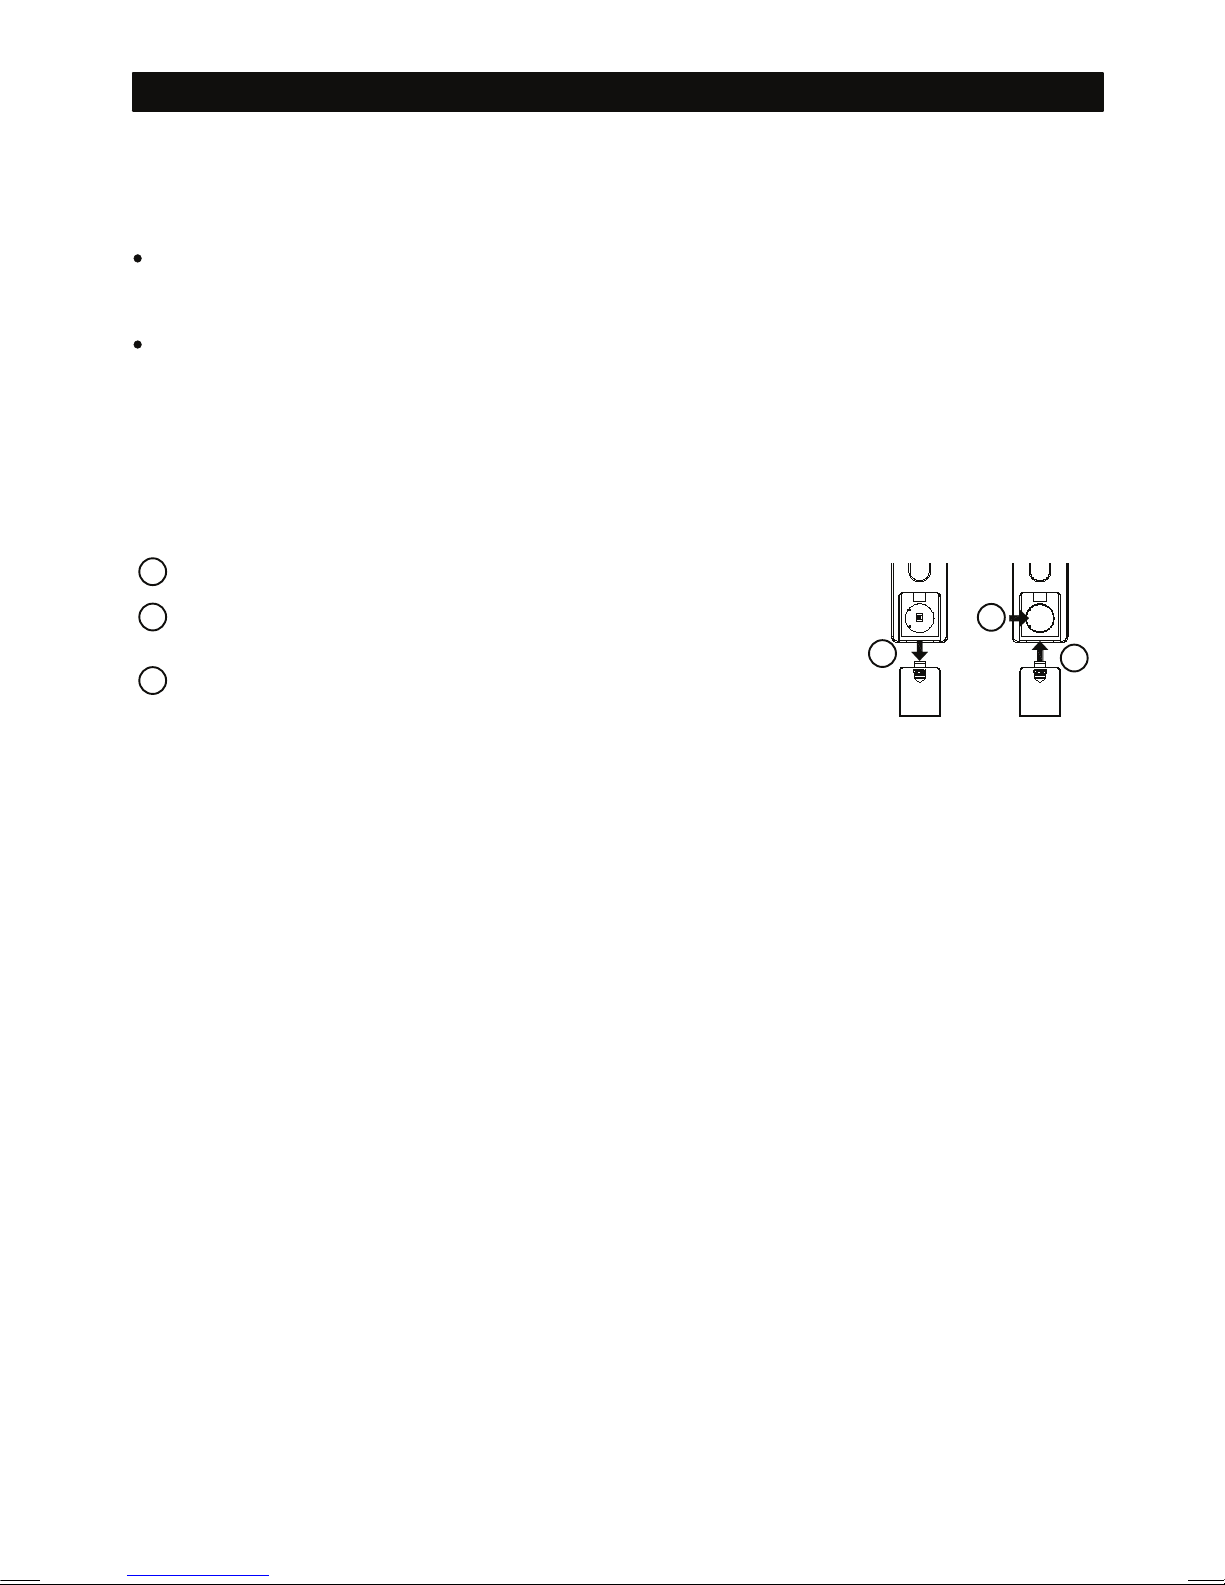
Insert the iPod/iPhone into the Dock of the
unit.
If an iPod/iPhone that is in playback mode is
inserted into the Dock, the unit will
automatically turn on and start playback of
the iPod/iPhone.
When headphones are plugged into the
iPod/iPhone, sound comes from both the
speakers of the unit.
Press the PRESET/ALBUM buttons ( /
) to scroll to the menu item you want,
and then press the SELECT button.
Select the menu item
Then press the PLAY/PAUSE button ( )
on the iPod/iPhone or the unit.
The unit will automatically turn on and start
playback from the iPod/iPhone’s song list.
Make sure to use an appropriate Dock
adapter (see “Getting started” on page 6).
The battery of the iPod/iPhone is recharged
to the full when the iPod/iPhone is docked
and the unit is ON.
In standby mode, unit can not recharge
iPod/iPhone because of minimised power
consumption to meet the regulation of IEA.
If you need to recharge iPod/iPhone, please
power on the unit.
The STOP button ( ) doesn’t work in
iPod/iPhone mode.
When in AM mode, iPod/iPhone can not be
recharged.
To select iPod mode
Select “iPod” using the SOURCE button. If an
iPod/iPhone is already docked, playback will
start.
When no iPod/iPhone is docked, the iPod
indicator on the display blinks.
In iPod mode, press the PLAY/PAUSE
button ( ) to start or pause playback.
To suspend playback temporarily
(pause mode)
Press the PLAY/PAUSE button ( )
during playback. Playback stops at the
current position. To resume playback, press
the PLAY/PAUSE button ( ) again.
Search for a part of a track
During playback, hold down the SKIP button
( or ) for more than 2 seconds
and release it when the part you want to
listen to is found.
During playback, press the RANDOM button
to change the random mode.
Each time the RANDOM button is pressed,
the RANDOM setting of iPod is changed as
follows:
To activate the random mode
If iPod/iPhone/iPod touch is set to random
songs or albums, the Random icon ( )
appears in the iiPod/iPhone’s display.
During playback, press the REPEAT button
to change the repeat mode.
Each time the REPEAT button is pressed,
the REPEAT setting of iPod is changed as
follows:
To activate the repeat mode
To skip to the next or a previous track
During playback, press the SKIP button (
or ) repeatedly until the desired track is
found. The selected track will be played from
the beginning.
If the iPod/iPhone is set to repeat one song,
the Repeat One icon ( ) appears in the
iPod’s display.
If the iPod/iPhone is set to repeat all songs,
the Repeat icon ( ) appears in the
iPod/iPhone’s display.
When the button is pressed during
playback, the track being played will be
played from the beginning. To return to the
beginning of the previous track, press the
button twice.
(off)
One All
songs off
iPod/iPhone
/iPod touch
mode

EN - 11
Listening to a Disc
1. Press the SOURCE button to select
“”.
2. Press the EJECT button.
3. Put a disc into the center spindle of the
player with the label side facing you.
Never put more than one disc in the
mechanism at a time.
Ensure that the disc is correctly mounted
on the spindle and locked in place.
4. Press the EJECT button to close
the CD door.
MP3/WMA files recorded out of folders are
automatically recognized as in the “001
(ROOT)” folder, and playback starts from
the first file.
Press the disc into the spindle until a slight
“click” is heard indicating the disc is
mounted correctly.
,WWDNHVDIHZVHFRQGVIRUWKHXQLWWRORDG
WKHGLVFUHDGLQJ72&FDQEHVKDOO
automaticallySOD\1REXWWRQVZLOOZRUN
GXULQJORDGLQJ
When no disc is loaded in the CD player,
“NO DISC” is displayed.
5. Press the STOP button ( ) to stop
playback.
When the playback of all the tracks/files
has finished, the unit stops automatically.
Do not tilt the unit with a disc inserted. It
may damage the disc and cause a
malfunction.
To remove the disc
Press the EJECT button to close the CD
door.
To insert a disc again, insert after the disc
is completely ejected.
Audio CD
current track
number
elapsed time of
current track
MP3/WMA disc
current file
number
elapsed time of
current file
current folder
number
Playback starts from the first track of the
disc.
When a CD is stopped
When a MP3/WMA disc is stopped
total tracks total playing time
total tracks
total number
of folders

EN - 12
Listening to an USB
1. Press the SOURCE button to select
“”.
2. Push the cover of usb solt to left.
3. Insert your USB memory into the USB
slot.
Pay attention to the direction of insertion.
Playback starts from the first track of the
usb.
4. Press the STOP button ( ) to stop
playback.
MP3/WMA files recorded out of folders are
automatically recognized as in the “001
(ROOT)” folder, and playback starts from
the first file.
When the playback of all the tracks/files
has finished, the unit stops automatically.
It takes a few seconds for the unit to load
the USB memoryUHDGLQJ72&FDQEH
VKDOOautomaticallySOD\ No buttons will
work during loading.
A high-capacity USB hard disc cannot be
used with this unit. Stopping playback temporarily(Pause
mode)
During playback, press the PLAY/PAUSE
button ( ). Playback stops at the
current position. To resume playback,
press the PLAY/PAUSE button ( )
again.
Stopping playback
Press the STOP button ( ) to stop
playback.
Searching for a part of a track/file
During playback, hold down the SKIP
button ( or ) and release it
when the part you want to listen to is
found.
Basic playback (disc/USB)
During programmed playback, the next or
previous track/file in the program is played.
Skipping to the next or a previous
track/file
During playback or pause mode, press the
SKIP button ( or ) repeatedly
until you find the desired track/file.
The selected track/file will be played from
the beginning.
In the stop mode, press the SKIP button
( or ) repeatedly to find the
desired track/file, then press the
PLAY/PAUSE button ( ).
If the button is pressed once during
playback, the track/file being played will be
played from the beginning.
To return to the beginning of the previous
track/file, press the button twice.
total number of files
total number
of folder
current file
number
elapsed time of
current file
current folder
number

EN - 13
Selecting a folder (MP3/WMA)
Press the PRESET button ( or )
to skip to next or previous folder.
Basic playback (disc/USB)
Displaying MP3/WMA information
During playback of an MP3/WMA disc/
USB memory, prss the ID3 button. The
information about the current track is
displayed as follows:
The display of this unit can only show single-
byte letters and numbers. If a file information
uses Japanese, Chinese or other double-byte
characters, playback is possible but the
name will not be shown correctly.
Folder name/file name are displayed up to 15
characters from the head. TITLE/ARTIST/
ALBUM are displayed up to 30 characters
from the head.
Programmed Playback (1)
Up to 64 tracks can be programmed in the
desired order.
To cancel the program mode, press the
STOP button ( ).
1. Press the SOURCE button to select
.
2. Press the PROGRAM button.
“MEM” lights up in the display.
3. Press the SKIP button ( or )
repeatedly to select a folder of MP3/WMA
disc, USB memory then press the
PROGRAM button.
Audio
CD
MP3/
WMA
MP3/
WMA
4. Press the SKIP button ( or )
repeatedly to select a track/file, then
press the PROGRAM button.
Audio
CD
MP3/
WMA
The track/file is programmed, and next
program number “P-02” is displayed.
Repeat steps 3 and 4 to program more
tracks/files.
You can program up to 64 tracks.
MP3/WMA files recorded out of folders are
recognized in the “001” (ROOT) folder.
Skip this step when playing an audio CD.
TITLE
ARTIST
File name (scrolling)
ALBUM

EN - 14
Changing the program
In the stop mode, press the PROGRAM
button or the STOP button ( ) for 2
seconds to cancel program.
Clearing program
In the stop mode, press the PROGRAM
button repeatedly. The track number and
program number will be shown on the
display.
Checking the programmed order
5. When the selection of track/file numbers
is completed, press the PLAY/PAUSE
button ( ) to start program
playback.
When the playback of all the programmed
tracks/files has finished, or if you press the
STOP button ( ), the MEM indicator will
go off and the program mode will be
cancelled. The program is retained in
memory until you eject the disc or take out
the USB memory or the power is interrupted.
You can return to the programmed playback
by pressing the PROGRAM button and the
PLAY/PAUSE button ( ).
Random function doesn’t work during
programmed playback.
Adding a track to the end of the program
Programmed Playback (2)
In the stop mode, press the PROGRAM
button repeatedly until “00” appears on the
display.
1.
2.
3.
When you program MP3/WMA files, select a
folder number using the SKIP button
( or ) and then press the
PROGRAM button.
Select a track/file number using the SKIP
button ( or ) , then press the
PROGRAM button.
The track/file is added to the end of the
program.
In the stop mode, press the PROGRAM
button repeatedly until the program number
to be changed appears on the display.
1.
2.
3.
When you program MP3/WMA files, select a
folder number using the SKIP button (
or ), then press the PROGRAM
button.
Select a new track/file number the SKIP
button ( or ), then press the
PROGRAM button.
The program is overwritten.
If you eject the disc, remove the USB
memory or the power supply is interrupted,
the programmed contents will also be
cleared.

EN - 15
13
Repeat Playback
On the unit, press the REPEAT/X-BASS button,
long pressing is X-BASS function and short
pressing is REPEAT function.
Every time the REPEAT button is pressed, the
mode is changed as follows:
If one of the following buttons is pressed,
repeat mode will be canceled:
STOP, SOURCE, EJECT, STANDBY/
ON (During playback of a disc)
During playback or in the stop mode, press
the RANDOM button.
“RAND” lights and the tracks will be played
randomly.
When an audio CD is loaded:
(off)
REP REP ALL
When on MP3/WMA disc, USB memory is
loaded:
(off)
REP REP ALLREP ALBUM
Repeat one
Press the REPEAT button once during
playback. “REP” lights.
The track being played will be played
repeatedly. If you press the SKIP button
( or ) and select another
track, the track you selected will be played
repeatedly.
Press the REPEAT button twice (or three
times for MP3/WMA).
“REP ALBUM” lights and all the tracks will
be played repeatedly.
During programmed playback, programmed
tracks will be played repeatedly.
In the stop mode, press the REPEAT
button, select a track using the SKIP
button ( or ), and then press
the PLAY/PAUSE button ( ) to
start playback.
Repeat all
Press the REPEAT button twice.
“REP ALBUM” lights and all the tracks in
the folder will be played repeatedly.
Repeat folder (MP3/WMA)
Random Playback
If the button is pressed during random
playback, next track will be randomly
selected and played.
If the button is pressed during random
playback, the currently played track will be
played from the beginning.
If the button is pressed twice or more,
other track will be randomly selected and
played. The track just being played cannot be
played again during random playback even if
the button is pressed.
To cancel the random playback, press the
RANDOM button.
To stop the random playback, press the
STOP button ( ).

EN - 16
14
Listening to an External Source
In addition to connecting other audio devices,
you can use the AUX IN to listen to an iPod that
has no dock connector or when an appropriate
Dock adapter is not available.
1. Connect the PHONES jack (audio
output jack) of an audio device to the
AUX IN jack of the unit using the
supplied stereo mini plug cable.
2. Press the SOURCE button to select
.
3. Play the source, and adjust the volume
of both the unit and the connected
audio device.
When using the headphones jack of the
device, if you do not adjust its volume, you
might not hear any sound from the unit.
Listening to the Radio
Press the or button to stop the
auto selection.
When the or button is
pressed momentarily, the frequency
changes by a fixed step.
Press the or button
repeatedly until the station you want to
listen to is found.
Selecting stations which cannot be tuned
automatically (manual selection)
1. Press the SOURCE button to select
“”.
2. Press the BAND button to select a band
FM or MW).
Hold down the or button until
the frequency display begins to change.
When a station is tuned in, the tuning
process will stop automatically.
3. Select the station you want to listen to
(auto selection).
ST/MONO button
Pressing this button alternates between
STEREO mode and MONO mode.
STEREO
FM stereo broadcasts are received in
stereo and the “ST” indicator lights in the
display.
MONO
To compensate for weak FM stereo
reception, select this mode. Reception will
now be forced to monaural, reducing
unwanted noise.
If the sound is distorted and the “ST”
indicator flashes, the signal is not strong
enough for good stereo reception. In this
case, change to MONO mode.
Turning the volume of the connected
device up too high might cause the sound
from your unit to be distorted. In this case,
reduce the volume of the device until the
distortion stops and then adjust the volume
level of the unit to a comfortable listening
level.

EN - 17
Preset Tuning
1.
You can store FM stations into preset channels
1 to 20 respectively and MW stations into preset
channels 1 to 10 respectively.
Tune in an FM RDS station.
2. Press the RDS button.
If the power turned off, the settings kept in
memory (clock, preset stations, timer
setting) will be erased.
1. Tune in a station you want to listen to.
2. Press the PROGRAM button.
The Radio Data System (RDS) is a
broadcasting service that allows stations to
send additional information along with the
regular radio program signal.
RDS (Radio Data System)
How to select preset stations
1. Press the BAND button to select a
band.
2. Press the PRESET button repeatedly
until the desired preset station is found.
To store more stations, repeat steps 1 to 4.
4. Within 5 seconds, press the PROGRAM
button.
preset channel
3. Within 5 seconds, select a preset
channel to store the station using the
PRESET buttons.
RDS works on the FM waveband in Europe
only.
Each time the RDS button is pressed, the
RDS mode is changed as follows:
Info
Frequency
RT (Radio Text)
RT (Radio Text)
When you select RT, the news of stations
composed of up to 64 symbols is
displayed.If there is no RT data, “RT” will
be displayed.

EN - 18
Frequency
When you select Frequency, the channel
and frequency of the currently tuned
station are displayed.
PS (Program service)
When you select PS, programme service
name or a station's mane is displayed.
RDS (Radio Data System)
Auto clock setting
The clock setting will be automatically
adjusted according to the CT (clock time)
data.To turn on or off auto clock adjustment,
keep pressing the RDS button until “RDS
CLOCK SYNC” is displayed. Then select ON
or OFF using the SKIP button ( or )
and press the RDS buton again.
1. Press the SOURCE button repeatedly to
select .
2. Press the PTY button.
You can search for stations by programme
type. This function is available only on RDS
services of FM waveband in Europe.
“PTY SEL” blinks on the display:
3. Select a desired programme type using
the SKIP button ( or ).
You can select from 31 kind of PTY
programmes.
You can also use the SKIP button (
or ) to select a progaramme type.
4. Press the PTY button again.
The unit starts searching.
If you want to stop searching, press the
SKIP button ( or )
If you want to cancel the PTY menu, press
the RDS button.
RDS (PTY Search 1)

EN - 19
PTY (Programme Type)
NEWS :
AFFAIRS :
INFO :
SPORT :
EDUCATE :
DRAMA :
CULTURE :
SCIENCE :
VARIED :
POP M :
ROCK M :
EASY M :
LIGHT M :
CLASSICS :
OTHER M :
WEATHER :
FINANCE :
CHILDREN :
SOCIAL A :
RELIGION :
PHONE IN :
TRAVEL :
LEISURE :
JAZZ :
COUNTRY :
NATIONAL :
OLDIES :
FOLK M :
DOCUMENT:
TEST
ALARM :
brief announcements, events, public opinion, reports, actual situations.
a kind of suggestion including practical announcements other than news,
documents, discussion, analysis and so on.
daily information or reference such as weather forecast, consumer guide, medical
assistance and so on.
sports related programs.
educational and cultural information.
all kinds of radio concert and serial drama.
all aspects of national or local culture including religious events, philosophy, social
science, language, theatre, and so on.
programs on natural science and technology
popular programs such as quiz, entertainment, private interview, comedy, satire and
so on.
program on commercial, practical and popular songs, and sale volume of discs, etc.
practical modern music generally composed and played by young musicians.
popular music usually lasting for less than 5 minutes.
classical music, instrumental music, chorus, and light music favored by non-
professionals.
orchestra including great operas, symphony, chamber music and so on.
other music styles(Rhythm & Blues, Reggae, etc.)
weather reports, forecast
financial reports, commerce, trading
children’s programs
social affairs
religious programs
program in which the public expresses its view by phone.
travel reports
programs concerning recreational activities
jazz music
country music
national music
music from the so-called golden of popular music
folk music
Documentaries
a program notifying an emergency or a natural disaster.
RDS (PTY Search 2)

EN - 20
Setting the Clock
If the power turned off, the settings kept in
memory (clock, preset stations, timer
setting) will be erased.
If no button is pressed for 10 seconds, the
time setting mode will be cancelled.
1. If the unit is on, press the STANDBY
button to turn it standby
“12 HOUR” or “24 HOUR” blinks. If you
want to change the hour mode, press the
or button.
2. Press and hold down the PROGRAM
button on unit or PROG/CLK button on
remote control.
3. Press the PROGRAM button on unit or
PROG/CLK button on remote control
once more.
The “hour” value blinks.
4. Press the SKIP button ( / )
to set the current hour.
5. Press the PROGRAM button on unit or
PROG/CLK button on remote control.
The “minute” value blinks.
6. Press the SKIP button ( / ) to
set the current minute.
7. Press the PROGRAM button on unit or
PROG/CLK button on remote control.
The clock starts.
Table of contents