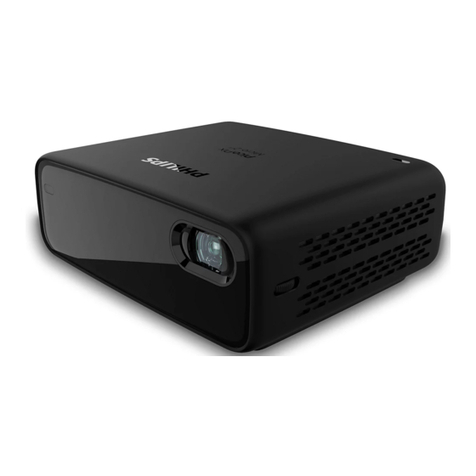
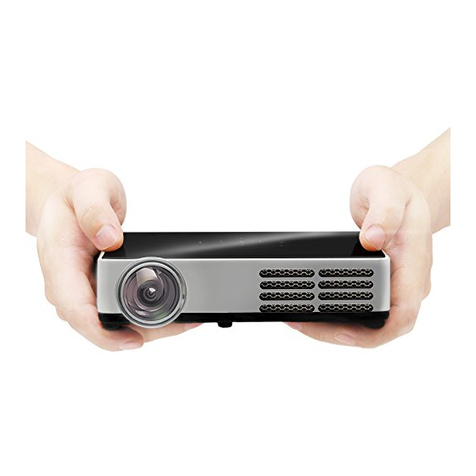
SINJI MINI PROJECTOR User manual

Manual
MINI
PROJECTOR


INDEX
English
Nederlands
Français
Deutsch
Español
Italiano
Português
4
10
16
22
28
34
40

4
1. CONTENTS OF THE PACKAGE
• Sinji Mini LED Projector
• Power adapter
• Remote control
• 3-in-1 video convert cable
• Manual
2. TECHNICAL SPECIFICATIONS
• Model: Sinji Mini LED Projector
• Contrast: 800:1
• Native resolution: 320*240 pixels
• Support resolution: 1920*1080 pixels
• Light: LED
• LED life time: 30.000 hours
• Operation mode: Manual operation
• Projection distance: 0,8 - 2 meters
• Projection size: 24 - 60 inches
• Projector distance: 1,6:1
• Aspect ratio: 4:3’
• Color: 16.7M
• Power supply: 12V-2A
• Unit size: 103*105*110mm
3. INSTRUCTIONS FOR USE
3.1 First use of the projector
Connect the power adapter (DC 12V/2.0A) as following picture:
Press the ON button on the top ofthe projector or remote control to
switch on the projector. When power supply is connected correctlythe
indicator on the front side of the projector will light up after switching on.
EN

5
3.2 Remote control introduction
4. MAIN FUNCTIONS
4.1 User Interface
Afterthe projector is switched on the following
icons will appear after 2-5 seconds:
4.2 Focus image
Locate projector in front of a projection screen and adjust the
displayed image with the keystone wheel till the image is sharp
4.3 Connections on the projector
EN

6
4.4 Input selection
Use the input button on the remote control to
select the relevant input source:
4.5 Content selection
Choose the content which you want to display:
Choose the file you want to display and press the PLAY
button on the remote control to display or stop.
4.6 AV Video equipment connecting
Use 3-in-1 video convert cable as followed and
select AV as input channel on the projector:
EN

7
4.7 HD equipment connecting
Use HD(MI) cable as followed and select HD
as input channel on the projector:
Supported file types:
576P, 480P, 720P, 640x480, 800x600, 1024x768,
1280x1024, 1280x720, 1440x900, 1920x1080, 1366x768,
1280x800, 1440x960, 1600x1200, 1680x1050
5. MENU OPTIONS
5.1 Menu guide
To access the Menu press the Menu key on the remote control. Use the
<- and -> buttons to navigate to the submenu’s. Use the up- and down
buttons on the remote control to navigate through the submenu’s. Press
the OK button on the remote control to select the selected option:
5.2 Audio submenu
EN

8
5.3 Time sub-menu
5.4 Set sub-menu
5.5 Display menu use guide
You can control the content by the display menu:
EN

9
6. SAFETY INSTRUCTIONS
• Please read user manual carefully before you use the projector
• Use onlythe standard 12V adapter to ensure stable power supply
• Do not open the projector. In case off technical problems,
please contact our support department
• To protect your eyes, don’t look into the
projector lamp when it’s switched on
• Don’t cover the ventilation holes to ensure cooling for the projector
• Please keep the projector away from water or any
other liquids since it’s not waterproof
7. CLEANING
Clean the product with a dry cloth. Don’t use any chemical liquids or oil!
8. PROBLEMS AND SOLUTIONS
1. The picture is not clear
• Please use the wheel on top of the projector to adjust the clarity.
Adjust the distance between the projector and the canvas
2. The file selected does not play
• Make sure the file type selected is supported:
EN

10
1. INHOUD VAN HET PAKKET
• Sinji Mini LED-projector
• Oplader
• Afstandsbediening
• 3-in-1 videoconvertorkabel
• Handleiding
2. TECHNISCHE SPECIFICATIES
• Model: Sinji Mini LED-projector
• Contrast: 800: 1
• Oorspronkelijke resolutie: 320 * 240 pixels
• Ondersteuning resolutie: 1920 * 1080 pixels
• Licht: LED
• LED-levensduur: 30.000 uur
• Bedrijfsmodus: handmatige bediening
• Projectieafstand: 0,8 - 2 meter
• Projectie grootte: 24 - 60 inch
• Projectorafstand: 1,6: 1
• Beeldverhouding: 4: 3 ‘
• Kleuren: 16,7 miljoen
• Stroomvoorziening: 12V-2A
• Afmeting product: 103 * 105 * 110mm
3. INSTRUCTIES VOOR GEBRUIK
3.1 Eerste gebruik van de projector
Sluit de voedingsadapter (DC 12V / 2.0A) aan op de volgende afbeelding:
Druk op de knop ON op de bovenkant van de projector of
afstandsbediening om de projector in te schakelen. Wanneer de
voeding correct is aangesloten, gaat de indicator aan de voorzijde
van de projector branden nadat deze is ingeschakeld.
NL

11
3.2 Introductie van de afstandsbediening
4. HOOFDFUNCTIES
4.1 Gebruikersinterface
Nadat de projector is ingeschakeld, verschijnen de
volgende pictogrammen na 2-5 seconden:
4.2 Focusbeeld
Plaats de projector voor een projectiescherm en pas het weergegeven
beeld aan met het keystone-wiel tot het beeld scherp is.
4.3 Aansluitingen op de projector
NL

12
NL
4.4 Ingangsselectie
Gebruik de invoerknop op de afstandsbediening
om de relevante invoerbron te selecteren:
4.5 Inhoud selectie
Kies de inhoud die u wilt weergeven:
Kies het bestand dat u wilt weergeven en druk op de knop PLAY
op de afstandsbediening om weer te geven of te stoppen.
4.6 AV-videoapparatuur aansluiten
Gebruik de 3-in-1 videoconvertorkabel als volgt en
selecteer AV als invoerkanaal op de projector:

13
NL
4.7 Verbinden van HD-apparatuur
Gebruik de HD(MI) -kabel als volgt en selecteer
HD als ingangskanaal op de projector:
Ondersteunde bestandstypes::
576P, 480P, 720P, 640x480, 800x600, 1024x768,
1280x1024, 1280x720, 1440x900, 1920x1080, 1366x768,
1280x800, 1440x960, 1600x1200, 1680x1050
5. MENU OPTIES
5.1 Menu gids
Om toegang te krijgen tot het Menu, drukt u op de Menu-toets op
de afstandsbediening. Gebruik de <- en -> knoppen om naar de
submenu’s te navigeren. Gebruik de knoppen omhoog en omlaag op de
afstandsbediening om door de submenu’s te navigeren. Druk op de knop
OK op de afstandsbediening om de geselecteerde optie te selecteren:
5.2 Audio submenu

14
NL
5.3 Tijd submenu
5.4 Stel het submenu in
5.5 Gids voor het gebruik van het weergavemenu
U kunt de inhoud beheren via het weergavemenu:

15
NL
6. VEILIGHEIDSINSTRUCTIES
• Lees de gebruikershandleiding zorgvuldig
voordat u de projector gebruikt
• Gebruik alleen de standaard 12V-adapter om te
zorgen voor een stabiele stroomvoorziening
• Open de projector niet. Neem bij technische problemen
contact op met onze supportafdeling
• Kijk niet in de projectorlamp wanneer deze is
ingeschakeld om uw ogen te beschermen
• Dek de ventilatiegaten niet af om te zorgen
voor koeling voor de projector
• Houd de projector uit de buurt van water of andere
vloeistoffen, omdat deze niet waterdicht is
7. REINIGING
Reinig het product met een droge doek. Gebruik geen chemische
vloeistoffen of olie!
8. PROBLEMEN EN OPLOSSINGEN
1. Het beeld is niet duidelijk.
• Gebruik het wiel op de bovenkant van de projector
om de helderheid aan te passen
• Pas de afstand tussen de projector en het canvas aan
2. Het geselecteerde bestand wordt niet afgespeeld
• Controleer of het geselecteerde bestandstype wordt ondersteund:

16
FR
1. CONTENU
• Mini Projecteur LED Sinji
• Adaptateur électrique
• Télécommande
• Câble de conversion vidéo 3 en 1
• Mode d’emploi
2. SPÉCIFICITÉS TECHNIQUES
• Modèle : Mini Projecteur LED Sinji
• Contraste : 800:1
• Résolution native : 320*240 pixels
• Résolution support : 1920*1080 pixels
• Lumière : LED
• Durée de vie LED : 30.000 heures
• Fonctionnement : Manuel
• Distance de projection : 0,8 - 2 mètres
• Taille de projection : 24 - 60 pouces
• Distance projecteur : 1,6:1
• Rapport d’aspect : 4:3’
• Couleur : 16.7M
• Alimentation : 12V-2A
• Dimensions : 103*105*110mm
3. MODE D’EMPLOI
3.1 Première utilisation du projecteur
Branchez l’adaptateur (DC 12V/2.0A) comme indiqué sur l’image :
Appuyez sur le bouton ON sur le dessus du projecteur ou de la
télécommande pour allumer le projecteur. Lorsque la source
d’alimentation est correctement branchée, l’indicateur sur la face
avant du projecteur s’allume après la mise sous tension.

17
FR
3.2 Présentation de la télécommande
4. FONCTIONS PRINCIPALES
4.1 Interface Utilisateur
2 à 5 secondes après l’allumage du projecteur,
les icônes suivantes apparaissent :
4.2 Mise au point de l’image
Placez le projecteur en face d’un écran de projection et ajustez l’image
grâce à la molette principale jusqu’à ce que l’image soit nette
4.3 Branchements sur le projecteur

18
4.4 Sélection de l’entrée
Servez-vous du bouton entrée sur la télécommande
pour sélectionner la bonne source d’entrée :
4.5 Sélection du contenu
Choisissez le contenu que vous souhaitez afficher :
Choisissez le fichier que vous souhaitez afficher et appuyez sur le
bouton PLAY de la télécommande pour le lancer ou l’arrêter :
4.6 Brancher un équipement vidéo AV
Utilisez le câble de conversion vidéo 3 en 1 comme suit et
sélectionnez AV comme canal d’entrée sur le projecteur :
FR

19
4.7 Brancher un équipement HD
Utilisez un câble HD(MI) comme suit et sélectionnez
HD comme canal d’entrée sur le projecteur :
Types de fichiers supportés :
576P, 480P, 720P, 640x480, 800x600, 1024x768,
1280x1024, 1280x720, 1440x900, 1920x1080, 1366x768,
1280x800, 1440x960, 1600x1200, 1680x1050
5. OPTIONS DE MENU
5.1 Guide du menu
Pour entrer dans le menu, appuyez sur le bouton Menu de la
télécommande. Servez-vous des boutons <- et -> pour naviguer
vers les sous-menus. Utilisez les boutons Haut et Bas de la
télécommande pour naviguer dans les sous-menus. Appuyez sur le
bouton OK de la télécommande pour sélectionner l’option choisie :
5.2 Sous-menu audio
FR

20
5.3 Sous-menu heure
5.4 Sous-menu réglage
5.5 Guide d’utilisation du menu d’affichage
Vous pouvez contrôler le contenu à l’aide du menu d’affichage :
FR
Table of contents
Languages:
