Solorock SRDW180813W User manual

ControlPanel..............................3
DishwasherFeatures.................. ....3
WashCycleTable..........................4
Detergent............................ ....5
RinseAid.................. .......... ....5
Loading the Dishwasher Rack . .. . . .. .. . . .. . .6
SilverwareBasket..........................7
FilteringSystem...................... .... 7
TurningOntheAppliance.............. .....8
CaringfortheDishwasher........ .. ........8,9
......................2
................1
Beforecallingforservice.......... 10,11
........
SRDW180813W,SRDW180813S
The electric dishwasher of model, besides the common
characteristics ofother household dishwashers, it hasits own specialties:
SRDW180813W,SRDW180813S
Error alarm
Fault codes display would inform the user of
abnormal statusof the machine.
6washprograms
You can choose desired programaccording tothe
soiled level.Such as,Allin 1,Heavy,Normal, Light
Rinse, Speed wash..
Stainless steel tub
You need not warry about stain of tub.
Rinse aid Warning Indicator
If the rinse aid are running low, there will be clearly
displayed on the panel alertingyou to top them up,
toensurethatthemachinecontinuestooperateat
optimum performance.
Timedelay feature
This allowsthe start ofthe programme to be delay
between 1 and 24 hours, enabling you to benefit
fully from cheaper electricity! Or just tobenefit
from the convenience of the programming
finishing when you want to.
1
The manufacturer, following a policy of constant
development and up-dating of the product, may
make modifications without giving prior notice.

This appliance must be grounded. In the event
of a malfunction or breakdown, grounding will
reduce the risk of electric shock by providing a
path of least resistance of electric current. This
appliance is equipped with a cord having an
equipment-grounding conductor and a grounding
plug.The plug must be plugged into an appropriate
outlet that is installed and grounded in accordance
with all local codes and ordinances.
Improper connection of the equipment-
grounding conductor can result in a risk
of electric shock. Check with a qualified
electrician or service representative if you
are in doubt whether theappliance is
properly grounded. Do not modify the plug
provided with the appliance ;If it is not fit
for the outlet .have a proper outlet installed
by a qualified electrician.
Under certain conditions, Hydrogen gas may be produced in a hot-water systemthathasnotbeen
usedfortwoweeksormore.HYDROGENGASISEXPLOSIVE.
If thehot-water system has not been used for sucha period, beforeusing the dishwasher turn on all
hot-water faucets and let the water flow from each for several minutes.Thiswill release any
accumulatedhydrogen gas.As the gas is flammable, do not smoke or usean open flame during this
time.
2
Keep child away from detergent and rinse aid, keep
child away from the open door of the dishwasher,
there could still be some detergent left inside.
Do not abuse, sit on, or stand on the door or dish
rack of the dishwasher.
Do not touch the heating element during or
immediately after use.
Do not wash plastic items unless they are marked
dishwasher safe or the equivalent. For plastic
items not so marked, check the manufactures
recommendations.
Useonlydetergentand rinseadditivesdesigned
for an automatic dishwasher. Never use soap ,
laundry detergent, or hand washing detergent
inyourdishwasher.Keeptheseproducts out of
children.
During installation, the powersupply mustnot
be excessively ordangerously bent or flattened.
The door should not be left in the open position
sincethiscould present atrippinghazards.
Do not tamper with controls.
Do not operate your dishwasher unless all
enclosure panels are properly inplace. Open the
door very carefully if the dishwasher is operating,
there is a risk of water squirting out.
Do not place any heavy objects of stand on the door
when it is open. The appliance could tip forward.
When loading items tobe washed:
1)Locatesharp items so that they are not likelyto
damage the door seal;
2) Load sharp knives with the handles up toreduce
the risk ofcut-typeinjuries.
Whenusing your dishwasher, you shouldprevent
plastic item from contacting with heating element.
If the supply cord is damaged, it must be replaced
by themanufacturer or itsserviceagent ora
similarly qualifiedperson in orderto avoida
hazard.
Please dispose of packing materials properly.
Use the dishwasher only for its intended function.
Remove the door to the washing compartment when
removing an old dishwasher from service or discarding it.
The applianceis not intendedfor use by young
children or infirm persons without supervision.
Dishwasher detergentsare strongly alkaline,they
can be extremely dangerous if swallowed.Avoid
contact with skin and eyes andkeepchildren away
from the dishwasherwhenthedoor is open.
Young children should be supervised to ensure that
they do not play withthe appliance.
Check that the detergent receptable isempty after
completionofthewashcycle.

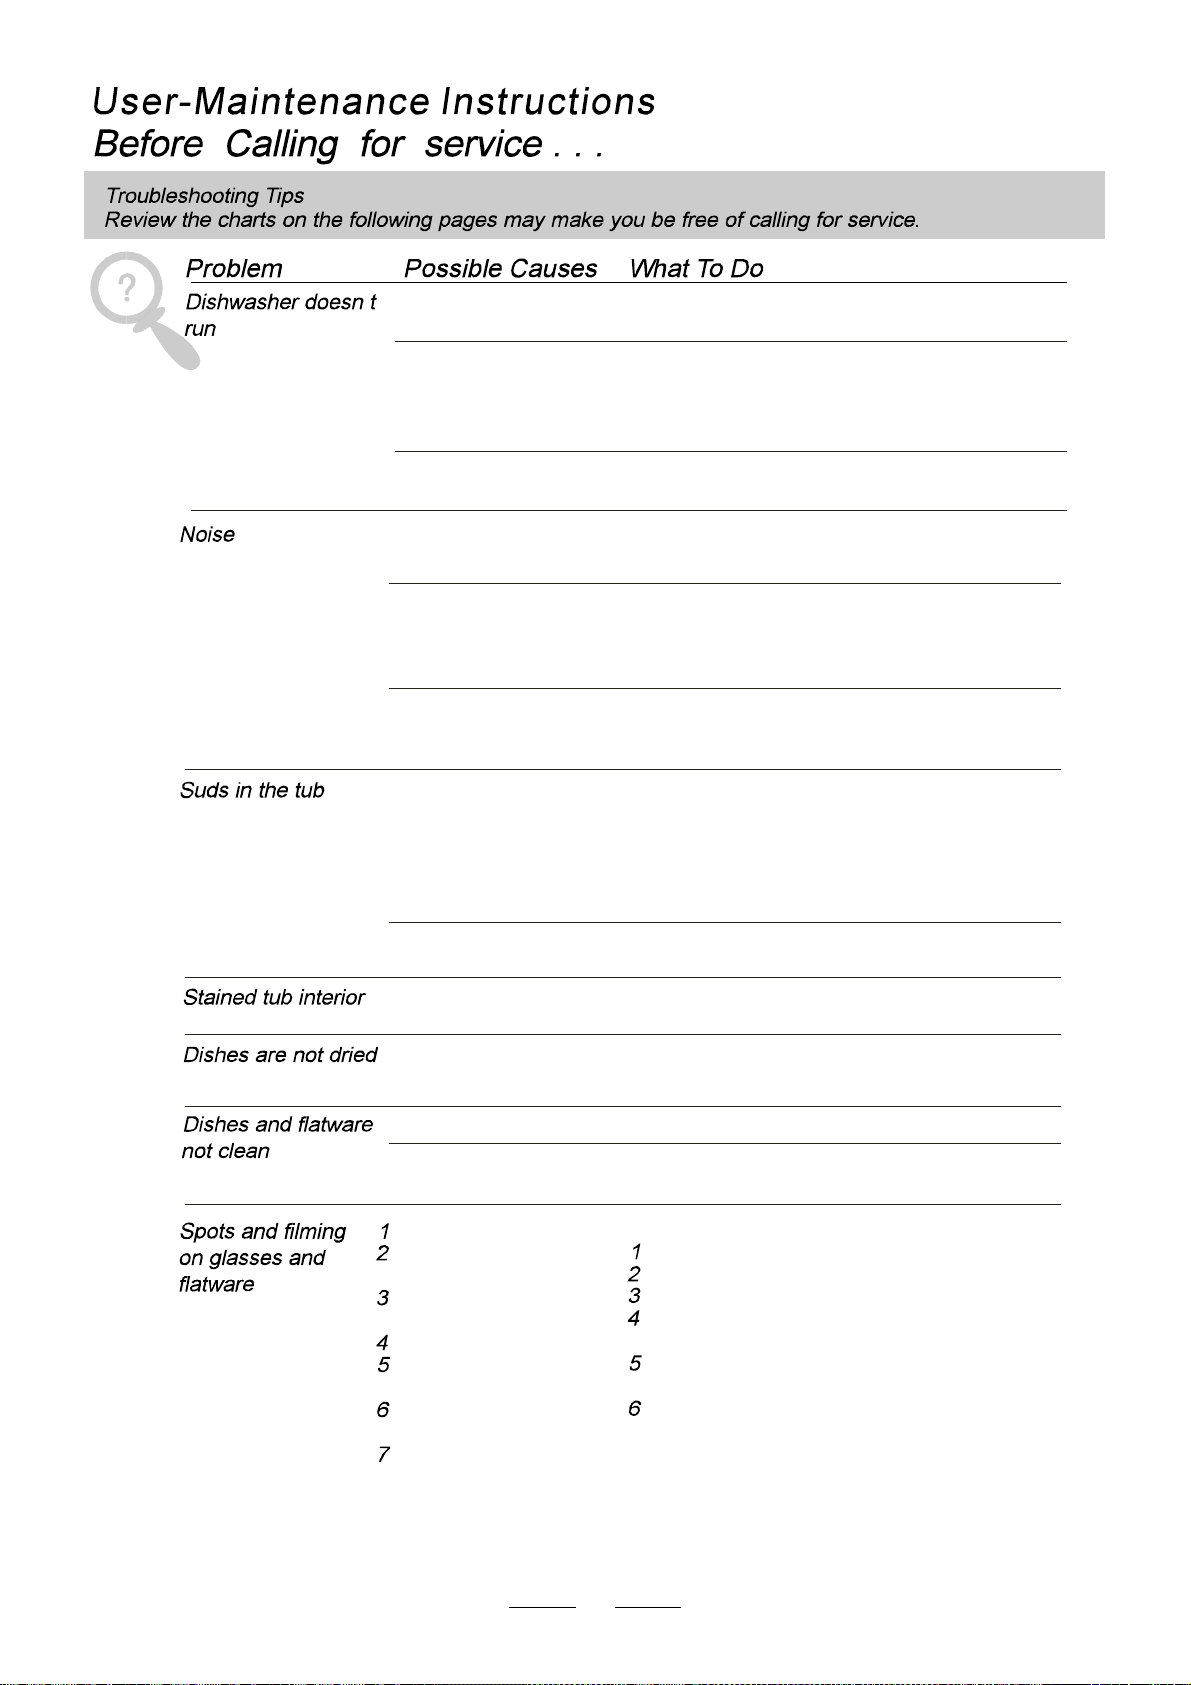
To get the best performance from your dishwasher, read all operating instructions before using
it forthe first time.
3
1
11
2
6
4
35
7
8
2
3
4
Powerindicator light:To showthepower supply.
Start /Pause button: To start the selected
washing programor pausethewashing program
whenthe machineis working.
Rinse aid warning lights: To show when thesalt
container or dispenserneed to be refilled.
Power switch:To turn on/off the power supply.
5
Washing Program Selector:To select one of
the six washingprograms.
7
8
6
Program indicator lights:To show the washing
program.
Delay Button : ToPress the button to delay.
Display window: Programremaining time,
delay time, running indicator, fault codes
and etc.
Upper Basket
Spray Arms
Lower Basket
Detergent Dispenser Silverware Basket
MainFilter
Cup Shelf
5
6
7
8
RinseAid Dispenser
Coarse Filter
9
10
12
11
3
2
14
Portable FaucetAdapterAssembly
Power Cord
Caster
Front View
(DoorOpen) Back View
1
2
3
4
5
6
7
8
9
10 11
12
4
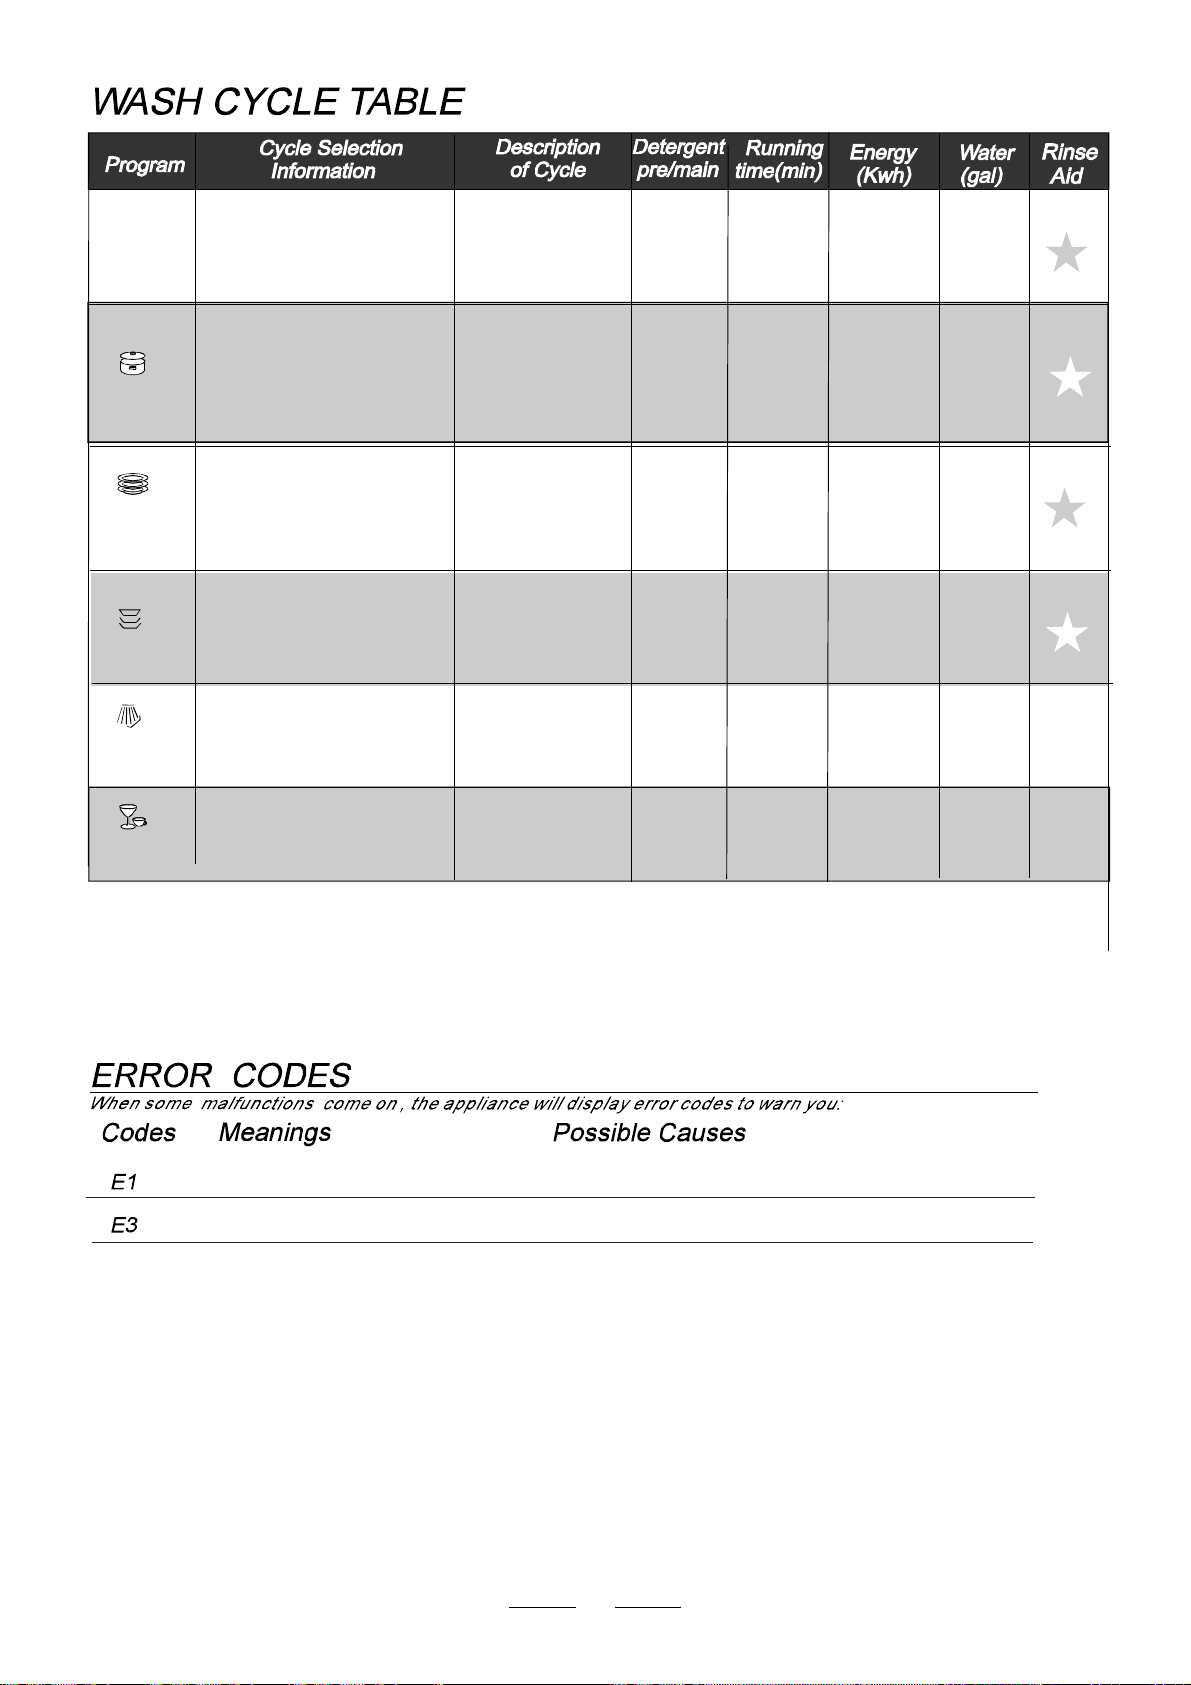
Light
Heavy
Normal
18g
18g
18g
For normally soiled loads,
such as , plates,glasses
and lightly soiledpans.
standard daily cycle.
pots
For lightly soiled loads,such
as plates,glasses,bowlsand
lightly soiled pans.
For the heaviest soiled
loads, such as pots, pans,
casseroledishes and dishes
thathavebeen sittingwith
dried foodon them for a
while.
Ashorterwashforlightly
soiled loadsthat do not
need drying.
Speed
Pre-wash
Pre-wash (50 )
Wash (53 )
Rinse
Rinse (65 )
Drying
℃
℃
℃
Pre-wash
Wash (53 )
Rinse
Rinse (65 )
Drying
℃
℃
Wash (50 )
Rinse
Drying
Pre-wash
Rinse (60 )
℃
℃
Pre-Wash
Wash
Rinse(55 )
Drying
(50 )℃
℃
18g.
115
100
130
65
4.6
3.65
3.67
2.75
For rinsing partial loadsthat
will be washed later.Do not
usedetergent with this cycle.
This cycle does not include
heated dry.
25 1.9
3.7
135
All in 1
Rinse
For all soiled loads, such as
pots,pans,casserole dishes
and dishesthat have been
sittingwithdried foodon them
for a while.
Pre-wash
Pre-wash
wash 53
Rinse 68
Drying.
(℃)
(℃)
All in1
Longer inlet time.
Faucets is not opened, or water intake is restricted,
or water pressure is too low.
Malfunction of temperature sensor or of heating element.
Longer heating time,
but not reaching required temperature
(AHAM)
Pre-Wash
Pre-Wash
0.6
0.58
0.545
0.43
0.05
0.32
5
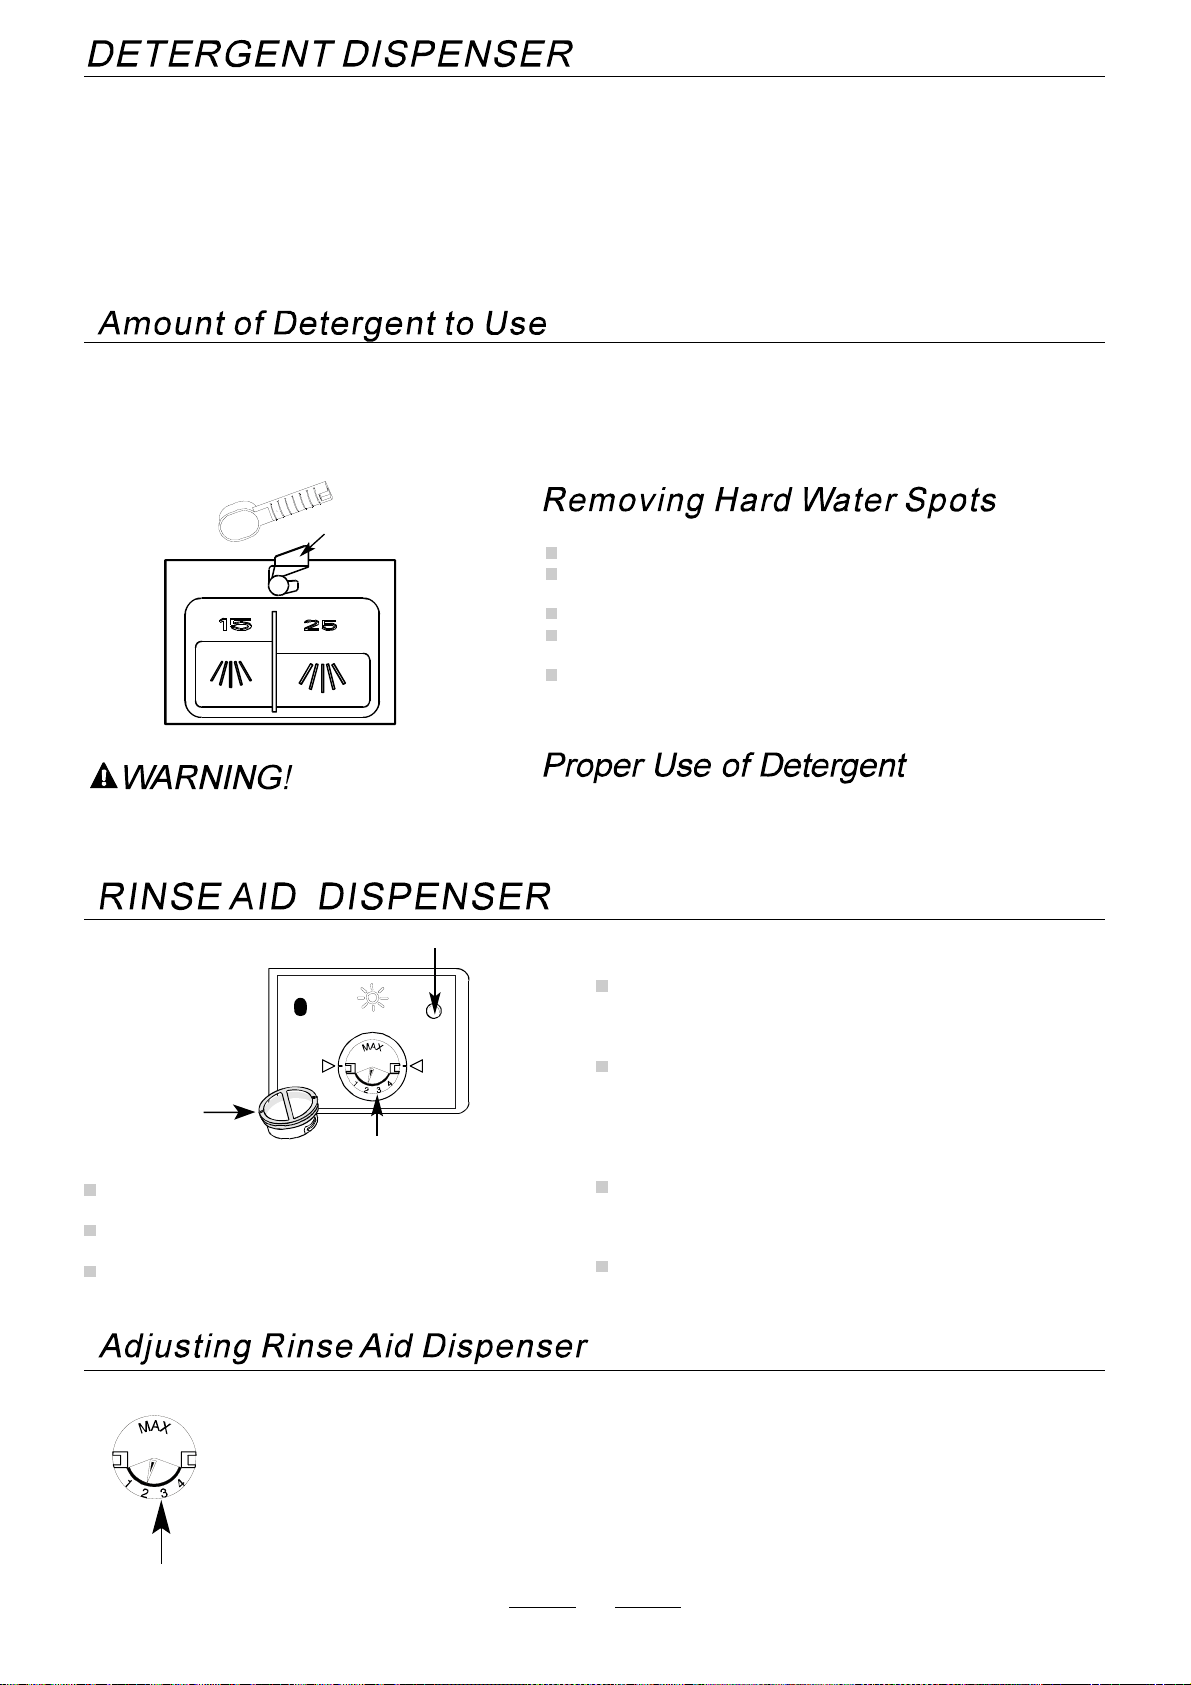
Dishwasher detergent is corrosive!
Take care to keep it out ofreach of children.
IFTHEWATERISN'T TOOHARD,YOUMAYALSOPREVENT THE FORMATIONOF DEPOSITS BYADDING
DETERGENT.
The amount of detergent needed can vary due to differences in waterhardness. To determine the waterhardness in
your area, contactyourlocal waterutility or areawater softening company. The harder thewater,the more detergent
you may need. Remember, you should adjust the amountof detergent you use by small amounts until you find the
correct amount.
To remove hard water spots, try the following:
Rundishes through a normal wash program.
Remove allmetal dishware,such as cutlery,pans, etc.,
from the dishwasher.
Do notadd detergent.
Pour two cups of vinegar into a bowl and set the bowl face
up on the lowerrack of the dishwasher.
Runthedishesthrougha normal wash program.
If this doesn't work, try the same process with 1 /4 cup of
citric acid crystals instead of vinegar.
Useonly detergentspecificallymade for use in dishwashers.
Keep yourdetergentfresh anddry. Don't put powderdetergent
into thedispenser untilYou're readyto washdishes.
Therinse aid isreleasedduring the final rinse to prevent
water from forming droplets on your dishes thatcanleave
spots and streaks. Italso improvesdrying by allowing
water to"sheet"offthe dishes.
Your dishwashers aredesigned touseliquid rinseaids.
Therinse aid dispenser islocatedinside the door next to
thedetergent dispenser.To fill the dispenser, openthe
capandpour the rinse aidinto thedispenser untilthe level
indicator turns completely black. The dispenser holds
about 100 ml of liquid rinse aid.
Be careful not tooverfill the dispenser, because this could
causeoversudsing.Wipeawayanyspillswithadampcloth.
Don't forget to replace the cap before you close the
dishwasherdoor.
If you havesoftwater, you may not need rinseaid for itmay
cause a white film to developon your dishes.
YOU MAYNOTADDTOOMUCH DETERGENT TOPREVENTTHEFORMATIONOFDEPOSITSBECAUSEYOUR
DISHWASHERS
HAVE SPECIALLY-DESIGNED WATERSOFTENERS.
Thedispensermust be refilled before the start of each wash cycle followingthe instructions providedin the" Wash
Cycle
Table".Your dishwashers than conventional dishwashers. Generally, only one
tablespoonof
detergent is needed for a normal wash load.Also, more heavily soiled items need more detergent.Always add the
detergent just
before starting dishwasher, otherwiseit could get damp andwill not dissolve properly.
useless detergent and rinse aid
To open the dispenser, turn the cap to the "open" (left)
arrow and lift it out.
Pourthe rinse aid into the dispenser,being careful
not to overfill.
Replace thecapby insertingit aligned with "open"
arrow andturning it to theclosed(right) arrow.
Ameasuredamount of rinse aid isreleased during the finalrinse.Aswith detergent,theamount
of rinse aid needed for your dishes depends on the hardness of thewater inyourarea. Too much
rinseaidcanresult inlather of foaming andcause cloudiness or steakson your dishes. Ifthe
waterinyourareaisverysoft,youmaynotneedrinseaid.Ifyoudo,youcandilutetherinseaid
withan equal amountof water.
Therinse aid dispenser has four settings.Always start with the dispenser set on" 2 ". If spotsand
poordryingare problems, increase theamount ofrinseaiddispensed byremoving the dispenser
lid and rotating the dial to"3". If the dishes still are not drying properly orare spotted,adjust the
dial to"4".. We suggest you to set on "2" .
Button
Indicator
Dispenser cap
Adjustable setting
Adjustable setting
6
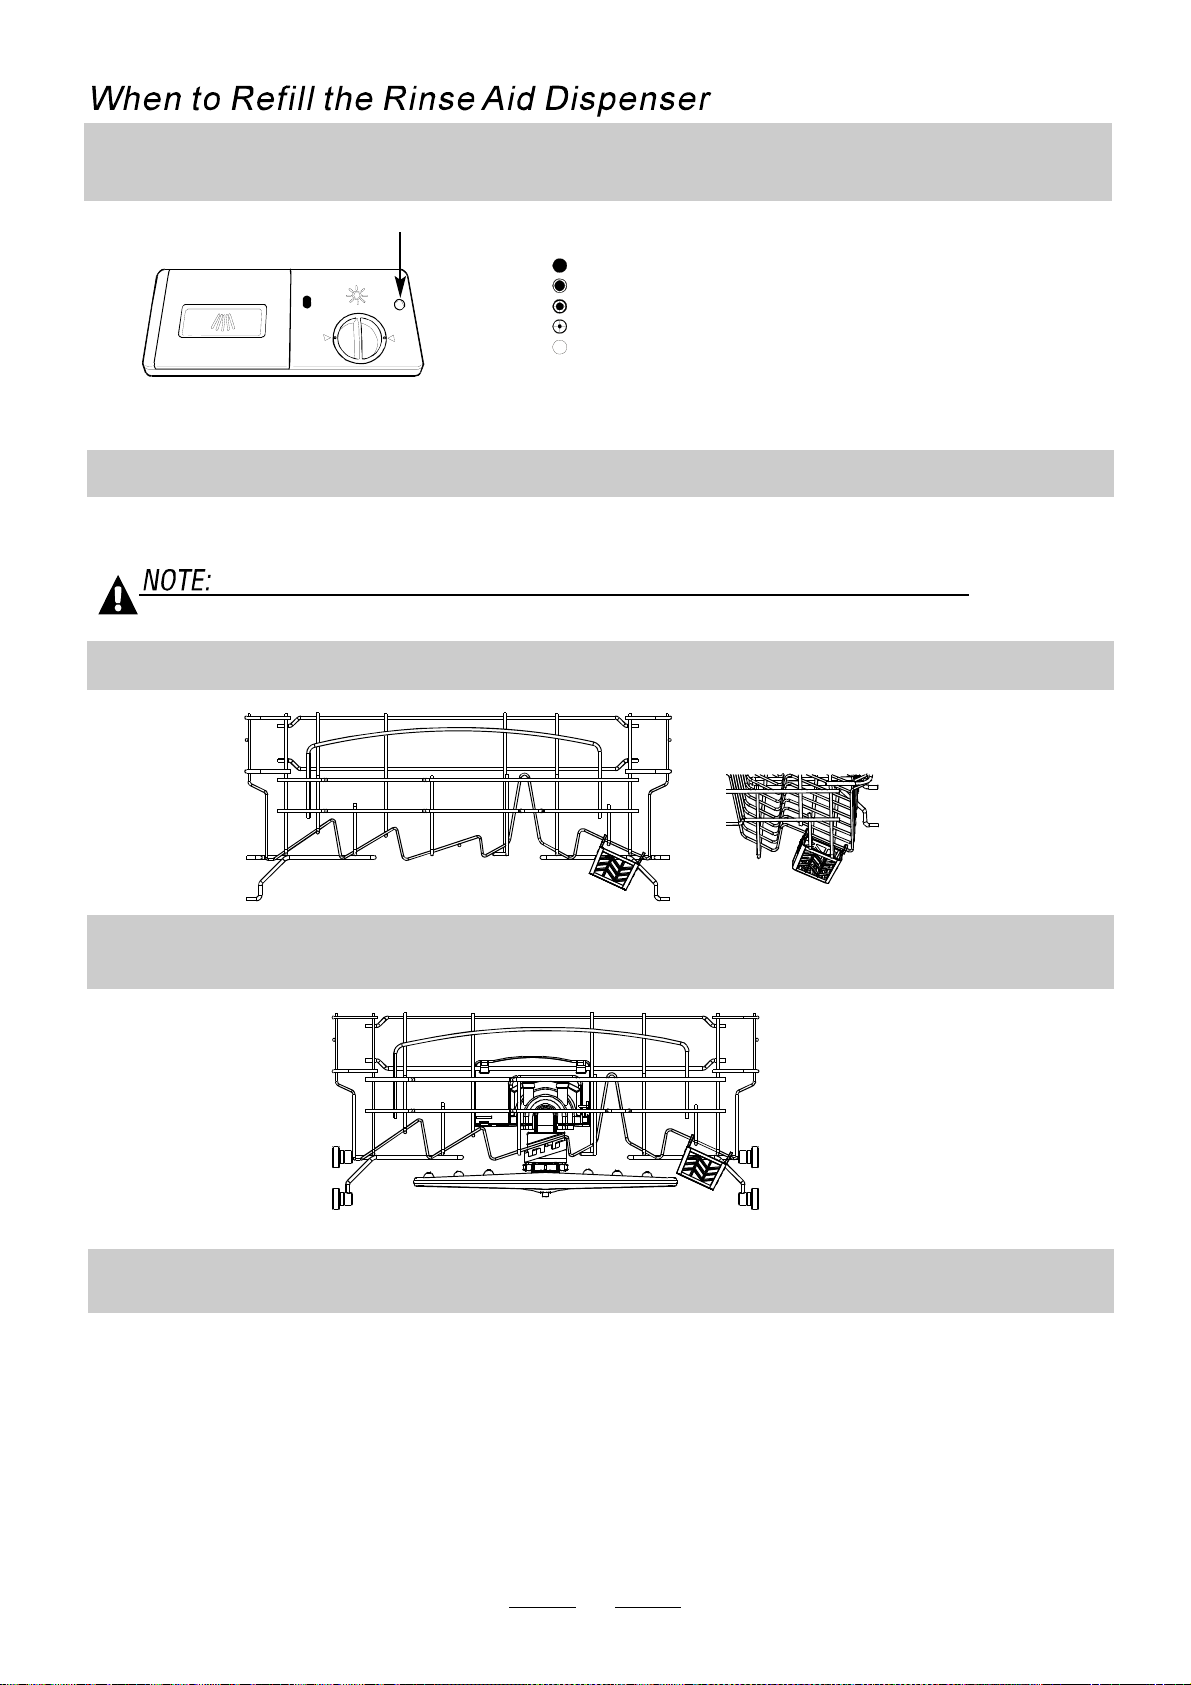
If there is no rinse aid warning light in the control panel, you can judge the amount of rinse aid by the following means.
Theblack dot ontherinse aiddispenser indicatestheamount of rinse aid inthedispenser.As therinse aiddiminishes,
the size of the black dot decreases. You should never let the rinse aid get below 1 / 4 full.
As the rinse aid diminishes, the size of the black dot on the rinse
aid level indicator changes, as illustrated below.
Full
3/4full
1/2full
1 / 4full-Should refill to eliminate spotting
Empty
Indicator
The appliance will not achieve a good performance.
Only the All in1 program can be used with All in1 tablets. If you use All in1 tablets in other programs,
Your dishwasher has a "Allin1 program" which needs no salt and rinse aid but a"Allin1tablet"
.
1. The figure below shows how to hang the Allin1 tablet container on the upperbasket.
2. Rotate the upper sprayer and change the location of the container to ensure the upper sprayer is not
obstructed by the All in 1 tablet container. Refer to the figure below for reference.
3. Put the All in1 tablet into the container ,then start the All in1 program.
How To Use The All in1 Program
.
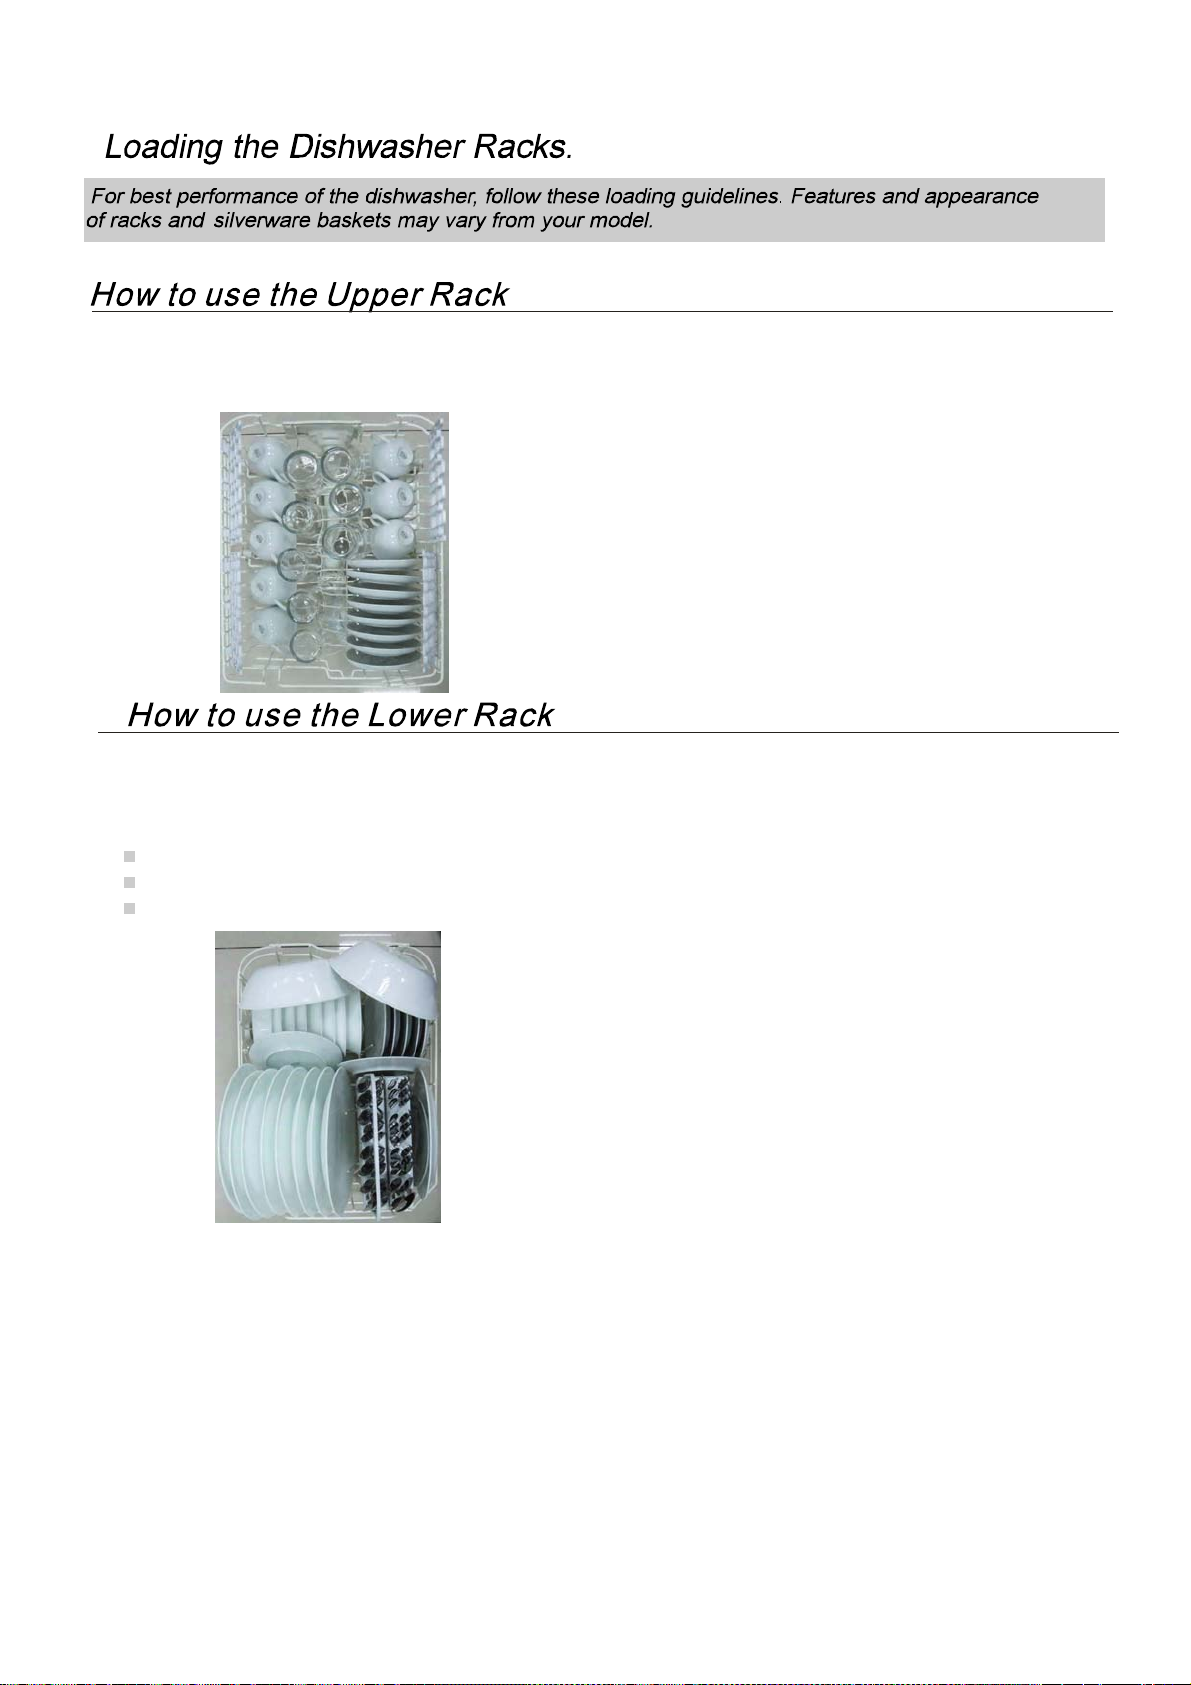
The upper rack isdesigned to holdmore delicate and lighter dishware such as glasses, coffee and tea cup and
saucers, as well as plates, small bowls and shallowpans(as long as they are nottoo dirty).
Positionthe dishesandcookwareso that they do not get movedbythesprayofwater.
The upperrack can beadjusted forheight by putting wheelsof different height into therails.
We recommend that you place large items which are most difficult to clean into the lower rack: pots, pans, lids,
serving dishesandbowls,as shown inthe figure tothe right.
Itis preferableto placeservingdishes and lids on the side of theracks inorder toavoid blocking the rotation of the
top spray arm.
Pots, serving bowls, etc, must alwaysbe placed top down.
Deep pots shouldbeslantedto allowwater toflowout.
The bottom rack feature fold down tine rows so that larger or more pots and pans can be loaded.
1
Cups
2
Serving bowl
3
4
Glasses
Fruit bowl
8
Saucer
7
9
Dinner plates
Silverware basket
6
Bread and butter plates
Serving plate
11
3
2
44
6
6
6
5
5
7
8
9
7
When thewashingcycle has finished, the buzzer of dishwasher will mooingeight second,thenstop. Turn off the
appliance using the ON/OFF button, open the door of thedishwasher. Waita few minutes before unloading the
dishwasher to avoid handling the dishes and utensils while they are still hot and more susceptible to breakage.
They will also dry better.
A forgotten dish can be added any time before the detergent cup opens.
Open the door a little to stop the washing.
After the spray arms stop working,you can open the door
completely.
Add forgotten dishes.
Close the door, the dishwasher will work after ten second.
4
3
2
1
Make sure that the plug 0f the appliance is inserted into the wall socket.
Make sure that the water supply is turned onto full pressure.
Load the dishwasher(see the section entitled, " Loading the Dishwasher " ).
Pour in the detergent(see the section entitled, " Salt, Detergent and RinseAid " ).
Close the door,press the ON/OFF button,and the ON/OFF light will turn on.
Press the "prog " to select the"Wash cycle".(see the section entitled."WashCycle Table".)button
2
3
4
5
6
Premise
:A cycle thatis underwaycanonly be modifiedif ithas only been running for a short time. Otherwise,
the detergent may havealreadybeen released, and the appliance may have already drained the washwater.
If this is the case, the detergent dispenser must be refilled (see the paragraph entitled " Loading the Detergent " ).
Open the door, Press the "Progkey-press" more than three second, thenyoucanchange theprogram tothe desired
cycle setting (see the section entitled, "Startinga wash cycle. . ." ).Then, closethe door.
1
7
Press the start button
,t
hewashing will start after ten seconds.
It is dangerous to open the door when washing,because the hot water may be scalded toyou.
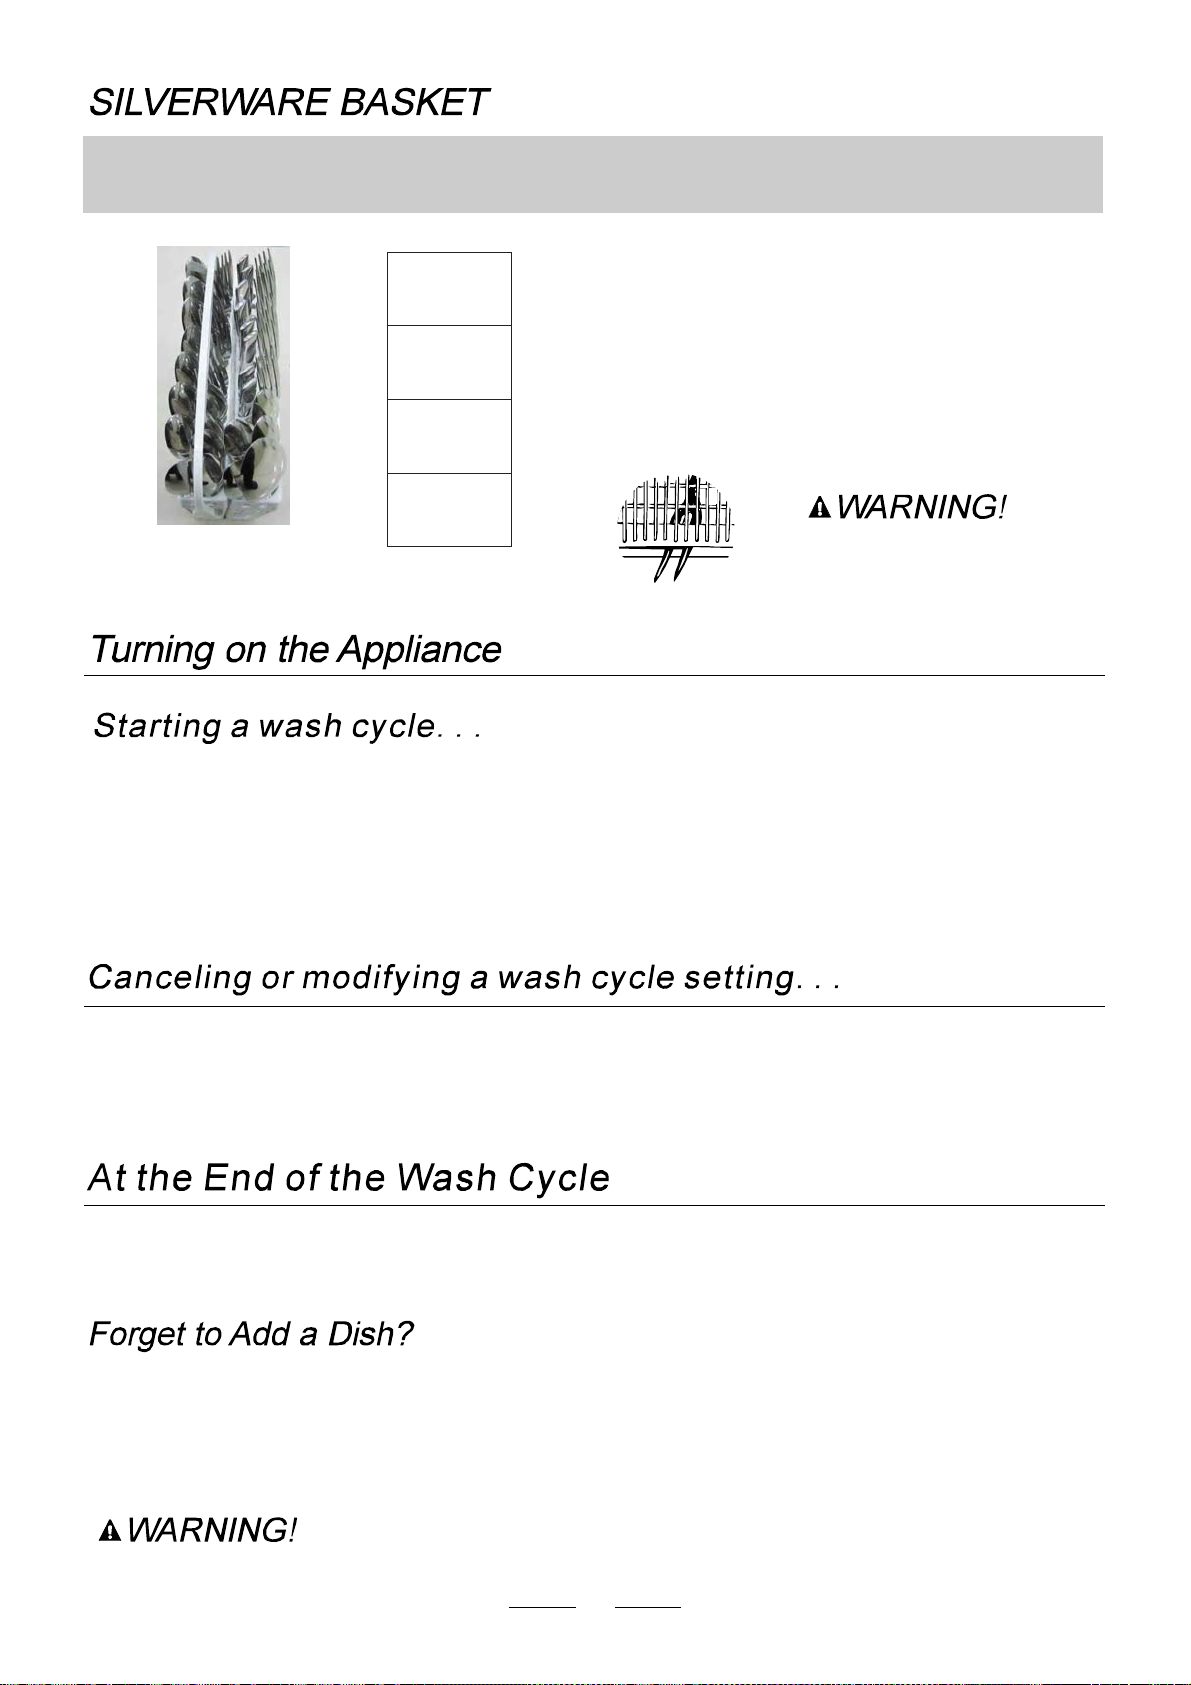
Silverware should be placed inthe silverware basket with handlesat the bottom: If the rack has side baskets,
the spoon should be loaded individually intothe appropriate slots, Especially long utensils should be placed
in the horizontal position at thefront of the upper rack.
Do not let any item extend through bottom.
1
1
1
1
1
4
7
1
1
1
6
4
4
4
4
4
4
4
3
3
3
3
3
5
5
5
5
5
5
5
5
3
3
3
6
2
2
2
2
2
2
2
2
Teaspoons
4
Soup spoons
2
Salad Forks
1
Serving fork
Serving spoon
6
Knife
5
3
Dinner forks
7
8
Coarse filter
Larger items,such as pieces of bone or glass, that could clog the drain are trapped
in the coarse filter. To remove an item caught in this filter, gently squeeze the tabs
on top of this filter andlift it out.
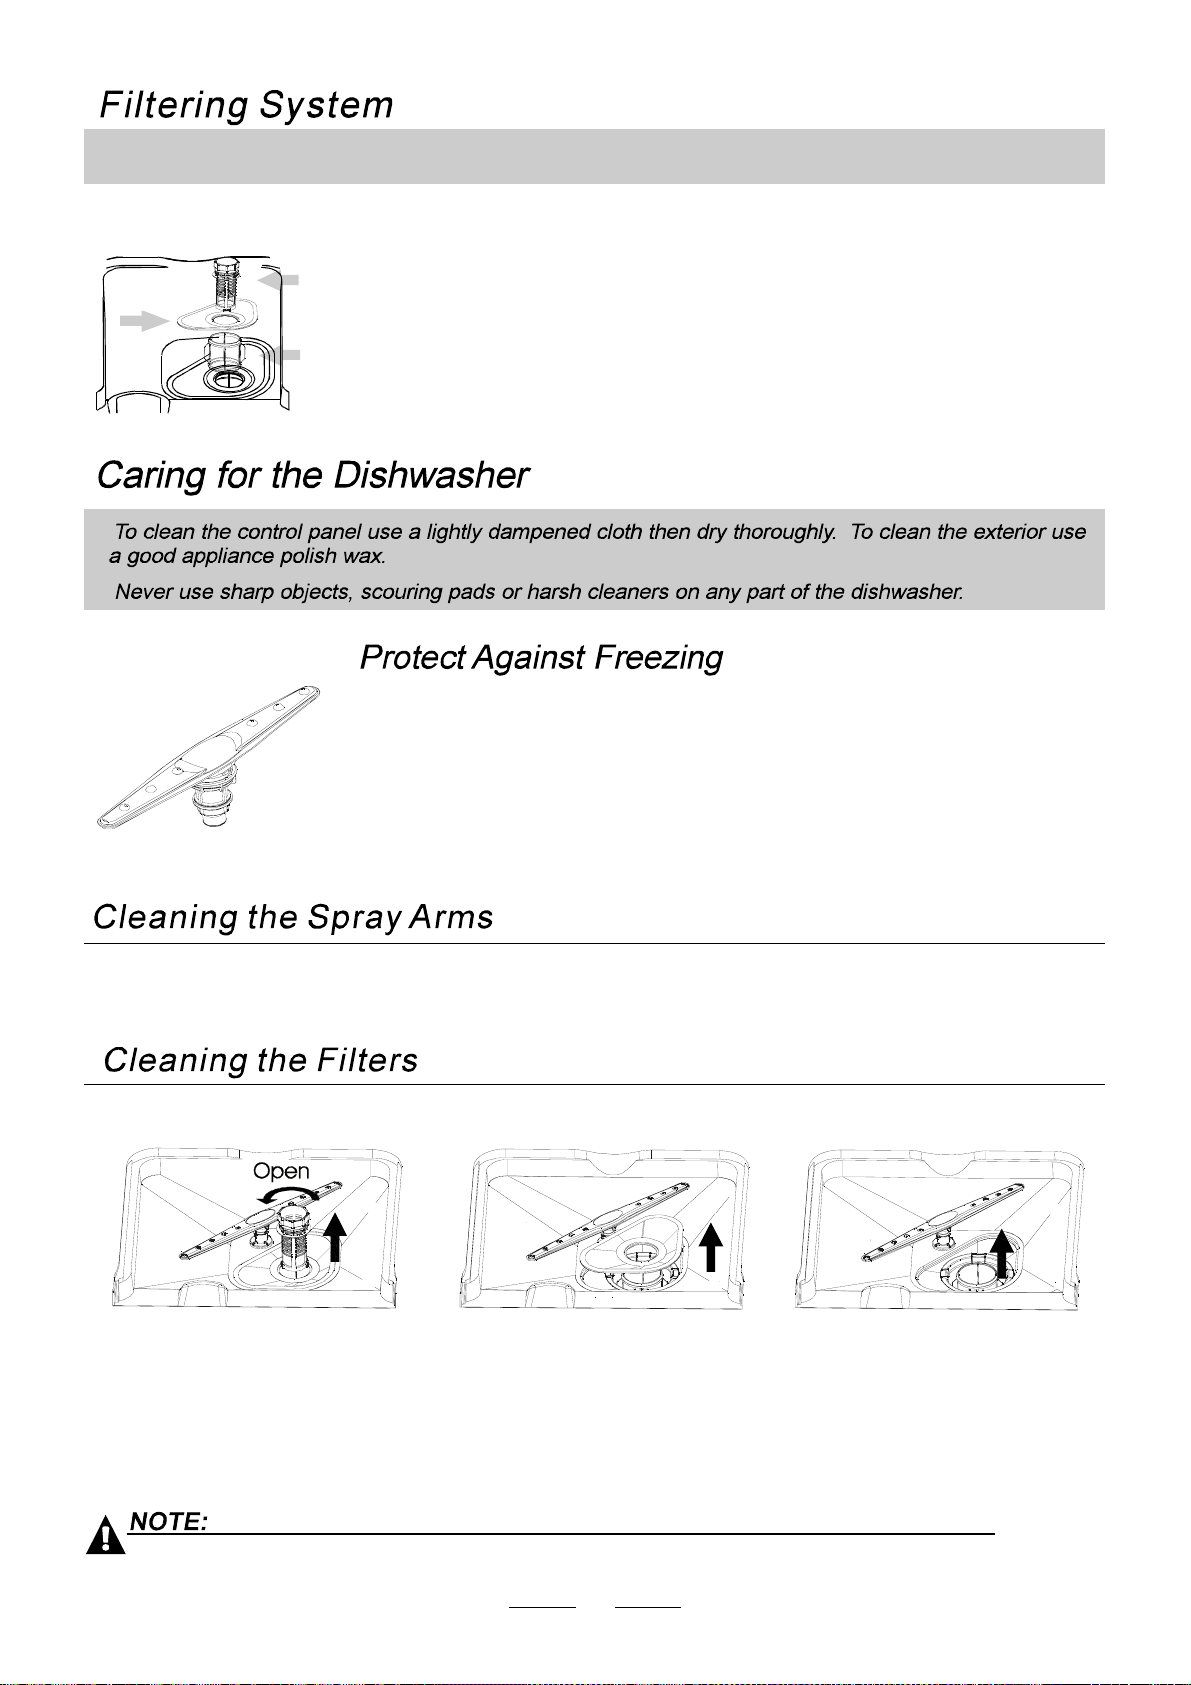
For your convenience, we have placed the drain pump and filtering system within easy reach inside the tub.
There are threecomponentsof the filtering system: the mainfilter, the coarse filter, and the fine filter.
2
2
Fine filter
This filter holdssoil and food residue in the sump area and prevents it from being
redeposited on the dishes during a cycle.
Mainfilter
Food and soil particles trapped bythis filter are pulverized by aspecialjet on
the lower spray arm and washed down the drain.
1
3
3
If your dishwasher is left in an unheated place during the winter, ask a service technician to:
Cut off electrical power to the dishwasher. Remove
fuses or trip circuit breaker.
Turn off the water supply and disconnect the water
inlet pipe from the water valve.
Drain water from the inlet and water valve.pipe
(Useapantocatchthewater.)
Reconnect the water inlet to the
water valve. pipe
Remove the plastic sump cover in the
tub the bottom and use a sponge to
soak up water in rubber boot.
5
4
3
2
1
It is necessary to clean the spray arms regularly for hard water chemicalswill clog the spray arm jets and bearings.
Toremovethespray arm, screwoffthenut to take out thewasheron top ofthespray arm and removethe arm.
Wash the arms in soapy andwarm waterandusea soft brushto cleanthejets.
Replace them after rinsing them thoroughly.
1
Step Turnthe filterin anti-clockwisedirection,
then lift it up.
:
1
Step lift the Mainfilterup:
2
Step liftthe Fine filter up:
3
When following this procedure from step1 to step 3, the filter system will be removed;
when following it from Step 3 to Step 1, the filter system will be installed.
2
13

9
Never use a spray cleaner to clean the door panelfor it could damage thedoor lock and electrical components.
It is not allowed to use the abrasive agentor some paper towelbecause of the risk of scratching or leaving spots
on the stainless steel surface.
To clean the edge around the door, you shoulduse only a soft warm, damprag.
To prevent penetration of water into the door lock and electrical components,
do not use a spray cleaner of any kind.
Also, never use abrasive cleaners or scouring pads on the outer surfacesbecause
they will scratch the finish. Some papers towels can also scratch or leave marks
onthe surface.
Afterevery wash, turn offthe water supply to the
appliance and leave the doorslightly ajar sothat
moisture and odors are not trapped inside.
Before cleaning or performing maintenance, always
remove theplug from the socket.Donotrunrisks.
Tocleantheexteriorandrubberparts ofthedishwasher,
do not use solventsor abrasive cleaning products.
Rather,use only a cloth and warm soapy water.
To remove spotsor stains from the surface ofthe
interior, use a cloth dampened with water and a little
white vinegar, or acleaning productmade specifically
for dishwashers.
Whenyougoon holiday, itis recommened thatyou
runawashcyclewiththedishwasheremptyandthen
remove the plug from the socket, turn off the water
supply and leave the door of the appliance slightly ajar.
This will help the sealslastlonger and prevent odors
from forming within theappliance.
Ifthe appliance mustbe moved, trytokeep itin the
vertical position. If absolutely necessary, it can be
positioned on its back.
One of thefactorsthatcause odorsto form in the
dishwasher is food that remains trapped in the seals.
Periodic cleaning with a damp sponge will prevent this
from occurring.
This dishwasher is designed for operation on an adequately wired individual 220~240VAC,50Hz.Use required fuse
15 amps. Fused electrical supply is required-copper wire only. Time delay fuse or circuit breaker recommended
and provide separatecircuit serving only this appliance. Outlet should be placed in adjacentcabinet.
After making sure that the voltage and the frequency values for the current in the home
correspond to those on the rating plate and that the electrical system is sized tor the maximum
voltage on therating plate, insert the plug into an electrical socketwhich is earthed properly.
If the electricalsocket towhich the appliance must be connected isnot appropriate tor the plug,
replace the socket, rather than using a adaptors or thelike as they could cause overheating
and burns.
Fuse blown, or the
circuit breaker acted Replace fuse or reset circuit breaker. Remove any other
appliances sharing the same circuit with the dishwasher
Sound from soft food shredding action and detergent cup
opening.
Utensils are not secure
in the baskets or something
small has dropped into
the basket
To ensure everything is secured in the dishwasher.
Motor hums Dishwasher has not been used regularly. If you do not use it
often, remember to set it to fill and pump out every week,
which will help keep the seal moist.
Improper detergent
Spilled rinse agent Always wipe up rinse agent
spills immediately.
Detergent with
colorant was used Make sure that the detergent is the one without colorant.
Rinse agent dispenser
is empty Make sure that the rinse agent dispense is filled.
Improper program
Improper rack loading Make sure that the action of the detergent dispenser and
spray arms are not blocked by large dishware.
Extremely hard water
Low inlet
temperature
Overloading the
dishwasher
Improper loading
Old or damp powder
detergent
Empty rinse agent
dispenser
Incorrect dosage of
detergent
•
To remove spots from glassware:
Take out all metal utensils out of the dishwasher.
Do not add detergent.
Choose the longest cycle.
Start the dishwasher and allow it to run for about
18 to 22 minutes, then it will be in the main wash.
Open the door to pour 2 cups of white vinegar
into the bottom of the dishwasher.
Close the door and let the dishwasher complete
the cycle. If the vinegar does not work: Repeat
as above, except use 1/4 cup (60ml)of citric acid
crystals instead of vinegar.
Some audible sounds are
normal
'
Make sure the dishwasher is turned on and the door is
closed securely.
Check that the water supply is connected properly and
the water is turned on.
Make sure the power cord is properly plugged into the
wall socket.
Power supply is not
turned on
Water pressure is low
Select stronger program
•
10
Use only the special dishwasher detergent to avoid
suds. If this occurs, open the dishwasher and let suds
evaporate. Add 1 gallon of cold water to the tub. Close
and latch the dishwasher, then Start the wash
cycle to drain out the water . Repeat if necessary.
Combination of soft
water and too much
detergent
Use less detergent if you have soft water and select a
shortest cycle to wash the glassware and to get them clean.
Tea or coffee stains using a solution of 1/2 cup of bleach and 3 cups warm water
to remove the stains by hand.
You have to wait for 20 minutes after a cycle to let the heating
elements cool down before cleaning interior; otherwise, burns
will happen.
Iron deposits in water
can cause an overall film You have to call a water softener company for a special filter.
Hard water minerals To clean the interior, use a damp sponge with dishwasher
detergent and wear rubber gloves. Never use any other cleaner
than dishwasher detergent for the risk of foaming or suds.
Dial is not in the
position
OFF
Turn the Dial to
OFF position and slide the door latch to the
left.
Dishes block detergent
cups Re-loading the dishes properly.
Normal phenomenon There is some steam coming through the vent by the door
latchduringdryingandwaterdraining.
Aluminum utensils have
rubbed against dishes Use a mild abrasive cleaner to eliminate those marks.
'
This is normal Asmall amount of clean water around the outlet on
the tub bottom at the back of the tub keeps the water
seal lubricated.
Be careful not to overfill the rinse aid dispenser.
Spilled rinse aid could cause oversudsing and lead
to overflowing. Wipe away any spills with a damp cloth.
Make sure the dishwasher is level.
Overfill dispenser or rinse
aid spills
Dishwasher isn t level
'
11
This manual suits for next models
1
Table of contents


