manuals.online logo
Brands
  1. Home
  2. •
  3. Brands
  4. •
  5. Sony
  6. •
  7. Camcorder
  8. •
  9. Sony Handycam NEX-VG900 User manual

Sony Handycam NEX-VG900 User manual

What’s in the Kit •••
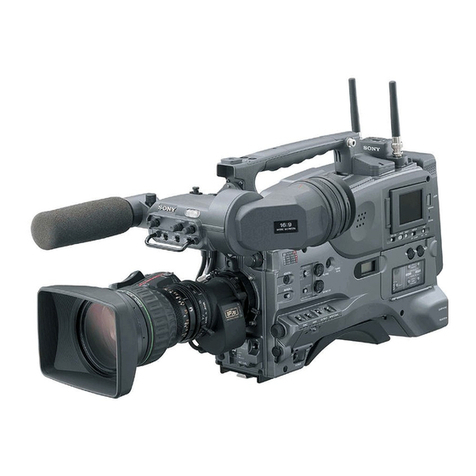
•SONY NEX VG900
video camera with
2.8 28-75 Zoom lens
•lens shade
•rubber eye cup
•remote control
•windscreen
•battery ( 3 )
•Power supply
•Power cable
•USB cable
•lapel mic
14
US
Getting Started
Step 1: Checking
supplied items
Make sure that you have following items
supplied with your camcorder.
The numbers in ( ) are the supplied
quantity.
This camcorder (1)
Body cap (attached to the camcorder)
(1) (p. 20)
AC Adaptor (1) (p. 17)
Power cord (mains lead) (1) (p. 17)
Component A/V Cable (1) (p. 41)
A/V connecting cable (1) (p. 41)
USB cable (1) (p. 52)







Wireless Remote Commander (RMT-
835) (1)
A button-type lithium battery is already
installed.
Rechargeable battery pack (NP-FV70)
(1) (p. 17)
Wind Screen (1) (p. 16)
Large eyecup (1) (p. 29)




36
US
Adjusting for shooting
conditions
Adjusting Exposure, etc., manually
(MANUAL dial)
It is convenient to make manual
adjustments using the MANUAL dial, by
assigning a menu item ([Exposure] in the
default setting) to the MANUAL button.
How to use the MANUAL dial
Adjust with MANUAL dial to make the
adjustment also when pressing IRIS or
SHUTTER SPEED.
To assign a menu item
Press and hold MANUAL for a few seconds
to display the [MANUAL Button] screen.
Rotate the MANUAL dial to assign an item.
You can assign [Exposure], [AE Shift], [WB
Color Temp.], [WB B-A], or [WB G-M].
Using a tripod
Attach a tripod (sold separately) to the
tripod receptacle using a tripod screw (sold
separately, the length of the screw must be
less than 5.5 mm (7/32 in.)).
MANUAL button
MANUAL dial
Tripod
receptacle
14
US
Getting Started
Step 1: Checking
supplied items
Make sure that you have following items
supplied with your camcorder.
The numbers in ( ) are the supplied
quantity.
This camcorder (1)
Body cap (attached to the camcorder)
(1) (p. 20)
AC Adaptor (1) (p. 17)
Power cord (mains lead) (1) (p. 17)
Component A/V Cable (1) (p. 41)
A/V connecting cable (1) (p. 41)
USB cable (1) (p. 52)







Wireless Remote Commander (RMT-
835) (1)
A button-type lithium battery is already
installed.
Rechargeable battery pack (NP-FV70)
(1) (p. 17)
Wind Screen (1) (p. 16)
Large eyecup (1) (p. 29)




• Power up the Camera •••
! ! mode button
• Set Date + Time + Area•••
•Setup menu > Clock icon
•Insert + Format SD card •••
•Setup menu > Format
•Set Shooting Mode •••
•press MODE button beside Power switch or
•use Shooting Mode menu setting
•Recording Format•••
•Setup menu >Image Quality/Size
•Frame Rate > 60i, 60p, 24p ( Next )
•REC Mode > choose Standard.
30
US
Step 7: Inserting a memory card
1
Open the cover, and insert the memory card with the notched edge in the
direction as illustrated until it clicks.
The [Preparing image database file. Please wait.] screen appears if you insert a new
memory card. Wait until the screen disappears.
2
Close the cover.
Notes
If [Failed to create a new Image Database File. It may be possible that there is not enough free space.] is
displayed, format the memory card.
Confirm the direction of the memory card. If you forcibly insert the memory card in the wrong direction,
the memory card, memory card slot, or image data may be damaged.
Do not open the cover during recording.
When inserting or ejecting the memory card, be careful so that the memory card does not pop out and
drop.
To eject the memory card
Open the cover and lightly push the memory card in once.





Access lamp
Note the direction of notched corner.
18
US
4
When the battery is charged, disconnect the AC Adaptor from the DC IN
jack of your camcorder.
Charging time
Approximate time (min.) required when you fully charge a fully discharged battery pack.
Battery pack Charging time
NP-FV70 (supplied) 195
NP-FV100 390
The charging times shown in the table above are measured when charging the camcorder at a
temperature of 25 C (77 °F). It is recommended that you charge the battery in a temperature range of
10 C to 30 C (50 °F to 86 °F).
Tips
See page 64 on recording and playing time.
When your camcorder is on, you can check the approximate amount of remaining battery power with the
remaining battery indicator at the upper right on the LCD screen.
To remove the battery pack
Slide the POWER switch to OFF. Slide the BATT (battery) release lever () and remove the
battery pack ().
To use a wall outlet (wall socket) as a power source
Make the same connections as “Step 3: Charging the battery pack” (p. 17). Even if the battery
pack is attached, the battery pack is not discharged.




BATT (battery) release lever
24
US
Step 5: Turning the power on, and setting the
date and time
1
Slide the POWER switch to ON while pressing the green button.
2
Select the desired language, then touch [Next].
3
Select the desired geographical area with / , then touch [Next].
To set the date and time again, touch (MENU) [Setup] [ ( Clock Settings)] 
[Date & Time Setting] [Date & Time]. When an item is not on the screen, touch /
until the item appears.

POWER switch
Touch the button on the
LCD screen
•Deactivating Auto Shut Off •••
•Setup menu > General Settings>A. Shut Off
• Set Zebra to 100 % white•••
•Camera / Mic menu > Shooting Assistant
•choose Zebra > On
•use + button to set Zebra to 100
•turn Zebra on/off with button
• Set Peaking for Focus Assist•••
•Camera / Mic menu > Shooting Assistant
•choose Peaking > On
•set colour and level
•turn Peaking on/off with button
• Turn on Audio Level Display•••
•Camera / Mic menu > Shooting Assistant
•choose Audio Level Display > On
• Set Digital Zoom Speed•••
•Camera / Mic menu > Shooting Assistant
•choose Digital Zoom > On
•choose Zoom Lever > On
•choose Zoom Speed > Variable or Fixed
•How do we use Zebra ?
A Zebra set at 100% will show that
part of the image that is pure white.
No other part of the image should
have zebra or it is over exposed.
1. Activate Zebra.
2. Place a white piece of paper in
your lighting setup or shot.
3. Adjust the exposure until only
this paper has lines on it.
•Press Shutter: 60 - 125
•Press Gain + adjust max 18dB
•Press Iris + adjust
4. Then reduce the aperture until
the lines disappear.
5. Your image is now a little under
exposed, which is ideal.
16
US
Step 2: Attaching the
supplied accessories
Attaching the Wind Screen
Use the Wind Screen when you want to
reduce the wind noise recorded by the
microphone. Attach the Wind Screen with
the Sony logo facing down.
•Expanded 4X Focus•••
to assist with manual focus
data
rate
PS
Highest
Quality
High
Quality
Std
Long
Time
60i
N/A
24MB
17MB
9MB
5MB
60p
28MB
N/A
N/A
N/A
N/A
24p
N/A
24MB
17MB
N/A
N/A
•Manual White Balance •••
Press White Balance button.
Auto Exposure
Manual Exposure
17
US
Getting Started
Step 3: Charging the battery pack
You can charge the “InfoLITHIUM” battery pack (V series) after attaching it to your
camcorder.
Notes
You cannot attach any “InfoLITHIUM” battery pack other than the V series to your camcorder.
You cannot attach the “InfoLITHIUM” battery pack NP-FV30/FV50, even though they are V series.
1
Slide the POWER switch to OFF (the default setting).
2
Attach the battery pack by sliding it in the direction of the arrow until it
clicks.
3
Connect the AC Adaptor and the power cord (mains lead) to your
camcorder and the wall outlet (wall socket).
The CHG (charge) lamp lights up and charging starts. The CHG (charge) lamp turns off
when the battery pack is fully charged.



Battery pack
CHG (charge) lamp
DC IN jack
To the wall outlet
(wall socket)
AC Adaptor
DC plug
Power cord
(Mains lead)
Align the mark on the DC plug
with that on the DC IN jack.
Charging the battery on the camera ••
SONY NEX 900 CAMERA SET UP
•Insert the camera battery
•Insert the SD card
•Turn on the camera
•Set the camera to video mode
•Go to menu > setup > clock
settings
to set the date & time
•Go to menu > setup > format
to erase the SD card
•Go to menu > image quality
to select frame rate
•Adjust camera settings to your
location
•Press record when you are all set!
PUTTING AWAY EQUIPMENT
•Remove Tripod plate from ca.
•Replace plate on tripod
•Turn the camera off
•Remove your memory card
•Remove the battery - please
hand it back to the depot staff
for recharging.
•Put the lens cap back on
•Lock the lens (found at the
bottom of the lens)
•Gently place the camera back
into the box
•Check that all the equipment
from the kit is put back carefully.
Refer to the yellow laminated
card.
•Return equipment to the depot
on time.
ADJUSTING EXPOSURE
GAIN
- This controls the light sensitivity of
your camera (0 - 30dB)
- For clear and minimal grain it is
recommended to stay between 0 –
10 dB
- To adjust gain, press the manual
button on the left side of the camera,
then press the GAIN / ISO button
and using the scroll feature you can
increase or decrease your gain (for
visual representation, click on
ZEBRA)
IRIS
- This controls how much light is being
let into your lens which affects your
depth of field and focus range
(depending on the f stop of your
lens)
- To adjust aperture, press the manual
button on the left side of the camera,
then press the IRIS button and using
the scroll feature you can increase or
decrease your aperture (for visual
representation of focused areas, click
on PEAKING)
SHUTTER SPEED
- This needs to be adjusted according
to your set frame rates
- Your shutter speed should be double
your frame rate (24fps = 1/48)
•Using the Viewfinder •••
Press Menu > Setup > General Settings
Press VF/Panel:
Auto - LCD screen will shut off when you
place your eye on the viewfinder.
Panel shuts off viewfinder.
•Using the camera on a tripod •
9
US
Using the camcorder
Do not hold the camcorder by the following
parts, and also do not hold the camcorder by
the jack covers.
Viewfinder LCD Screen
Lens Built-in microphone
The camcorder is not dustproofed, dripproofed
or waterproofed. See “Precautions” (p. 66).
Menu items, LCD panel, viewfinder and
lens
A menu item that is grayed out is not available
under the current recording or playback
conditions.
The LCD screen and viewfinder are
manufactured using extremely high-precision
technology, so over 99.99% of the pixels are
operational for effective use. However, there
may be some tiny black points and/or bright
points (white, red, blue, or green in color) that
appear constantly on the LCD screen. These
points are normal results of the manufacturing
process and do not affect the recording in any
way.




Do not record the sun or leave the camcorder
under the sun for a long time. The inside of
the camcorder may be damaged. If sunlight is
focused on a nearby object, it may cause a fire.
When you must place the camcorder under
direct sunlight, attach the lens cap.
Exposing the LCD screen, the viewfinder or the
lens to direct sunlight for long periods of time
may cause malfunctions.
Do not aim at the sun. Doing so might cause
your camcorder to malfunction. Take images
of the sun only in low light conditions, such as
at dusk.
Do not look at the sun or a strong light through
a removed lens. This may cause irrecoverable
damage to your eyes.
About language setting
The on-screen displays in each local language
are used for illustrating the operating
procedures. Change the screen language before
using the camcorder if necessary (p. 26).
On recording
To ensure stable operation of the memory
card, it is recommended to format the memory
card with your camcorder before the first
use. Formatting the memory card will erase
all the data stored on it and the data will be
irrecoverable. Save your important data on your
PC etc.
Before starting to record, test the recording
function to make sure the image and sound are
recorded without any problems.
Compensation for the contents of recordings
cannot be provided, even if recording or
playback is not possible due to a malfunction of
the camcorder, memory card, etc.
To view recordings made on the camcorder on
a TV, an NTSC-based TV is required for the
NEX-VG900, and a PAL-based TV is required
for the NEX-VG900E.
Television programs, films, video tapes,
and other materials may be copyrighted.
Unauthorized recording of such materials may
be contrary to the copyright laws.
Use the camcorder in accordance with local
regulations.











Black points
White, red, blue or green points
36
US
Adjusting for shooting
conditions
Adjusting Exposure, etc., manually
(MANUAL dial)
It is convenient to make manual
adjustments using the MANUAL dial, by
assigning a menu item ([Exposure] in the
default setting) to the MANUAL button.
How to use the MANUAL dial
Adjust with MANUAL dial to make the
adjustment also when pressing IRIS or
SHUTTER SPEED.
To assign a menu item
Press and hold MANUAL for a few seconds
to display the [MANUAL Button] screen.
Rotate the MANUAL dial to assign an item.
You can assign [Exposure], [AE Shift], [WB
Color Temp.], [WB B-A], or [WB G-M].
Using a tripod
Attach a tripod (sold separately) to the
tripod receptacle using a tripod screw (sold
separately, the length of the screw must be
less than 5.5 mm (7/32 in.)).
MANUAL button
MANUAL dial
Tripod
receptacle
9
US
Using the camcorder
Do not hold the camcorder by the following
parts, and also do not hold the camcorder by
the jack covers.
Viewfinder LCD Screen
Lens Built-in microphone
The camcorder is not dustproofed, dripproofed
or waterproofed. See “Precautions” (p. 66).
Menu items, LCD panel, viewfinder and
lens
A menu item that is grayed out is not available
under the current recording or playback
conditions.
The LCD screen and viewfinder are
manufactured using extremely high-precision
technology, so over 99.99% of the pixels are
operational for effective use. However, there
may be some tiny black points and/or bright
points (white, red, blue, or green in color) that
appear constantly on the LCD screen. These
points are normal results of the manufacturing
process and do not affect the recording in any
way.




Do not record the sun or leave the camcorder
under the sun for a long time. The inside of
the camcorder may be damaged. If sunlight is
focused on a nearby object, it may cause a fire.
When you must place the camcorder under
direct sunlight, attach the lens cap.
Exposing the LCD screen, the viewfinder or the
lens to direct sunlight for long periods of time
may cause malfunctions.
Do not aim at the sun. Doing so might cause
your camcorder to malfunction. Take images
of the sun only in low light conditions, such as
at dusk.
Do not look at the sun or a strong light through
a removed lens. This may cause irrecoverable
damage to your eyes.
About language setting
The on-screen displays in each local language
are used for illustrating the operating
procedures. Change the screen language before
using the camcorder if necessary (p. 26).
On recording
To ensure stable operation of the memory
card, it is recommended to format the memory
card with your camcorder before the first
use. Formatting the memory card will erase
all the data stored on it and the data will be
irrecoverable. Save your important data on your
PC etc.
Before starting to record, test the recording
function to make sure the image and sound are
recorded without any problems.
Compensation for the contents of recordings
cannot be provided, even if recording or
playback is not possible due to a malfunction of
the camcorder, memory card, etc.
To view recordings made on the camcorder on
a TV, an NTSC-based TV is required for the
NEX-VG900, and a PAL-based TV is required
for the NEX-VG900E.
Television programs, films, video tapes,
and other materials may be copyrighted.
Unauthorized recording of such materials may
be contrary to the copyright laws.
Use the camcorder in accordance with local
regulations.











Black points
White, red, blue or green points
Other manuals for Handycam NEX-VG900

5

Other Sony Camcorder manuals

Sony SSC-CM565R User manual

Sony

Sony SSC-CM565R User manual

Sony HDCAM HDW-730 User manual

Sony

Sony HDCAM HDW-730 User manual

Sony DCR-TRV240 User manual

Sony

Sony DCR-TRV240 User manual

Sony DCRDVD850 - Handycam DVD Hybrid Camcorder User manual

Sony

Sony DCRDVD850 - Handycam DVD Hybrid Camcorder User manual

Sony Handycam DCR-PC105 User manual

Sony

Sony Handycam DCR-PC105 User manual

Sony Handycam HDR-CX7E User manual

Sony

Sony Handycam HDR-CX7E User manual

Sony MHS PM1 - Webbie HD Camcorder User manual

Sony

Sony MHS PM1 - Webbie HD Camcorder User manual

Sony DXC-151A User manual

Sony

Sony DXC-151A User manual

Sony PXW-X500 User manual

Sony

Sony PXW-X500 User manual

Sony HDR-CX110 - High Definition Flash Memory Handycam... User manual

Sony

Sony HDR-CX110 - High Definition Flash Memory Handycam... User manual

Sony HANDYCAM PMW-320K Manual

Sony

Sony HANDYCAM PMW-320K Manual

Sony BRCH900 User manual

Sony

Sony BRCH900 User manual

Sony HDR-AS20 User manual

Sony

Sony HDR-AS20 User manual

Sony Handycam Video 8 CCD-TR86 User manual

Sony

Sony Handycam Video 8 CCD-TR86 User manual

Sony Handycam DCR-IP220 Manual

Sony

Sony Handycam DCR-IP220 Manual

Sony Digital betacam DVW-707 User manual

Sony

Sony Digital betacam DVW-707 User manual

Sony HANDYCAM Instruction Manual

Sony

Sony HANDYCAM Instruction Manual

Sony CCD-TR78 - Video Camera Recorder 8mm User manual

Sony

Sony CCD-TR78 - Video Camera Recorder 8mm User manual

Sony Handycam DCR-IP220 User manual

Sony

Sony Handycam DCR-IP220 User manual

Sony Handycam CCD-FX730V User manual

Sony

Sony Handycam CCD-FX730V User manual

Sony MICROMV DCR-IP5 User manual

Sony

Sony MICROMV DCR-IP5 User manual

Sony Digital 8 DCR-TRV120 User manual

Sony

Sony Digital 8 DCR-TRV120 User manual

Sony HDR XR 105 E User manual

Sony

Sony HDR XR 105 E User manual

Sony Handycam HDR-CX160 User manual

Sony

Sony Handycam HDR-CX160 User manual

Popular Camcorder manuals by other brands

JVC Everio GZ-E10 Detailed user guide

JVC

JVC Everio GZ-E10 Detailed user guide

Hi Sharp AR Series instruction manual

Hi Sharp

Hi Sharp AR Series instruction manual

Silvercrest HD SCAZ 5.00 B2 User manual and service information

Silvercrest

Silvercrest HD SCAZ 5.00 B2 User manual and service information

Elmo GPC E7344 DN Technical manual

Elmo

Elmo GPC E7344 DN Technical manual

Easypix Challenge HD user manual

Easypix

Easypix Challenge HD user manual

Blackmagicdesign Intensity Pro Operation manual

Blackmagicdesign

Blackmagicdesign Intensity Pro Operation manual

Easypix DVX 5000 HD user manual

Easypix

Easypix DVX 5000 HD user manual

HIK VISION DS-2CC511P(N)-A Technical manual

HIK VISION

HIK VISION DS-2CC511P(N)-A Technical manual

Silvercrest DV-5300HD User manual and service information

Silvercrest

Silvercrest DV-5300HD User manual and service information

MP-Man PC24 instruction manual

MP-Man

MP-Man PC24 instruction manual

RCA EZ5000R Series Guide de l'utilisateur

RCA

RCA EZ5000R Series Guide de l'utilisateur

Canon VIXIA HF S10 quick start guide

Canon

Canon VIXIA HF S10 quick start guide

RCA Small Wonder EZ1000 series quick start guide

RCA

RCA Small Wonder EZ1000 series quick start guide

JVC GR-SXM257UM Service manual

JVC

JVC GR-SXM257UM Service manual

JVC Everio GZ-E10 Basic user's guide

JVC

JVC Everio GZ-E10 Basic user's guide

JVC GR-SXM755UC instructions

JVC

JVC GR-SXM755UC instructions

Panasonic Palmcorder PV-L780 operating instructions

Panasonic

Panasonic Palmcorder PV-L780 operating instructions

JVC Everio GZ-EX255 Detailed user guide

JVC

JVC Everio GZ-EX255 Detailed user guide

manuals.online logo
manuals.online logoBrands
  • About & Mission
  • Contact us
  • Privacy Policy
  • Terms and Conditions

Copyright 2025 Manuals.Online. All Rights Reserved.