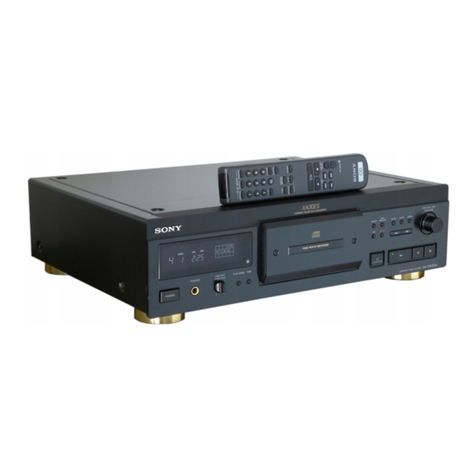
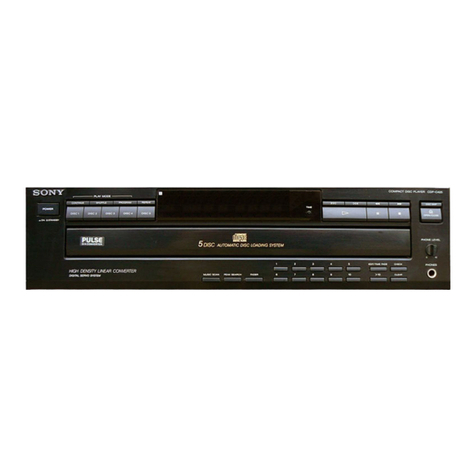
Sony CDP-CX55 User manual

— 1 —
SPECIFICATIONS
Model Name Using Similar Mechanism CDP-CX50/CX571
CD Mechanism Type CDM-46TE
Base Unit Type KSM-213BFN/M-NP
Optical Pick-up Type KSS-213B/S-N
SERVICE MANUAL
MICROFILM
COMPACT DISC PLAYER
CDP-CX55
US Model
Canadian Model
AEP Model
UK Model
E Model
Australian Model
PX Model

— 2 —
TABLE OF CONTENTS
1. SERVICING NOTE .......................................................... 3
2. GENERAL .......................................................................... 6
3. DISASSEMBLY
3-1. Front Panel ......................................................................... 16
3-2. Illumination ASSY .............................................................. 16
3-3. CD Mechanism Deck .......................................................... 17
3-4. Base Unit and Magnet Holder............................................. 17
3-5. CD Mechanism Section ...................................................... 18
4.TEST MODE ..................................................................... 19
5. MECHANICAL ADJUSTMENTS .............................. 22
6. ELECTRICAL ADJUSTMENTS ............................... 25
7. DIAGRAMS
7-1. Circuit Boards Location ...................................................... 28
7-2. IC Block Diagrams ............................................................. 30
7-3. Block Diagrams
• BD Section........................................................................ 33
• Main Section..................................................................... 35
7-4. Printed Wiring Board — BD Section —.............................37
7-5. Schematic Diagram — BD Section — ............................... 39
7-6. Printed Wiring Board —Audio Section — ........................ 41
7-7. Schematic Diagram — Audio Section — ........................... 43
7-8. Printed Wiring Board — Main Section —.......................... 45
7-9. Schematic Diagram — Main Section — ............................ 47
7-10. Printed Wiring Board — Display Section — .................... 49
7-11. Schematic Diagram — Display Section —....................... 51
7-12. Printed Wiring Board — Sensor, Motor Section —..........53
7-13. Schematic Diagram — Sensor, Motor Section — ............ 54
7-14. IC Pin Functions................................................................ 55
8. EXPLODED VIEWS
8-1. Case Section........................................................................ 59
8-2. Front Panel Section ............................................................. 60
8-3. Chassis Section ................................................................... 61
8-4. Mechanism Deck Section 1 (CDM-46TE) ......................... 62
8-5. Mechanism Deck Section 2 (CDM-46TE) ......................... 63
8-6. Optical Pick-up Section (KSM-213 BFN/M-NP)............... 64
9. ELECTRICAL PARTS LIST ........................................ 65
CAUTION
Use of controls or adjustments or performance of procedures
other than those specified herein may result in hazardous ra-
diation exposure.
The laser component in this product
is capable of emitting radiation
exceeding the limit for Class 1.
This appliance is classified as
a CLASS 1 LASER product.
The CLASS 1 LASER
PRODUCT MARKING is
located on the rear exterior.
This caution label
is located inside
the unit.
MODEL IDENTIFICATION
— BACK PANEL —
4-991-160-0π
4-991-160-1π
4-991-160-2π
4-991-160-3π
4-991-160-4π
4-991-160-5π
4-991-160-6π
PARTS No. MODEL
US model
Canadian model
AEP model
Australian model
E, PX model
Singapore model
UK model

— 3 —
SAFETY CHECK-OUT
After correcting the original service problem, perform the follow-
ing safety checks before releasing the set to the customer:
Checktheantennaterminals,metaltrim,“metallized”knobs, screws,
and all other exposed metal parts forAC leakage. Check leakage as
described below.
LEAKAGE
The AC leakage from any exposed metal part to earth Ground and
from all exposed metal parts to any exposed metal part having a
returntochassis,mustnotexceed0.5mA(500microampers).Leak-
age current can be measured by any one of three methods.
1. A commercial leakage tester, such as the Simpson 229 or RCA
WT-540A. Follow the manufacturers’ instructions to use these
instruments.
2. A battery-operated AC milliammeter. The Data Precision 245
digital multimeter is suitable for this job.
3. Measuring the voltage drop across a resistor by means of aVOM
or battery-operatedAC voltmeter. The “limit” indication is 0.75
V, so analog meters must have an accurate low-voltage scale.
The Simpson 250 and Sanwa SH-63Trd are examples of a pas-
sive VOM that is suitable. Nearly all battery operated digital
multimeters that have a 2V AC range are suitable. (See Fig. A)
Fig. A. Using an AC voltmeter to check AC leakage.
To Exposed Metal
Parts on Set
0.15
µ
F1.5k
Ω
AC
voltmeter
(0.75V)
Earth Ground
NOTES ON HANDLINGTHE OPTICAL PICK-UP BLOCK
OR BASE UNIT
The laser diode in the optical pick-up block may suffer electrostatic
breakdown because of the potential difference generated by the
charged electrostatic load, etc. on clothing and the human body.
During repair, pay attention to electrostatic breakdown and also use
the procedure in the printed matter which is included in the repair
parts.
The flexible board is easily damaged and should be handled with
care.
NOTES ON LASER DIODE EMISSION CHECK
The laser beam on this model is concentrated so as to be focused on
the disc reflective surface by the objective lens in the optical pick-
up block. Therefore, when checking the laser diode emission, ob-
serve from more than 30 cm away from the objective lens.
LASER DIODE AND FOCUS SEARCH OPERATION
CHECK
Carryoutthe“Scurvecheck”in“CDsectionadjustment”andcheck
that the S curve waveform is output repeatedly.
SECTION 1
SERVICING NOTE
SAFETY-RELATED COMPONENT WARNING !!
COMPONENTS IDENTIFIED BY MARK !OR DOTTED LINE
WITH MARK !ON THE SCHEMATIC DIAGRAMS AND IN
THE PARTS LIST ARE CRITICAL TO SAFE OPERATION.
REPLACE THESE COMPONENTS WITH SONY PARTS
WHOSE PART NUMBERS APPEAR AS SHOWN IN THIS
MANUAL OR IN SUPPLEMENTS PUBLISHED BY SONY.
ATTENTION AU COMPOSANT AYANT RAPPORT
À LA SÉCURITÉ!!
LESCOMPOSANTSIDENTIFIÉSPARUNEMARQUE!SUR
LES DIAGRAMMES SCHÉMATIQUES ET LA LISTE DES
PIÈCES SONT CRITIQUES POUR LA SÉCURITÉ DE
FONCTIONNEMENT.NE REMPLACER CES COMPOSANTS
QUE PAR DES PIÈCES SONY DONT LES NUMÉROS
SONT DONNÉS DANS CE MANUEL OU DANS LES
SUPPLÉMENTS PUBLIÉS PAR SONY.
— 4 —
CD-TEXTTEST DISC
This unit is able to display the test data (character information) written in the CD on its fluorescent indicator tube.
The CD-TEXT TEST DISC (TGCS-313:4-989-366-01) is used for checking the display.
To check, perform the following procedure.
Checking Method:
1. Turn ON the power, set the disc on the disc table with the side labeled as “test disc” as the right side, close the front cover, and chuck the
disc.
2. Press the ”button and play back the disc.
3. The following will be displayed on the fluorescent indicator tube.
Display : 1kHz/0 dB/ L&R
4. Press the =and +buttons to switch the track. The text data of each track will be displayed.
For details of the displayed contents for each track, refer to “Table 1 : CD-TEXT TEST DISC TEXT Data Contents” and “Table 2 : CD-
TEXT TEST DISC Recorded Contents and Display”.
Restrictions in CD-TEXT Display
In this unit, some special characters will not be displayed properly. These will be displayed as a space or a character resembling it. For details,
refer to “Table 2 : CD-TEXT DISC Recorded Contents and Display”.
Table 1 : CD-TEXT TEST DISCTEXT Data Contents (TRACKS No. 1 to 41:Normal Characters)
1
2
3
4
5
6
7
8
9
10
11
12
13
14
15
16
17
18
19
20
21
TRACK
No. Displayed Contents
22
23
24
25
26
27
28
29
30
31
32
33
34
35
36
37
38
39
40
41
TRACK
No. Displayed Contents
1kHz/0dB/L&R
20Hz/0dB/L&R
40Hz/0dB/L&R
100Hz/0dB/L&R
200Hz/0dB/L&R
500Hz/0dB/L&R
1kHz/0dB/L&R
5kHz/0dB/L&R
7kHz/0dB/L&R
10kHz/0dB/L&R
16kHz/0dB/L&R
18kHz/0dB/L&R
20kHz/0dB/L&R
1kHz/0dB/L&R
1kHz/-1dB/L&R
1kHz/-3dB/L&R
1kHz/-6dB/L&R
1kHz/-10dB/L&R
1kHz/-20dB/L&R
1kHz/-60dB/L&R
1kHz/-80dB/L&R
1kHz/-90dB/L&R
Infinity Zero w/o emphasis//L&R
Infinity Zero with emphasis//L&R
400Hz+7kHz(4:1)/0dB/L&R
400Hz+7kHz(4:1)/-10dB/L&R
19kHz+20kHz(1:1)/0dB/L&R
19kHz+20kHz(1:1)/-10dB/L&R
100Hz/0dB/L*
1kHz/0dB/L*
10kHz/0dB/L*
20kHz/0dB/L*
100Hz/0dB/R*
1kHz/0dB/R*
10kHz/0dB/R*
20kHz/0dB/R*
100Hz Squer Wave//L&R
1kHz Squer Wave//L&R
1kHz w/emphasis/-0.37dB/L&R
5kHz w/emphasis/-4.53dB/L&R
16kHz w/emphasis/-9.04dB/L&R
NOTE : The contents of Track No. 1 to 41 are the same as those of the current TEST DISC-their titles are displayed.

— 5 —
Table 2: CD-TEXT TEST DISC Recorded Contents and Display
(In this unit, some special characters cannot be displayed. This is no a fault.)
TRACK
No. Recorded contents Display
´
NAll the same
NAll the same
NAll the same
NAll the same
NAll the same
NAll the same
NAll the same
X Y Z [ / ] ^ _ (58····
NAll the same
NAll the same
NAll the same
xyz{I}~(78····
i ¢ £ ¤ ¥ § (A0···· is not displayed
≥(A8···· Cª¬PR–are not displayed
µ• (B0···· •±23¶are not displayed
† ¿ (B8···· 1ºare not displayed
NAll the same
NAll the same
NAll the same
ÙÚÛÜY ß (D8····
NAll the same
NAll the same
ñòóôõö÷(F0····
NAll the same
NAll the same
NAll the same
to
NAll the same
′
*
42
43
44
45
46
47
48
49
50
51
52
53
54
55
56
57
58
59
60
61
62
63
64
65
66
67
to
99
! ” # $ %& ´ (21h to 27h)1kHz 0dB L&R
( ) + , – . / (28h to 2Fh)
01234567 (30h to 37Fh)
8 9 : ; < = > ? (38h to 3Fh)
@A B CD E F G (40h to 47Fh)
H I J K L MNO (48h to 4Fh)
P QR S T U VW (50h to 57Fh)
X Y Z [ ¥ ] ^ _ (58h to 5Fh)
a b c d e f g (60h to 57Fh)
h i j k l m n o (68h to 6Fh)
p q r s t u v w (70h to 77Fh)
xyz{I } (78h to 7Fh)
i ¢ £ ¤ ¥ § (A0h to A7h) 8859-1
≥Cª¬PR–(A8h to AFh)
•±23 µ¶ • (B0h to B7h)
†1º¿ (B8h to BFh)
ÀÁÂÃÄÅÆÇ (C0h to C7Fh)
ÈÉÊËÌÍÎÏ (C8h to CFh)
DÑÒÓÔÕÖ (C0h to C7Fh)
ØÙÚÛÜY ß (D8h to DFh)
àáâãäåæç (E0h to E7Fh)
èéêëìíîï (E8h to FFh)
∂ñòóôõö÷(F0h to F7Fh)
øùúûüy ÿ (F8h to FFFh)
No.66
No.67
to
No.99
~
′
1
41
23
4
′
´
˙
1
41
23
4

— 6 —
SECTION 2
GENERAL
LOCATION OF PARTS AND CONTROLS
Front Panel 23
4
5
6
7
8
This section is extracted from
instruction manual.
19
10
11
12
13
20
21
22
19 18 17 16 15 14
1 POWER switch
2 Front cover
3 CONTINUE button
4 Display window
5 SHUFFLE button
6 PROGRAM button
7 REPEAT button
8 TIME/TEXT button
9 INPUT button
10 DISC/CHARACTER/PUSH ENTER knob
11 SEARCH button
12 CHECK button
13 CLEAR button
14 ±button
15 ≠button
16 pbutton
17 Pbutton
18 ·button
19 PLUS ONE button
20 X-FADE button
21 NO DELAY button
22 MEGA CONTROL button

— 7 —

— 8 —

— 9 —

— 10 —

— 11 —

— 12 —

— 13 —

— 14 —

— 15 —

— 16 —
SECTION 3
DISASSEMBLY
Note : Follow the disassembly procedure in the numerical order given.
3-1. FRONT PANEL
3-2. ILLUMINATION ASSY
D
A
B
C
While pressing arrows
A
,
B
, and
C
,rotate the illumination assembly
in arrow direction
D
and remove it.
ILLUMINATION ASSY
2
Screw (BVTT3x6)
1
Screw (BVTT3x6)
5
Bracket (illumination)
(with illumination assy)
4
Two screws (BVTT3x6)
!º
Claw
Expand the front panel
in the direction of arrow
A
to release catching claws.
A
6
Screw
(BVTT3x6)
7
Beam
B
MAIN board: CN503
!¡
Claw
Expand the front panel
in the direction of arrow
B
to release catching claws.
!™
Front panel
8
Flat type wire
(21 core)
9
Three screws
(BVTT3x6)
3
Connector
LED board: CNP841
To AUDIO board

— 17 —
3-3. CD MECHANISM DECK
5
Two screws
(BVTT3x10)
!∞
Connector
TABLE SENSOR
board: CN52
!™
Screw
(BVTT3x10)
1
Screw
(PTPWH2.6x8)
2
Table (50)
3
Two screws
(BVTP3x8)
4
Ring (B)
!¡
CD mechanism deck
7
Connector
DISC SENSOR (S) board: CN53
8
Flat type wire (16 core)
BD board: CN102
6
Screw (BVTT3x10)
9
Flat type wire (9 core)
BD board: CN103
!º
Connector
SW board: CN54
!¢
Connector
TABLE SENSOR board: CN51
!£
Connector
MOTOR board: CN61
!§
CD mechanism base unit
3-4. BASE UNIT AND MAGNET HOLDER
Remove in the arrow direc-
tion while pressing the claw
with a screwdriver, etc.
3
Screw
(BTP2.6x10)
4
Magnet holder
1
Two screws
(BTP2.6x8)
Remove in the arrow direc-
tion while pressing the claw
with a screwdriver, etc.
8
Tension coil spring (F-2)
9
BU holder assy
0
Torsion spring (Holder)
!¡
Base unit
6
Two screws
(PTPWH2.6x8)
5
Two screws
(PTPWH2.6x8)
7
Tension coil
spring (F-1)
2
Reinforcement assy

— 18 —
3-5. CD MECHANISM SECTION
NOTE:
Adjustthepositionofthegear
as shown in the figure when
attaching.
9
Slider (Lock)
!º
Slider (Cam)
!£
Slider
(Loading)
4
Cam cover
3
Screw
(BTP2.6x8)
1
Screw
(BTP2.6x8)
2
SW board
!™
Torsion spring
(Loading)
!¡
Disc holder
(A)
!∞
Loading lever ASSY
!¢
Tension coil spring (Lever)
6
Screw
(BTP2.6x8)
7
Cover
(Lever)
5
Screw
(BTP2.6x8)
8
Disc holder
(B)

— 19 —
SECTION 4
TEST MODE
ADJ MODE
1. Press the POWER button to turn ON the power, and open the
front cover.
2. Place the CD on the slit, close the front cover, and chuck the the
CD.
3. Press the POWER button to turn OFF the power.
4. Short-circuit the test point (TP302:ADJ) and test point
(TP303:GND) of the main board with a lead wire.
5. Press the POWER button to turn ON the power.
The CD is played back automatically and the ADJ mode is set.
• Prohibits high speed search during accessing
• Ignores even if GFS becomes L
ADJ Mode Special FunctionTable
(The buttons shown in the ( ) function only when the remote com-
mander provided is used.)
Button Function
(3)
(8)
CHECK
CLEAR
Tracking servo, sled servo OFF
Tracking servo, sled servo ON
Observation mode during S
Automatic eccentricity measurement (Not used for servicing)
Display of special functions in ADJ mode
*1
CD1
ALL DISCS
S-JI mode
*2
CD1
ALL DISCS
Sokuteichu -4
DISC TRACK MIN SEC
• Observation mode during S
When this mode is set, the
right will be displayed. *1
• Automaticeccentricitymea-
surement (Not used for ser-
vicing)
When this mode is set, the
right will be displayed.
TheSokuteichu count down
display will be counted
down from 4 to to 1 *2.
After counting down, the
eccentricity value will be
displayed *3.
Sokuteichu count down display
*3
CD1
ALL DISCS
Henshin 026
FLUORESCENT INDICATOR TUBE, LED ALL LIT,
AND KEY CHECK MODE
1. Short-circuit the test point (TP302:ADJ) and test point
(TP301:AFADJ) of the main board with a lead wire.
2. Insert the power plug into the outlet. The whole fluorescent in-
dicator tube lights up.
When the SRAM is faulty, “SRAMNG” will be displayed.
3. When the front cover is opened, the POWER button LED goes
off. Closing the front cover will light it up again.
Pressing the POWER button sets the key check mode.
The POWER button LED also lights up.
All buttons have individual button numbers.
When a button is pressed, the button number is counted up and
displayed.
Eccentricity value
CD1
1 DISC
0
1
Count up display
Buttons and Corresponding Button Numbers
CLEAR
CHECK
REPEAT
PROGRAM
SEARCH
INPUT
TIME/TEXT
ENTER
±
≠
CONTINUE
SHUFFLE
POWER
X-FADE
NO DELAY
·
P
p
PLUS ONE
MEGA CONTROL
DISC/CHARACTER
0
1
2
3
4
5
6
7
8
9
14
15
16
17
18
All lit (LED lights up)
Partially lit 1 (LED lights up)
Partially lit 2
LED lights up
Partially lit 3 (LED lights up)
Partially lit 4
Each time JOG is rotated, PROGRAM 123 is
displayedonthefluorescentindicator tube,and
1, 2, 3 light up one by one.
Clockwise : PROGRAM 1n2n3
Counterclockwise : PROGRAM 3n2n1
Button Button Number or Display
Displays button number

— 20 —
Partially lit 1
ABCDEFG
CD1
Partially lit 2
Partially lit 3
CD1
2nd
Partially lit 4
PROGRAM 1
CD1
PROGRAM 1
FLUORESCENTINDICATORTUBEAND LED CHECK
MODE
This mode is set by pressing the POWER button while pressing the
CHECK and PLUS ONE buttons in the power-off (standby) state.
The whole fluorescent indicator tube lights up, and the STANDBY,
MEGA CONTROL, PLUS ONE, ·, and PLEDs light up.
This mode can be exited by pressing the POWER button.
SHIPMENT MODE
(Set to this mode when returning the unit to the
user.)
This mode is set by pressing the POWER button while pressing the
REPEAT and PLUS ONE buttons in the power-off (standby) state.
The power goes off automatically after the SRAM is all-erased and
the BD is opened (loading out state).
[ MAIN BOARD ] — CONDUCTOR SIDE —
IC501
IC201
CN702
CN704
AGING MODE
• Mode which repeatedly changes and plays back discs automati-
cally in the unit.
• It will repeat aging as long as no errors occur.
• If an error occurs during aging, it will stop all servos, motors, etc.
instantaneously, display the error number, and stop operations.
However, the stopping conditions differ according to whether the
unit is equipped with the “self-protection function during errors”
described later.
The function serves to maintain the state of the unit when errors
occur.
Sequence of Aging Mode
$
$
$
$
$
$
$
$
$
Order of Disc Change
(1 cycle takes 3 minutes)
$
$
$
1. No. 51
2. No. 20
3. No. 40
4. No. 30
5. No. 10
6. N0. 40*
$
$
$
$
1. Disc change
2. Load in
3. TOC read
4. Access of last track
5. 3 second playback
6. Access of first track
7. 3 second playback
8. Load out
* DISC No. 40 chucks twice during one cycle.
To differentiate, the “ 2nd ” on the block indicator of the fluo-
rescent indicator tube will light up during the second chucking.
Special Functions in Aging Mode
There are some useful function in the aging mode.
• Disc setting mode*1
• Switching of use/disuse of protection function in errors *2
• Aging cycle count function *3
*1 Disc setting mode:
5 discs are set before setting the aging mode. This mode makes
the setting of these discs more easy.
*2 Switching of use/disuse of protection function in errors:
Function which voluntarily corrects errors which occur during
normal operations by retries.
If this function is not provided, all operations will be stopped
without retiring. It is suitable for checking errors with low re-
producibility.
If this function is provided, and errors can be corrected by re-
tries, aging will be continued without stopping.
(The normal aging should be performed with “be”.)
TP302 (ADJ)
TP303 (GND)
TP301 (AFADJ)
CD1
R505 R504
Table of contents
Other Sony CD Player manuals

Sony
Sony DNE330S User manual

Sony
Sony CDX-T65 User manual

Sony
Sony CDP-XE330 User manual

Sony
Sony CDP-CA70ES - Compact Disc Player Instructions and recipes

Sony
Sony DVX-100S Product guide

Sony
Sony CDP-X555ES User manual

Sony
Sony CDX-GT484US User manual

Sony
Sony CFD-6 User manual

Sony
Sony CDX-G1020UC User manual

Sony
Sony CDP-CE405 - 5 Disc Cd Changer User manual

Sony
Sony D-VJ65 User manual

Sony
Sony Discman D-E905 User manual

Sony
Sony Discman D-240 User manual

Sony
Sony D-E350 - PSYC CD Walkman User manual

Sony
Sony XDCAM PDW-HD1500 User manual

Sony
Sony NP-F20 User manual

Sony
Sony MZ-S1 SonicStage v1.5 User manual

Sony
Sony SCD-XE600 User manual

Sony
Sony CDX-T69 User manual

Sony
Sony Walkman D-E340 User manual