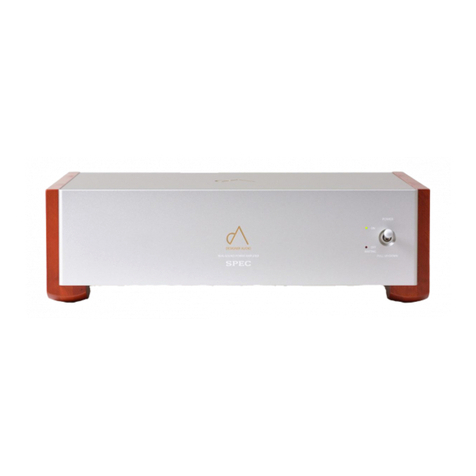
SPEC Designer Audio RPA-MG1000 User manual

RPA-MG1000
MONAURAL POWER AMPLIFIER

CAUTION: TO REDUCE THE RISK OF ELECTRIC SHOCK, DO
NOT REMOVE CHASSIS. NO USER-SERVICEABLE
PARTS INSIDE. REFER SERVICING TO QUALIFIED
SERVICE PERSONNEL.
AVIS: RISQUE DE CHOC ELECTRIQUE-NE PAS OUVRIR.
THIS SYMBOL IS INTENDEDTO ALERTTHE USER TO THE PRESENCE OF NON-INSULATED
“DANGEROUS VOLTAGE” WITHIN THE PRODUCTS ENCLOSURE THAT MAY BE OF
SUFFICIENT MAGNITUDETO CONSTITUTE A RISK OF ELECTRIC SHOCK TO PERSONS.
THIS SYMBOL IS INTENDEDTO ALERTTHE USERTOTHE PRESENCE OF IMPORTANT
OPERATING AND MAINTENANCE (SERVICING) INSTRUCTIONS IN THE LITERATURE
ACCOMPANYING THE UNIT.
WARNING
Exposure to extremely high noise levels may cause a
permanent hearing loss.
Individuals vary considerably to noise induced hearing loss
but nearly everyone will lose some hearing if exposed to
sufficiently intense noise for a sufficient time.
Operating Environment
Operating environment temperature and humidity: +5 °C to
+35 °C (+41 °F to +95 °F); less than 85 %RH (cooling vents not
blocked)
Do not install this unit in a poorly ventilated area, or in locations
exposed to high humidity or direct sunlight (or strong artificial
light)
WARNING
This equipment is not waterproof. To prevent a fire or shock
hazard, do not place any container filled with liquid near
this equipment (such as a vase or flower pot) or expose it
to dripping, splashing, rain or moisture.
POWER-CORD CAUTION
Handle the power cord by the plug. Do not pull out the plug
by tugging the cord and never touch the power cord when
your hands are wet as this could cause a short circuit or electric
shock. Do not place the unit, a piece of furniture, etc., on the
power cord, or pinch the cord. Never make a knot in the cord or
tie it with other cords.The power cords should be routed such
that they are not likely to be stepped on. A damaged power
cord can cause fire or give you an electrical shock.
Check the power cord once in a while.
European model only
If you want to dispose this product, do not mix it with general household waste. There is a separate collection
system for used electric products in accordance with legislation that requires proper treatment, recovery and
recycling.
Private households in the member states of the EU, in Switzerland and Norway may return their used electric products free of
charge to designated collection facilities or to a retailer (if you purchase a similar new one).
For countries not mentioned above, please contact your local authorities for the correct method of disposal.
By doing so you will ensure that your disposed product undergoes the necessary treatment, recovery and recycling and thus
prevent potential negative effects on the environment and human health.
Safety Precautions
2

Contents
Chapter 1 Introduction
Check included items ................................................................ 4
Installing this product ............................................................... 4
Regarding installation ............................................................... 4
Chapter 2 Connections
Connections diagram ............................................................... 5
How to connect the speaker cords....................................... 7
How to connect XLR cables..................................................... 7
How to connect audio cords................................................... 8
How to connect the power cord............................................ 8
Chapter 3 Part Names
Front panel .................................................................................... 9
Rear panel....................................................................................10
Chapter 4 How to Operate
Playback steps............................................................................12
Chapter 5 Other
Troubleshooting........................................................................13
Care and maintenance............................................................13
Specifications .............................................................................14
Warranty and after sales service..........................................15
3

4
Chapter 1 Introduction
Check included items
• Power cord × 1
• DC cord (MAIN) × 1
• DC cord (SUB) × 1
• Mini plug connection cable
• Operation manual (this book)
Installing this product
• Be sure to install this product on a at, stable surface.
• Do not install this product in the following locations:
—On top of a television (the image may warp)
—Near a cassette deck or other magnetism emitting device (the
audio may be adversely aected)
—In a location hit by direct sunlight
—In a moist location
—In high or low temperature locations
—In a location with vibration
—In a location with much dust or tobacco smoke
—In kitchens or other locations where fumes are emitted and
oil is used
Regarding installation
Caution
• Never place items on top of this product, cover it with a sheet,
or use it when its heat radiation is obstructed. Abnormally high
temperatures may damage the product.

Chapter 2 Connections
Connections diagram
Important
• When connecting devices or making changes, be sure to turn the POWER switch OFF and disconnect the power cord from the
electrical outlet. Plug in the power cord last.
• If an extremely loud signal is input to this product, there is a danger that noise will be generated and cause damage. In such a case,
lower the input signal level.
• Use only the included DC cords for the connection between the amplier and power supply. Do not use any other cords. Be careful not
to mistake the MAIN DC cord and the SUB DC cord.
■When MONO mode (mono connection)
• Set the 9SPEAKERS selector switch to [1]. (page 11)
• When a playback device is directly connected to the product, the volume of the product can be adjusted by connecting the volume
controller (H-VC5) (sold separately) to the SPEC-VOL CONT terminal. Set the 3GAIN selector switch to [SPEC-VOL]. (page 11)
• When a control amplier is connected to the product, set the 3GAIN selector switch to [MAX] or [-6 dB]. (page 11)
• For this connection, always connect a speaker to the speaker 1 terminal. No sound will be output from the speaker 2 terminal.
H-VC5
Speaker system
To the speaker terminals To the audio
output terminal
To the balanced
output terminals
Control amplier, etc
To AC IN
To the electrical outlet
* Depending on the control amplier used, there may be a caution regarding simultaneously connecting RCA and XLR, so refer to the
operation manual of the respective control amplier.
5

■When MONO x 2 mode (bi-amplier connection)
• Set the 9SPEAKERS selector switch to [1+2]. (page 11)
• When a playback device is directly connected to the product, the volume of the product can be adjusted by connecting the volume
controller (H-VC5) (sold separately) to the SPEC-VOL CONT terminal. Set the 3GAIN selector switch to [SPEC-VOL]. (page 11)
• When a control amplier is connected to the product, set the 3GAIN selector switch to [MAX] or [-6 dB]. (page 11)
HIGH
LOW
H-VC5
Speaker system
To the speaker
terminals
To the audio
output terminal
To the balanced
output terminals
Control amplier, etc
To AC IN
To the electrical outlet
* Depending on the control amplier used, there may be a caution regarding simultaneously connecting RCA and XLR, so refer to the
operation manual of the respective control amplier.
6
Chapter 2 Connections

How to connect the speaker cords
The connection terminals are red for positive (+) and black for
negative (–).
1 Twist the wire.
2 Loosen the speaker terminal, and insert the speaker
cord.
3 Once the speaker cord is inserted, tighten and secure
the speaker terminal.
321
10 mm
The connection terminals on this product are also compatible
with Y lug terminals and banana plugs.
Y lug terminals Banana plugs
Caution
• Use speakers with nominal impedance of 4 Ω to 16 Ω.
• Connect accurately the + and – terminals between the speakers
and this product.
• Do not allow unshielded center wire from the terminals to stick
out and make contact with each other. If the center wires touch
the device may break.
• Use sucient current capacity speaker cord and be sure to
make connections that are not loose and do not short. Using
low current capacity connecting cords or making imperfect
connections may aect playback audio and can cause
overheating or short circuits.
• High voltage is output from the speaker terminals. To avoid the
danger of electrical shock, be sure to unplug the power cord
before making speaker connections.
How to connect XLR cables
Connect the balanced output terminal on the device to the XLR
input terminal on the product.
Match the orientation of the XLR plug to the XLR input terminal
on the product, and then push the XLR plug into the XLR input
terminal until a click is heard.
LINE 2 (XLR)
When disconnecting an XLR plug, press the latch lever (the part
with “PUSH” inscribed on it) while pulling the cable. Use caution,
as forceful disconnection may damage the unit.
LINE 2 (XLR)
Press the latch lever
Note
• The pin positioning of the XLR input terminal of this product is
depicted below. Conrm that the product to be connected is
compatible with the pin positioning of this product. For further
details, consult the operation manual included with the product
to be connected.
1
2
3
1: Ground
2: Hot
3: Cold
• The balanced output signal level of the source device (CD
player, DA converter, etc.) may be signicantly larger than the
RCA unbalanced output, depending on the device. For this
reason, the signal level of balanced input on the product is
dropped approximately 3 dB lower than the RCA unbalanced
input. Depending on the connected device, playback may
occur at a volume lower than a device with an RCA unbalanced
connection, but this is normal and not a malfunction.
7
Chapter 2 Connections

How to connect audio cords
Connect the RCA output terminal on the device to the RCA input
terminal on the product.
How to connect the power cord
Once all connections have been made, connect the included
power cord to the AC IN terminal of this product and to the
residential electrical outlet. Press rmly to push the plug all the
way in.
* The plug type varies according to the region.
Caution
• The power cord for this product is removable, but please refrain
from using power cords other than the cord included (3P plug-
in socket type with electrical current capacity: 7 A).
Note
• When not using this product for extended periods, be sure to
turn the POWER switch OFF or unplug the power cord from the
electrical outlet.
• Turn the POWER switch OFF before unplugging the power cord.
• The power consumption of this product varies greatly
depending on the volume level of the playback audio signal.
For satisfactory music playback, connect to an electrical outlet
with sucient capacity. (Connecting to a low capacity electrical
outlet creates the danger that the connection will overheat.)
• If the residential power supply is cut o due to a power outage,
the state of this product will be as follows when power is
restored.
—If the POWER switch is ON when power is restored
"The product returns to its state prior to power restoration.
—If the POWER switch is OFF when power is restored
"The product is in the normal power OFF state.
8
Chapter 2 Connections

Chapter 3 Part Names
Front panel
1
1 ON indicator
Lit when the product power is turned on.
Change the illumination type by setting the DIMMER switch.
(page 10)
9

Rear panel
■Power supply
1
23
4 5
1 POWER switch
Turns power ON and OFF.
2 AC IN terminal
Connect the included power cord. (pages 5 to 6, 8)
3 Fuse
The fuse may break if something abnormal occurs to the
product. Contact us if the fuse breaks. (page 15)
4 DIMMER switch
Changes the illumination type of the ON indicator on the front
of the product. (For both the power supply and amplier)
ON : Lit in white light.
1/2 : Lit using white light. Slightly dimmer than ON.
OFF: Only the center of the ON indicator is lit using warm
yellow light.
5 DC OUT terminals
Connect the power supply to the amplier using the included
dedicated cables.
10
Chapter 3 Part Names

■Amplier
2 63
9
57
8
4
1
1 DC IN terminals
Connect the amplier to the power supply. (Using the
dedicated cables.)
2 SOUND MODE selector switch
Changes the sound quality. Set the sound quality as desired.
3 GAIN selector switch
Switches the output gain of this product.
MAX : Select this setting when using a preamp. Switches
the setting to the rated output.
-6dB : Switches the setting to the rated output minus
6dB.
SPEC-VOL : Select this setting when using the volume
controller (H-VC5).
4 SPEC-VOL CONT terminal
Connect the volume controller (H-VC5).
5 Speaker terminal
Connect the speakers. Always connect a speaker to terminal 1.
Connect speakers to terminal 1 and 2 in bi-amplier operation.
6 INPUT selector switch
Switch the input terminals of this product.
LINE 1 : Set this when the device connected to this
product is connected to the RCA terminals.
LINE 2 : Set this when the device connected to this
product is connected to the XLR terminals.
LINE 2 (ATT) : Set this when the device connected to this
product is connected to LINE 2 (XLR terminals)
and you hear distortion due to, for example,
excessive input. This reduces the level of the
input signal by approximately 6dB.
7 Audio input terminals (pages 5 to 6)
LINE 1 : RCA-type input terminal.
LINE 2 : XLR-type input terminal (female).
8 Audio output terminals
LINE OUT outputs the input signal to the product unmodied.
9 SPEAKER selector switch
Switches the mode for the connection between this product
and the speakers.
1 : Select this setting when the product is used in a typical
connection. No sound will be output from the speaker 2
terminal. (page 5)
1+2 : Sound will be output from both the speaker 1 and
speaker 2 terminals. Select this setting when using a bi-
amplier connection. (page 6)
11
Chapter 3 Part Names

Chapter 4 How to Operate
Playback steps
2
1 Turn on the power of the playback device.
2 Conrm that the volume of the device connected to
the product is set to its lowest setting, and then turn
on the power of the product.
Check that the ON indicator on the body front panel is lit.
12

Chapter 5 Other
Troubleshooting
If you think this product may be broken, check the following troubleshooting items. Some minor operational errors can make the
product appear to be broken.
Potential causes other than this product should also be considered. Check the other devices being used as well as all simultaneously
operated electrical devices. If the following instructions do not help even on multiple inspections, contact us. (page 15)
Issue Cause/Treatment Reference
The power does not turn on. • Is the power plug disconnected from the electrical outlet?
→Correctly insert the power plug into the outlet.
page 8
• Is the power plug disconnected from the AC IN terminal?
→Correctly insert the power plug.
page 8
• If the power will not turn on even with correctly connecting the power plug, the
fuse may be broken.
→Contact us for consultation.
page 15
There is no sound. • Is the connecting cord disconnected from the terminal, or connected incorrectly?
→Correctly connect the cord.
pages 5 to 8
• Is the speaker cord disconnected from the terminal, or connected incorrectly?
→Correctly connect the speaker cord.
pages 5 to 7
• Is the terminal or connecting cord pin plug dirty?
→Wipe clean the terminal or plug.
–
• Is the GAIN selector switch of this product set to SPEC-VOL?
→Set it to the MAX or -6dB position.
page 11
Sound comes out of the speakers even
after turning o this product.
• Immediately after turning o the power, sound may come out of the speakers
while the ON indicator is lit, but this is not a sign of breakage.
→When playback is nished, rst turn the volume of the device connected to
the product all the way down and then shut o the power of this product.
–
The volume is low. • Is the GAIN selector switch set to -6 dB?
→Set it to MAX.
page 11
Note
The product may not function properly due to external factors, such as static electricity. In this case, the product may once again
function properly if the power cord is unplugged and then plugged in again. If this does not solve the problem, please contact SPEC
CORPORATION.
Care and maintenance
For daily maintenance, use a polishing cloth to lightly wipe the front panel of this product. If it is very dirty, use a soft cloth moistened
with neutral detergent watered down to 1/5-1/6 concentration and wipe o the dirt, then wipe dry with a dry cloth.
If alcohol, thinner, petroleum ether or insecticide adhere to the front panel it may be damaged, so use caution. Whenever using pre-
moistened wipe, be sure to completely read the warning instructions that come with the wipe.
Natural wood is used for the side panels and bottom panels of the product. Do not place it in direct sunlight or near a heater. The front
panel may become discolored, and the product may be warped due to the natural wood contracting.
13

Specications
■Amplier
Maximum output ................................300 W × 2 (4 Ω, during bi-amplier connection)
Frequency response...........................10 Hz - 30 kHz ±1 dB (6 Ω, 1 W)
Line input terminal .............................XLR input: 1
RCA unbalanced input: 1
Line output terminal .......................... XLR output: 1
RCA unbalanced output: 1
Speaker terminal .................................2
External dimensions...........................450 mm (width) × 180 mm (height) × 455 mm (depth)
Weight.....................................................18.0 kg
■Power supply, other
Power voltage.......................................110, 120, 220, 230, 240 V AC, 50 Hz/60 Hz
Electrical consumption......................With no signal: 16 W, during maximum output: 550 W
External dimensions...........................450 mm (width) × 180 mm (height) × 440 mm (depth)
Weight.....................................................27.0 kg
■Included items
Power cord............................................. 1
DC cord (MAIN).....................................1
DC cord (SUB)........................................1
Mini plug connection cable.............1
Operation manual (this book) ........1
* Due to improvements the above specications and external appearance may be changed without notice.
14
Chapter 5 Other

Warranty and after sales service
■About Warranty
Make sure that the name of your distributor and the date of
purchase are written in the warranty. Read it carefully, and
then keep it in a secure location. The warranty is valid for
one year from the date of purchase.
■Malfunctions
If the product malfunctions in the course of normal use
(use in accordance with the manual and safety precautions)
during the warranty period, then we will repair the product
free of charge. When you bring your product to the
distributor for servicing, be sure to bring the warranty with
you. See the guarantees in your warranty for details. We
will repair malfunctions occurring after the warranty period
has expired for a fee, in accordance with our servicing
regulations.
Please note that we cannot provide any warranty or
bear any liability for damage to any equipment that is
connected to the unit resulting from incorrect use.
Contact Information
SPEC CORPORATION
+81-3-3660-0303TEL:
FAX: +81-3-3660-0333
E-mail: info-ex@spec-corp.co.jp
URL : spec-corp.co.jp
■Terms of Warranty
1. If this product malfunctions during use in accordance with the
manual, and during the warranty period, then please bring the
product and this warranty to the store where you purchased it.
It will be repaired free of charge.
2. If you cannot ask the store where you purchased it for repairs
(e.g. if you have moved or the product was a gift), please
consult with SPEC CORPORATION.
3. A fee will be charged for repairs in the following circumstances,
even if it is during the warranty period.
(A) The product malfunctioned or was damaged due to user
error or unauthorized repair or modication
(B) The product malfunctioned or was damaged due to
dropping, etc. after purchase
(C) The product malfunctioned or was damaged due to
re, ooding, lightning and other weather phenomena,
pollution, salt damage, or the like
(D) The product malfunctioned or was damaged due to
other than normal use, such as long hours of continuous
commercial use
(E) The main unit has been disassembled
(F) The text of the warranty has been changed or overwritten
(G) The malfunction was caused by another company’s
product
4. This warranty cannot be re-issued. Store it in a safe place, and
do not lose it.
WARRANTY RPA-MG1000 MONAURAL POWER AMPLIFIER
Name Telephone
( )
Address
Date of Purchase Distributor Name & Telephone
Warranty Period (Main Unit Only)
One Year
from Date of Purchase
15
Chapter 5 Other
SAMPLE

2019
4th FL.NIHOMBASHI NAKAYA BUILDING,12-12 NIHOMBASHI-
KOBUNA-CHO,CHUO-KU,TOKYO 103-0024,JAPAN
Table of contents
Other SPEC Amplifier manuals
