Springfield 96203 User manual

COLOR CHANGING ALARM CLOCK/THERMOMETER
Model 96203 Instruction Manual
BATTERY INSTALLATION
Remove the battery door compartment cover on the base of the unit
This product operates on 3 AAA batteries (not included). Insert (3) AAA batteries according to the polarity
markings in the battery compartment
The unit beeps and shows the default clock time
Replace the battery compartment cover
SETTING THE UNIT & VIEWING SCREENS
Use the setting buttons and switches on the bottom to program the unit
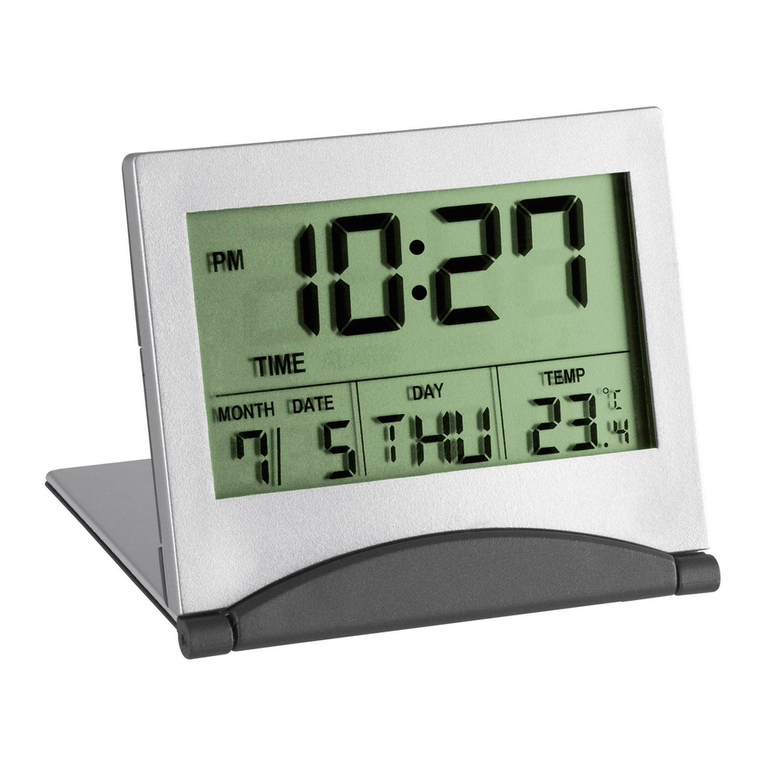
Gently push the screen back to switch between clock, date, alarm, timer and temperature displays
The “M” button on the bottom of the unit will also switch between displays
TIME SETTING
Press the “M” button to switch to the TIME screen
Press the “S” button to switch between 12 and 24 hour clock formats
Press and hold the “S” button for 3 seconds. The hour digits flash.
Press the “▲” or “▼” button to change the hour
Press the “S” button to select the displayed hour. The minute digits flash
Press the “▲” or “▼” button to change the minutes
Press the “S” button to select the displayed minutes. The clock is set.
DATE SETTING
Press the “M” button to switch to the DATE screen
Press and hold the “S” button for 3 seconds. The year digits flash.
Press the “▲” or “▼” button to change the year
Press the “S” button to select the displayed year. The month digits flash.
Press the “▲” or “▼” button to change the month
Press the “S” button to select the displayed month. The date digits flash.
Press the “▲” or “▼” button to change the date
Press the “S” button to select the displayed date. The date is set.

ALARM SETTING
Press the “M” button to switch to the AL (alarm) screen
Press and hold the “S” button for 3 seconds. The hour digits flash.
Press the “▲” or “▼” button to change the hour
Press the “S” button to select the displayed hour. The minute digits flash.
Press the “▲” or “▼” button to change the minutes
Press the “S” button to select the displayed minutes
Press the “S” button to turn on or off the alarm. A bell icon ( ) in the upper left corner of the screen indicates
the alarm is on.
Press the “▲” button to select a beeping alarm sound. Press the “▼” button to select a musical alarm sound.
Press the “S” button to silence the alarm when it sounds
TIMER SETTING
Press the “M” button to switch to the TIMER screen
Press and hold the “S” button for 3 seconds. The minute digits flash.
Press the “▲” or “▼” button to change the minutes
Press the “S” button to select the displayed minutes. The second digits flash.
Press the “▲” or “▼” button to change the seconds
Press the “S” button to select the displayed seconds
Press the “S” button to start the timer countdown
The alarm will sound for 60 seconds when time is up. Press the “S” button to stop the alarm. The timer will
recall the last set time. Press the “▼” button to reset the timer to zero.
The timer will time up to 180 minutes, 59 seconds
TEMPERATURE DISPLAY
Press the “M” button to switch to the TEMPERATURE screen
Press the “S” button to switch between °F and °C temperature scales
RETURN TO TIME SWITCH
The unit can be set to show a selected screen continuously (ex. temperature), or it can automatically
return to the convenient clock screen.
Set to OFF to hold the current screen until another screen is selected
Set to ON to automatically return to the clock screen after 10 seconds of viewing another screen
NOTE: if set to ON during programming, and no buttons are pressed within 10 seconds, the unit will return to
the clock screen. Simply repeat programming steps, or move the switch to OFF during programming.
BACKLIGHT SWITCH
For a continuous color changing display, move the Backlight switch to ON
For a 10 second backlight, move the Backlight switch to TR. When a screen changes, the backlight will turn on
and then off automatically.
To keep the backlight off, move the Backlight switch to OFF
TIPS AND PRECAUTIONS
Set the backlight switch to OFF or TR to conserve battery power.
Continuous use of the color changing LED feature could cause the temperature reading to be higher than the
actual air temperature. For best results, turn off the continuous color changing feature when product is not in
use.
Should the display or sounds become dim or irregular, replace all the batteries at the same time. Do not mix old
and new batteries. Do not mix Alkaline, carbon-zinc (standard) or Nickel-Cadmium (rechargeable) batteries.
To reset all the settings, gently push a small tool into the RESET hole on the bottom of the unit.

Do not tamper with the unit's internal components. Doing so may cause damage. Other than replacing
the batteries, the unit contains no user-serviceable parts.
Do not subject the unit to excessive force, shock, dust, temperature or humidity. This may result in
malfunction, shorter electronic life span, damaged battery and distorted parts.
The unit is intended for indoor use only. It is not sealed against moisture and could be damaged if
used outdoors or in humid indoor conditions. Do not expose the unit to: water, direct heat, a hot
surface or direct sunlight. This may cause damage to the casing or the electric circuits and components
inside.
Do not dispose of batteries in fire. Batteries may explode or leak. Remove the batteries if the unit will
not be used for a long period of time. Always replace all batteries at the same time; do not mix old and
new batteries. Do not mix alkaline, standard (carbon-zinc) or rechargeable (ni-cad, ni-mh, etc.)
batteries.
NOTE: please recycle or dispose of batteries per local regulations.
WARNING: Batteries may pose a choking hazard. Do not let children handle batteries.
PRECAUTION: Do not dispose of batteries in fire. Batteries may explode or leak. Remove the batteries
if the thermometer will not be used for a long period of time.
FCC STATEMENT OF COMPLIANCE
Caution: Changes or modifications not expressly approved by the party responsible for compliance could
void the user’s authority to operate the equipment.
Note: This device complies with part 15 of the FCC Rules. Operation is subject to the following two
conditions: (1) this device may not cause harmful interference, and (2) this device must accept any
interference received, including interference that may cause undesired operation. This equipment has
been tested and found to comply with the limits for a Class B digital device, pursuant to part 15 of the
FCC rules. These limits are designed to provide reasonable protection against harmful interference in a
residential installation. This equipment generates, uses and can radiate radio frequency energy and, if not
installed and used in accordance with the instructions, may cause harmful interference to radio
communications. However, there is no guarantee that interference will not occur in a particular
installation. If this equipment does cause harmful interference to radio or television reception, which can
be determined by turning the equipment off and on. The user is encouraged to try to correct the
interference by one or more of the following measures:
-Reorient or relocate the receiving antenna.
-Increase the separation between the equipment and receiver.
-Connect the equipment into an outlet on a circuit different from that to which the receiver is connected.
-Consult the dealer or an experienced radio/TV technician for help.
Taylor Precision Products / Springfield Precision
2220 Entrada Del Sol, Suite A
Las Cruces,New Mexico 88001
For additional product information, please contact us through www.taylorusa.com or springfieldprecision.com
Made to our exact specifications in China.
© 2012 Taylor Precision Products, Inc. and its affiliated companies, all rights reserved. Springfield® is a
registered trademark of Taylor Precision Products, Inc. and its affiliated companies. All rights reserved.
96203 7.13
Table of contents
