SR Research EyeLink Portable Duo User manual

EyeLink Portable Duo Quick Start Guide
5
1Basic PC Setup
With the Laptop Host PC (included) powered off, connect its power supply. Set up the basic
components of the Display PC as you would any other computer. The Display PC can be any
modern 15” or 17” laptop computer running on Windows (XP, Vista, 7, or 10), Mac OS X
(10.6.8 or later), or Linux PC with an Ethernet port. This computer may have been oponally
acquired from SR Research.
Laptop Host PC with Laptop Mount
Test that the Setup is Working
Turn on the Host PC to verify that the Host
Applicaon starts. Once the Host PC is up and
running you should see the Camera Setup
screen.
To exit to the File Manager from the Host Applicaon, press Ctrl-Alt-Q (or click the “Exit”
buon on the Setup screen and then select “Exit”). The File Manager interface is illustrated
below. You can use the buons highlighted below to start the Host PC Applicaon or shut
down the Host PC.
Starts Host Applicaon Shuts down Host PC
Connued
on back
4
2
3
Display PC
See Chapter 6 of the EyeLink Portable Duo Installaon Guide for detailed instrucons
Host PC to Display PC Connecon
Using the Ethernet cable supplied, connect the Host PC
Ethernet port to an Ethernet port on your Display PC.
Configure that Display PC Ethernet port with the
following stac IP address:
IP Address: 100.1.1.2 Subnet Mask: 255.255.255.0
Surge Protector
Laptop Host PC
Display PC
2
3Camera Connecon
Connect both plugs at the end of
the eye tracker’s cable into the USB
3.0 ports on the Host PC.
Adjust the span of the laptop mount with the
supplied tools to fit the intended Display laptop
PC. Place the camera upside down on a desk
with the screw holes facing up, then the laptop
mount on the camera, and install the two screws
through the mount and into the camera with the
supplied tools. Place the laptop mount on the
Display laptop PC with the two side rails resng
on the edges of the laptop.
R
Leave the default gateway and other sengs blank.
Aach the Laptop Mount to the Camera
Version 1.02L
See Chapter 4 of the EyeLink Portable Duo Installaon Guide for detailed instrucons
USB1000-880-WA
EyeLink USB Camera
Serial # CAA11
SR Research Ltd.
Made in Canada
5V @ 1.8A
IP21
82123730156
Install two camera screws with the supplied Allen Key
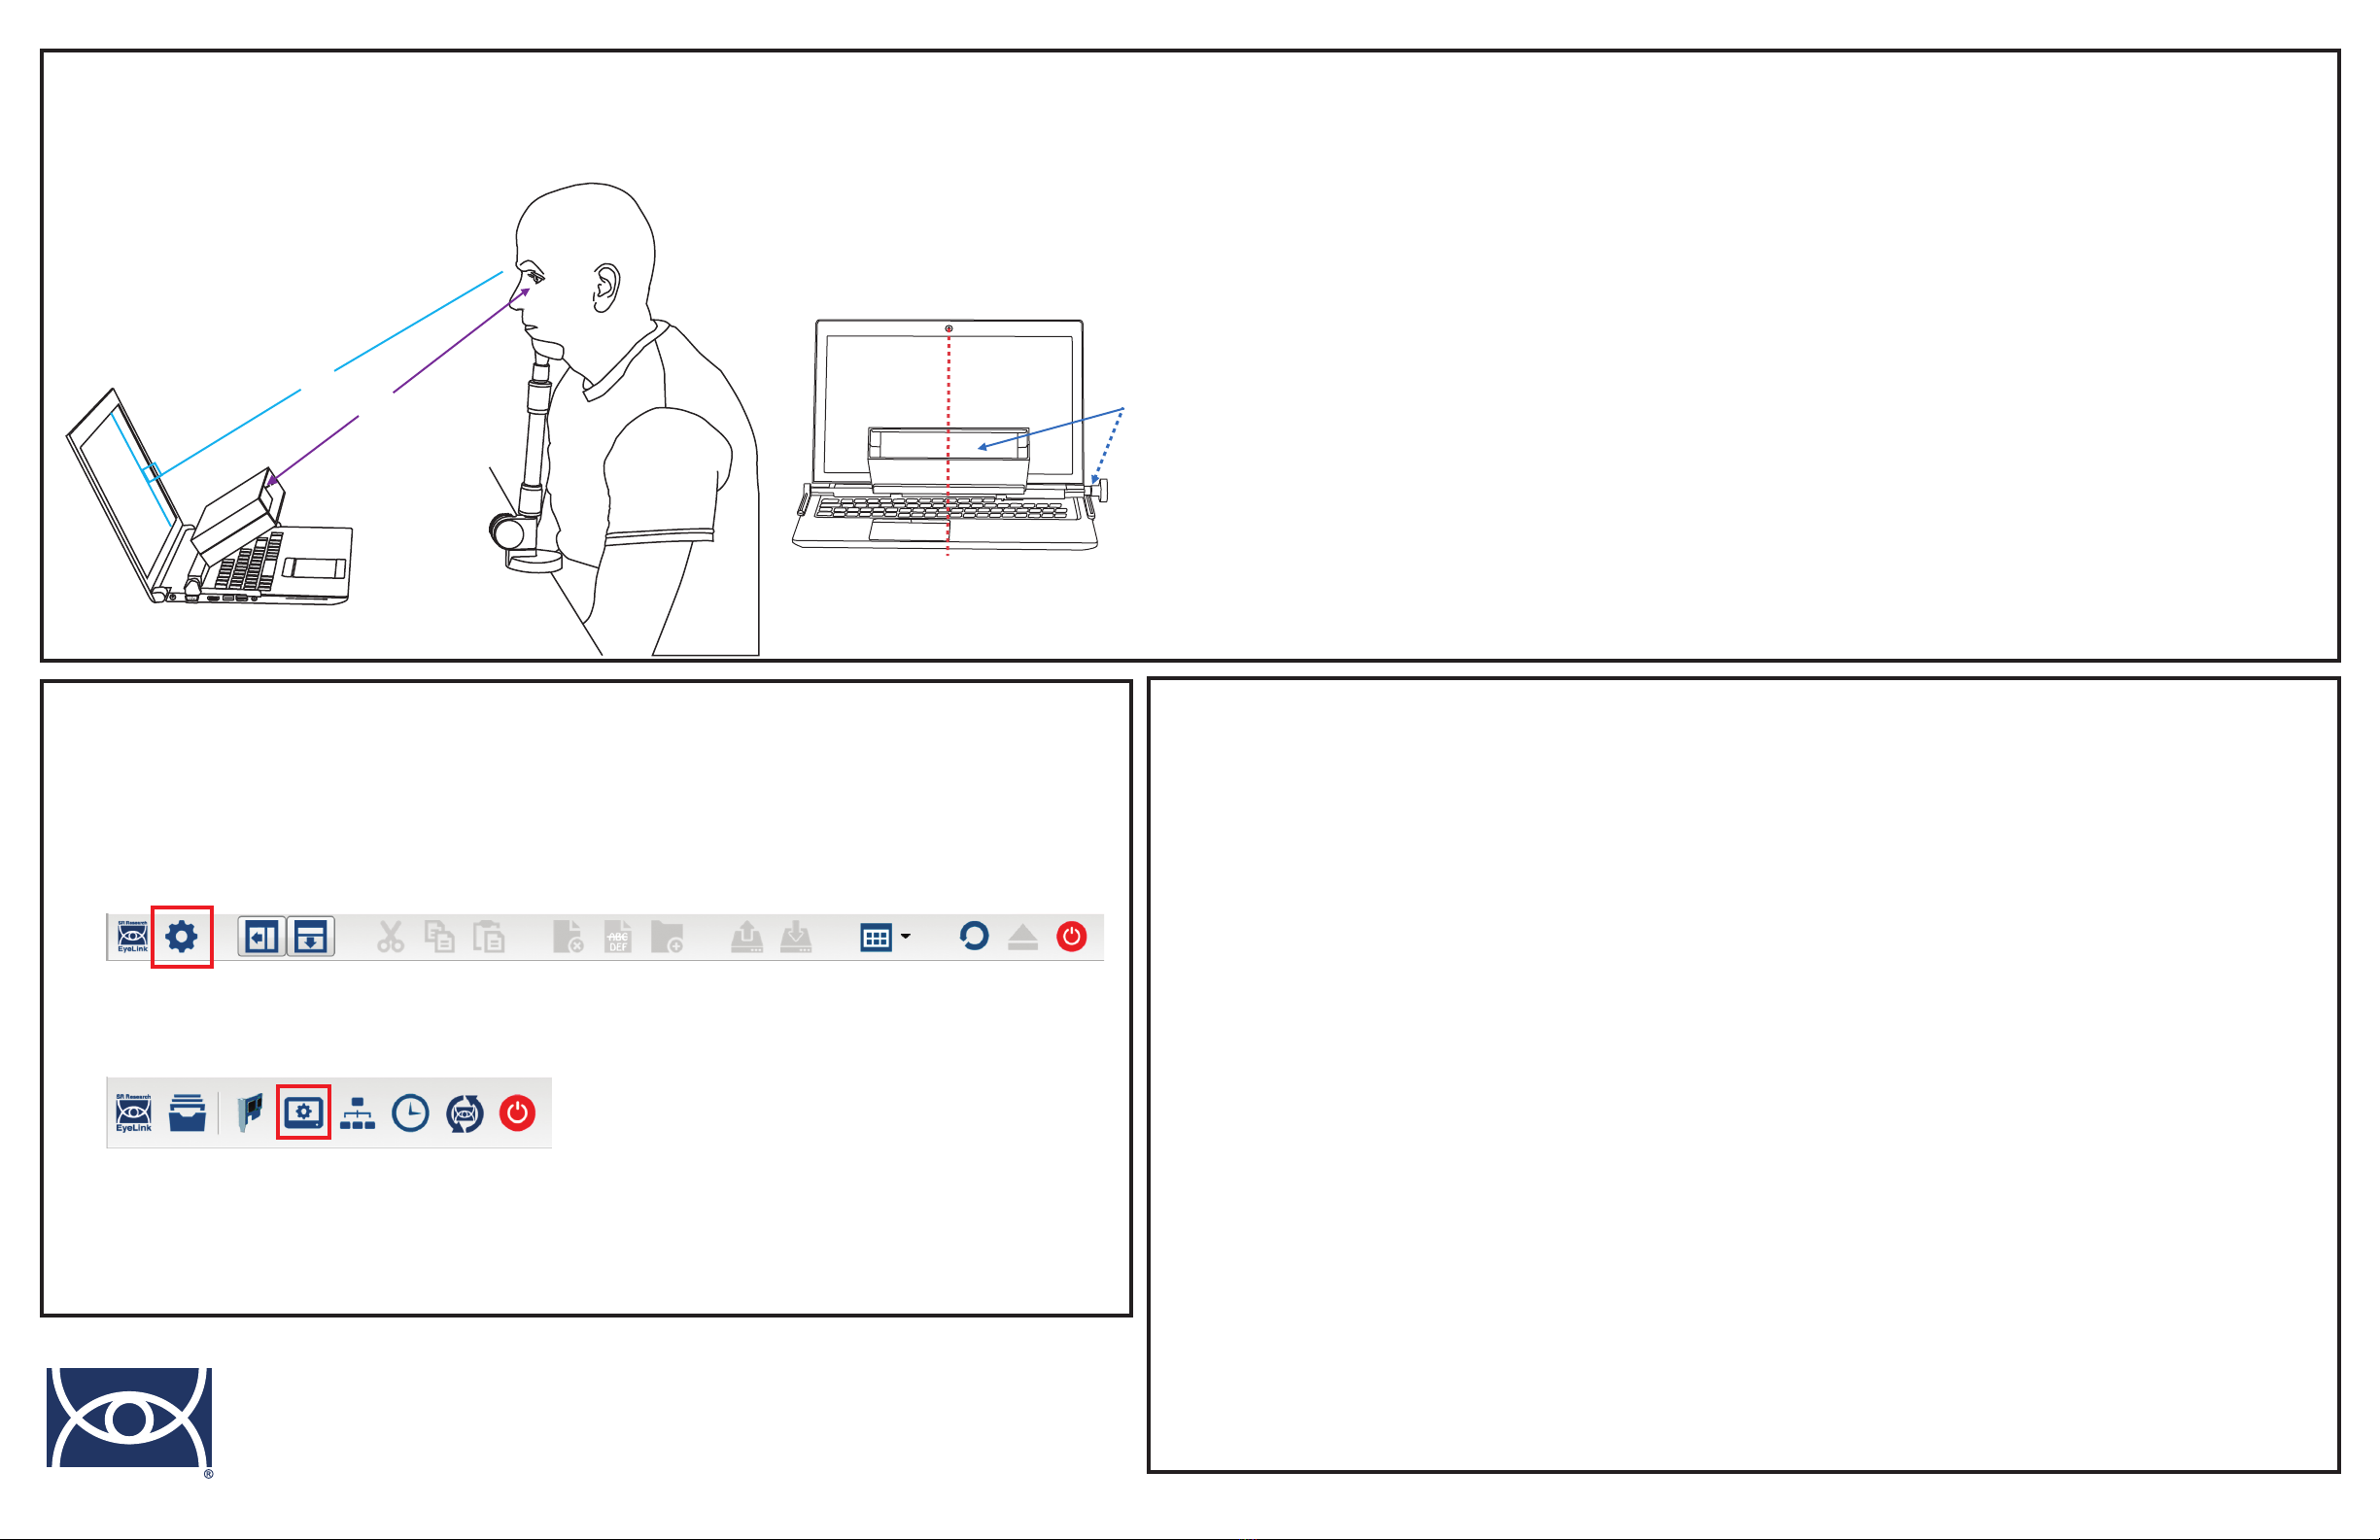
Tracker and Parcipant Posioning
6
Step A) The camera should be placed as close to the screen as possible without blocking the
parcipant’s view. Adjust the posion of the laptop so that the distance from the front of the camera
to the parcipant’s eyes is about 45 cm. If using the Remote Mode, make sure that the reported
target distance on the Host PC is around 52 cm.
Step B) When the parcipant is seated, lt the screen of the laptop so that it is perpendicular to the
parcipant’s line of sight.
Step C) Adjust the posion of the laptop so that the images of the parcipant’s eye are aligned in the
horizontal center of the camera view.
Step D) Adjust the camera angle by holding the camera with your le hand, lng it to the intended
angle, and then ghtening the clamping knob on the right side of the mount with right hand to lock
the camera at the intended posion.
7Enter Screen Sengs
Exit to the File Manager if the Host Applicaon is running (press Ctrl-Alt-Q or click the “Exit”
buon from the Setup screen and then choose “Exit”).
From the File Manager, press the Configuraon Buon.
8Install Display PC Soware
Display PC soware installers are provided on the USB drive that came with the system; or, the most
recent installers can be downloaded from hp://www.sr-support.com, or from the following links:
A) Experiment Builder (Windows and Mac OS X):
hp://www.sr-research.com/eb.html
B) Data Viewer (Windows and Mac OS X):
hp://www.sr-research.com/dv.html
C) EyeLink Developers Kit (Windows, Mac OS X, and Linux):
hp://www.sr-research.com/devkit.html
Experiment Builder and Data Viewer require the use of a USB HASP license key. The license key
driver can be installed in Windows from “Start -> Programs -> SR Research -> Install Hasp Driver”, or
in Mac OS X from the installer packages.
Run Experiment Builder to access example projects from the “File -> Examples” menu.
Even more examples can be found at www.sr-support.com under “Experiment Builder -> Examples”.
The system is also compable with E-Prime, Psychtoolbox for Matlab, Presentaon, LabView,
Python, C/C++, C#, and the Windows COM interface.
Aer installing the EyeLink Developers Kit, example projects for other programming environments
will be available in Windows under “Start -> Programs -> SR Research -> EyeLink Examples” and in
Mac OS X under “Applicaons -> EyeLink -> SampleExperiments”.
From the Configuraon screen press the Screen Sengs buon.
Follow the instrucons that appear to enter the Screen Dimensions, Display Resoluon,
Eye-to-Screen Distance, Camera-to-Screen Distance, and Opmal Target-to-Camera Distance.
A
B
C
For addional support, please contact SR Research:
Email: support@sr-research.com
Support forums: www.sr-support.com
Phone: 613-271-8686
Toll Free: 1-866-821-0731
Configuraon
Screen Sengs
See Chapter 3 of the EyeLink Portable Duo User Manual for detailed instrucons
See Secon 5.4 of the EyeLink Portable Duo Installaon Guide for detailed instrucons
EyeLink is a registered trademark of SR Research Ltd.
D
EyeLink
SR Research
Other manuals for EyeLink Portable Duo
1


