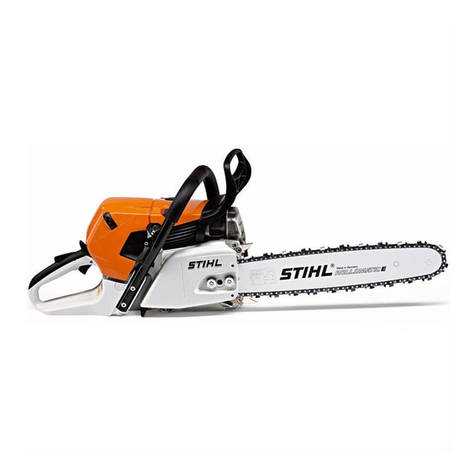
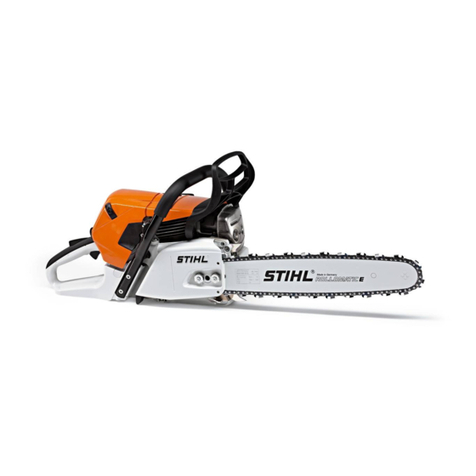
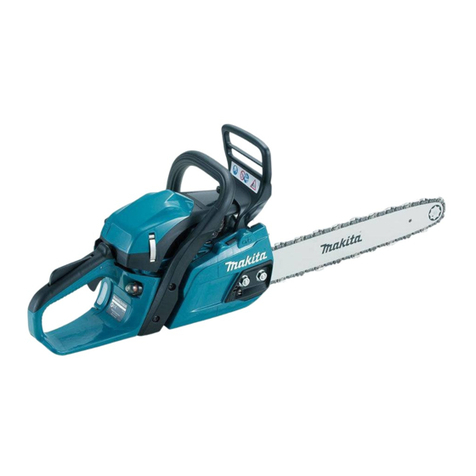
Stihl 090 User manual


Congratulationsl
You
are
the
owner
of a
precision-manufactured
STlHL
chain
saw
designed
to
give
you
long
and
dependable
service.
To
receive
maximum
performance
and
satisfaction
from
your
STlHL
chain
saw,
it
is
important
that
you
read
and
understand
the
maintenance
and
safety
precautions
before
using
your
saw.
Contact
your
STlHL
Dealer
or
the
SllHL
Distributor
for
your
area
if
you
do
not
understand
any
of
the
instructions
or
warnings
in
this
Manual.
This
Manual
contains
warnings
regarding
your
saw,
operating
and
safety
instructions for all
STlHL
090
series
power
saws.
WarningI
Because
a
chain
saw
is
a
high-speed
wood-cutting
tool,
some
special
safety
precautions
must
be
observed
as
with
any
other
power
saw
to
reduce
the
risk of
personal
acci-
dents.
Careless
or
improper
use
may
cause
serious
or
even
fatal
injury.
It
is
important
that
you
fully
understand
'the
contents
of
this
Manual
and
that
you
allow
only
persons
who
understand
this
Manual
to
operate
your
chain
saw.
Pay
special
attention
to
the
safety
precautions
and
cutting
techniques
outlined
on
pages
4
to
19.
STIHL!s
philosophy
Is
to
continually
improve
all
of its pro-
ducts.
As
a
result,
engineering
changes
and
improvements
are
made
from
time-to-time.
Written
notices
relating
to
such
changes
are
sent
to
STIHL
Dealers.
Ifthe
operating
characteristics
of
the
appearance
ofyour
saw
differs
from
those
described
in
this
Manual,
please
contact
your
local
STlHL
Dealer
for
updated
information
and
assistance.
0458
166
0121.
MO,7S.AO.1:
Printed In
West
Germany x
8nHL
090,
090
AY,
090
G
InstructionManual/Owner'sManuals, .
Sharpeningand Maintenance
of
SawChains
Contents
Parts of
the
Chain
Saw
Satety
Precautions
-
The
Operator
-The
Saw
-
The
Use
of
the
Saw
-
Maintaining
and
Storing
the
Saw
Mounting
Guide
Bar
and
Chain
Fuel
Chain
Oil
Helpers
Handle
Starting
011
Quantity
Control
Cutting
Attachment
Air
Filter
Carburetor
.
Replacing
the
Chain
Sprocket
Gear
Lubricant
090 G
Rewind
Starter
Maintenance
Chart
Specifications
Sharpening
and
Maintenance
of
Saw
Chain
STIHL~
C
1990
Andreas
Stlhl,
Walblingen
Andreas Stihl
D-7050W8lblingen
2
4
4
6
6
19
20
22
22
23
24
27
28
30
31
32
33
34
36
37
39
1

Parts
of
the
Chain Saw
4 Front hand Guide
5 Front handle bar nose 3
6 tenninal Guide
bar
2
of filter cover
Bumper spike
13
9 Clutch
l'
O'lain catcher 15
Oil
hand
Chain
16
12
Oil
22 Chain
23
Choke lever
18
throttle lock
19
25 Slarter throttle lock
20
2

Defil1llfOns
1.
Oilo~
Saw
Chain. A
J09P
~
of
cutters.
tie straps
~drive
links.
.
','
~,.-
2. Guide Bar.
Su_~:ijuJdes
the
saw
chain.
.
";.,:
)"'~:
~:/r~
3. Gu
..
~rNose.:~~,paitoftheguidebar.
4.
~
~auarii.-~.::\~
afnst
ro..
~
.,."
PI,
ag P
jecting
~fInd
helps preventthe left
hand
from
touchi
ttcEt
Ch8tn
if
It
slipsoff
the
handle bar•
•
0<
,.:,._.,..J!~t
",,-of
..
'
',',
',,,,,
, ,
5.
FrontHandle.
Handle
bar
for
the left
hand
atfront
of
saw.
6.
Sp;idc
Plug
TemdnaL Connects the spark
plug
with
1he
i9nHiOn
Wire.
7.
Lock'or-Filter
Cover. For
remoVing
filter cover, per-
rnitS1Uter
to.be
cIearied.:
8.
,
Rear'Handle-The
Support
handJe
forthe right hand,
. Iocited at
or
tOward
the
rear
of
the
saw.
9.
Oil
Fftier
~For
closing
the
011
tank.
10.
Stop
Switch. Switches
the
engine's
ignition
system
off
and
stops the
running
of
the
engine.
11.
Oil Hand Pump.
For
additional
manual
c::;haln
lubri-
cation..
12.
011
Inspection
WIiu:Iow.
For
contrO'mng
the
chain
011
level.
13. BUmper
~
Toothed
stop
for
holding
saw
steady
againSt
wood.
14.
ClUtch.
C()upJes
engine
to
chain sprocket
when
engine
is accelerated beyond Idle
speed.
15.
Chain
Catcher. Catches a broken chain
and
guides
Itinside
the
chain
sprocket COVet
""~~~~\'
16.
cta8fr.
8prf;K=ket.
The toothed wheel that drives the
sawctUll~
.
17.
Chain.Sprock8t
Cover. Covers the clutch and the
sproClCet.
18.
Choke
Lever.
Eases engine starting
by
enriching
~ixlure.
19.
StartfngThrottle Lock.
Keeps
the throttle partualJy
~n
~ring
starting.
20.
~
Throttle
Look.
Must
be
depressed before
~
the
throttle
trigger.
21.
Throttle
TrIgger. Controls
the
speed ofthe
engine.
22. ChaInGuard(Scabbard). Protects
the
operator
from
touchil1$1
the
chain.
23. DecompfessionValve. Makesstarting easier.
24.
Muffler.
Attenuates
exhaust noises
and
diverts ex-
haust
gases
i~,
req~lreQ
~on.
25.
Starter
~'The,
grip
Of
the,
pull
,starter.
which is
the
device
to
start the engine.
26.
Fuel
FlUer
Cap.
For
closing
the
fuel tank.
3

Safety Precautions
The
use
ofanychain sawmay
be
hazardous.
The
saw
chain
has
large,
sharp cutters. If the cutters contact your
flesh,
they
will
cut
you,
ewn
Hthe
chain,
is not
m9VIns.'
At
full
throttle, the chain
speed
can
reach
45
mph
'(20
ri1Is).
It is
important that
you
read,
fully
understand
and
observe the
following .
safetY
precautions
and
.
warningS.
;Read
the
owner's
manual and the safety'
inStructions
periOdically.
Pay
special attention to the section
on
reactive
forces,
pages
10
to 13.
Warning!
Reactive
forces,
including
kickback,
can
be
dangerous.
Careless or improper use of any chain
saw
may
cause
seriousorfatallnjuiy. . ' , .
All
safety precautions that are generally
observed
when
workingwith Bnaxeora'hand
saW
aisoapply
~
the'opefa-
lion
of
chain
saws.
HOWever;
beCause
'8
Chain
saw
is a
hlghspeed,
fast cutting power
tool,~a1
safety
pre-
cautions
mustbe
obSerVed
to
reduce
,tti~~
risk of
personal
accidents. .-.
Have
your
,STIHL
dealer
show
you
how
to operate
your
chain
saw.
ObserVe
all
appllCabra'~
safetY
'regulations,
standards
and
ordinances.
,Warning!
4 Minors should never
be
allowed
to
use
a
chain
saw.
2
Bystanders,
espedallychildren
and
anim~s
should
.not
be
allowed in the area where a chain saw is
in
use
(ill.
1).
Neverletlt\esaw
run
unattended.
$.Ore
itina
locked
place
away
from
'Children
and
empty
the fuel
tank
before
stonng
for longerthan afew
days.
. .
Do
not
lend
Y'0ur
chain saw without the Owner's
Manual.
Be
sure
that
'anyone'
'using
,yO~'saw
understands
the
information contained in this Manual.
Thesesafetyprecautions
and
waqlingsapply
to
the
use
of
all
STlHL
~n
saws.
Different
~odc$
may
have
~erent
parts
and
controls. See the 'appropriate section of your
Owner's
Manual for a description of the controls
and
function of
the'
p8rts
ofyour model
saw.
Safe
use
ofa chain
SaW
involves
t the operator
2. the saw
3. the
uSe
ofthe
saw.
THE
OPERATOR
Physical
Condition
You
must
be
in good physical condition and
mental
health
and
not under the influence of
any
substance
(drugs,
alcohol),
which might impairvision, dexterity
or
judgment.

Do
not
operate a chain saw when
you
are fatigued
(UI.
2).
Be
alert
.:..
H
you
'get tired while
operating
yOlir ctiain
saw,
take.
a
~r~ak.
tiredness
may
result
,in
.1oSs~f
co~.
Working
vVith
aity,chaiO
saw.
can
De
'Strenu()us.
If
you
have
any
.
conditiOn
tfiat
inight
..
be
aggravated by 'strenuous
work.
check
with
yourdoctor
befOre
operating achain
saw.
~!
PtoIonged.~
ofcl1ain saws (orother
m~ines)
exposing
the
operator to vibrations may produce Whitefinger dis-
ease
(Raynaud's phenomenon). This phenomenon redu-
ces
the hand's ability to
feel.
and regulate temperature,
produces
numbness andburriing sensations
and
may
•
cause
nerve
and
circulation damage
and
tissue necrosis.
MinySTIHL
models
are'
available with
an
anti-vibration
system
designed to reduce engine 'vibration.
An
anti-
vibration system is recommended for those using chain
saws
on
aregular orsustained basis.
Heated
handles help to reduce the risk of Whit8finger
diseaseand
are
recommended forcold weather
use.
Most
STlHL
Powerheads
are availablewith heated handles.
Anti-vibration
sYstems
and
he~ecI
handles do not gua-
rantee
that
you
will not,sustainWhitefinger
d"lS8ase~
There-
fore continual
and
regular users'should 'monitor clOsely
.their
use
ofchain saws
and
theirphysical condition.
ProperClothing .
'.
CIOthil1Q
'musfbe stUrdy
and
snug-fitting. but allow
c0m-
plete
fieedom
of'
movement.
AvOId
Ioose-fitting jackets,
~
~.jeweirY.
~
or~
pants,
or
anYthing
thatcould
become
entangled
with the
saw
orbrush. Wear
ove~~
o~
jeans
with'
a reinforced
cutting
resistant insert
(Ill
3). , . .
p.
your hands with gloves when handling saw
and
saW
chain.
Heavy-duty, nonslip gloves improve your grip
and
protectyour
hands.
Good
footing is most Important
in
chain
saw work.
Wear
sturdy boots
with
nonslip soles. Steel-toed safety boots
are
recommended.
. ,"
>.
Proper
eye
protection
Is
a must. Non-fogging, vented
goggles or a.face screen is recommended. Their use
reducesthe risk ofeye
injury.
" "
Wear
an
approved safety
hard
hat
to
protect your
head.
Chain
saw
noisemaydarriage your hearing. Always wear
sound barriers (ear plugs
or
earmuffters)
to
protect your
hearing.
Continual
and regular users should have ·their hearing
checked
regularty.
5

4
THE
SAW
Parts
of
the
chain
saw;
Illustrations
and
definitions
of the
parts
see
pages
2 and
31
~I
NevermodHy a
chain
saw
in
any
way.
Only
attachments
supplied
by
STlHL
or expressly
appro~,!)y
STlHL
,for
use
with
the
specific
STlHL
saw
modelS
,are.
authorized.
Although
certain
unauthorized
attachmentsaie
useable
with
the
STlHL
powerhead.
their
use
may,
in
fact,
.be
extremely dangerous. '
THE
USE
OF
THESAW
TranSportingthe
chain
saw
W8ming!
AJW8yS
Stop
the
enQtne
before'pUtting
a
chain
saw
down or
carryi~
~.
~
~
.chain'
sti~;with
~'
engine
running
is extteinely
dangerous.
'A'CCidentaJ
acceleration
of the
engine
eancsuse
the
chain to
rotate.
Avoid
touchmg
the
hotmUffter.' .
.~
.
6
By
hand:
When
carrying
your
saw
by
hand,
the
'engine
must
be
stopped
and
the
saw
must
be
in
the
proper
position.
Grip
~e
front
handle
and
place
themuffleratthe
'side
away
from
the
body
(i1l.4).
" .
1tl8'
c;hafn
-guard
(scabbard)
~Uld
tie
over
the
chain
and
the
gu~
barWhfCh
~rd
P9fljt
b8ckwards.
When
carrying
your
~
~
barsttouldbebehind
you
(i1l.4).
By
vehicle: When transporting in a
vehicle,
keep
chain
EiI19
bar,
~v~red
with the
ch~n.guard.,
Properly
,secure
your
saw
to
prevent
turnover,
fuel
SpHlage
and
damage
to
the
saW.
" .
Prepaf8tion
forihe
use
of
the
saw
T~
offthe
chain
guard
and
inspectforsafetyin
operation.
For
assemblY
please
foUow
~
procedure described at
the
appropriate
section "Mounting
the
Bar
and
Chafn" of
yourowner's
Manual.
'
STlHb-Oilornatic
chain,
guide
bar
and
sprocket
must
match
eaCh
other:'
' " .
."
If
the,
g~i48
~r
'or chain Is
~1aC8dt
it
must
be
with
a bar
or
Ch8In
ofthe
same
type.
ReplaCement
with
another
type
of
guide baror
chain
'wiD
seriously
increase
the
00,ances
,of
ope~
iF.ljury
~ue
t()
the
Contact
of
the
'moving
chain
with
.~
operator
during
n;rtational
kicIcb8ck.
W8rnirig!
Proper
tension
of
the
chain is extremely important. In order
to
av~
~
.setting the
tensiol1ing
~we
must
'be
fot~
as,
d~
in
Y9ur
~"'M~,~ys
~re
~h,e*agoraarn~s>'fotthesp~coveriS(~)~
seCuteJy
after
tensioning,
~e
.chaffL
CheCk
Chain
t~n
once'~
after
t:taving.
tigtlte.ned
the
n~
and thereafter
at
regular
intervals
(Whenever
the
saw
is
shut
off).
If
the
chain
becomes loosewhile cutting,
shut
offthe
engine
and
then
tighten.
Nevertry to tighten thechain
while
theengine
is runningl

5
Fueling
-
Your
STlHL
chain
saw
uses
an
oll-gasoline mixture for
fuel
(seechapter"
Fuel
n ofyour
Owner's
Manual).
Warning!
Gasoline
is
an
extremely
flammable
fuel.
Use
extreme
caution
when
handling
gasoline or
fuel
mix.
Do
not
smoke
or
bring
any
fire
or
flame nearthe
fuel
(ill. 5).
Fueling
Instructions
Fuel
your
Chain
saw
in well-ventilated
areas,
outdoors
only.
Always
shut off the
engine
and
allow
It to
cool
before
refueling.
Relieve
fuel
tank
pressure
by
loosening
fuel
cap
slowly.
Select
bare
ground
for fueling
and
move
at
least
10
feet
(3
m)
from
fueling spotbefore starting the
~ngine.
Wipe
off
any
spilled
fuel
before
starting your
saw
and
check
for
leakage.
Check
for
fuel
leakage
while
refueling
and
during
operation.
If
fuel
or
011
leakage
is
found,
donotstart or
run
the
engine
until
leak
is
fixed
and
spilled fuel
has
been
wiped
away.
6
Starting
Wamlng!
Your
chain
saw
is
a one-person
saw.
Do
not
allow
other
persons
to
be
near
the
chain
saw.
Start
and
operate
your
saw
without
assistance.
.
For
safe
and
specific starting Instructions.
see
the
appro-
priate
section
ofthe
Owner's
Manual.
Do
not
drop
start.
This
method
is
very dangerous
because
YC?':I
maY.lose
control ofthe
saw
(ill. 6).
Place
the
chain
saw
on
finn
ground
orothersolidsurface
in
an
open
area.
Maintain
a
good
balance
and
secure
footing.
Beabsolutely
sure
thatguidebar
and
chainareclearof
you
and
all
other obstructions
and
objects,
including
the
ground:
because
when
the
engine starts
at
starting-
throttl~,
engine
speed
will be fast
enough
fOr
the
clutch to
engage
sprocket
and
tum the
chain,
which
may
cause
kickback
to
occur.
Engage
the
chain
brake
when
starting a
QuiclCstop
model.
(see
chapter
"Chain Brake"
in
yourOwner's
Manual).
7

8
Never attempt to start the
saw
when
the guide
bar
is
in
a
cut or
kerf.
When
you
pull
the
starter grip, don't
wrap
the starter
rope
around
your
hands.
Do
not allow
the
gripto
snap
back,
but
guide
the
starter
rope
slowly back to permit
the
rope
to
rewind
properly.
Failure
to followthis
probedure
may
result
in
injury to
hand
or
fingers
and
may
damage
the
starter
mechanism.
Importantadjustments
Warning!
At
correct idle
speed,
chain
should
not
turn.
For
directions
to
adjust idle
speed,
see
the appropriate
section ofthis Owner's
Manual.
Do
not
use
a
saw
with incorrect idle
speed
adjustment.
Adjust
the
idle
speed
your
..
self according.to the'appro-
priate section ofthis
manual.
Have
your
STIHL
Dealercheck your
saw
and
make
proper
adjustmentsor
repairs.
.
Afteradjusting achain start the
saw,
letthe
engine
run
fora
while,
then
switch engine off
and
recheck
chain
tension.
Proper
chain
tension
Is
very importantat
all
times.
Working COl\dltlons
Operate your
chain
saw
onlyoutdoorsinaventilatedarea.
Operate the saw under good visibility
and
daylight condi-
tionsonly.
Warning!
Take
extreme care in
wet
and
freezing
weather
(rain,
snow,
ice).
Put
off the work
when
the weather is
.
windy,
stormy or rainfall is
heavy.
Clear the
area
where
you
are working.
7
Warning,!
Avoid
stumbling
on
obstacles
such
as
stumps,
roots or
rocks
and
watCh
out for holes or ditches.
Be
extremely cautious when working
on
slopes or
uneven
ground.
There
is increased danger of slipping on freshly
debarked
logs.
.
CuttingInstructions
Grip:
Always
hold the saw firmly
with
both hands
when
..
the
engine
is
running. Place your lefthandon front
handle
bar
and
yourrighthand
on
rear
,handle
and
throttle trigger
..
Left-handers should followthis instruction
too.
Wrap
your fingers tightly
around
the handles, keeping
the
handles cradled between yourthumb
and
forefinger
(ill.
7),
With your
hands
inthis position,
you
can
bestoppose
and
absorb the
push,
pull
and
kickback forces of your
saw
without
having
itslipout
of
yourgrip
(see
sectionof
reactive
forces).
Make
sure yourchain
saw
handles
and
grip
are
in
good
condition
and
free ofmoisture, pitch, oil or
grease.
Wamlngl'Never
use
the
saw
with one
hand.
You
cannot
control reactive forces (see pages
10
to
13)
and
may
lose
control ofthe
saw.

warning!
Do
not
operate
your
chain
saw
with
starting
throttle.
Cutting
with
starting throttle
does
not
permit
the
operator
proper
control
ofthe
saw
or
chain
speed.
Wamingl
Never
touch
a
rotating
chain
with
your
hand or
any
part
ofyour
body.
Wamlngl
Do
not
cut
any
material
other
than
wood
or
wooden
objects.
Use
your
chain
saw
for
cutting
only.
It is
not
designed
for
prying
or
shoveling
away
limbs,
roots
or
other
objects.
When
sawing,
make
sure
that
the
saw
chain
does
not
touch
any
foreign
materials
such
as
rocks,
nails
and
the
like
(ill.
8).
Such
objects
may
be flung
off,
damage
the
saw
chain
or
cause
the
saw
to
kick
back.
In
order
to
keep
control
of your
saw,
always
maintain
a
firm
foothold.
Never
work
on
a
ladder,
In
a
tree
or
on
any
other
insecure
support.
Neveruse the
saw
above
shoulder
height
(ill.
9).
Position
the
chain
saw
in
such
awaythatyour
body
isclear
of
the
cutting
attachment
wheneverthe
engine
is
running.
Stand
to
the
leftofcutwhile
bucking
(see
ill.
10).
Don't
put
pressure
on
the
saw
when
reaching
the
end
of a
cut.
The
pressure
may
causethe bar
and
rotating
chain
to
pop
out of the
cut
or
kerf,
go
out of
control
and
strike
the
operatoror
some
other object. Ifthe rotating
chain
strikes
some
otherobjectareactiveforce (see
pages
10to
13)
may
cause
the
chain
to
strike the
operator.·
9

10
Reactive
forces
during
the
cut,
including
kickba-*
WARNING!
Reactive forces, that
may
occur during
any
cut are kick-
back,
pushback
andpull-in.
Reactive forces
·can
··be
dangerous!
In
any chain
saw,
the powerful force
used
to
cut
wood
can
be
reversed
(and
work againsttheoperator).
If the rotating chain is suddenly stopped
by
contact
with
any solid object like a log or branch or is pinched, the
reactiveforces Instantly
oCcUr.
These reactive forces
may
result
in
loss of control which
may,
in
tum, cause serious
or
fatal injury.
Anunderstaiidin~i
of the
cauSes
of
these
reactfveforces
may
help you
aVoid
loss ofcontrol.
The most
common
reactive forces are
':"ldckback,
-pushback,
-pull-in.
Kickback:
Kickback occurs
when
the upperquadrant ofthebar
nose
contaCts
a solid object
in·
the
woOd
Or
is pinched
(III.
11).
The
reaction of the cutting force of the chain 'causes a
rotational
force ofthe chain saw'in the directidn
Opposite
to the
chain
movement, mainly in the plane
of
the
bar.
This
may
fling
thebar
in
an
uncontrolled arc mainly
in
theplane
ofthe
bar.
Under
some
circumstances the bar
·moves
towards the
operator
who
may
suffer severe or fatal
injury.
It may also
occur during limbing. It also occurs
when
the nose of
the
guide bar is pinched
unexPeCtecDY,
unintentionally
contacts
sorld
material
in
thewood (ill.
12)
oris Incorrectly
used to begin aplunge or
bOring
cut.
The greater
the
force
of
the kfckb8ck reaction, the
more
difficult it becomes for the operator to controf the
saw.

.
...
..-
~
.
Many
factors influence the occurence
and
force of the
!kickback
reaction.
The
~
of
bar
and
saw chain you
~
~
is afactorinthe forceof
ttie-klCkback
reaction.
;
The
speed
of
~
~wh"
the
cutter
contacts
the
object.
.,'
_
~"
<.~,
),' -
'_'.
".
-
,Kickoaclfforces'Inereuewlth
the
raleOf
Impact·
il
>
\::..:
_"M~:
','
,'i-
~
''''-''f
~_ct~~
u.;
~ose
of
the
b,ar
and
the
~fo.~·{see-IIt-11).'.-
':
,.:
'
".'
KickbaCltVmosfproriOunc:ed
'"1M
upper
quadrantofthe
~bar
ROSa,
,,'.'
SOme
STlHL
chaintypesaredesignedtoreducekickback
forces.
The.cJeptb.aauges:'
Improper
lowering
of
the
depth gauges also
Incre~
the
chanceofa~
:1
The
sharpening
condition:
warning!
Adun
orimpropertysharpen.ed
~
mayIncreasethe
risk
of
kickback.
Always cut
with
a property sharpened chain.
",
Devices
for
reducing
the
risk
of
Idckback
Injury
STlHL
has
developed a chain stopping system to reduce
the
risk
ofinjury
In
certain kickback sItuations.Jt~ called a
Quickstop.
""
.,
The,
,Quickstopis,
av-.i~
as
an
optiQn on most STIHL
chain.saws.
' .
Wti.
a~
oc:curs
the
guide.bar
may
iotate
around
the
front
handle. H
the
cutting position
Is
such that
the
operatOr's
left
hand
is
gripping
the
froI1t
hBrldle
behind
the
hand
guard,
and
ifthe left hand rotates around the front
handle and contacts the front:
hanef
guard, which is the
,Quickstop activating
lever,.
this contact
will
activate the
.Quickslop
and,~
the;chaln'(~
ill 13). '
\
The
~.brake
of
some
STlHL
chain
saws
isadditional
.
self-activated
by
fnertia.·
see
appropriate.
ct1apler
"ChaIn
Brake"dt
yo~r
<?wner's
ManuaL
', ,
,
Kickback
tendency increases as
the
radius orsize
of
the
guide
bar,
noseAncreaseLSTIHL has
developed
guide
bars
with
small
nose
radius.
These
bars.are designed to
reduce
the
kfckback
tendency
and
are available, as
an
option.
STlHL
taas~
d~~
chains
whoseconftgu,r~
are
~ned.to
reduce.~
forces. These.
chains
are
available
as
an
option.
.
Warning!
Chain
saw
kickback
may cause serious orfatal
'injury.
To
reduce the
risk
of
kickback
injuries snHL'recommends
that
you
equip
your
saw·With
anarrow),ose
bal,
lOW
profile
chain
or
oth8r
chatn
deSIgned
to
reduce
'kickback
forces,
..
~aS11HL~.
WarningI
~o
Qulcksk;Jp
or
ch~
~
de~
.prev&n!SkIckback.
These
devices
are
designed onlyto stopthe chain.
if
acti-
vated,
in.
certainkickback
situations.
In
~r
for the
Quickstep
to
reduce
the
riSk
of
'kiCkback
inj~,
it
mUst
be
P"'~
mai~
anei'ln
gOod
working
order.
In
addition,
there
mustbe
enough
distancebetween
the
bar
and
the operatorto ensure that
the
Quickstop has
sufficienttimetoactivate
and
stopthe chain before poten-
tial contact
with
the
operator. '
11

13
Warning!-
Even
ifyour
saw
is
equipped
with a
Quickstop,
a
n8J'l'OVl
nos.e
_~
or
~uced
kickback
chain,
this
does
notguaran-
tee'th8t'you
'!III
not
be
Injuied by
kfcftback,~and
therefore
always-
observe
aU
safety
prec8utlons
to
avoldldckback
situations.
Toavoid kickback
The
best'
protection
-from
perSonal
injury that
may
result
from
kickback·
Is
to
avoid
I<k:kb8Ck
Situations:
. ,
'~
1.
~kI
the
chain
saw
firmly
with
both handsandlnalntain
a
secure
grip.
2.
Be
aware
of1he
location
Of
the
guide bar
nose
at
aU
timeS.
-':'
3. Neverbringthenose
Of
theguide
bar
In
COntactwfth
any
.
~bject.
Do
not
cutlimbs
with
the nose ofthe guide bar.
.
Be'~DIhi
car8fulWhti
smalftb'
h'nmbS.
sman
SIze
~.'.1
..
ug
, brustf
antf'saplIngs
which
may
eaSily
catchthe
chain.
.
~.-
,,'
."
~',
.
4.
Don't
overi8ach.
i_
12
5. Don'tcut above shoulder height.
6.
Begin
cutting and continue
at
fuU
throttle.
7.
Cut
only
one
log
at
a
time.
8.
Use
extreme
caution
when
re-entering
a-previous
cut.
, • > ~
9.
Do
notattemptplungecuts (see
page
18) if
you
arenot
experienced
with
theSe
cutting
techniques.
10.
Be
alert forshifting
of
the
log
orother forces that
may
cause
thecutto
close
arid
pinch
thechain.
11.
Maintain saw chain properly. Cut
with
acorrectly shar-
pened, properlytensioned chain at
all
times.
12. Statid
to
the side
of
the cutting path of the
ch8Jn
saw.
Pusliback:
~hback
occurs
when
the
chain
on
the
top
of
the
bar
is
suddenlystopped
when
Ills
pInChed.
caughforencounters
a foreign object in
..
wood.
The
reaction
of
the
chain
drives the
saw
straight back toward the operator
causing
loss
of
saw
cOntrol.
PUshbackfrequenttyoccws
when
the
topofthebar
Is
used
forcutting (see
111.14).

_'
To
8VoIcI
puShback
1.
Be
alertto forces orsituations
that
may
cause
material
to
pinchthe
top
of
the
chain.
2.
rlc?
notcut~reth~
one
log ata time.',
3.
Do
nottwistthe •
when
withdrawing the
bar
from
a
plupge
cut
or
und8r~
cut (figures 25
to
'Zl
and
33,
pageS
16, 17 and 19),'
becaUse
the chain
can
pinch.
'. ,
Pull-ln:
PuU-ln
occurs
when
the
chain
,on
the bottom ofthe
bar
Is
suddenly
stopped.
The,chain
on~8
bottomoUhebarstops
when
it
is
pinched, caught orencounters a foreign object
In
the
wood
(see
HI.
15).
The reaction of the chain pulls
theS(lW forward, causing
Ute
operatorto
Iotle
control.
Pull-4n.frequently
occurs
when
the
buR.per
sPIke
ofthe
saw
Isnot.I)eId,secureIyagainst
the
tree orlimb
and
when
the
chain
is not'rotating atJuU
speed
before It contacts the
wood.
WBmlngf
Use extreme.caution
when
cutting small size
brush
and
sapOF.'9$.'
whfch
m~y
easily catch the.chafn
and
pull
you
off
balance.
'.
To
aVoId
pu~1n
','
...
'
_",,','
1.
~
St$rt'a
cut
with
'the
Ci1aJn
rotating at
full
speed
and
the
bumper
SpIk8'~,COhtactwlth
1he
wood.
2.
PuU-in~8ISo~pre~~~:~~:_toopen
the
kerf
Or
cut.
-' '
Femng
is,
cuttll'I9
down a tree.
Before
femng
atree, considercarefully
afl
conditions
which
may
affectthe direction offall/including:
The
intended direction
of
the fall.
The
natural
lean
ofthe tree.
Any
MOusuallyheavylimb
atru.cture.
Surrounding
trees
and
obstaQles.
The
wind
direction andspeed.
Warnlngt
Always
observe the generalcondition ofthe tree.
Look
for
decayand,rot
in
thetrunk-If
iUs
rottedinside, itcouldsnap
and
faD
towardtheoperatorwhile beingcut.
Alsolookfor
broken
or
dead
brandies
which
could vibrate
loose
and
fall
on
the
operator.
When
felling
on
a
slope.
the
operator
should
stand
on
the
up-hiIJ
side
Hpossible.
13

When felling in the vicinity of roads, railways and power
lines, etc
..
take extra precautions (see ill.
16).
Inform the
police,
u1ifity
company
or
railway au1hority before begin-
ning
to
cu1
.
When felling, maintaJn a distance of
at
least·
2'h
tree
lengths
from
the nearest person (see ill.
17).
Note:
14
The noise of your engine may drown any warning call.
Felling
Instructions:
Firs1
clear the tree base and work area from interfering
limbs end brush and clean its lower portion with
an
axe
(ill.
18).
.
Then, establish.a path of escape and remove all obstacles.
This path should be opposite tothe planned'dlrection ofthe
fall
of
the tree end at a
4S.
angle (ill. 19). An alternate
path must also be selected. Place all tools and equipment
a safe distance away from the tree,
bu1
not
on
the escape
path.

20
H
ttle.~,,~
large
~
~
cut
Into
the
largest
.-.
~utbeSSes
vertically;
first,
(hori,zontally
next)
and
remove
(Hl20~
,,;
~
d8t8rmiil8,
the
placement
of
the.feUIng
note."
(Ul2t).
1J1e'~
~
~
,poper:tY
,placed
determ1r)es
the
directioh
In
whJchthe
treewiiUaLIt
Is
madeperpendicular
to
the
nne
Of
f8n
&net
shOUld
be.
close
to
the
groUnd
as
possible. Cutthe
felling
notch
to
a
dePth
of
abOut
one-fifth
to one-fourth of the trunk diameter (Ill 22). It should be
In
no
~
higher than it is
deep.
Make the felling notch
verycarefully.
Begin
the
felUng
cut slightly higherthan the
feDing
notch
and.
ora
the
opppsite side of
tIMI
tn!e
(ill.
.22).
Then
cut
ho~l)I~h:toward$
~
~,n,g
notch. Apply the
chab1
saw
with its
spikes
dlrecdy
t;MlhIndthe
~
portion
of
wood and cuttoward the notch (ill
23~
Leave
approx-
imately
'ho
.o1.the
~
dlam_~
~n.c;ul
This is
the
hln.ge
(III.
23}.'Ofi'i1ot
Cut
thrOugh
the
hinge
_use
you
Could
lose control
of
the direction
of
the
faIL
Drive wedges into
the
felfll'l9.
~t
~
~
to
COI1tmI
the
direction
oftha
ftdl.W~es
shouldbeofw9Qd.
Ught
alloy
or
plastic-
never
~'~
Which
can
~
kIckback,and
~
tothechala
22
Hinge
---i~
Felling
notch
-*
Hinge......,........,H
Felling
notch
15

16
24
A'iways
keep
to
the
side ofthe
f8Jling
tree.
When
the tree
starts
to
fall,
shutoff
the
engine.
WIthdraw
the bar
and
walk
away
on
the pre-plannedescape
path.
Watch
outfor
failing
limbs.
Warning! :
Be
extremely careful with partially fallen trees
which
are
poorly
supported.
When
the tree
h~;or
19r
~
other
reason
does
not
fall'
completelY,
set"the
saw
asfde'and
pull
the tree
down
with
a cabIe·wlnch,btockand tackle ortJactor.lfyou
try
to
cut
it
down
with
your
saw,
you
may
be
injured.
Sectioning Method
warning!
.
Felling
atree that has adiameter greater than the
length
of
the
guide bar
requl~
use
of either the
sectioning
or
plunge-cut
method.
These methods' are
extremely
dangerous
because they
InvolVe
the
use
of the
nose
of
the
guide
bar
and
can
result
In
kickback. Only
property
trained professionals should attempt· these techniqueS.
25
Forthe
tteeHOriing
methOd
(HI.
24)
make
thefirstcut
with
the
guide bar fanning
tn
toWard
the·
hinge. Then,usmgthe
bumperspike asa pivot, repositionthe
saw
forthenext
cut.
Avoid
reposftioning the
saw
more
than
necessary.
When
r8poSltiori!rig
fci
the
11Et~
~
ic8ep
'the guide
~r
.i¥!Iy
engaged
in the
kerr
to keep
the
fettlng
cut
strafght
If
the
saW
begins
to
pinCh.
inSert
a
w8dge
to
openthe
cut.
On
the
~
cut.
dO
not
cut
the
hinge.'
Plunge-Cut
~
Tmber
haVIng
a diameter
more
than
tWice
the
!ength
Of
the
gUKJe
bar
reqUires
the use of the
plunge-(x.it
method
before
making
th.e
f8lHngcUt . .
First.
cUt
a large. wide
nOtch.
Make
a
plunge-
cut
In
the
centerofthe
notCh.
. . .
The-
plunge
cut
is
made
with
the guide'
~
nose.
BegIn
the
plunge.
cUt
by
'applylitg
the
lower
portiOn
of
the
guide
bei
nose
to
the
tree
at
an
angle
(ill.
25)~
Cut until
the
dePth
ofthe kerf
Is
aboutthe
same
as
the width
of
theguide
bar

26"
28
~
.
\A)
~
29
(m.
26).
Next,
align
the saw
In
the direction
In
which the
recess
isto
be
cut."
.
WIth
the
ssw-
at
fulithrotUe, insert
th8
guide bar
in
the
trunk
(II!.
27).
Enlarge
the
plunge
cut as
shown
In
illustration (ill.
28).
warning
I
There
is
an
extreme
danger
of
kickback
at
ttris point.
Extra
caution
must
be
taken
to
maintain
control
of1he
saw.
To
make
the
felting cut,
..
follow the·sectlonfng
rnettiod
describedpreviously (ill.
29).
Hyou
are
inexperienced with a
chain
saw prunge-cutting
should
not
be
attempted.
Seek
the help
of
a professional.
Umbing
Umbing .is
removing
the
branches
from
a fallen tree.
WBmIngl
There is an
extreme
danger
of
kickbackduring the limbing
operation.
Do
not work with thehose
of
the
bar.
Be
extre-
mely cautious
and
avoid contacting the
log
orother limbs
with
the
nose
of
theguide bar.
00
notstand
on
alog while Ilmblng it-youmayslip orthe
log
may
roll.
17
Po

18
Start
Umbing
by
leaving
the
lower
limb$
to
support
the
log
off
the
ground
(ill. 30).
Always
cut
f~
the
top of the
limb.
Do
not
underbuckfreely hanging limbs
•.
A pinch
may
result
or
the
limb
may
fall,
causing
loss
of
control.
If a
pinch
occurs,
stop.the
engine
and
remove
the
saw,
by
liftingthe
limb.
warning!
Be
extremely
cautious
when cutting
limbs
undertension.
The
limb
could
spring backtoward
the
operatorand
cause
loss ofcontrol of
the
saw
orinjury
to
the
operator.
Bucking
Bucking
is
cutting a
log
into
sections.
Warnings!
1.
When bucking,
do
not
stand
on
the
log.
Make
sure
the
log
will
not
ron
down-hill. If
on
a
slope,
stand
on
the
up-
hill
side
of
the
109
(see
Ill.
31).
Watch
out
for
rolling
logs.
2.
Cut
only one
log
atatime.
3.
Shattered
wood
should be cut
very
carefully.
Sharp.
sliversof
wood
may
be
caught
and
flung
in
the
direction
ofthe operatorof
the
saw.
4.
When
cutting
small
iOgS~
Use
8SaWhorae-(iD.
32).
NeVer
permitanother
person
to
hold
the
log.
Never
hold
the
log
with
your
leg
or.foot.
5.
Logs
under straln,'require
sPecial
attention to
prevent
the saw
trpm
pinch1n.g
•.
The
fifst cut·is
made
on
the
compression
side to relievethe stresS
on
the
log
(see
III.
33~
34).
The
bucking
cutis
thEm
made
as
shown.
Ifthe
saw
pinches,
stop
the
engine
and
remove
it
from
the
log.
6.
Only
properly trained professionals
should
work
in
an
area
where
the
logs,
limbs
Bn.d
roots
are
tangled
(i.e. a

1.
Refoeving
cut
33
. 2. Cross art
34
blowdown area, ill. 35). Worldng
in
blowdown areas
is
extremely hazardous.
7.
Drag the logs into a clear area before cutting. Pull out
exposed and cleared logs first.
Maintenance BDd Repair
Never operate a chain saw that is damaged, improperly
adjusted
Of
not completely or securelyassembled. Follow
the maintenance and repair.instructions
in
the appropriate
section of your
Owne~s
Manual.
warning!
Always stop the engine and make sure that the chain is
stoppe.d
before doing any maintenance or repair
wor!<
or
cleaning the saw.
Do
not attempt any maintenance or
repair
wor!<
not described in your
Own~s
Manual. Have
such work performed at your STlHL service shop orily.
MAINTAINING
AND
STORING
THE
SAW
Keep the chain, bar and sprocket clean and lubricated;
replace worn sprockets or chains.
Keep the chain sharp.
You
can spot a dull chain when
easy-to-cut wood beccmes hard to cut and bum marks
appear
on
the wood.
Keep the chain at proper tension. Tighten all nuts, bolts
and
screws
except
the
carburetor
adjustment
screws
after
each
use.
Keep
spar!<
plug
and
wire connection tight and clean.
Store saws
In
a high or locked place, away from children.
19
This manual suits for next models
2
Table of contents
Other Stihl Chainsaw manuals

Stihl
Stihl MS 194 T User manual

Stihl
Stihl MS 201 TC-M User manual

Stihl
Stihl MS 170 User manual

Stihl
Stihl MS 461 Rescue User manual

Stihl
Stihl MS 650 User manual

Stihl
Stihl MS 400 C-M User manual

Stihl
Stihl MS 362 C-Q User manual

Stihl
Stihl MS201T User manual

Stihl
Stihl MSA 161 T User manual

Stihl
Stihl MS 150 C User manual

Stihl
Stihl MSE 141 C User manual

Stihl
Stihl 17 User manual

Stihl
Stihl MS 271 User manual

Stihl
Stihl MS 661 C-M User manual

Stihl
Stihl MS 261 C-M User manual

Stihl
Stihl MS 170 User manual

Stihl
Stihl MS 193 User manual

Stihl
Stihl MS201T User manual

Stihl
Stihl MS 201 TC-M User manual

Stihl
Stihl MS201T User manual