Original-GebrauchsanleitungGedruckt auf chlorfrei gebleichtem Papier.
Druckfarben enthalten pflanzliche Öle, Papier ist recycelbar.
© ANDREAS STIHL AG & Co. KG 2021
0478-983-9912-A. VA8.F21.
0000009328_004_D
0478-983-9912-A
deutsch
1
Diese Gebrauchsanleitung ist urheberrechtlich geschützt. Alle Rechte bleiben vorbehalten, besonders das Recht der Verviel-
fältigung, Übersetzung und der Verarbeitung mit elektronischen Systemen.
Inhaltsverzeichnis
Liebe Kundin, lieber Kunde,
es freut uns, dass Sie sich für STIHL entschieden haben.
Wir entwickeln und fertigen unsere Produkte in
Spitzenqualität entsprechend der Bedürfnisse unserer
Kunden. So entstehen Produkte mit hoher Zuverlässigkeit
auch bei extremer Beanspruchung.
STIHL steht auch für Spitzenqualität beim Service. Unser
Fachhandel gewährleistet kompetente Beratung und
Einweisung sowie eine umfassende technische Betreuung.
STIHL bekennt sich ausdrücklich zu einem nachhaltigen und
verantwortungsvollen Umgang mit der Natur. Diese
Gebrauchsanleitung soll Sie unterstützen, Ihr STIHL
Produkt über eine lange Lebensdauer sicher und
umweltfreundlich einzusetzen.
Wir danken Ihnen für Ihr Vertrauen und wünschen Ihnen viel
Freude mit Ihrem STIHL Produkt.
Dr. Nikolas Stihl
WICHTIG! VOR GEBRAUCH LESEN UND
AUFBEWAHREN.
1 Vorwort
. . . . . . . . . . . . . . . . . . . . . . . . . . . . . . . . . . . . . . . . . . . . .
1
2 Informationen zu dieser Gebrauchsanleitung
. . . . . . . .
2
2.1 Geltende Dokumente
. . . . . . . . . . . . . . . . . . . . . . . . . . . . . . . .
2
2.2 Kennzeichnung der Warnhinweise im Text
. . . . . . . . . . .
2
2.3 Symbole im Text
. . . . . . . . . . . . . . . . . . . . . . . . . . . . . . . . . . . .
2
3 Übersicht
. . . . . . . . . . . . . . . . . . . . . . . . . . . . . . . . . . . . . . . . . . . .
2
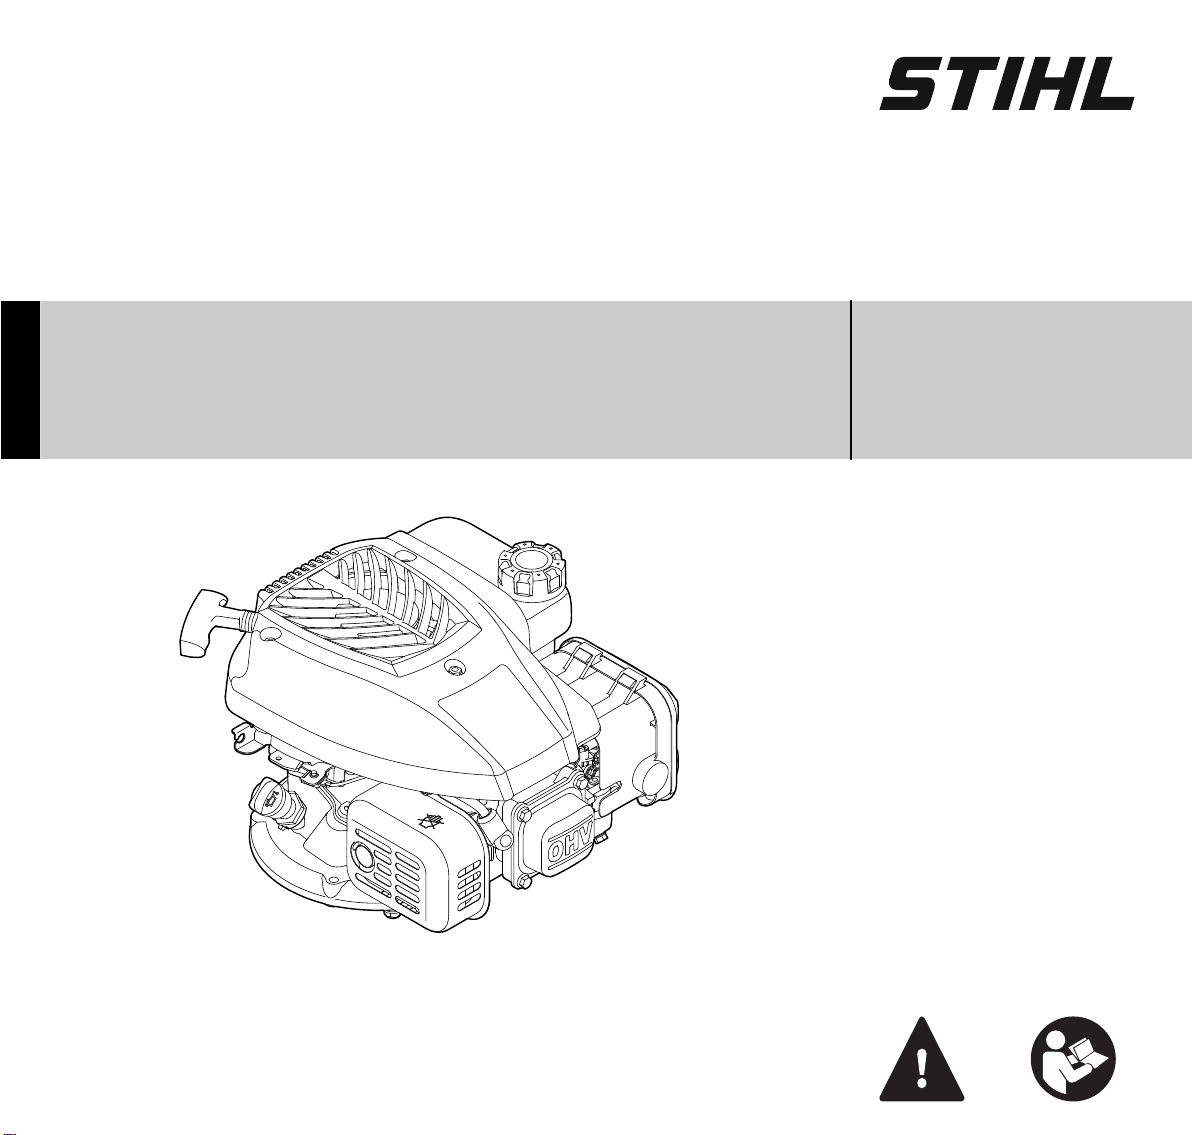
3.1 Motor
. . . . . . . . . . . . . . . . . . . . . . . . . . . . . . . . . . . . . . . . . . . . . . .
2
3.2 Symbole
. . . . . . . . . . . . . . . . . . . . . . . . . . . . . . . . . . . . . . . . . . . .
3
4 Sicherheitshinweise
. . . . . . . . . . . . . . . . . . . . . . . . . . . . . . . . .
3
4.1 Warnsymbole
. . . . . . . . . . . . . . . . . . . . . . . . . . . . . . . . . . . . . . .
3
4.2 Kraftstoff und Tanken
. . . . . . . . . . . . . . . . . . . . . . . . . . . . . . .
3
4.3 Arbeiten
. . . . . . . . . . . . . . . . . . . . . . . . . . . . . . . . . . . . . . . . . . . . .
4
5 Motor einsatzbereit machen
. . . . . . . . . . . . . . . . . . . . . . . . .
5
5.1 Motor betanken
. . . . . . . . . . . . . . . . . . . . . . . . . . . . . . . . . . . . .
5
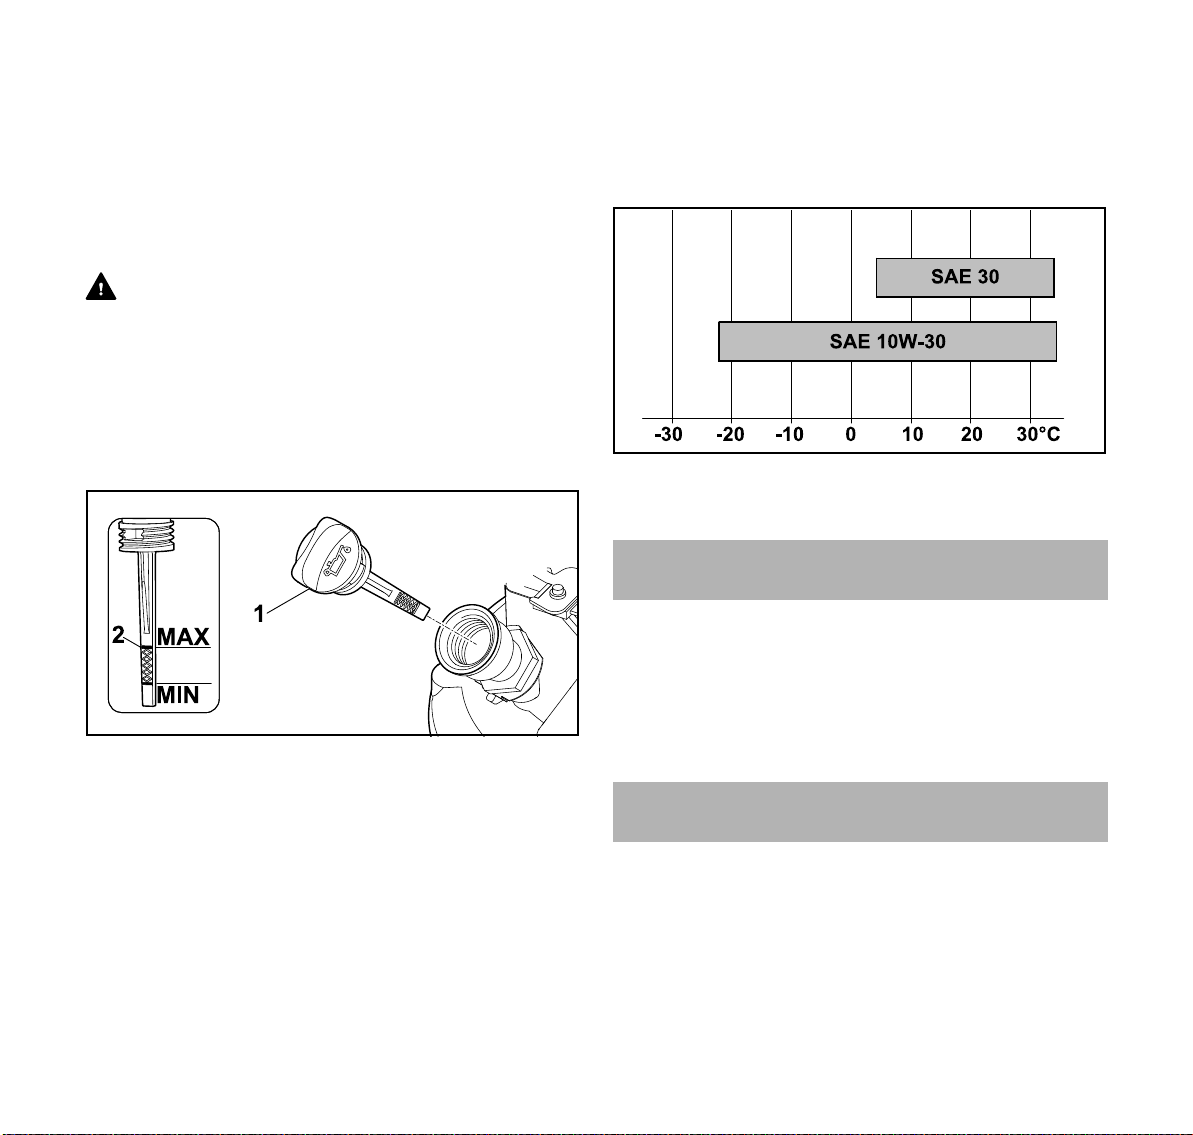
5.2 Motoröl einfüllen
. . . . . . . . . . . . . . . . . . . . . . . . . . . . . . . . . . . .
6
6 Reinigen
. . . . . . . . . . . . . . . . . . . . . . . . . . . . . . . . . . . . . . . . . . . .
6
6.1 Motor reinigen
. . . . . . . . . . . . . . . . . . . . . . . . . . . . . . . . . . . . . . .
6
7 Warten
. . . . . . . . . . . . . . . . . . . . . . . . . . . . . . . . . . . . . . . . . . . . . .
6
7.1 Wartungsintervalle
. . . . . . . . . . . . . . . . . . . . . . . . . . . . . . . . . .
6
7.2 Ölstand prüfen
. . . . . . . . . . . . . . . . . . . . . . . . . . . . . . . . . . . . . .
7
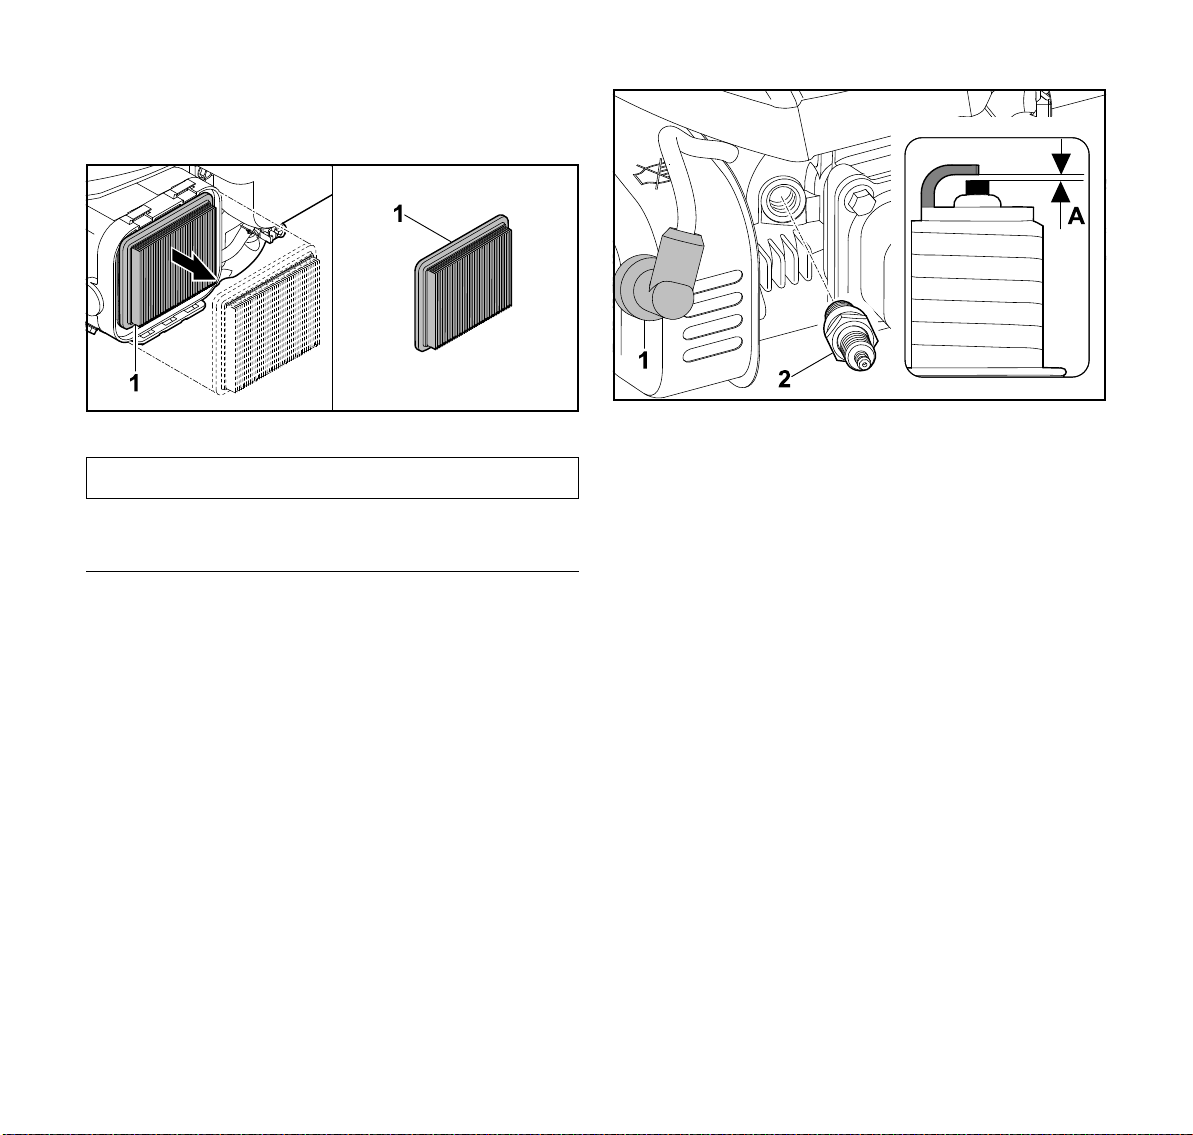
7.3 Luftfilter ersetzen
. . . . . . . . . . . . . . . . . . . . . . . . . . . . . . . . . . . .
7
7.4 Luftfilter reinigen
. . . . . . . . . . . . . . . . . . . . . . . . . . . . . . . . . . . .
7
7.5 Zündkerze prüfen
. . . . . . . . . . . . . . . . . . . . . . . . . . . . . . . . . . .
8
7.6 Motoröl wechseln
. . . . . . . . . . . . . . . . . . . . . . . . . . . . . . . . . . .
8
8 Technische Daten
. . . . . . . . . . . . . . . . . . . . . . . . . . . . . . . . . . .
9
8.1 Abgas-Emissionswert
. . . . . . . . . . . . . . . . . . . . . . . . . . . . . . .
9
9 Ersatzteile und Zubehör
. . . . . . . . . . . . . . . . . . . . . . . . . . . . .
9
9.1 Ersatzteile und Zubehör
. . . . . . . . . . . . . . . . . . . . . . . . . . . . .
9
9.2 Wichtige Ersatzteile
. . . . . . . . . . . . . . . . . . . . . . . . . . . . . . . . .
9
1Vorwort