Once in position, tighten the ropes equally to
bring the awning to its natural shape. DO NOT
over tighten. To tighten, hold the rope above the
slider and pull the slider up. To release, hold the
rope above the slider and pull the slider down.
Remember that all guy ropes are a trip hazard,
especially in the dark.
ADJUSTABLE REAR SUPPORT POLES
Finally, fit the two adjustable rear vertical
support poles, one to each corner of the
awning. The poles flattened top section must be
inserted into the reinforced retaining pocket
found at each top rear corner, behind the
triangular panel. Both poles should be extended
and the mini quick locks closed to hold them
under tension. Make sure that the rear weather
seal pads are positioned in-between the
caravan’s wall and support bars.
VERTICAL STORM POLE POCKET
Located in the central air beam is an integral
sewn in vertical storm pole pockets which can
be used in conjunction with a rear support pole
in certain weather conditions to aid stability and
any water dispersal. The flat end of pole with
the black plastic protection piece simply needs
to be inserted into the integrated storm pole
pocket and adjusted to the correct tension ie
slightly lifting the roof (making sure not to over
adjust) and tightened using the quick lock
bracket. (see fig.1 below)
Additional poles (DT0052) are also available
to purchase from a SunnCamp stockist if
you do not wish to use one of your rear
support poles. The use of the vertical storm
pole pocket with a rear support pole is designed
to help in certain weather conditions i.e heavy
rain but is not to be relied upon in severe
adverse weather conditions.
Fig. 1
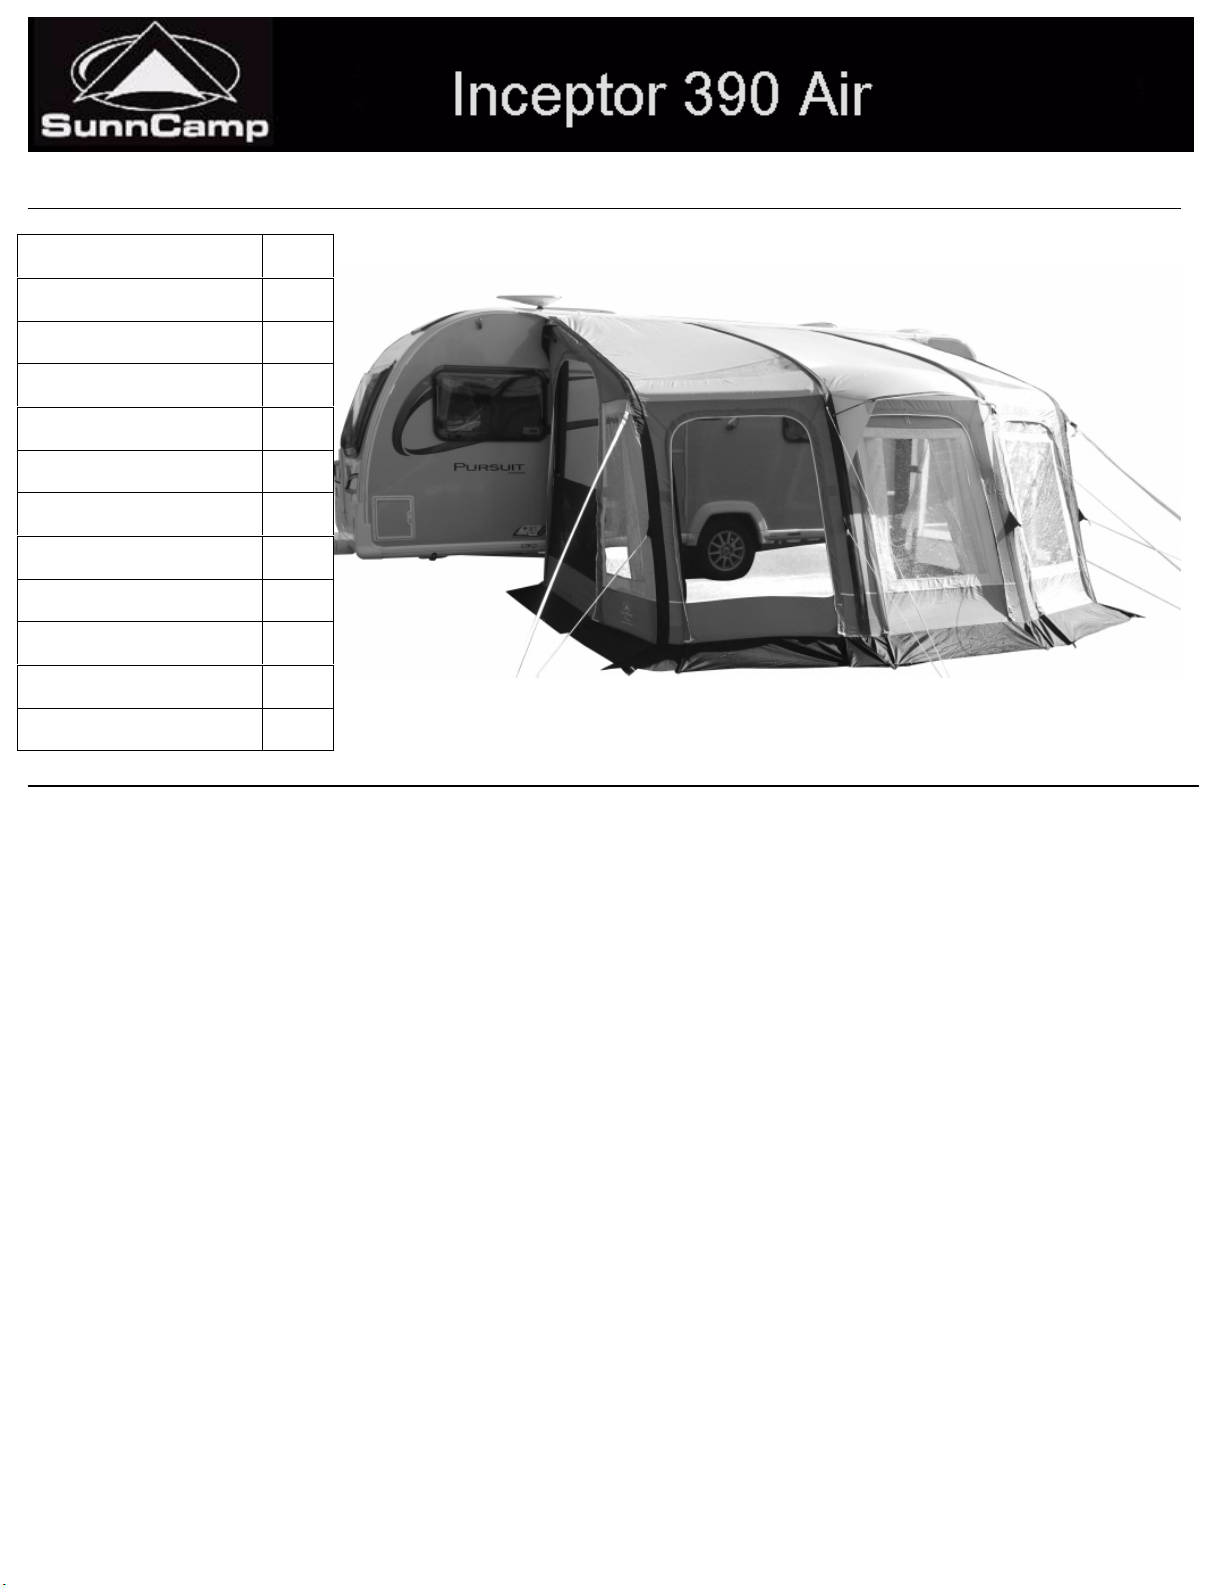
SIDE ENTRANCES
The side entrances are single skinned and can
be rolled out of the way and retained by a set of
loops and toggles. When closed, the zip
cover/baffle must be carefully pressed into
place ensuring the velcro tabs are aligned and
the skirt correctly positioned, secured by awning
pegs, to avoid water ingress should it rain.
Alternatively the side panels can be used with
the supplied veranda bar to create a veranda
option or can be zipped out and you can fit the
SunnCamp Air Annexe (which is available to
purchase from your SunnCamp stockist). Extra
veranda poles are also available to purchase
from your SunnCamp stockist (DT0091).
FRONT ENTRANCE/S
These can be rolled out of the way or can be
raised to create a porch. Your SunnCamp
stockist can supply, as an additional item, a set
of porch poles that simply slot together.
When used as a porch, insert the spike end of
the porch poles into the eyelets at entrance’s
two corner pegging points, then hook a guy
rope over the spike and secure to the ground
with a peg. Adjust each guy rope tension to
bring the porch square. When closed, the zip
cover/baffle must be carefully secured into
place, ensuring the velcro tabs are aligned and
the skirt correctly positioned, secured by awning
pegs, to avoid water ingress should it rain.
WINDOWS
All windows have curtains, which can be closed
and are secured in place with Velcro tape.
When open, carefully roll the curtain and secure
with toggle and loop.
WEATHER SKIRT
Once the awning is erected, check that the
weather skirting, to the base of the awning,
is correctly laid to help prevent water ingress.
These can be secured in place using the
pegging points.
SAFETY
It is advisable to have a ‘Fire’ bucket filled with
water, placed outside the awning.
Hopefully it will never be needed, but if it is, you
will be glad you made the effort.
The awning fabric is fire retardant, NOT fire
proof and therefore you must not smoke or use
a naked flame in or near it. This includes the
traditional ‘camp fire’.
Guy ropes can cause a trip hazard and should
be marked so that passers by can see them.
Awning pegs are also a trip hazard and should
not be left ‘half in’.
CLEANING, STORAGE AND REPAIRS
Cleaning…
Both inside and outside of the awning should
only be cleaned using fresh clean water and a
damp cloth. Do not use detergents or chemical
cleaners.
Storing…
The awning is best stored in its original carry-
bag. However, if the awning is dismantled when
wet, you MUST thoroughly dry the awning as
soon as possible. After a wet pack-up, erect the
awning as soon as possible and allow its
flysheet, guy ropes and of course the carry-bag
to fully dry naturally before repacking everything
away. If stored when the flysheet and / or guy
ropes are wet, the awning will suffer from
mildew and will become unusable. Please note
that damage caused by incorrect storage is
NOT covered by the manufacturer’s warranty.
The valves body should be left unscrewed from
the air tubes when packing away the awning.
Please refer to the section headed VALVES.
Repairs…
Repairs to the awning should only be made by
the manufacturer’s recommended agents.
Repairs made by an unauthorised third party
will make the manufacturer’s warranty void.
STORM AND WEATHER SUITABILITY
This awning is designed for light use in normal
weather conditions. It is not suitable for storms,
gales, sub zero or tropical conditions.
UV DETERIORATION
Prolonged exposure to direct sunlight can
weaken the fabric of the awning. To avoid the
risk of UV deterioration, site the awning in a
shaded area, where it will be protected from
exposure to strong sunlight.
MOISTURE
Moisture collecting on the inside of the awning’s
fabric is condensation caused by the occupier;
It is NOT a sign of leakage.
Note that damage caused by condensation, is
NOT covered by the manufacturer’s warranty.
SEAMS
This awning has all its main seams hot air taped
to help prevent leakage. The remaining seams
should be treated with a seam sealant to
maximize the awnings weatherproofing.
Seam sealant should also be applied to main
seams where the tape has lost adhesion or has
been damaged (tie points or suspension points
for example).
Seam sealant is available from your SunnCamp
stockist.
VALVES
Please note that the valves used on this product
rely on a good air seal which can fail and
become ineffective if left under compression
whilst in storage. To reduce the chance of valve
malfunction, the valves should be fully
unscrewed when the product is in storage.
Replacement valves are available to purchase
from your SunnCamp stockist.
INFLATABLE BLADDERS
Please note that an emergency repair patch is
enclosed with your tent/awning for emergency
repairs to small holes. If you over inflate your
bladder, it may explode and this will not be
repairable. Spare bladders with full instructions
are available to purchase from your SunnCamp
stockist.
DISMANTLING
To deflate each tube, arrange access to the
respective valve via an entrance or access flap.
Turn the valves air release collar anticlockwise
to remove and allow the stored air to escape.
The release collar will remain attached by a
plastic tab. Note that un-pegging can be carried
out before, during or after deflation. Once fully
un-pegged, slide the beading from the
caravan’s awning channel. The awning should
now be carefully rolled prior to placing back in
the carry-bag. DO NOT refit the valve before
storing. Please refer to ‘Storing’ for further
information.
AIR PRESSURE MAINTENANCE
Changing atmospheric conditions can make the
air tubes appear to lose or gain pressure.
commonly caused by a rising or lowering in
ambient temperature. Should this occur, the
tube will simply require either a top up or
release of excess pressure. It should NOT be
considered a sign of leakage or puncture.
However, where leakage is suspected, you
should firstly inspect the valve to ensure that no
parts are cross-threaded and that the air seals
are in good condition and tight. Removing a
valve then re-fitting and re-inflating may help. If
you discover that a valve has become faulty or
a bladder has developed a leak, spares are
available to purchase from your SunnCamp
Stockist.
Where there has been a drop in the ambient
temperature and you have topped up the air,
please monitor the tube carefully because when
the ambient temperature rises, the pressure is
likely to increase and you may need to release
some air.
SAFETY WARNING: BBQ’S/GAS
APPLIANCES
Your tent has a sewn in label warning against
CARBON MONOXIDE POISONING. Please be
aware of carbon monoxide poisoning and do
not under any circumstances use or leave a
used BBQ (even if you think it is still not
burning) in your awning or tent.