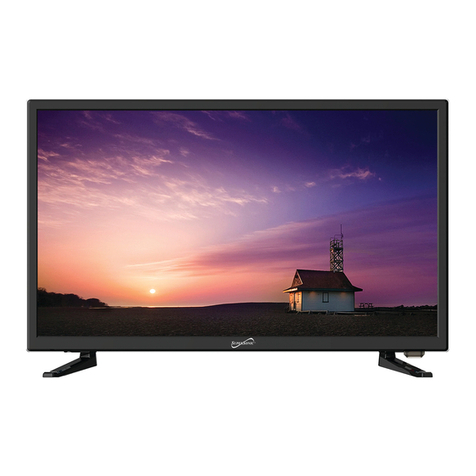
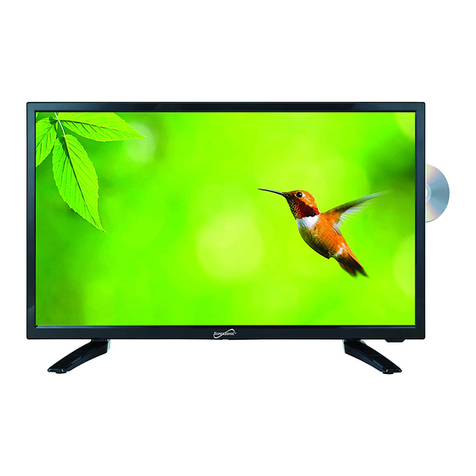
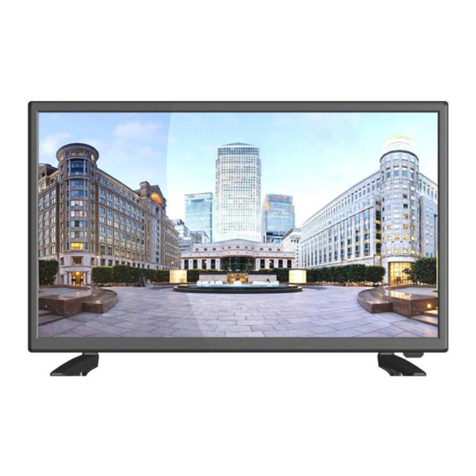
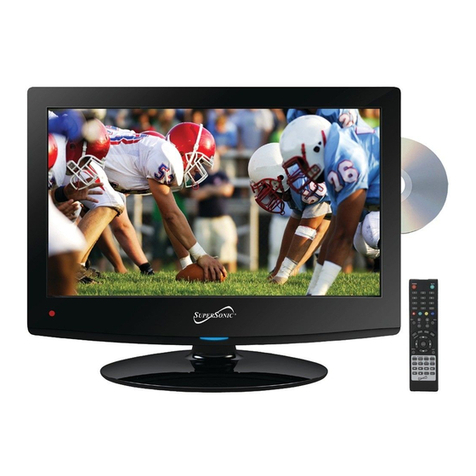
Supersonic SC-2411 User manual

SC-2411
24 LED COLOR TV
R
R

Table Of Contents
Safety Information.................................................................................................................2
Preparations Guide
Important Safety Precautions.................................................................................................3
Installed And Connected TV
TV Bracket assemble.............................................................................................................4
TV Buttons And Terminal Interface........................................................................................ 5
External device connection diagram...................................................................6
Install And Connect TV...........................................................................................................8
Sound Menu.........................................................................................................14
Mai n Men u Operation................................................................................................12
Time Menu.....................................................................................................16
Setup Wizard ...............................................................................................................9
Setup Wizard
Select Input Source........................................................................................................................ 10
PC
Setup Menu........................................................................................................................17
Cananda Rating.........................................................................................................................24
1
PC Menu......................................................................................................................................29
TV Stand installation Instructions.......................................................................8
This user manual for reference only
Select Input Source
TV
Close Caption........................................................................................................................18
Lock Caption........................................................................................................................21
US Rating........................................................................................................................23
TV ........................................................................................................................23
MAPP ........................................................................................................................24
Hotel Menu.........................................................................................................................25
Channel Menu.........................................................................................................................27
Other Information
Help......................................................................................................................................31
Specifications.......................................................................................................................32
Remote Controller
............................................................................................................7

Safety Information
2
High voltages are used in the operation of
this product.to reduce the risk of electric
shock,do not remove cover of the cabinet,
refer servicing to qualified service personal
If the TV any changes or coarse adjustment, electric shocks
to be hurt, do not attempt to open a machine-maintenance,
customer contact centres needed overhaul.
The exclamation point within an equilateral
triangle is intended to alert the user to the
presence of important operting in the
literature accompanying the appliance.
Warning
The lightning flash with arrowhead symbol
within an equilateral triangle,is inten ded to
alert the user to the presence of uninsulated
dangerous voltage within the products
enclosure that may be of sufficient magnitude
to constitute a risk of electric shock to persons.

3
Important Safety Precautions
1. Read these instructions.
2. Keep these instructions.
3. Heed all warnings.
4. Follow all instructions.
5. Do not use this apparatus near water.
6. Clean only with dry cloth.
7. Do not block any ventilation openings. Install in accordance with the
manufacturer’s instructions.
8. Do not install near any heat sources such as radiators, heat registers, stoves, or
other apparatus (including amplifiers) that produce heat.
9. Do not defeat the safety purpose of the polarized or grounding-type plug. A
polarized plug has two blades with one wider than the other. A grounding type plug
has two blades and third grounding prong. The wide blade or third prong are
provided for your safety. When the provided plug does not fit into your outlet,
consult an electrician for replacement of the obsolete outlet.
10. Protect the power cord from being walked on or pinched, particularly at plugs,
convenience receptacles, and the point where they exit from the apparatus.
11. Only use attachments/accessories specified by the manufacturer.
12. Use only with the cart, stand, tripod, bracket, or table specified by the
manufacturer, or sold with the apparatus. When a cart is used caution when
moving the cart/apparatus combination to avoid injury tip-over.
13. Unplug this apparatus during lightning storms or when unused for long periods
of time.
14. Refer all servicing to qualified service personnel. Servicing is required when the
apparatus has been damaged in any way, such as power-supply cord or plug is
damaged, liquid has been spilled or objects have fallen into the apparatus, the
apparatus has been exposed to rain or moisture, does not operate normally, or has
been dropped. Warning to reduce the risk of fire or electric shock, do not expose
this apparatus to rain or moisture.
15. The apparatus shall be disconnected from the mains by placing the power/standby
switch in the standby position and unplugging the power cord of the apparatus from
the AC mains receptacle.
16. The socket-out shall be installed near the equipment and shall be easily accessible.
17. This product should never be placed in a built-in installation such as a bookcase
or rack unless proper ventilation is provided or the manufacturer's instructions have
been adhered to.
18. Apparatus shall not be exposed to dripping or splashing.
19. Do not place any sources of danger on the apparatus (e.g. liquid filled objects,
lighted candles).
20. Wall or Ceiling Mounting - The appliance should be mounted to a wall or ceiling
only as recommended by the manufacturer.
21. Never place the TV, remote control or batteries near naked flames or other
heat sources, including direct sunlight. To prevent the spread of fire, keep
candles or other flames away from the TV, remote control and batteries at
all times.
22. The USB terminal should be loaded with 0.5 A under normal operation.
4
TV Bracket assemble
SOURCEMENUCH+ -
CH
-
VOLVOL+
Fix the TV on the wall
1.First,put the TV on the table smoothly and put some soft cloth on the table to avoid
scratching the screen.
2.User the screw driver to take off the screws which are fixed on the bottom stand
(the direction of the arrow, refer to the ptoto1).And take off the bottom stand(please
take off the screws and bottom stand carefully).
3.Make one bracket which can fix on the wall according to the size of arrow direction
of photo2 and photo3.
4.Drill four holes properly on the wall (the size only for reference) and put into four
screws.(optional parts) Drill four holes properly on the wall (the size only for reference)
and put into four screws.(optional parts)
5.according to the step 4,use the screwdriver to lock the screw on the back of the TV.
then hang the TV on the wall.
1 2
3
4
Note:
1.The bracket fixed on the wall is optional part.
2.when you assemble the TV, there should be no other articles on the around and front
and please keep the distance from other articles.
3.When assemble the TV, please ask the career man to fix in order to avoid the danger.
4.The fixing picture is only for reference.
5.Please follow the use manual about bracket assemble to fix the TV.
6.Attach the mounting bracket from the VESA compatible wall mounting kit.

TV Buttons And Terminal Interface
5
R
9. AV
signal input and relevant right/left
sound channel.
: external AV
VGA/AUDIO: VGA audio input.
: Connect the antenna to
the antenna input.
HDMI Input: Digital signal input from
HDMI video connector
YPbPr:Color difference
components input and relevant
video input
(3.5mm)
. COAXIAL:
14.USB: Only used for updating soft ware
Digital audio output
ANT 75
Ω
COAXIAL
INPUT
VIDEO R
L
AC 100-240V~
50/60Hz
HDMI
INP UT
Y Pb Pr
14 13 6 10 7 12 11
9 8

External device connection diagram
DVD Set-top boxes
HDMI
HDMI
HDMI input connection
VIDEO R L
INPUT
AV input connection
AV output connection
VIDEO R L
INPUT
Y Pb Pr
INPUT
Y Pb Pr input connection
USB connection
TV connection
6
AV input connection
VGA input connection
R L
OUTPUT

Remote Controller
7
TV
AV YPBPR
HDMI PC
R
(1)Open the battery compartment cover
on the back side
(2)Insert two 1.5V batteries of AAA type
with correct polarity
(3)Close the battery compartment cover
on the back side
Universal Remote Control code:007F
(Universal Remote control is not included)

1
3
2
4
Install And Connect TV
8
TV AN T
FM AN T
TV signal output
Set your TV
To put your TV in a firm place which can
bear the weight of the TV.
To avoid danger, please don’t expose the
TV near water or heating place (such as
light, candle, heating machine),do not block
the ventilation at the back of TV.
Connect antenna and power
1.Connect the antenna cable to the antenna
socket on the back of the TV.
2.To plug the power cord of TV (AC 100-
240V~ 50/60Hz).
1
3
Turn on TV
3.Press the power button of the TV the
indication light will turn to green. if it is
on standby mode (the light is red),press
the power button on the remote control
to turn on the TV.
Note:
Picture for reference purposes only.
2
TV Stand Installation Instructions
1.Open the carton and remove the TV
and scattered accessories and base
(some models without base).
2.to avoid the injury of the TV, covered
with a soft mattress, put it on the table, face
down on a soft mattress, the base of the
neck is fixed on the TV with screws.
3.screw the base and connected to the TV.
4. the installation is complete.
R

9
Setup Wizard
Connect an RF cable from the TV’s input called “RF-In” and to your TV Aerial socket.
Select Language
Press </ > button to select the language to be used for menus and message.
Press ▼ / ▲ button to select go to next step and press ENTER/ button to go.
Select Time
Press ▼ / ▲ button to select the time zone, daylight saving time and time format you want to.
Press </ > button on the remote control to adjust.
Press ▼ / ▲ button on the remote control to select go to next step and press ENTER/ button
to go.

10
Auto Scan
Press </ > button to select the antenna type.
Press ▼ / ▲ button to select go to next step and press ENTER/> button to start auto scan.
Setup Wizard

11
Press INPUT button to display the input source list,
Press ▼ / ▲ or button to select the input
source you want to,
Press ENTER button to enter the input source,
Press EXIT button to quit.
INPUT
Select Input Source
Main Menu
Press MENU to display the main menu or return to the previous menu or close the main menu.
Press </ > to highlight the desired menu icon, and press ENTER to select.
Source Select
TV
AV
HDMI
Component
PC

12
Picture Menu
Pre ss
Pre ss
Pre ss
Pre ss
ENU to ente r th e main menu, Pre ss butt on to select.
Pre ss to ente r.
ENU again to exit or back to pare nt menu.
butt on to select among Pictu re Mode /Brightness/ Contra st / Color / Tint / Sharp ness / Color
Tempera tu re / Advanced Settings.
Pre ss to enter.
Pre ss butt on to adjust.
ENU again or back to pare nt menu.
M</ >
ENTER / ▼
M
▼ / ▲
ENTER / ▼
</ >
M
【Pic tu re Mode】
Adjust pictu re mode to change pictu re appeara nce.
Pre ss butt on to select(S tandard / Dynamic / Soft / User) .
【Brig htn ess】
Pre ss butt on to adjust.
【Contra st】
Pre ss butt on to adjust.
</ >
Adjust the visual perc eption outp ut of th e enti re picture, it will effe ct th e iuminousness of th e picture.
</ >
Adjust th e highlight inte nsity of the pictu re , but th e shadow of the pictu re is invariable.
</ >
Note :T he bri ghtn ess,contra st, color, ti nt and sharpness are only available in User mode,you can adjust as
you like.
Sta ndard Pro duces a highly defi ned image in a norm ally lit room.
Dynamic Produces a highly defined image in a bri ghtl y lit ro om.
Soft Pro duces a highly defi ned image in a soft lit room.
User Select to customize pictu re sett ings.
TV
Main Menu Operation

13
【Colo r】
【Tint】
Adjust th e hue(R ed,G re en,B lue) of the pictu re .
Pre ss butt on to adjust.
【Sharp ness】
Pre ss butt on to adjust.
【Colo r Tempera tu re】
【Advanced Settin gs】
Adjust advanced video fe atu re s to fine tu ne the pictu re .
Pre ss butt on to ente r .
【Aspect Ratio】
Adjust how the pictu re fills th e scre en.
【Nois e Reductio n】
Set opti ons to reduce video noise.
Adjust th e saturation of the color based on your own like.
</ >
</ >
Adjust th e peaking in th e deta il of th e pictu re .
</ >
Incre ase or re duce warm color of th e picture pers onally(re d),a nd th e cool color pers onally(b lue) accord ing
to your like.
> sub-m enu.
Pre ss butt on to adjust.
Norm al
Norm al Auto mati cally adjust Aspect Rati o based on TV size and TV progra m.
Wide Use to watc h wide scre en(1 6:9) conte nt.
Zoom Expands image to fill scre en. Top and butt on maybe cut off.
Cinema Stre tc hes image at edges but keeps a clear image in th e cente r.
Off Select to tu rn off video noise dete ction.
Low Dete ct and reduce low video noise.
Medium Detect and re duce modera te video noise.
High Detect and re duce enhanced video noise.
Auto Dete ct and reduce video noise automatically.
Incre ase th e sex-l inked colors fo r th e white.
Warm In cre ase th e re d color fo r th e white .
Cool Incre ase th e blue to ne fo r th e white .
TV

14
Sound Menu
Pre ss
Pre ss
Pre ss
Pre ss
ENU to ente r th e main menu, Pre ss butt on to select.
Pre ss to ente r.
ENU again to exit or back to pare nt menu.
butt on to select among Equalizer / Bass / Tre ble / Balance /M TS/ Audio Language /D igital Audio
Outp ut/ AVL .
Pre ss to enter.
Pre ss butt on to adjust.
ENU again or back to pare nt menu.
M</ >
ENTER / ▼
M
▼ / ▲
ENTER / ▼
</ >
M
TV
【HDMI Mode】
Only available in HDMI input.
【Dynamic Contra st】
Auto mati cally adjust pictu re deta il and bri ghtn ess.
Pre ss butt on to select (O ff/O n).
Pre ss butt on to select (Video/G ra phic).
</ >
</ >

15
【Sound Mode】
Select a sound mode to achieve ideal sound.
Pre ss butt on to select(S ta ndard / Music / Movie / Sports / User) .
【Bass】
【Treble】
【Bala nce】
【MTS】
It is only available in ATV.
Pre ss butt on to select(M ono/Stereo/S AP).
【Audio Language】
. It is only available in DTV.
Pre ss butt on to select(E nglish / / ).
【Dig ita l Audio Output】
Send digital audio to exte rn al audio system.
Pre ss butt on to select.
【AVL】
select(O n / Off) .
</ >
Adjust th e bass effe ct. In cre ases or decre ases lower-p itc hed sounds.
</ >
Adjust th e tre ble effe ct. In cre ases or decreases high-p itc hed sounds.
</ >
Adjust th e balance betw een left and right speakers to adapt to your liste ning positi on.
</ >
</ >
</ >
</ >
</ >
Note :T he bass and tre ble are only available in User mode,y ou can adjust as you like.
Sta ndard Pro duces a balanced sound in all enviro nments .
Music Preserv es th e ori ginal sound. Good fo r musical pro grams.
Movie Enhances tre ble and bass for a rich sound experi ence.
Sports Enhances vocals fo r TV audio.
User Select to customize audio sett ings.
Mono Sets th e sound to mono.
Ste re o Sets th e sound to ste re o when stereo is not available, th e sound is auto mati cally switc hed
to mono.
SAP Sets the sound to th e second audio progra m.
PCM Select to outp ut audio in 2-c hannel ste re o.
Raw Original image coded date .
Off Set digita l audio outp ut off.
Pre ss butt on to adjust.
Confi gure s th e multi -tra ck sound.
Set th e auto volume contro l.
Pre ss butt on to
Select th e language supporte d by th e chosen digita l channel
Fre nch Spanish
NOTE:
Balance: This item can adjust the speaker’s output, it enables you to listen to best at your position.
AVL: This item uses for reducing the difference between channel and program’s
volume automatically.
it made the overall water to be even. This function will also reduce the fluctuation of the sound.
TV

16
Time Menu
Pre ss
Pre ss
Pre ss
Pre ss
ENU to ente r the main menu, Pre ss butt on to select.
Pre ss to ente r.
ENU again to exit or back to parent menu.
butt on to select among Sleep Timer / Time Zone / Daylight Saving Time / Time Form at / Auto
Clock / Clock.
Pre ss to enter.
Pre ss butt on to adjust.
ENU again or back to pare nt menu.
M</ >
ENTER / ▼
M
▼ / ▲
ENTER / ▼
</ >
M
Time Zone
Dayli ght Savin g Tim e
Time Form at
Auto Clo ck
【Sle ep Tim er】
Set a ti mer fo r th e TV to tu rn off auto mati cally.
Pre ss butt on to select(O ff / 5min/10min /1 5min/ 30min / 60min / 90min / 120min/1 80min/2 40min).
【 】
Select your ti me zone.
Pre ss butt on to select(E aste rn / Centra l / Mounta in / Pacifi c / Alaska / Hawaii /S amoa/
Newfo undland / Atl anti c).
【 】
Set th e daylight saving ti me fo r your are a.
Pre ss butt on to select(O n / Off) .
【 】
Select your ti me format.
Pre ss butt on to select(1 2-hour / 24-hour) .
【 】
It is only available in DTV.
Pre ss butt on to select(O n / Off) .
</ >
</ >
</ >
</ >
</ >
Use to synchro nize the display auto mati cally.
TV

17
Setup Menu
Pre ss
Pre ss
Pre ss
Pre ss
ENU to ente r th e main menu, Pre ss butt on to select.
Pre ss to ente r.
ENU again to exit or back to parent menu.
butt on to select among Menu Language / Tra nspare nt / OSD Timeout / Closed Capti on /Over
Scan/ In put Label / Oth er sett ings / Restore Defa ult / Setup Wizard.
Pre ss to enter.
Pre ss butt on to adjust.
ENU again or back to pare nt menu.
M</ >
ENTER / ▼
M
▼ / ▲
ENTER / ▼
</ >
M
【Menu la nguage】
Pre ss butt on to select language(E nglish / Français / Español).
【Transpare nt】
Adjust th e tra nsparency of th e OSD (o n scre en display) menu.
Pre ss butt on to select. (0 %,25%,5 0%,7 5%,1 00%)
【OSD Tim e out】
Adjust th e duration of the OSD (o n scre en display) menu.
Pre ss butt on to select. (5 Sec., 15Sec., 30Sec., 45Sec.,60Sec.
【Clo sed Captio n】
Adjust Closed Capti oning sett ings. Only available under TV and AV sourc e.
Pre ss ENTER / button to enter.
For deta il please re fe r to page 12.
Select an OSD menu language can be displayed.D efault English is selecte d as menu language.
</ >
</ >
</ >
TV

18
CC Mode
Analo g CC
Dig ita l CC
O
Mode
Font Sty le
Font Siz e
Font Edge Style
Font Edge Colo r
FG Colo r
Colo r
FG Opacity
Opacity
【 】
Turn Closed Capti oning on/off.
Pre ss butt on to select(C C Off / CC On / CC OnMute).
【 】
Set Closed Capti oning fo r sta ndard(analog) pro gra m.
Pre ss butt on to select(C C1 / CC2 / CC3 / CC4 / TEXT1 / TEXT2 / TEXT3 / TEXT4).
【 】
Set Closed Capti oning fo r digital pro gram.
Pre ss butt on to select(O ff / Serv ice1 / Serv ice2 / Serv ice3 / Service4 / Serv ice5 / Serv ice6).
【 ptio n】
Adjust th e digital Closed Capti oning sett ing.
Pre ss butt on to ente r.
【 】
Set th e look of digita l Closed Captioning. Auto mati c uses bro adcaste r’s style.
Pre ss butt on to select(D efault / Custo m).
【 】
Select fro m 8 fo nt styles.
Pre ss butt on to select(D efault / Font 0 / Font 1 / Font 2 / Font 3 / Font 4 / Font 5 / Font 6 / Font 7).
【 】
Adjust th e size of the digita l Closed Capti oning fo nt.
Pre ssvbutt on to select(D efa ult /N orm al / Large / Small).
【 】
Adjust th e edge of the digita l Closed Capti oning box.
Pre ss butt on to select(D efault / None / Raised / Depressed / Unifo rm / Left Shadow / Right Shadow).
【 】
Adjust th e color of th e digita l Closed Captioning box.
Pre ss butt on to select(D efault/ Black / White / Red / Gre en / Blue / Yellow / Magenta / Cyan).
【 】
Adjust th e color of th e digita l Closed Captioning fo nt.
Pre ss butt on to select(D efault/ Black / White / Red / Gre en / Blue / Yellow / Magenta / Cyan).
【BG 】
Adjust th e digital Closed Capti oning backgro und color.
Pre ss butt on to select(D efault/ Black / White / Red / Gre en / Blue / Yellow / Magenta / Cyan).
【 】
Adjust th e tra nsparency of th e digita l Closed Captioning fo nt.
Pre ss butt on to select(D efault / Solid / Flashing / Translucent) .
【BG 】
Adjust th e digital Closed Capti oning backgro und tra nspare ncy.
Pre ss butt on to select(D efault / Solid / Flashing / Translucent) .
</ >
</ >
</ >
>
</ >
</ >
</ >
</ >
</ >
</ >
</ >
</ >
Close Caption
TV

19
【Over Scan】
Pre ss butt on to select(O n / Off) .
It is only available to ente r 1080i/7 20p/1 080p in DTV/Component/ HDMI. Defa ult is On.
It fi xed set to be On in ATV/AV. It fixed set to be Off in PC/U SB.
【Input Labels】
Cre ate labels fo r th e devices connected to your TV.
Pre ss ENTER / butt on to ente r.
【Oth er Settin gs】
Set th e para mete r of audio only, no signal power off and no operation power off.
Pre ss ENTER / butt on to ente r.
【Blu e Scre en】
To select the tra nsiti on type re quire d while changing fro m one channel to anoth er
Pre ss butt on to select(O n / Off) .
【Audio Only】
Play th e audio with th e pictu re tu rn ed off. When you tu rn the Audio Only on and exit th e OSD menu,
the panel will be dark ; and th en pre ss any key to exit th e Audio Only sta tu s.
Pre ss butt on to select(O n / Off) .
</ >
</ >
</ >
TV
This manual suits for next models
1
Table of contents
Other Supersonic LED TV manuals

Supersonic
Supersonic SC-2212 User manual

Supersonic
Supersonic SC-1911 User manual

Supersonic
Supersonic SC-2211 User manual

Supersonic
Supersonic SC-1511 User manual

Supersonic
Supersonic SC-3211 User manual

Supersonic
Supersonic SC-1311 User manual

Supersonic
Supersonic SC-2814 User manual

Supersonic
Supersonic SC-1512 User manual

Supersonic
Supersonic SC-1912 User manual

Supersonic
Supersonic SC-1312 User manual