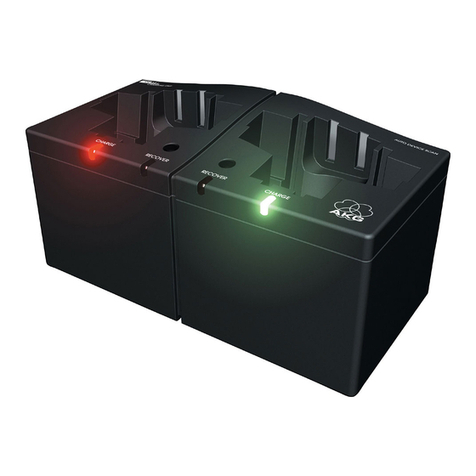
SurfLink MINI MOBILE User manual

MINI MOBILE
OPERATIONS MANUAL
System includes: SurfLink Remote Microphone 2
and SurfLink Mini Mobile Adapter

IMPORTANT: SurfLink Mini Mobile Adapter is ONLY
compatible with SurfLink Remote Microphone 2.

Table of Contents
Introduction 4
Basic Use
SurfLink Remote Microphone 6
SurfLink Mini Mobile 8
SurfLink Remote Microphone
Controls Overview 12
Operation
Low Battery and Charging 14
Power On/Off Slider 16
Syncing to Hearing Instruments 17
Built-In Microphones 19
LED 20
How to Wear 21
Streaming Audio 22
Interoperability with Other Accessories 23
SurfLink Mini Mobile
Controls Overview 24
Operation
Low Battery and Charging 26
Multi-function Push-Button 27
Power On/Off 27
Bluetooth Pairing 27
Interacting with Phone Calls 29
Listening to Music 30
Resetting 30
LED 31
Typical Use Cases 32
Troubleshooting
SurfLink Remote Microphone 34
SurfLink Mini Mobile 36
Regulatory Notices 38
IMPORTANT: SurfLink Mini Mobile Adapter is ONLY
compatible with SurfLink Remote Microphone 2.

Introduction
The SurfLink Mini Mobile system includes both the
SurfLink Remote Microphone and SurfLink Mini Mobile
Adapter. Prior to use, both products will need to be
separately set up. The SurfLink Remote Microphone
will be synced to your hearing instruments. The
SurfLink Mini Mobile Adapter will be paired to your
Bluetooth device.
The SurfLink Remote Microphone is designed
to stream remote microphone audio directly to your
900MHz wireless hearing instruments. When worn
by a distant speaker in noisy environments, SurfLink
Remote Microphone functions as an assistive listening
device.
When SurfLink Mini Mobile Adapter is attached to
SurfLink Remote Microphone, the resulting SurfLink
Mini Mobile system is designed to stream audio
from your Bluetooth device to your 900MHz wireless
hearing instruments.
Streaming – Audio or sound transmitted from
SurfLink Remote Microphone to your 900MHz wireless
hearing instruments.
4

Package Contents
• SurfLink Remote Microphone
• SurfLink Mini Mobile Adapter
• USB-to-MicroUSB Charging Cable
• Wall Power Adapter
• Operations Manual
Optional Accessories
• Car Charger Adapter
• Lanyard
Typical Setup for SurfLink Remote Microphone
5
Hearing Instrument Speaker

SurfLink Remote Microphone
Basic Use
To quickly start using SurfLink Remote Microphone:
1. Power on SurfLink Remote
Microphone. Green LED
appears for 2 seconds.
2. Press “Sync” icon on
slider button for 5 seconds
until LED starts rapidly
blinking blue.
3. Open one hearing
instrument battery door,
insert battery and close
battery door. Green LED
pulses to confirm successful
sync.
If you only have one hearing
instrument, wait 20 seconds
until red LED pulses.
6
Basic Use

If you have two hearing
instruments, open second
hearing instrument battery
door, insert battery and
close battery door. Green
LED pulses to confirm
successful sync.
4. Each hearing instrument
should automatically start
streaming audio. Blue
LED slowly pulses when
audio streaming is active.
5. Have a speaker attach
SurfLink Remote
Microphone to their
clothing, within 8 inches
(20cm) of their mouth is
recommended for best
performance.
6. To stop streaming, turn
off SurfLink Remote
Microphone.
7
Basic Use

SurfLink Mini Mobile
Basic Use
To quickly start using SurfLink Mini Mobile:
1. Ensure SurfLink
Remote Microphone
has been properly
setup with your hearing
instruments and is in
powered on state.
2. Insert the male
microUSB jack of
SurfLink Mini Mobile
Adapter into SurfLink
Remote Microphone’s
female microUSB jack.
3. To turn on SurfLink
Mini Mobile Adapter,
press its push-button
for 2 seconds and
release when the
green LED appears.
8
Basic Use

4. Put your Bluetooth device into
pairing mode.
NOTE:Some devices may ask for the SurfLink
Mini Mobile Adapter PIN, which is 0000.
5. While the green LED
is slowly pulsing,
double-click the push-
button. The LED starts
rapidly blinking blue,
which puts SurfLink
Mini Mobile Adapter
into Bluetooth Pairing Mode.
6. On your Bluetooth device, select SurfLink Mini
to complete the pairing process.
x2
9
Basic Use

7. A green LED confirms
a successful Bluetooth
pairing.
8. To verify your setup, ensure LED is slowly
pulsing blue and either:
• Play music on your Bluetooth device
• Have someone call your Bluetooth device
o When you hear the incoming call ringtone
in your hearing instruments, briefly press
and release the push-button on SurfLink
Mini Mobile Adapter.
o Speak into SurfLink Mini Mobile Adapter
microphone.
o To end the call, briefly press and
release the push-button.
10
Basic Use

9. To turn off SurfLink Mini
Mobile Adapter, press
the push-button for 2
seconds and release
it. The red LED briefly
appears to provide
confirmation.
11
Basic Use

2
4
1
6
3
5
12
Controls Overview

SurfLink Remote Microphone
Controls Overview
1. MicroUSB Jack for Charging
Charging via Battery-Charging Cable.
2. Power On/Off Slider
• Moving the slider towards the microUSB jack
powers on SurfLink Remote Microphone.
• Moving the slider away from the microUSB
jack powers off SurfLink Remote Microphone.
3. Syncing
Establishes the relationship between SurfLink
Remote Microphone and hearing instruments.
4. Built-In Microphones
Pick up sound and transmit to hearing
instruments.
5. LED Indicator
Identifies the current state of SurfLink
Remote Microphone.
6. Clip
Affixes SurfLink Remote Microphone
to clothing, lanyard, etc.
13
Controls Overview

Operation
Low Battery and Charging
If SurfLink Remote Microphone is on and enters
a low battery condition, the LED slowly pulses
red and provides an audible indicator tone to a
hearing instrument. The indicator tone is distinctly
different from the low battery indicator for a hearing
instrument, so there is no confusion as to which is
experiencing a low battery condition. Once SurfLink
Remote Microphone enters a low battery condition,
the indicator tone will occur about every 5 minutes
until SurfLink Remote Microphone automatically shuts
down, or until a power source is applied.
When SurfLink Remote Microphone is attached to a
power source, charging automatically begins. While
SurfLink Remote Microphone is off, the LED turns
solid green during charging and turns off when fully
charged. While SurfLink Remote Microphone is on,
the LED prioritizes streaming by slowly pulsing blue,
but continues charging in the background.
14
Operation

TIP – Charging SurfLink Remote Microphone can take
longer while streaming audio. Charging will be faster
when the SurfLink Remote Microphone is off.
Typical Charging Method
To charge the battery,
attach the microUSB end
of the charging cable to the
microUSB jack on SurfLink
Remote Microphone.
Attach the USB end of
the charging cable to a
female USB jack, such as
found on a plugged-in wall
power adapter, car charger
adapter or computer.
15
Operation

Car Charger Adapter
The SurfLink Remote
Microphone can be charged
using a car charger adapter.
These adapters can be
obtained from your hearing
professional (ask for part
#52869-000).
Power On/Off Slider
Power On – Move the slider
toward the microUSB end to
turn on. The LED turns green
for 2 seconds to verify power
is on.
Power Off – To stop streaming
audio, move the slider away
from the microUSB end until
the brightly colored surface is
exposed. The LED turns red for
2 seconds to verify power is off.
16
Operation

Syncing to Hearing Instruments
Syncing establishes a relationship between your
hearing instruments and SurfLink Remote Microphone.
For hearing instruments to receive streamed audio
from SurfLink Remote Microphone, you must first
sync the hearing instruments with SurfLink Remote
Microphone. You only have to sync SurfLink Remote
Microphone with your hearing instruments once, as
they will automatically link when both are powered on
and they are within wireless operating range.
To put SurfLink Remote
Microphone into an
active syncing state,
press the “Sync” icon
on the Power On/Off
slider for 5 seconds
until the LED starts
rapidly blinking blue. To sync a hearing instrument
with SurfLink Remote Microphone, open your hearing
instrument battery door, insert a battery, and close
your hearing instrument battery door.
17
Operation

18
The SurfLink Remote Microphone remains in an active
syncing state for up to 20 seconds (concluded by red
LED blink), or until one hearing instrument is synced
with it (confirmed by a green LED blink).
After a successful hearing instrument syncing, SurfLink
Remote Microphone continues in an active syncing
state for another 20 seconds (concluded by red
LED blink), or until the second hearing instrument is
synced with it (confirmed by green LED blink).
After successful syncing, each hearing instrument
should automatically start streaming audio. If syncing
did not yield the desired result, then repeat the
process.
To cancel syncing mode, turn off and then turn on
SurfLink Remote Microphone.
The SurfLink Remote Microphone can be synced with
at most one left and one right hearing instrument at
a time. When hearing instruments are synced with
SurfLink Remote Microphone, any previously synced
hearing instruments will be automatically deleted.
Operation

19
Operation
Built-In Microphones
Depending on SurfLink Remote Microphone’s physical
orientation, it automatically adjusts the microphone
settings to either “Focus” (directional) or “Surround”
(omni-directional).
“Focus” – When SurfLink
Remote Microphone is
body worn, it automatically
prioritizes sound from above
while reducing sounds levels
from other directions. This is
useful for listening to a single
speaker when background noise
is present.
“Surround” – When SurfLink
Remote Microphone is placed
horizontally (on its clip),
it receives sound from all
directions. This setting is useful
for listening to multiple nearby
speakers in quiet environments.
TIP – In noisy environments, move SurfLink Remote
Microphone as close as possible to sound source.

LED
The LED indicator provides helpful information about
SurfLink Remote Microphone:
LED BEHAVIOR SURFLINK REMOTE
MICROPHONE STATE
Off
• SurfLink Remote Microphone is off
and is not attached to a power
source
• If SurfLink Remote Microphone is
off and attached to a power source,
then battery is fully charged.
• If SurfLink Remote Microphone
appears on but is not operational,
then battery may need charging.
Solid green • Battery is charging and SurfLink
Remote Microphone is off
Green for
2 seconds • SurfLink Remote Microphone
successfully powers on
Slow pulsing red • Low battery state and SurfLink
Remote Microphone is on
Red for 2 seconds • SurfLink Remote Microphone
powers off
Rapid blinking red • Possible error condition, refer to
Troubleshooting section
Slow pulsing blue • SurfLink Remote Microphone is
streaming audio
Rapid blinking blue • SurfLink Remote Microphone is in
active syncing state
20
Operation
Table of contents
