Suzuki AZ1801 User manual

User Manual
AZ1801

5-19
OTHER CONTROLS AND EQUIPMENT
69RH0-74E
Installation of radio frequency
transmitters
We recommend that you always ask a
SUZUKI dealer or a qualified workshop
about frequency band, max output power,
antenna position at vehicle and specific
conditions for installation and/or use before
installing a radio transmitter in your vehi-
cle. Such equipments may cause the elec-
tronic control system to malfunction if they
are incorrectly installed or they are not
suited for the vehicle.
Audio system (if equipped)
Safety information
Open source definition
This Product includes following open
source software.
mbedtls version 2.5.1
Copyright © 2006–2015, ARM Limited,
All Rights Reserved
SPDX-License-Identifier: Apache-2.0
Licensed under the Apache License, Ver-
sion 2.0 (the “License”); you may not use
this file except in compliance with the
License.
You may obtain a copy of the License at
http://www.apache.org/licenses/LICENSE-
2.0
Unless required by applicable law or
agreed to in writing, software distributed
under the License is on an “AS IS” BASIS,
WITHOUT WARRANTIES OR CONDI-
TIONS OF ANY KIND, either express or
implied.
See the License for specific language gov-
erning permissions and limitations under
the License.
This file is part of mbed TLS (https://
tls.mbed.org)
Please be noted that a portion of this soft-
ware is made by changing or modifying
original source files.
WARNING
If you pay too much attention to
operating the audio system or view-
ing the audio system display while
driving, an accident can occur. If
you set the sound volume too loud,
it could prevent you from being
aware of road and traffic conditions.
• Keep your eyes on the road and
your mind on the drive. Avoid pay-
ing too much attention to operat-
ing the audio system or viewing
the audio system display.
• Familiarize yourself with the audio
system controls and operation of
the audio system before driving.
• Preset your favorite radio stations
before driving so that you can
quickly tune to them using the
presets.
• Set the sound volume to a level
that will allow you to continue to
be aware of road and traffic condi-
tions while driving.
• Set the smartphone dock on to the
Audio system at a comfortable
viewing angle and familize your-
self with the smartphone applica-
tion controls.

User Manual
AZ1801

5-20
OTHER CONTROLS AND EQUIPMENT
69RH0-74E
Basic operations
69RM05001
(1) “VOL/PWR” knob
(2) “MODE” button
(3) MICROPHONE (for handsfree)
(4) “DISP/BACK” button
(5) “MENU” button
(6) “TUNE/FLD” knob
(7) USB/AUX
(8) SMARTPHONE DOCK CAP
(9) “SEEK UP” button
(10) “SEEK DOWN” button
MENU
TUNE
/
FLD VOL
/
PWR
AUX
MODEDISP/
(5) (4)(6) (2)
(10)
(9)
(7)
(8)
(1)(3)
Turning on/off power
Press “VOL/PWR” knob (1) to turn on the
power. The unit starts to operate in the pre-
vious mode that the power was turned off.
• To turn off the power, press “VOL/PWR”
knob (1) for about 1 second.
Adjusting the volume
Turn “VOL/PWR” knob (1).
• Turning it clockwise increases the vol-
ume.
• Turning it counterclockwise decreases
the volume.
Mute
• Press “VOL/PWR” knob(1) to mute the
sound.
• To cancel mute, press any button.
NOTE:
For the purpose of safe driving, adjust the
audio volume to a level that allows you to
hear sounds outside of the vehicle includ-
ing car horns and particularly emergency
vehicle sirens.

5-21
OTHER CONTROLS AND EQUIPMENT
69RH0-74E
Sound settings
1) Press “MENU” button (5). Setup menu
will be displayed.
2) Turn “TUNE/FLD” knob (6) to select
“Sound Settings”, and press the knob
(6) to determine the selection.
3) Turn “TUNE/FLD” knob (6) to select
one of the settings as follows, and
press the knob (6) to determine the
selection.
Equalizer
The equalizer can set various types of
sounds depending on the type of music.
1) Turn “TUNE/FLD” knob (6) to select
“Equalizer”, and press the knob (6) to
determine the selection.
2) Turn “TUNE/FLD” knob (6) to select
one of the settings as follows, and
press the knob (6) to determine the
selection.
NOTE:
• When you select “Custom”, the sound
curve can be adjusted as your prefer-
ence. Turn “TUNE/FLD” knob (6) to
adjust values of sound, and press the
knob (6) to determine the selection.
• “>> <<” mark appears at both left and
right ends of the currently selected
equalizer.
Adjusting bass/treble/balance/fader
1) Turn “TUNE/FLD” knob (6) to select
“Bass”, “Treble”, “Balance” or “Fader”,
and press the knob (6) to determine the
selection.
2) Turn “TUNE/FLD” knob (6) to adjust the
sound, and press the knob (6) to deter-
mine the selection.
• “Bass” / “Treble”:
– Can be adjusted in levels -6 to 0 to +6.
– Turn “TUNE/FLD” knob (6) clockwise
to adjust the low or high frequency and
turn the knob (6) counterclockwise to
quiet.
• “Balance”:
– Can be adjusted in 9 level left to right.
– Turn “TUNE/FLD” knob (6) clockwise
to emphasize the right speaker, and
turn the knob (6) counterclockwise to
emphasize the left speaker.
• “Fader”:
– Can be adjusted in 9 level back to
front.
– Turn “TUNE/FLD” knob (6) clockwise
to emphasize the front speaker, and
turn the knob (6) counterclockwise to
emphasize the rear speaker (if
equipped).
NOTE:
When you adjust to emphasize the rear
speakers, sound output may fade out com-
pletely in case vehicle is not equipped with
rear speakers.
Equalizer
Bass
Treble
Balance
Fader
AVC
Speaker Configuration
Flat
Classic
Jazz
Rock
Hip-Hop
Pop
Custom

5-22
OTHER CONTROLS AND EQUIPMENT
69RH0-74E
Adjusting the AVC (Auto volume con-
trol)
The Auto Volume Control (AVC) function
automatically adjusts (increases/
decreases) the sound volume in accor-
dance with vehicle speed. The AVC control
is provided with four selectable levels
(LEVEL OFF, 1, 2, 3). The level of volume
adjustment increases together with the
LEVEL number.
1) Turn “TUNE/FLD” knob (6) to select
“AVC”, and press the knob (6) to deter-
mine the selection.
2) Turn “TUNE/FLD” knob (6) to adjust the
level, and press the knob (6) to deter-
mine the selection.
Adjusting the sound parameters as per
speaker configuration
1) Turn “TUNE/FLD” knob (6) to select
“Speaker Configuration”, and press the
knob (6) to determine the selection.
2) Turn “TUNE/FLD” knob (6) to select
“2SPK” or “4SPK”, and press the knob
(6) to determine the selection.
• “2SPK”:
Sound is generated from the front
speakers.
• “4SPK” (if equipped):
Sound is generated from the all speak-
ers.
NOTE:
For optimal sound experience, ensure that
speaker configuration is selected as per
the actual speakers present in the vehicle.
System settings
1) Press “MENU” button (5). Setup menu
will be displayed.
2) Turn “TUNE/FLD” knob (6) to select
“System Settings”, and press the knob
(6) to determine the selection.
3) Turn “TUNE/FLD” knob (6) to select
one of the settings as follows, and
press the knob (6) to determine the
selection.
Beep on/off
Beep sound is activated when error mes-
sage is displayed or during operations of
few button.
Beep setting can be turned on or off
through the following steps:
1) Turn “TUNE/FLD” knob (6) to select
“Beep”.
2) Press “TUNE/FLD” knob (6) to select
“ON” or “OFF”.
Security setting
Refer to “Anti-theft feature” later in this
section.
Initialize setting
You can delete the registered Bluetooth®
device information.
1) Turn “TUNE/FLD” knob (6) to select
“Initialize”, and press the knob (6) to
determine the selection.
2) Turn “TUNE/FLD” knob (6) to select
“Reset BT”, and press the knob (6) to
determine the selection.
3) Turn “TUNE/FLD” knob (6) to select
“YES”, and press the knob (6) to deter-
mine the selection.
Beep
Security
Initialize
Vehicle Alerts
Reverse Warning Priority
Auto Scroll
RDS
SmartPhone APP

5-23
OTHER CONTROLS AND EQUIPMENT
69RH0-74E
Vehicle alerts setting
You can turn on or off the warning indica-
tions related to vehicle system using this
setting. By default, this setting is ON for all
alerts.
1) Turn “TUNE/FLD” knob (6) to select
“Vehicle Alerts”, and press the knob (6)
to determine the selection.
2) Turn “TUNE/FLD” knob (6) to select
one of the settings as follows, and
press the knob (6) to determine the
selection.
3) Press “TUNE/FLD” knob (6) to select
“ON” or “OFF”.
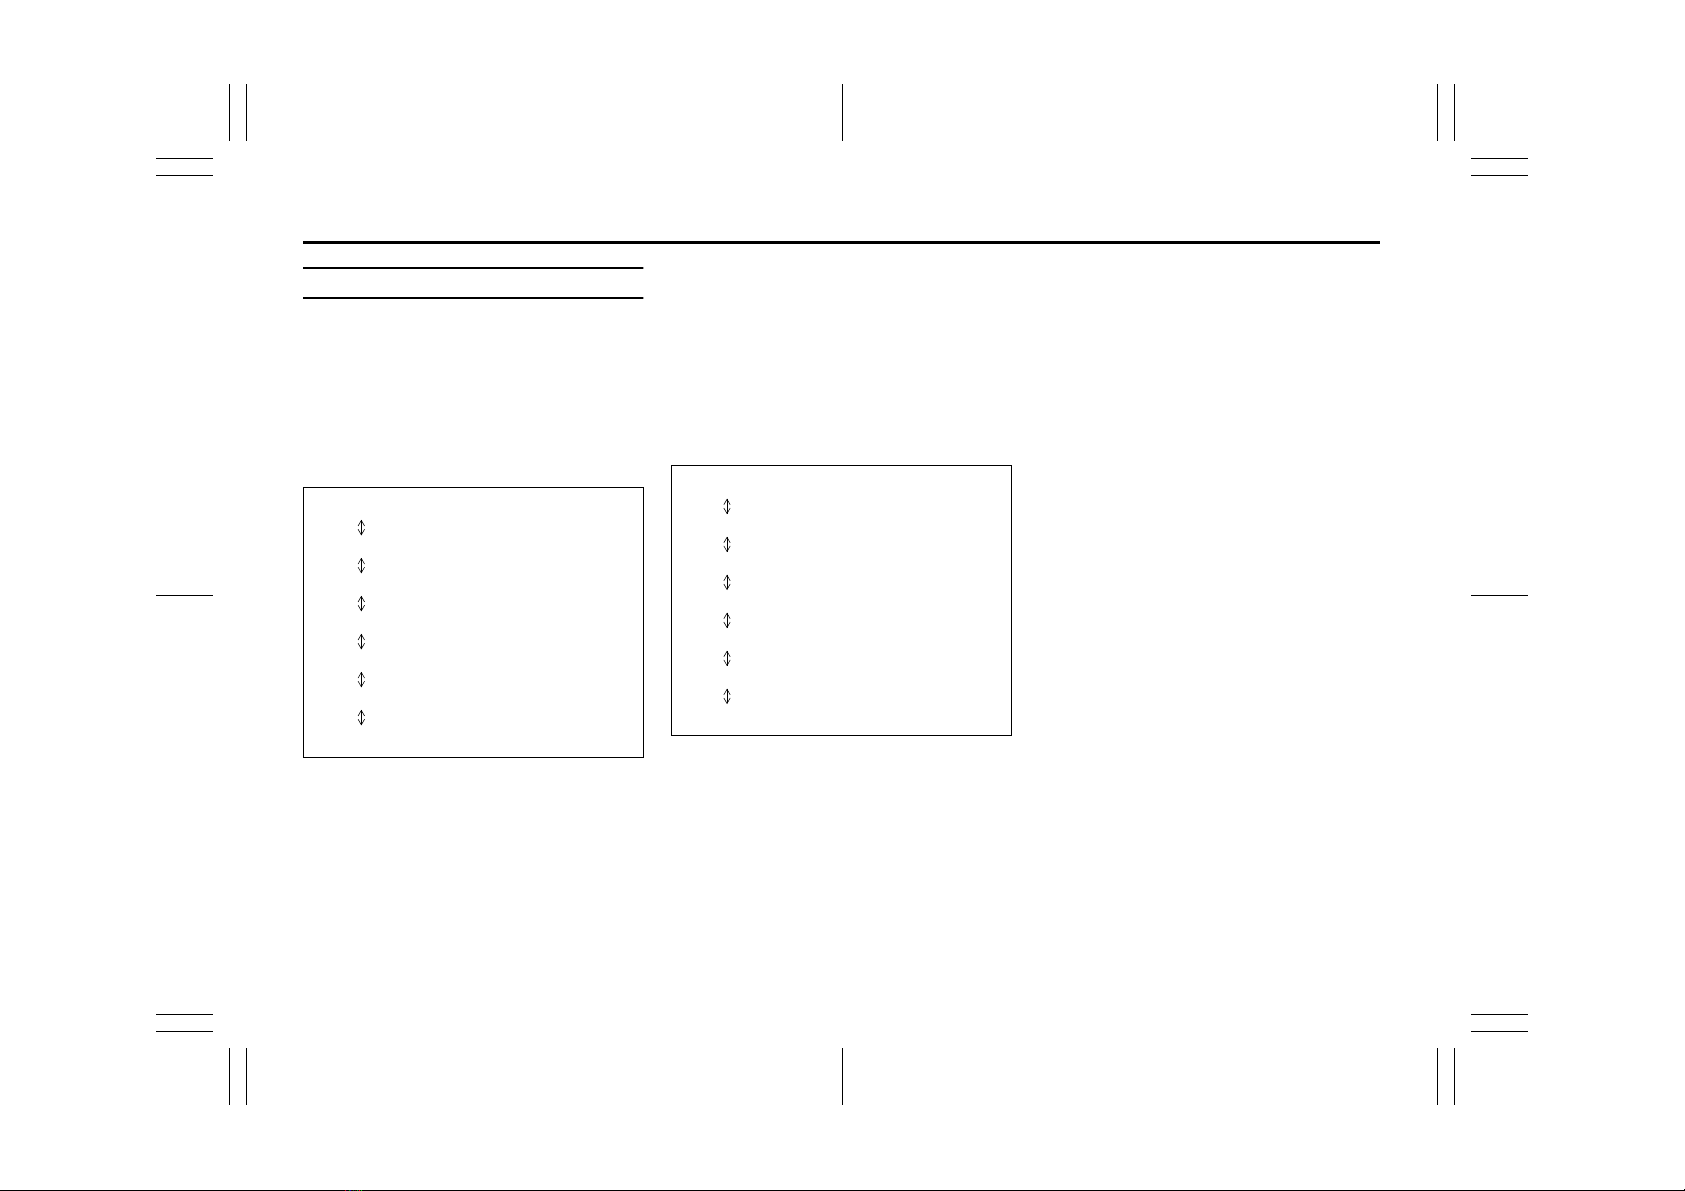
4) Following are the warning display
related to vehicle system:
• “Parking Brake Engaged”:
Parking brake is engaged.
• “Seat Belt Open”:
Seat belt(s) is (are) remaining unbuck-
led.
• “Door Open”:
Doors are not completely closed.
• “Low Fuel”:
Fuel is low.
NOTE:
If you push “DISP/BACK” button (4) while
the warning and indicator messages is dis-
played, the indication will disappear.
Reverse warning priority setting
On applying reverse, volume of audio sys-
tem gets lowered. By default, this setting is
ON. This setting can be turned on or off
through the following steps:
1) Turn “TUNE/FLD” knob (6) to select
“Reverse Warning Priority”, and press
the knob (6) to determine the selection.
2) Turn “TUNE/FLD” knob (6) to select
“No” or “Yes”, and press the knob (6) to
determine the selection.
Auto scroll setting
Auto scroll setting is ON by default.
If the text contains more characters, “>”
mark will appear at the right end and the
display changes to the next set of charac-
ters automatically.
1) Turn “TUNE/FLD” knob (6) to select
“Auto Scroll”.
2) Press “TUNE/FLD” knob (6) to select
“ON” or “OFF”.
RDS (Radio Data System) setting
Enabling this setting displays the mes-
sages transmitted by FM station. This set-
ting is ON by default. You can choose to
turn ON/OFF this setting through the fol-
lowing steps:
1) Turn “TUNE/FLD” knob (6) to select
“RDS”.
2) Press “TUNE/FLD” knob (6) to select
“ON” or “OFF”.
NOTE:
• Messages are displayed only when RDS
signal is included in FM radio waves.
• The messages are displayed program
service name only.
Smartphone app setting
Refer to section 5-52 for details about
smartphone application.
Smartphone app can be used only when
app setting is enabled as ON.
Refer to “Suzuki Smartplay Dock applica-
tion” later in this section for details.
1) Turn “TUNE/FLD” knob (6) to select
“SmartPhone APP”.
2) Press “TUNE/FLD” knob (6) to select
“ON” or “OFF”.
NOTE:
An Apple device can be connected in
either Bluetooth®or iPod mode. Blue-
tooth®mode has higher priority over iPod
Mode. In case, you want to connect the
Apple device on iPod mode instead, use
the above setting and change Smartphone
app setting to “OFF”
Parking Brake Engaged
Seat Belt Open
Door Open
Low Fuel

5-24
OTHER CONTROLS AND EQUIPMENT
69RH0-74E
Listening to the radio
69RH145
Display
69RM05002
MENU
TUNE
/
FLD VOL
/
PWR
AUX
MODEDISP/
(4) (3)
(1)
(2)
(D)
(B) (C) (A)
(1) UP button
(2) DOWN button
(3) “MODE” button
(4) “TUNE/FLD” knob
(A) Frequency
(B) Band
(C) Auto store mode indication
(D) RDS data
NOTE:
Radio Reception
Radio reception can be affected by envi-
ronment, atmospheric conditions, or radio
signal’s power and distance from the sta-
tion.
Nearby mountains and buildings may inter-
fere or deflect radio reception, causing
poor reception. Poor reception or radio
static can also be caused by electric cur-
rent from overhead wires or high voltage
power lines.

5-25
OTHER CONTROLS AND EQUIPMENT
69RH0-74E
Selecting the band
1) Press and hold “MODE” button (3) to
change to the list of available modes.
2) Turn “TUNE/FLD” knob (4) to select
“FM” or “AM”, and press the knob (4) to
determine the selection.
NOTE:
You can also switch the display in
sequence by short pressing the “MODE”
button (3).
Seek tuning
Press and hold UP button (1) or DOWN
button (2) to start searching.
The unit stops searching for a station at a
frequency where a broadcast station is
available.
Manual tuning
Turn “TUNE/FLD” knob (4).
The frequency being received is displayed.
Preset memory
1) Tune to the desired station.
2) Press “TUNE/FLD” knob (4) to change
the display to the preset channel list.
3) To store the station, turn “TUNE/FLD”
knob (4) to select one of the channels,
and press and hold the knob (4) to
determine the selection.
4) To select station from the preset chan-
nel list, press “TUNE/FLD” knob (4) to
change the display to the preset chan-
nel list.
Turn “TUNE/FLD” knob (4) to select
one of the channels, and press the
knob (4) to determine the selection.
NOTE:
12 stations can be stored for FM, and 6
stations can be stored for AM.
In case a station is stored over an existing
preset station, previous data will be overid-
den.
Auto store
1) Press and hold “TUNE/FLD” knob (4) to
start searching when in FM/AM mode.
Some stations in good reception will
automatically be stored to preset chan-
nel list in order, starting from a station
whose frequency is the lowest.
2) To select station from the preset chan-
nel list, press “TUNE/FLD” knob (4) to
change the display to the preset chan-
nel list while auto store mode indication
(C) is displayed.
NOTE:
• Auto Store can be cancelled by pressing
the “DISP/BACK” button.
• When the auto store is performed, the
station previously stored in the memory
at the position is overwritten.
• 6 stations can be preset for FM-AS, and
6 stations can be preset for AM-AS in
auto store mode.

5-26
OTHER CONTROLS AND EQUIPMENT
69RH0-74E
Listening to files stored in a USB device
69RH146
Display
69RM05003
MENU
TUNE
/
FLD VOL
/
PWR
AUX
MODEDISP/
(6) (5) (4) (3)
(1)
(2)
(C)
(B)
(A) (D)
(1) “UP” button
(2) “DOWN” button
(3) “MODE” button
(4) “DISP/BACK” button
(5) “MENU” button
(6) “TUNE/FLD” knob
(A) Track number
(B) Play time
(C) Current Active track information
(if supported by audio device)
(D) Repeat/Random status Indication
NOTICE
Do not connect any USB device other
than a USB memory or a USB audio
player. Do not connect multiple USB
devices to the USB connector using a
USB hub, etc. Supplying power to
multiple USB devices from the con-
nector could cause overheating,
smoke and permanent damage to
audio system.

5-27
OTHER CONTROLS AND EQUIPMENT
69RH0-74E
Selecting a USB device mode
1) Press and hold “MODE” button (3) to
change the display.
2) Turn “TUNE/FLD” knob (6) to select
“USB”, and press the knob (6) to deter-
mine the selection.
NOTE:
You can also switch the display in
sequence by short pressing the “MODE”
button (3).
Selecting a folder
Turn “TUNE/FLD” knob (6) to select the
desired folder.
Selecting a track
• Press UP button (1) to listen to the next
track.
• Press DOWN button (2) twice to listen to
the previous track.
When DOWN button (2) is pressed
once, the track currently being played
will start from the beginning again.
Fast forwarding/rewinding a track
• Press and hold UP button (1) to fast for-
ward the track.
• Press and hold DOWN button (2) to fast
rewind the track.
• Releasing the button can stop the fast
forwarding/rewinding.
Repeat playback
1) Press and hold “MENU” button (5) to
change the display.
2) Turn “TUNE/FLD” knob (6) to select
“Repeat”,
3) Press “TUNE/FLD” knob (6) to select
one of the settings as follows.
•FILE
The track currently being played will be
played repeatedly.
•FOLDER
All the tracks in the folder currently
selected will be played repeatedly.
Random playback
1) Press and hold “MENU” button (5) to
change the display.
2) Turn “TUNE/FLD” knob (6) to select
“Random”.
3) Press “TUNE/FLD” knob (6) to select
one of the settings as follows.
•FOLDER
The tracks in the currently selected
folder will be played in random order.
•ALL
The tracks in the connected USB device
will be played in random order.
OFF
FILE
FOLDER
OFF
FOLDER
ALL

5-28
OTHER CONTROLS AND EQUIPMENT
69RH0-74E
Display change
Press “DISP/BACK” button (4).
Each time the button is pressed, display
will change as follows:
NOTE:
• “NO TITLE” will be displayed when there
is no text information in the file currently
being played.
• If text data contains more characters
than the display area, “>” mark will
appear at the right end.
Notes on USB device
Compatible USB devices
• USB mass storage class
For details as to whether your USB
memory/USB audio is compatible with
USB mass storage class, please contact
the USB memory/USB audio manufac-
turer.
• Audio file
MP3 (.mp3) / WMA (.wma) / AAC (.m4a) /
AAC (.aac)
• File system
FAT 16/32, VFAT (supporting long file
name)
• USB standard compatibility
1.1/2.0 full speed
• If a USB hub or extension cable is con-
nected to the audio system, it may not
be recognized. In this case, directly con-
nect the USB device to the audio sys-
tem.
• Devices such as MP3 players/mobile
phones/digital cameras may not be rec-
ognized as audio systems for playing
music.
USB device connection
• When connecting a USB device, make
sure that the connector is pushed all the
way into the port present on audio sys-
tem.
• Depending on the USB flash drive that
you are using, (non-brand product, USB
flash drive that has been externally dam-
aged) it may disable connection or
cause unstable operation.
• Do not leave the USB device for long
periods of time in places inside the vehi-
cle where the temperature can rise too
high.
• Back up any important data beforehand.
We cannot accept responsibility for any
lost data.
• It is recommended not to connect a USB
device that contains data files other than
MP3/WMA format.
Playing MP3/WMA/AAC files on a USB
device
• Playback or display may not be possible
depending on the type of USB device in
use or the condition of the recording.
• Depending on the connected USB mem-
ory, the files may be played in different
order from the order that the files were
stored.
• The DRM (Digital Rights Management)
file cannot be played.
Folder name / Track title
File name / Track title
Album name (MP3, AAC only) /
Track title
Artist name / Track title

5-29
OTHER CONTROLS AND EQUIPMENT
69RH0-74E
Compatible compression formats
MP3
•Bitrate
MPEG1 Audio Layer III: 32 up to 320 kbps
MPEG2 Audio Layer III: 8 up to 160 kbps
MPEG2.5 Audio Layer III: 8 up to 160 kbps
VBR: up to 384 kbps (MAX.)
• Sampling frequency
MPEG1 Audio Layer III: 32/44.1/48 kHz
MPEG2 Audio Layer III: 16/22.05/24 kHz
MPEG2.5 Audio Layer III: 8/11.025/12 kHz
• Channel
Stereo/Joint stereo/Dual channel/
Monaural
•ID3tag
ID3v1.x/ID3v2.x
WMA
• Windows Media Audio Ver.7/Ver.8/Ver.9
Standard compliant
• Bit rate: 32 up to 320 kbps
• VBR: up to 384 kbps (MAX.)
• Sampling frequency: 32/44.1/48 kHz
• WMA tag: Ver.8.0
• Channel: 2 Channels
AAC
• Bit rate: 16 up to 320 kbps
• VBR: up to 320 kbps (MAX.)
• Sampling frequency: 32/44.1/48 kHz
• AAC tag: iTunes m4a metadata
Maximum number of files/folders
• Maximum number of files: 2500
• Maximum number of files in a folder: 255
• Maximum number of folders: 255
– Root folder and empty folder are
included.
• Maximum depth of tree structure: 8
NOTICE
Never use “.mp3”, “.wma” or “.m4a”
as a file name extension if it is not in
the MP3/WMA/AAC format file. Fail-
ure to observe this may result in
damage to the speaker due to noise
production.

5-30
OTHER CONTROLS AND EQUIPMENT
69RH0-74E
Listening to an iPod
69RH146
Display
69RH159
MENU
TUNE
/
FLD VOL
/
PWR
AUX
MODEDISP/
(6) (5) (4) (3)
(1)
(2)
(C)
(B)
(A)
(1) UP button
(2) DOWN button
(3) “MODE” button
(4) “DISP/BACK” button
(5) “MENU” button
(6) “TUNE/FLD” knob
(A) Track number
(B) Play time
(C) Current Active track information
(if supported by audio device)
Selecting an iPod mode
1) Press and hold “MODE” button (3) to
change the display.
2) Turn “TUNE/FLD” knob (6) to select
“iPod”, and press the knob (6) to deter-
mine the selection.
NOTE:
You can also switch the display in
sequence by short pressing the “MODE”
button (3).
Selecting a track
• Press UP button (1) to listen to the next
track.
• Press DOWN button (2) twice to listen to
the previous track.
When DOWN button (2) is pressed
once, the track currently being played
will start from the beginning again.

5-31
OTHER CONTROLS AND EQUIPMENT
69RH0-74E
Fast forwarding/rewinding a track
• Press and hold UP button (1) to fast for-
ward the track.
• Press and hold DOWN button (2) to fast
rewind the track.
• Releasing the button can stop the fast
forwarding/rewinding.
Repeat playback
1) Press and hold “MENU” button (5) to
change the display.
2) Turn “TUNE/FLD” knob (6) to select
“Repeat”.
3) Press “TUNE/FLD” knob (6) to select
one of the settings as follows.
•FOLDER
All the tracks in the folder currently
selected will be played repeatedly.
•SONG
The track currently being played will be
played repeatedly.
NOTE:
Settings may be displayed depending on
the model of iPod.
Random playback
1) Press and hold “MENU” button (5) to
change the display.
2) Turn “TUNE/FLD” knob (6) to select
“Random”.
3) Press “TUNE/FLD” knob (6) to select
one of the settings as follows.
•SONG
The tracks in the iPod will be played in
random order.
NOTE:
Settings may be displayed depending on
the model of iPod.
Display change
Press “DISP/BACK” button (4).
Each time the button is pressed, display
will change as follows:
NOTE:
• “NO TITLE” will be displayed when there
is no text information in the file currently
being played.
• If text data contains more characters
than the display area, “>” mark will
appear at the right end.
Selecting a category
Categories such as Artist, Album, Podcast,
Genre, Audiobook, Playlist, Song may be
displayed depending on the model of iPod.
1) Press and hold “TUNE/FLD” knob (6) to
change the display.
2) Turn “TUNE/FLD” knob (6) to select
one of the categories, and press the
knob (6) to determine the selection.
OFF
FOLDER
SONG
OFF
SONG
Playlist name /Track title
(Playlist mode only)
Artist name / Track title
Album name / Track title
Genre / Track title

5-32
OTHER CONTROLS AND EQUIPMENT
69RH0-74E
Notes on iPod
Made for iPod
• iPod touch (6th generation)
• iPod touch (5th generation)
• iPod nano (7th generation)
• iPhone 8 Plus
• iPhone 8
• iPhone 7 Plus
• iPhone 7
• iPhone SE
• iPhone 6s Plus
• iPhone 6s
• iPhone 6 Plus
• iPhone 6
• iPhone 5s
• iPhone 5c
• iPhone 5
* Some functions may not be available
depending on the model of iPod.
iPod
69RH201
• Use of the Made for Apple badge means
that an accessory has been designed to
connect specifically to the Apple prod-
uct(s) identified in the badge, and has
been certified by the developer to meet
Apple performance standards. Apple is
not responsible for the operation of this
device or its compliance with safety and
regulatory standards.
• Please note that the use of this acces-
sory with an Apple product may affect
wireless performance.
• Apple, iPod touch, iPod nano, iPhone,
and Lightning are trademarks of Apple
Inc., registered in the U.S. and other
countries.
NOTE:
Please do not connect iPod accessory
such as iPod remote control or head-
phones while connecting the iPod with the
unit. Unit may not operate correctly.

5-33
OTHER CONTROLS AND EQUIPMENT
69RH0-74E
AUX function
69RH147
(1) AUX socket
(2) “MODE” button
(3) “TUNE/FLD” knob
Display
69RH160
MENU
TUNE
/
FLD VOL
/
PWR
MODEDISP/
(3)
(1)
(2)
AUX connection
To listen to auxiliary audio sources (sold
separately) through the unit, follow the
instruction below.
1) Connect the auxiliary audio source to
the AUX socket (1) with an AUX cable.
2) Press and hold “MODE” button (2) to
change the display.
3) Turn “TUNE/FLD” knob (3) to select
“AUX”, and press the knob (3) to deter-
mine the selection.
NOTE:
You can also switch the display in
sequence by short pressing the “MODE”
button (2).
NOTE:
Please consult your place of purchase for
details about whether a given auxiliary
audio source can be connected and the
proper auxiliary cord to use.
CAUTION
• Before connection, mute the unit,
and also keep the volume of the
auxiliary audio source within a
range that will not cause distortion.
• When the audio source is turned
off, noise may be emitted. Be sure
to turn off the unit or switch to
another mode before turning off the
audio source.

5-34
OTHER CONTROLS AND EQUIPMENT
69RH0-74E
Setting of Bluetooth®devices
69RH185
MENU
TUNE
/
FLD VOL
/
PWR
AUX
MODEDISP/
(5) (3)(4) (2) (1)
Steering switch (if equipped)
69RH186
(1) OFF HOOK button
(2) “DISP/BACK” button
(3) “MENU” button
(4) ON HOOK button
(5) “TUNE/FLD” knob
(6) Bluetooth®setting button
Bluetooth®related settings can be entered
only when the vehicle is in stationary con-
dition.
WARNING
Do not register or set the Bluetooth®
device while driving. Stop your vehi-
cle in a safe area before registering
the device.
(6)

5-35
OTHER CONTROLS AND EQUIPMENT
69RH0-74E
Registration of Bluetooth®devices
To use Bluetooth®devices (Bluetooth®
audio or mobile phone) on the audio sys-
tem, it is required to register the Blue-
tooth®devices to the audio system. Up to
5 Bluetooth®devices can be registered.
NOTE:
• Certain functions cannot be used
depending on the Bluetooth®device.
• Refer to the user manual included with
your device regarding the operation
method of Bluetooth®devices.
• If the pairing cannot be established, the
connection operation is canceled.
For the Bluetooth®device pairing
method, refer to the user manual
included with your device or try pairing
again.
1) Press “MENU” button (3). Setup menu
will be displayed.
2) Turn “TUNE/FLD” knob (5) to select
“Bluetooth Settings”, and press the
knob (5) to determine the selection.
3) Turn “TUNE/FLD” knob (5) to select
“Pairing”, and press the knob (5) to
determine the selection.
4) Turn “TUNE/FLD” knob (5) to select
“Name & Passkey”, and press the knob
(5) to determine the selection.
NOTE:
If you have no Bluetooth®device to be reg-
istered, you can also switch the display to
“Pairing Name” and “Passkey” at once by
pressing the Bluetooth®setting button (6),
OFF HOOK button (1) or ON HOOK button
(4).
5) Operate and register the Bluetooth®
device.
Secure Simple Pairing (SSP) incom-
patible Bluetooth®device:
Enter the passkey into the Bluetooth®
device.
Secure Simple Pairing (SSP) com-
patible Bluetooth®device:
Select “Yes” to register the Bluetooth®
device.
It is possible to automatically register
devices depending on the type of Blue-
tooth®device.
NOTE:
If the Bluetooth®device contains music
player and mobile phone function, both
functions will be registered simultaneously.
When deleting a Bluetooth®device, both
functions will be deleted simultaneously.
Set from the list of mobile phones
The list of paired mobile phones is dis-
played and the various settings can be
changed.
1) Press “MENU” button (3). Setup menu
will be displayed.
2) Turn “TUNE/FLD” knob (5) to select
“Bluetooth Settings”, and press the
knob (5) to determine the selection.
3) Turn “TUNE/FLD” knob (5) to select
“Pairing”, and press the knob (5) to
determine the selection.
NOTE:
If you have the mobile phone which cur-
rently connected, you can also switch the
display to “Pairing” at once by pressing the
Bluetooth®setting button (6).
4) Turn “TUNE/FLD” knob (5) to select
“Pairing Phone List”, and press the
knob (5) to determine the selection.
5) Turn “TUNE/FLD” knob (5) to select
one of the registered mobile phones,
and press the knob (5) to determine the
selection.
NOTE:
“>>” mark appears at the left end of the
currently connected mobile phone.

5-36
OTHER CONTROLS AND EQUIPMENT
69RH0-74E
6) Turn “TUNE/FLD” knob (5) to select
one of the settings as follows, and
press the knob (5) to determine the
selection.
• “Connect”:
Connect a registered mobile phone.
• “Disconnect”:
Disconnect a registered mobile phone.
•“Delete”:
Delete a registered mobile phone.
Selection from the Bluetooth®audio list
The list of paired Bluetooth®audio is dis-
played and the various settings can be
changed.
1) Press “MENU” button (3). Setup menu
will be displayed.
2) Turn “TUNE/FLD” knob (5) to select
“Bluetooth Settings”, and press the
knob (5) to determine the selection.
3) Turn “TUNE/FLD” knob (5) to select
“Pairing”, and press the knob (5) to
determine the selection.
NOTE:
If you have the Bluetooth®audio which
currently connected, you can also switch
the display to “Pairing” at once by pressing
the Bluetooth®setting button (6).
4) Turn “TUNE/FLD” knob (5) to select
“Pairing Audio List”, and press the knob
(5) to determine the selection.
5) Turn “TUNE/FLD” knob (5) to select
one of the registered Bluetooth®audio
devices, and press the knob (5) to
determine the selection.
NOTE:
“>>” mark appears at the left end of the
currently connected Bluetooth®audio.
6) Turn “TUNE/FLD” knob (5) to select
one of the settings as follows, and
press the knob (5) to determine the
selection.
• “Connect”:
Connect a registered Bluetooth®audio.
• “Disconnect”:
Disconnect a registered Bluetooth®
audio.
•“Delete”:
Delete a registered Bluetooth®audio.
Change of passkey
1) Press “MENU” button (3). Setup menu
will be displayed.
2) Turn “TUNE/FLD” knob (5) to select
“Bluetooth Settings”, and press the
knob (5) to determine the selection.
3) Turn “TUNE/FLD” knob (5) to select
“Pairing”, and press the knob (5) to
determine the selection.
NOTE:
If you have the Bluetooth®device which
currently connected, you can also switch
the display to “Pairing” at once by pressing
the Bluetooth®setting button (6).
4) Turn “TUNE/FLD” knob (5) to select
“Edit Passkey”, and press the knob (5)
to determine the selection.
5) Turn “TUNE/FLD” knob (5) to select a
number for the first digit, and press the
knob (5) to determine the selection.
Select and determine numbers for from
the second to fourth digits in order in
the same manner.
6) Press “TUNE/FLD” knob (5) to deter-
mine the passkey setting.
Automatic connection with the Blue-
tooth®device
If the “BT Power” is set to “ON”, turning the
ignition switch to “ON” position will auto-
matically connect the registered Blue-
tooth®device.
• With the automatic connection, the Blue-
tooth®device that was connected last
will be prioritized.
1) Press “MENU” button (3). Setup menu
will be displayed.
2) Turn “TUNE/FLD” knob (5) to select
“Bluetooth Settings”, and press the
knob (5) to determine the selection.
3) Turn “TUNE/FLD” knob (5) to select
“Initial Settings”, and press the knob (5)
to determine the selection.
4) Turn “TUNE/FLD” knob (5) to select
“BT Power”.
5) Press “TUNE/FLD” knob (5) to select
“ON” or “OFF”.
Table of contents
Other Suzuki Car Receiver manuals