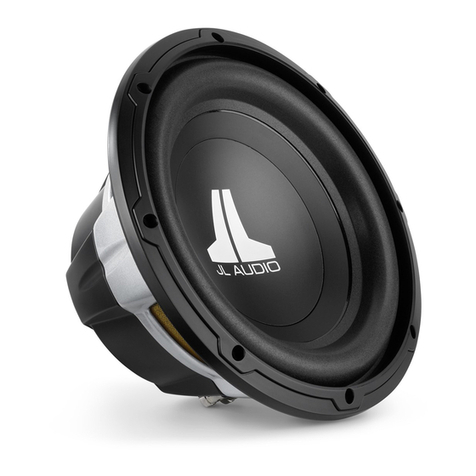
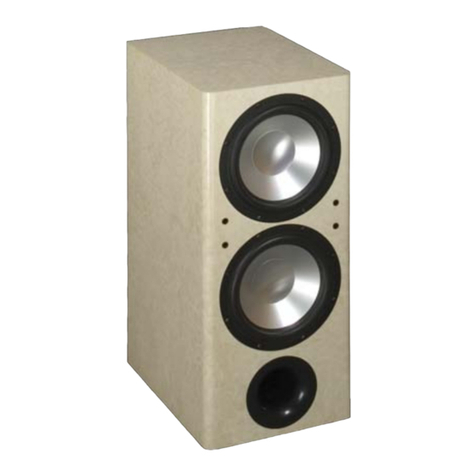
Target Audio TSU User manual

TSU SUBWOOFERS
MANUALE D’USO - OWNER’S MANUAL

ATTENZIONE
Leggete con attenzione questo manuale e seguite passo passo
le istruzioni, che mostrano in modo generico l’installazione di
un sistema car audio, ma non contengono i metodi specifici di
installazione sul vostro veicolo.
Un prolungato ascolto a volume molto elevato può causare
danni permanenti al sistema uditivo: raccomandiamo di non
eccedere con il volume. Potenti sistemi car audio possono
produrre pressioni sonore che eccedono il limite previsto da
alcune legislazioni: rispettate le norme del vostro Paese.
Durante la guida ascoltate a livello moderato: dovete essere
sempre in grado di udire i rumori esterni per affrontare even-
tuali emergenze.
Un sistema car audio fornisce le migliori prestazioni solo se
correttamente installato: è quindi necessaria una buona cono-
scenza delle problematiche meccaniche ed acustiche dell’auto.
Per evitare qualsiasi rischio, raccomandiamo che l’installa-
zione sia eseguita da personale specializzato, nel rispetto delle
norme di sicurezza vigenti.
La Coral Electronic non risponde di eventuali danni a persone
o cose derivati dalla mancata osservanza di queste raccoman-
dazioni e/o dall’uso improprio dei propri prodotti.
WARNING
Please read this manual carefully and follow the instructions
step by step. These instructions generally show you how to
install a car audio system, but they do not explain the specific
installation methods for your type of car.
Protracted listening at very high volume level may cause per-
manent hearing damages: we recommend to not exceed with
high volume. High-powered car audio systems may produce
pressure levels which exceed the limits of legislations in some
countries: please respect such rules of your country.
We also recommend the use of a moderate volume level while
driving: you must always be able to hear external noises in or-
der to face possible emergency situations promptly.
A car audio system gives its best performances only if correctly
installed: for this reason, a good car’s acoustical and mechani-
cal knowledge are required.
To ensure total safety, we strongly recommend you to entrust
installation to a qualified personnel, respecting the current
safety laws.
Coral Electronic declines any liability for damages caused to
people and things in disregarding the contents of the present
manual and/or concerning the improper use of its products.

COSTRUZIONE
Per ottenere i risultati previsti, è importante attenersi alle indi-
cazioni di questo manuale. Se non avete gli attrezzi o l'espe-
rienza necessari, rivolgetevi ad un installatore professionista.
Indossate sempre adeguati mezzi di protezione durante l'uso
degli attrezzi.
Per la realizzazione del box, suggeriamo l'utilizzo di pannelli
di MDF (Medium Density Fibreboard) da almeno 19 millimetri
di spessore, uniti da abbondante colla vinilica. Prestate atten-
zione affinché il mobile non presenti fessure: da ciò dipenderà
la buona resa delle basse frequenze.
Quando previsto dal progetto, per realizzare il condotto reflex,
scegliete un tubo in PVC (come quelli utilizzati in edilizia), che
deve essere saldamente incollato al mobile.
Ponete una guarnizione in neoprene (quella autoadesiva per
infissi) da 2-3 millimetri tra il box e l'altoparlante. Usate delle
guarnizioni anche tra eventuali pannelli amovibili.
CONSTRUCTION
In order to reach expected results, it's very important to
follow these instructions. If you think you don't have right
tools or enough experience, please contact a professional
installer. Be sure to wear right protective equipment during
the construction.
To build the enclosure, we suggest to use MDF (Medium
Density Fibre-board) panels, with thickness of 19 millime-
tres at least, jointed with a lot of vinyl glue. Pay attention that
the enclosure doesn't present any splits: this can affect the
bass frequency response.
When the project requires a reflex vent, choose a PVC tube
(like the ones used in building), that have to be firmly glued
to the enclosure.
Put a neoprene gasket with 2-3 millimetres of thickness (like
the one used on windows) between box and loudspeaker. Use
the same gasket when the project requires removable panels.
B
A
C
D
volume litres 17 32 50 120
Amm 120 175 200 350
Bmm 230 300 350 500
Cmm 300 340 420 420
Dmm 320 400 440 680

INSTALLAZIONE
Prima di installare il subwoofer, assicuratevi che
non interferisca con la sicurezza di guida.
Controllate la superficie di posizionamento per prevenire danni
al serbatoio, ai cavi elettrici o alle condutture idrauliche. Fissa-
te con cura il subwoofer ad una superficie solida, in un luogo
protetto da polvere, umidità ed oggetti in movimento.
COLLEGAMENTI
Prima di effettuare i collegamenti, spegnete l'autoradio, l'am-
plificatore e tutti gli apparati elettronici del sistema audio, per
evitare possibili danni.
Collegate il subwoofer all'amplificatore utilizzando cavo di
buona qualità. Fate scorrere i fili attraverso una guaina di pro-
tezione; non passate vicino a centraline elettroniche, ai cablag-
gi dell'autovettura o a parti che generano calore.
La sezione del cavo deve essere adeguata alla potenza applica-
ta ed alla lunghezza del cavo stesso, come da tabella:
INSTALLATION
Before the installation, check that the subwoofer
never interferes with your total driving safety.
Check the mounting location carefully, to avoid damages to the
gas tank, electrical wires or hydraulic pipes. Fix the subwoofer
carefully on a steady surface, away from dust, moisture and
moving objects.
WIRINGS
Before starting connections, turn off car radio, amplifier and
all electrical devices in your audio system, in order to avoid
possible damages.
Link the subwoofer to the amplifier by using high quality ca-
ble. Route all wires through a protection grummet; don't put
cable close to electronic devices, car wiring or heat-generating
parts
The wire gauge has to be adapted to the used power and to the
cable length, as on underneath table:
Length 0÷2 meters > 2 meters
150 watt rms 14 AWG / 2.2 mm214 AWG / 2.2 mm2
300 watt rms 14 AWG / 2.2 mm212 AWG / 3.3 mm2
450 watt rms 12 AWG / 3.3 mm210 AWG / 5.3 mm2
800 watt rms 10 AWG / 5.3 mm28 AWG / 8.4 mm2

TARATURA
Utilizzate l'uscita filtrata per subwoofer
del vostro amplificatore e regolate il suo
controllo low-pass tra 60 e 120 Hertz.
Se disponibile, utilizzate il filtro sub-
sonico e regolatelo intorno ai 25 Hertz.
Se l'amplificatore ha il controllo di fase,
regolatelo sulla posizione che offre il
miglior risultato.
TUNING
Use the subwoofer filtered output of
your amplifier and adjust its low-pass
control between 60 and 120 Hertz. If
available, use the subsonic filter by set-
ting its cut frequency around 25 Hertz. If
the amplifier is equipped with a phase
control, adjust it in order to obtain the
right sound.
Inoltre, é possibile aggiustare la risposta
variando la posizione del subwoofer e la
direzione di emissione dell'altoparlante.
As well, it's possible to adjust the response
by changing the subwoofer position and
the loudspeaker emitting direction.
Se il vostro amplificatore non ha un'usci-
ta per subwoofer, utilizzate un crossover
passivo con frequenza di taglio compre-
sa tra i 60 e 120 Hertz.
If your amplifier is not equipped with
subwoofer output, use a passive crosso-
ver with cut frequency between 60 and
120 Hertz.
I volumi dell'abitacolo e del bagagliaio
influiscono sulla risposta alla basse
frequenze e giocano una parte impor-
tante nelle prestazioni del sistema car
audio; anche la fase di collegamento
del subwoofer influenza la resa acustica:
provate ad invertire tra di loro i fili positi-
vo e negativo del subwoofer (controfase),
quindi scegliete la posizione che offre il
miglior risultato nella vostra auto.
The volumes of passenger compartment
and car's trunk influence the bass fre-
quency response and play an important
role on performances of the car audio
system; also subwoofer linking phase
influences acoustic result: try to invert
positive and negative wires of the sub-
woofer (out of phase), then choose the
position offering the best performances
in your car.
SUBWOOFER AMPLIFIER
CROSSOVER
SUBWOOFER AMPLIFIER

Data TSU 10 TSU 12 TSU 15
external diameter - mm 260 320 390
nominal impedance Zn ohm 4 4 4
max power Pm watt 400 550 650
nominal power Pn watt 200 275 325
sensitivity (2,83 V/1m) - dB 92 92 93
frequency range BW hertz 35-2K 30-2K 25-2K
resonance frequency Fs hertz 32 34 29
mechanical Q factor Qms - 7,57 6,38 5,64
electrical Q factor Qes - 0,36 0,47 0,58
total Q factor Qts - 0,34 0,44 0,52
moving mass Mms g 69,7 152,9 184,9
compliance Cms mm/N 0,35 0,14 0,16
emission diameter D mm 210 260 330
equivalent volume Vas litres 66 56 163
force factor BxL N/A 11,6 14,5 13,4
voice coil resistance Re ohm 3,4 3,0 3,0
voice coil inductance Le mH 1,1 1,5 1,5
linear excursion Xmax mm 4 6 6
voice coil diameter - mm 50 65 65
cut out diameter - mm 230 280 354
Free air use yes yes yes
Closed box volume litres 17 32 50
volume litres 32 50 120
Bass reflex tube diameter mm 94 94 154
tube length mm 300 270 320

GARANZIA
La Coral Electronic garantisce le caratteristiche ed il perfetto funzionamento di questo apparecchio.
Qualora tuttavia, per un qualsiasi motivo non imputabile ad uso improprio, erronea installazione o manomissione, esso dovesse presentare difetti di
funzionamento, l’acquirente potrà usufruire dell’assistenza tecnica gratuita per il periodo di due anni dalla data di acquisto, certificata dal documento
di vendita.
In caso di necessità, l’acquirente consegnerà l’apparecchio accuratamente imballato, preferibilmente nell’imballo originale, al rivenditore presso
il quale è stato effettuato l’acquisto, che provvederà all’inoltro al nostro centro assistenza. In alternativa, l’acquirente potrà inviare a proprie spese
l’apparecchio direttamente al nostro laboratorio. In ogni caso l’apparecchio dovrà essere accompagnato dal documento di vendita.
Prima di usufruire del servizio assistenza, oppure in caso di dubbi relativi al funzionamento ed all’utilizzo dell’apparecchio, consigliamo di rileggere
attentamente le istruzioni.
WARRANTY
Coral Electronic guarantees characteristics and perfect operation of its products. Coral Electronic will replace those parts which should prove
defective within two years from the date of purchase, certified by the sales receipt. The warranty is void in case of misuse or illegal opening. For
more details, please contact the official distributor in your country.
RICICLAGGIO
Al termine della durata, il presente prodotto deve essere smaltito in modo ecologico, in conformità alla legislazione vigente. Il simbolo del bidone
della spazzatura barrato indica che il presente prodotto rientra nell’ambito della Direttiva UE “Rifiuti di apparecchiature elettriche ed elettroniche”
(RAEE) e della Direttiva UE “Restrizione dell’uso di determinate sostanze pericolose nelle apparecchiature elettriche ed elettroniche” (ROHS), non ne
è quindi consentito lo smaltimento insieme ai rifiuti domestici.
RECYCLING
At end of life, you must ensure that this product is disposed off in accordance with the laws in force in your country. The crossed-out wheelie bin
symbol means that this product falls under the scope of the E.U. “Waste Electrical and Electronic Equipment” (WEEE) directive and “Restriction
Of the use of certain Hazardous Substances in electrical and electronic equipment” (ROHS) directive and should not be disposed off with your
household waste.

Ci riserviamo il diritto di modificazioni senza preavviso. Decliniamo ogni responsabilità per eventuali errori o imprecisioni.
We reserve the right to change the specifications without notice. We decline each liability for any mistake or inaccuracy.
Target Audio is a brand of Coral Electronic - 10098 Rivoli - Torino - Italy - www.targetaudio.it
This manual suits for next models
3
Table of contents
Other Target Audio Subwoofer manuals
