TD Prime 4 Operating and maintenance manual

0
2nd Generation Prime 2/4
Cam DVR Dash Cam
Instructional Manual

1
Index
1. Index......................................................................................
2.Structure diagram.....................................................................
2.1Features........................................................................
.
3..Operationinstruction...............................................................
Part description...................................................................
Button description................................................................
Indicating Light Description......................................................
Operating Instructions.............................................................
Operating Instructions Continued............................................
Video setup.....................................................................
System Setup.........................................................................
Parking monitor...............................................................
Rear camera setting.........................................................
Recording Mode............................................................
Camera Mode................................................................
Specification...................................................................
4.
5.
8.
Playback Mode................................................................
7.
6.
Specification....................................................................
9. Specification continued...................................................
Trouble-shooting.............................................................
Package Includes............................................................

2
Features
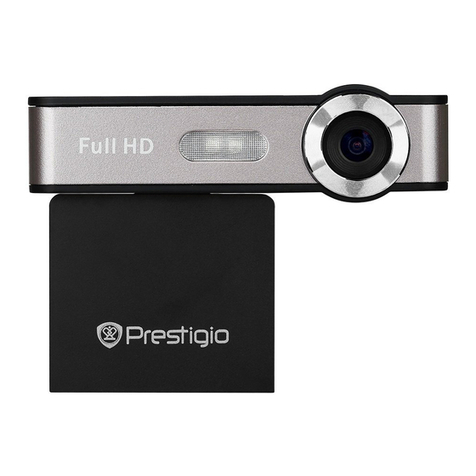
This 2019 model records video and takes photos during driving. It
adopts dual Sony323 1080P HD sensor for top of the line night vision
performance.
Structure diagram

3
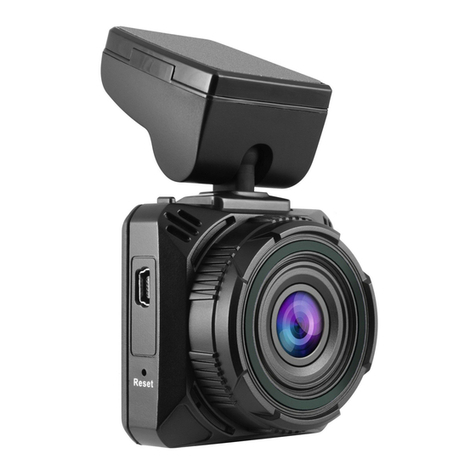
Part description
1. USB Power Source
2. 2. 2nd Outside Camera
3. Reset Button
4. Microphone
5. 3.0 inch HD Screen
6. LED Recording Indicator
7. LED Charging Indicator
8. HD Lens
9. Speaker
10.OK Button
11. Mode Button
12. Lock Button
13.Power Button
14. SD Card Slot
15. Up Button Selection Arrow
16. Menu Button
17. Down Button Selection Arrow
Button description
Button
Description
POWER ON/OFF
1.Short press to power on, long press to
power off
2.While powered on status, short press to
turn on LED light
OK
Stop Recording / Start Recording
MENU
Menu (M) button while not recording
Menu (M) button - short press While not recording
Gets to dash camera menu settings
Up Button Selection Arrow Navigate Arrow
Down Button Selection Arrow Navigate / toggle between cameras mode
RESET
RESET

4
Indicating light description
Name
Description
2 Indicating lights
When blue light flashes camera is
recording video; When blue light
stops flashing the recording stops.
When Red light is solid camera is
charging; when red light turns off the
battery is fully charged.
Operating Instruction
POWER ON/OFF
1. Short press POWER Button to turn on and long press to turnoff.
2. When the car charger is plugged in, the dash cam turns on and starts
recording; when car charger is unplugged and dash cam battery fully
charged, video files saved and dash cam powered off. Dash camera is not
meant to stay on without a power source.
Battery charging:
Ways of battery charging
1. Charging via PC USB cable. Will not be able to record
2. Charging via car charger.
Charging battery icon on screen flashes while charging, with blue light
flashing.

5
Installing memory card
Push memory card into card slot per with metal on sd card facing forward.
Remove memory card: Gently push the sd card inward a bit, and then it
releases, remove it from card slot.
Basic operations
Mode: Must stop recording to get into menu screen
Video mode: Is for recording videos
Photo mode: Is for taking photos
Playback mode: It for Reviewing videos and photos
Video setup -Must stop recording to get into menu screen
Resolution options: These settings ONLY WORK WHEN ONE CAMERA is
being used to record:
WVGA P30 (Low), FHD P30 (Medium), HD P60 (High)
ONLY Resolution option when recording and using BOTH inside and Outside
cameras: FHD P30+FHD P30
Loop recording (Used to measure increments in which camera records): 3
Minutes, 5 Minutes, 10 Minutes, Off
Exposure (Used to filter backgrounds): 0.0, -1/3, -2/3, -1.0, -4/3, -5/3,
-2.0, 2.0, 5/3, 4/3, 1.0, 2/3, 1/3
Motion Detection (Used to monitor vehicle when unattended): On, Off Never
have ON while driving.
ON- Will continue to record as normal, but if Motion is detected, recording will
be locked and saved.
Record Audio (Used to record voice and sound in main camera area): On, Off
Date stamp (Used to show recording time & date information): On, Off
G-sensor Used to lock and store recordings when a sudden impact is detected
(accident) or when hard braking is applied):
Low, Medium, High, Off
Recommended setting is LOW
Operating Instruction Continued

6
Must stop recording to get into menu screen
Delay Time lapse when recording:
1 Second, 5 Seconds, 10 Seconds, Off
Dual Cam Display (Used to determine which camera is to be viewed): Front,
Behind, Both
Setup
Date/Time, Plate number, Auto power off, Beep sound, Language, Frequency, TV
mode, Format, Default setting ,Version, Screen saver, Version Delete all, Lock all,
Unlock all
Video Mode Options
Video recording: Switch to video mode, press OK button to start/stop recording
video.
Photo Taking: Switch to camera mode, press OK to take photo
Playback: Switch to playback mode, press LEFT/RIGHT button to select video
files, press OK button to play/pause.
Parking monitor ON/OFF
Never have ON while driving.
ON- Power off dash camera and when vibration or motion is detected it will turn on
dash cam and start recording. Video is saved and locked.
Dash cam will automatically go back into parking monitor mode based on the time
amount that is set in loop recording
Outside Second Camera Setting
Plug second camera to HD port on dash cam, follow the sequence of: Left down
arrow to toggle between camera's.
Video setup - Resolution setup
To start dual camera recording, only resolution option is:
“FHDP30+FHDP30”.
Must stop recording to get into menu screen
System setup
Press Middle left MENU button to enter main menu, go to SETUP menu and
select desired options via OK button. Return to main menu via middle left MENU
button
System setup options
Date/Time: Used to set Date and Time. Use Right, Left, and OK buttons to change
values and press Menu button to save.
Auto power off: Used to turn camera off after unit is first powered on. Off/1
minute/3 minutes/5 minutes
Language: Used to select language: Chinese simplified/Chinese traditional/
English/French/Japanese/Russian/German/Italian/Portuguese/ Spanish etc.
Frequency: Used to clear frequency barriers that arrive. 50Hz/60Hz Format SD
Card: Cancel/OK
This will erase every recording or photo taken even ones that are saved on the
card
Default setting: Restore default setting, Cancel/OK

7
Delete all: Used to delete videos and photos: Delete all video, Cancel/
OK
Lock all: Used to lock videos and photos Lock all video, Cancel/OK
Unlock all: Used to unlock videos and photos: Unlock all video, Cancel/
OK
USB
Connect USB with PC, power on and USB menu pops up
1. Mass Storage
Storing video files and photos.
2. Camera
For PC cam mode.
3. Video
Select to go to dash cam interface.
Recording Mode
As shown in picture;
Press the "OK" button to start recording, the video red, top left
icon will start to flash, and the blue indicator will start flashing.
You are now in record mode.
Camera Mode
Playback Mode

8
Lens: 6 glass 1.8 wide angle lens
Resolution: FHD1080P@30FPS+FHD1080P@30FPS
Built-in lens 300W pixels
Video format: H.265
Photo format: JPEG
Frame rate:
H.264@1080P 30fp/s
H.264@720P 60fp/s
H.264@720P 30fp/s
G-sensor: Built in 3-axis solid collision detection
Record mode: Loop recording, time lapse recording
Memory card: Support TF memory card 8GB~128GB
LCD: 3.0 inch
Video output: HDMI,AV OUT
Boot time: 2S
Working voltage: DC 5V 1.5A
USB: USB 2.0 disk
Video specification: FHD1080P=1920*1080 /
1080P=1440*1080/
Motion detection Supports
Camera mode 12 million
Parking monitoring Supports
Dual Sony IMX323
Sensor
Specification

9
frequency 50HZ/60HZ
Image resolution: 12M 4032*3024 10M 3648*2736
8M 3264*2448 5M 2592*1944
3M 2048*1536
Working current: 450mA (typical value) (DC 5V)
Quiescent current: 20uA
Storage temperature:℃(-20℃-70℃)
Operating temperature:℃(0℃-60℃)
Operation humidity (RH) 15%-60% RH
Battery:
Light source
Troubleshooting:
If recording stops:
Due to the huge HD video data, please use the high-speed TF SD card. Recordings may stop if SD card
is full with locked video
“File Error” prompt appears when viewing pictures, in playback video or recording mode
When the TF card stores data, an error occurs, and the file is incomplete. Please use the “Format”
function of Dash cam to reformat the TF card.
The image taken is foggy
Check the lens for dirt and fingerprints; use lens cloth to wipe the lens before taking a picture.
When shooting scenes such as the sky and the water, the image is very dark.
The camera's auto exposure function is affected in large contrast scenes and can be corrected by
adjusting the “EV” value in the machine setup menu.
Under cloudy and indoor light, the color performance is not perfect
Please check the machine "White Balance" function ,if it was be set to automatic.
There are horizontal stripes in the image
This is caused by setting the wrong "light source frequency". Please set it to "50Hz" or "60Hz" according
to the local power supply frequency.
When the machine freeze
Press the reset button to resume recovery.
Packaging accessories:
1. 2nd Gen Prime Front Facing Dash Camera
2. Outside Weather-proof Camera
3. Windshield Suction Mount
4. CLA Power Cord
5. USB Data transfer cable
6. Instructional Manual
3. 5V 1.5A high charge car charger
4. instruction manual
5. UB Data Cable
Built-in polymer battery 240mAh
This manual suits for next models
1
Table of contents
