Quick Guide to Using the Axia Console
11/2/06, Version 1.0 Page 2
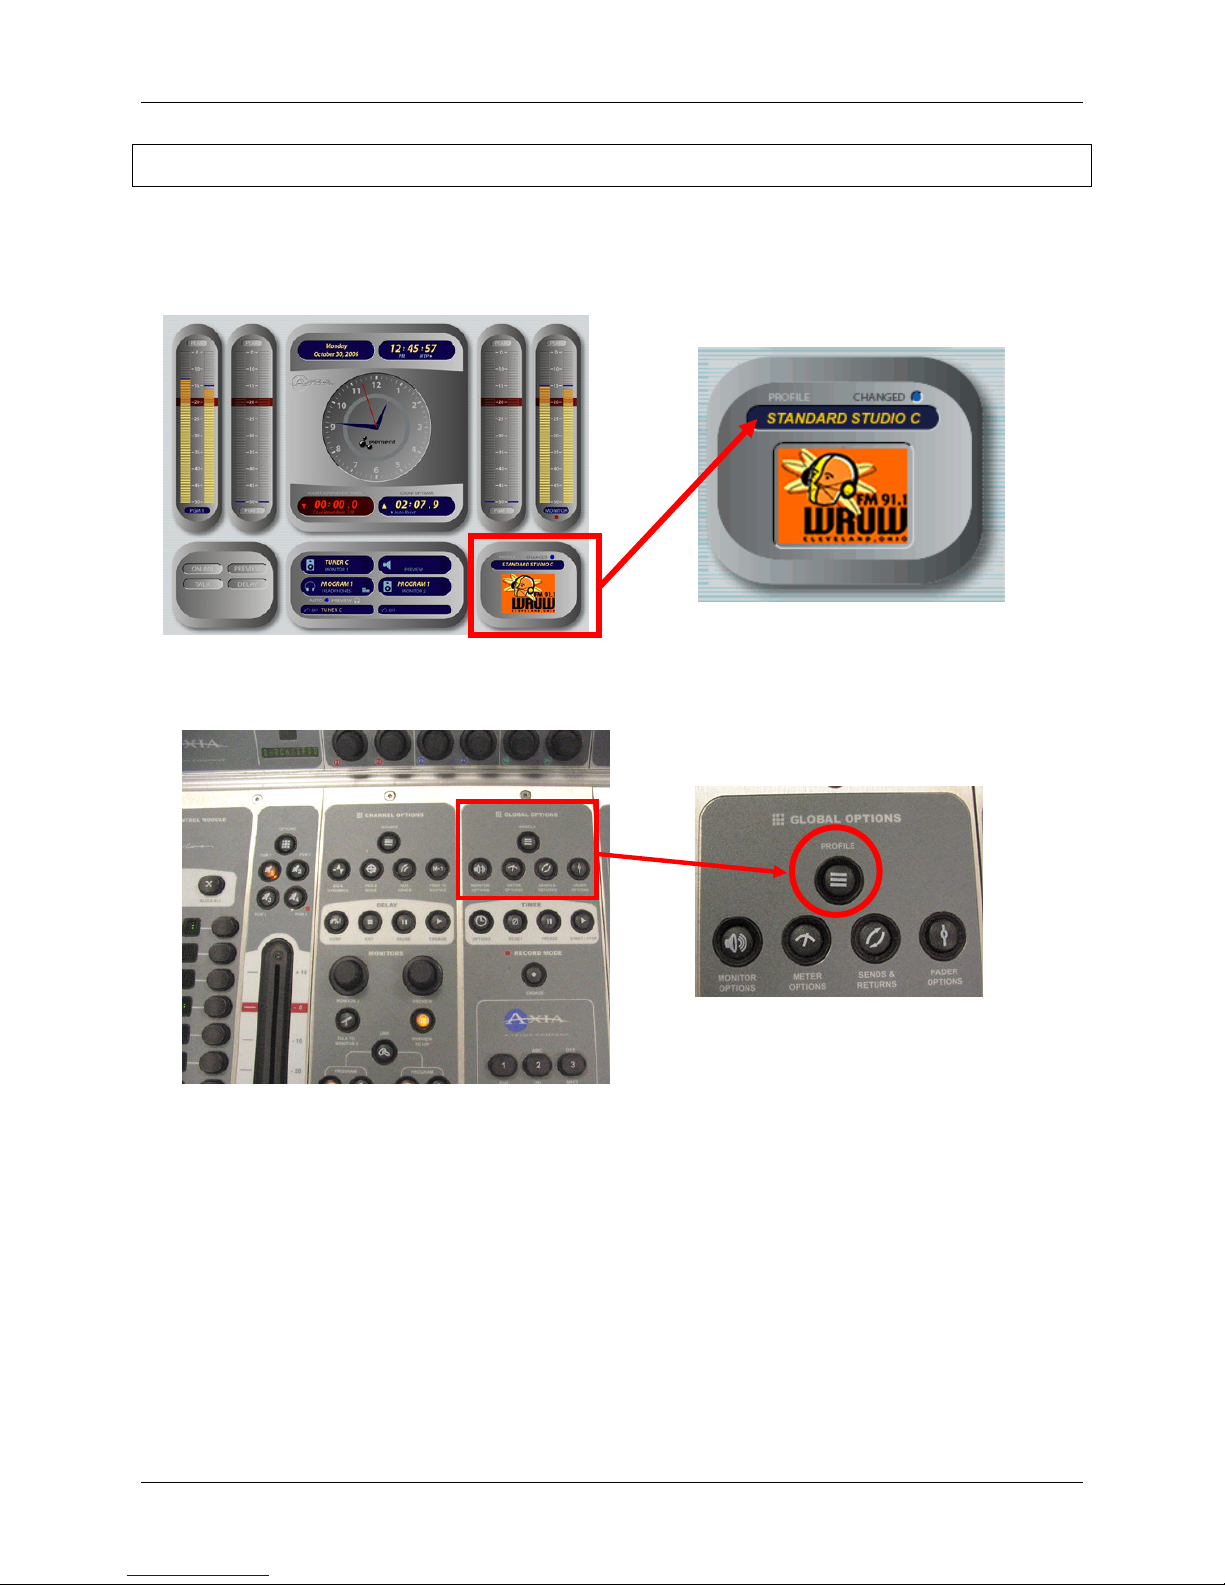
All About Your Profile Choices
One of the exciting features of our Axia Element audio system is the ability to save
“preset” choices of channels for various purposes. Our console has 14 channels,
but we have more than 21 different audio sources available to use in the studio.
Therefore, we have created a couple of presets, called “profiles”, to allow quick
access to different pieces of equipment in the studio.
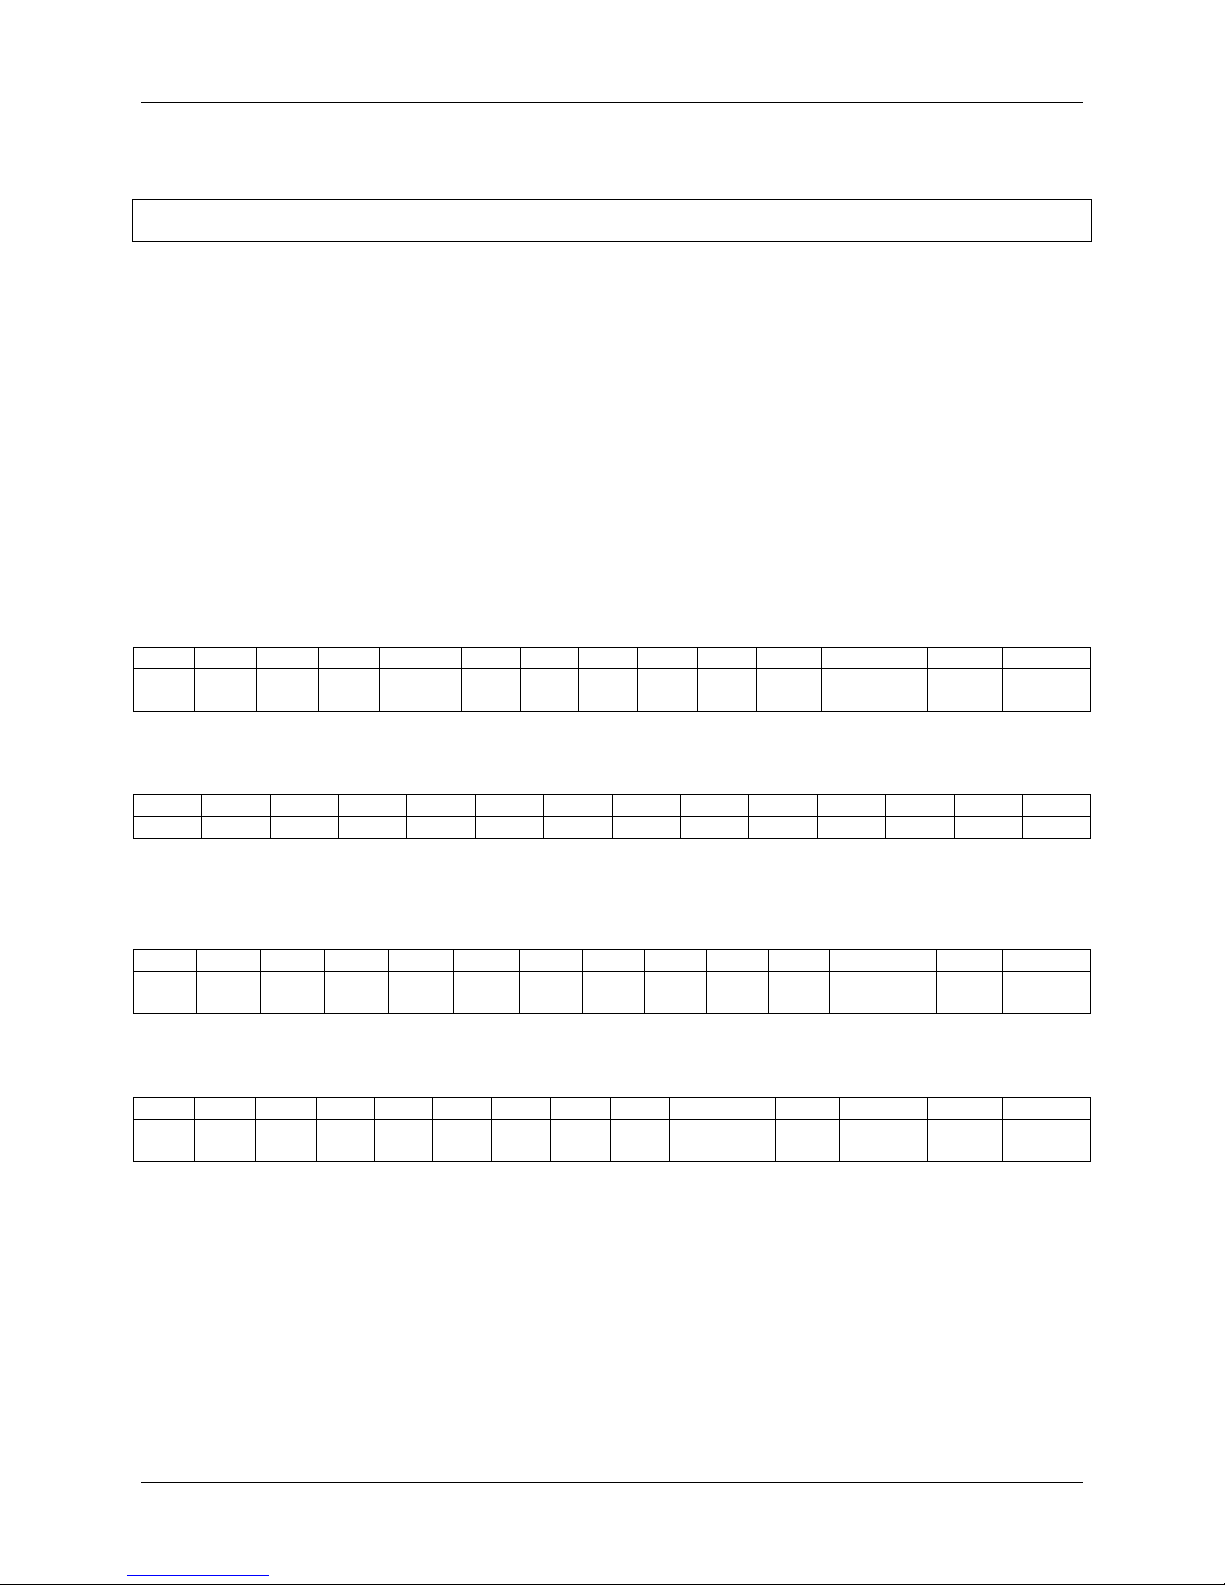
The STANDARD STUDIO C Profile
STANDARD STUDIO C
1 2 3 4 5 6 7 8 9 10 11 12 13 14
MIC 1 MIC 2 MIC 3 TT 1 TT 2 CD 1 CD 2 CD 3 CD 4 COMPUTER
RCA/
IPOD MINIDISC PHONE EFFECTS
The STANDARD STUDIO C profile is fine for most of our music shows on the
station. It gives us the flexibility to use up to three (3) mics, plus the most heavily
used audio equipment in the studio, and the ability to do phone interviews.
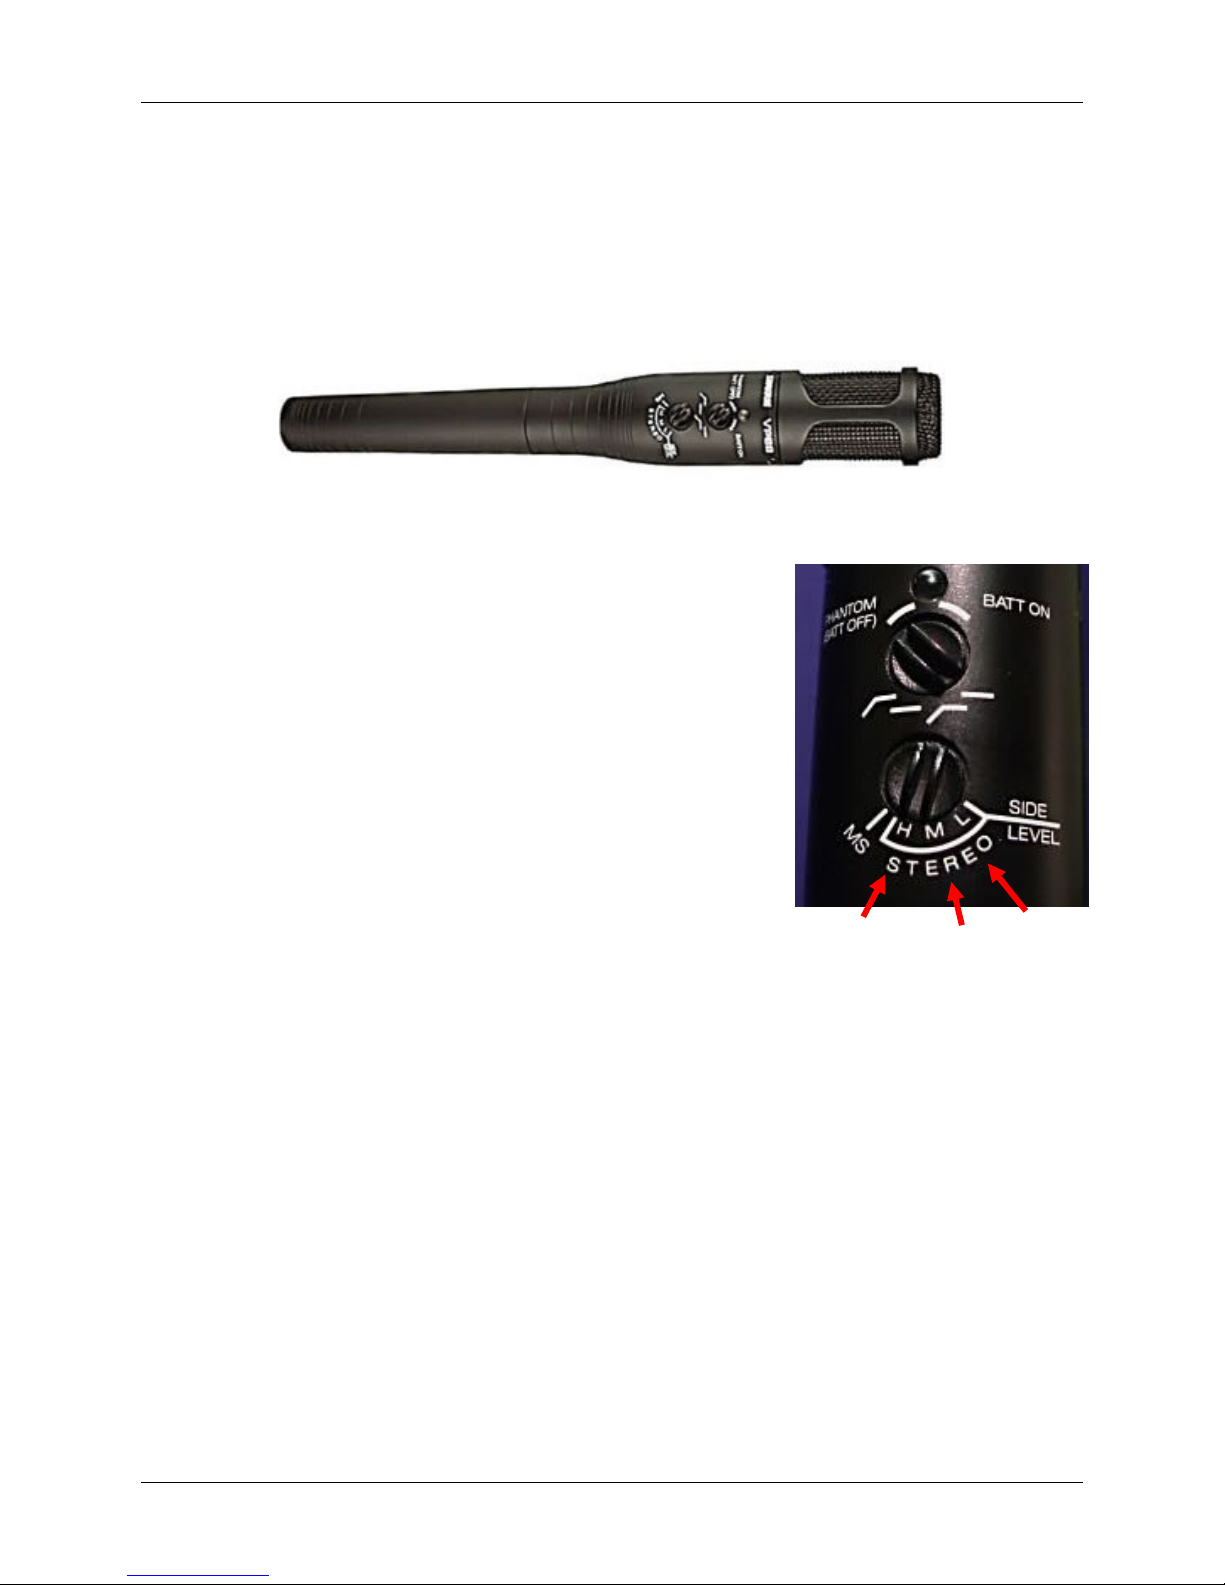
However, we have five (5) microphones available in the studio! If you are
having multiple guests for a show, or even having an in-studio band performance,
you might want to use Mic 4 and/or the Stereo Microphone. We have preset two
profiles for this purpose.
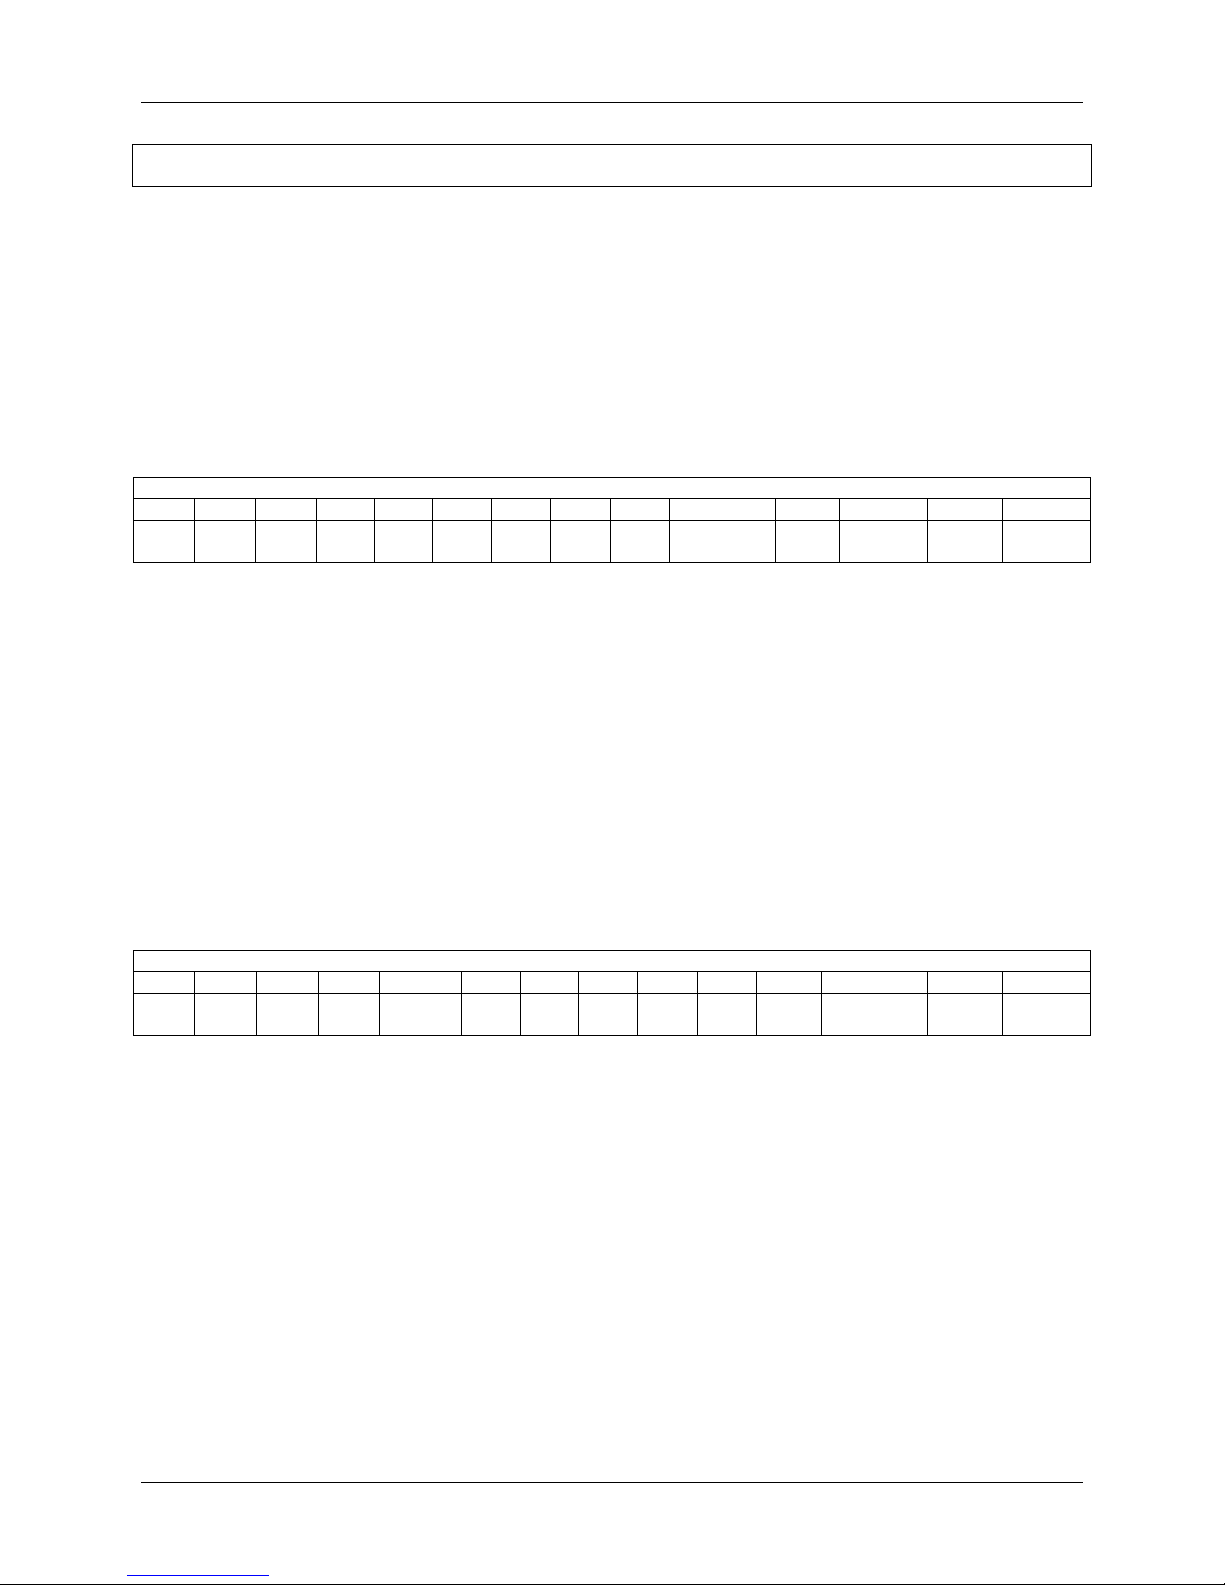
The ALL 5 MICS (Lo/Mid/Hi Stereo) Profile
ALL 5 MICS (Lo/Mi /Hi Stereo)
1 2 3 4 5 6 7 8 9 10 11 12 13 14
MIC 1 MIC 2 MIC 3 MIC 4
STEREO
MIC TT 1 TT 2 CD 1 CD 2 CD 3
RCA/
IPOD COMPUTER PHONE EFFECTS
The first multi-mic profile is the ALL 5 MICS (Lo/Mid/Hi Stereo) profile. This
profile inserts Mic 4 on Channel 4 and the VP88 Stereo Mic on channel 5, moves
the turntables and CD players two channels to the right, drops CD4 and drops the
Minidisc player.
This profile serves two purposes. First, you can have quick access to the four
“interview” microphones mounted on the desktop booms. Second, you can have
quick access to the stereo microphone, which is useful if you are having a music
performance in the studio.