Tenor 175S User manual

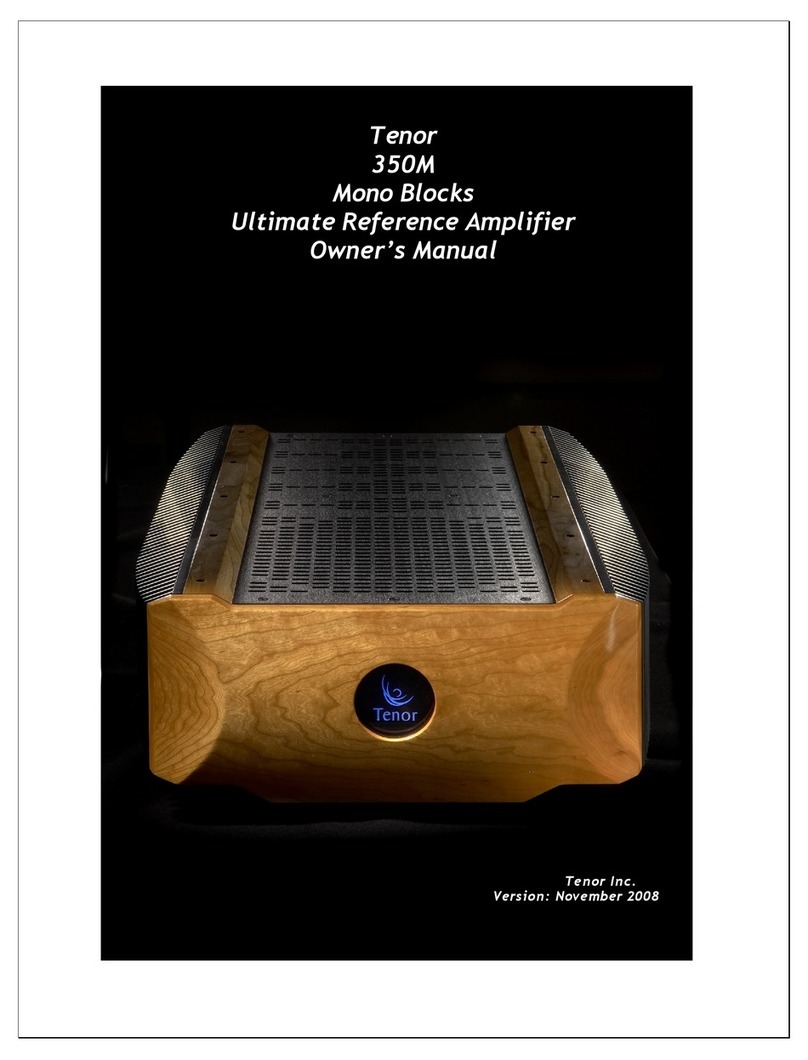
Tenor
175S
Ultimate Stereo Reference Amplifier
Owner’s Manual
Te nor I nc.
Version: November 2008

2

3
Important Safety Instructions
•Please read this Owner’s Manual for your own safety and the protection of your Tenor
equipment.
•Once you have installed your Tenor equipment, store this Owner’s Manual in a safe
place for future reference if necessary.
•Please heed all warnings.
•Please follow all instructions.
•Do not use this equipment near water or where there might be a chance it could come
in contact with water.
•Clean only with a clean dry cloth.
•Do not install near a heat source such as radiators, heat registers, stoves or any other
source of heat.
•Do not defeat the safety purpose of the polarized and/or grounding type plug. A po-
larized plug has two blades with one slightly wider than the other. A grounding plug
includes the third ground prong. In the event the plug provided does not fit your
power outlet, consult an electrician for assistance. Failure to do this may result in
damage to the equipment and/or possible injury or death.
•Please protect the power cord from being walked on or pinched, particularly at the
wall and at the plug on the rear panel of the equipment.
•The use of extension cords and/or convenience plugs is not advised due to the power
requirements of the equipment.
•Please mount equipment as specified in User Manual.
•Please unplug equipment during lightening storms and when not in use for long peri-
ods of time.
•Refer all service of equipment to qualified personnel. In the event the equipment
has been damaged, dropped, exposed to water or foreign objects have entered the
cabinet, disconnect immediately from power source and consult a qualified service
technician.
WARNING: TO REDUCE THE RISK OF FIRE OR ELECTRIC SHOCK, DO NOT EXPOSE THIS AP-
PLIANCE TO RAIN OR MOISTURE!
CAUTION: TO REDUCE THE RISK OF ELECTRICAL SHOCK, DO NOT REMOVE COVER. NO
USER-SERVICEABLE PARTS INSIDE. REFER ALL SERVICING TO QUALIFIED PERSONNEL!

4
Table of Contents
Introduction ........................................................................................................6
Congratulations....................................................................................................................................... 6
Safe Set-up Instructions .................................................................................................................... 6
Design Principles ................................................................................................................................... 6
Precision Engineering & Assembly ............................................................................................. 6
Unpacking............................................................................................................ 7
Lifting Caution – 148lbs (67Kg)!.....................................................................................................7
Travel Cases................................................................................................................................................7
List of Items Included with pair of Tenor 175S ..................................................................7
Moving Amplifier....................................................................................................................................7
Installation ......................................................................................................... 8
Considerations ..........................................................................................................................................8
3rd Party Isolation Stands ...................................................................................................................8
Placement....................................................................................................................................................8
Ventilation ..................................................................................................................................................8
Source Components .............................................................................................................................. 9
Speakers....................................................................................................................................................... 9
Remote Turn On Jack.......................................................................................................................... 9
Power Requirements ........................................................................................ 10
AC Mains Voltage.................................................................................................................................. 10
Warm-Up ................................................................................................................................................... 10
Mute Operation ..................................................................................................................................... 10
Break-in Period.......................................................................................................................................11
Tube Life....................................................................................................................................................11
Special Design Features .................................................................................. 12
Power Supply.......................................................................................................................................... 12
Audio Amplification..........................................................................................................................12
Protection................................................................................................................................................. 12
Environmental Considerations .....................................................................................................13

5
Front Panel .......................................................................................................14
Front Panel Layout..............................................................................................................................14
On/Off Switch .......................................................................................................................................14
Front Lens – Indicator Light ...........................................................................................................15
Mute Switch .............................................................................................................................................15
Rear Panel & Internal View.............................................................................16
Cautions ..................................................................................................................................................... 16
AC Mains On/Off & Fuse .................................................................................................................16
Remote Turn On Jack........................................................................................................................16
Single Ended and Balanced Inputs............................................................................................ 17
Loudspeaker Binding Posts ............................................................................................................ 17
175S Internal View............................................................................................................................... 17
Troubleshooting & Protection Circuitry Overview........................................ 18
Internal Fuses Associated With Protection Circuitry................................................... 18
Other Internal Fuses........................................................................................................................... 18
Example Protection Scenarios ..................................................................................................... 19
No Audio + Front Panel Lens Light is Dark .................................................................... 19
No Audio + Front Panel Lens Light is Blue..................................................................... 19
No Audio + Front Panel Lens Light is Red (continuous) ........................................ 19
No Audio + Front Panel Lens Light is Red (flashing)...............................................20
Audio + Front Panel Lens Light turns briefly from Blue (normal) to Red 20
Ground Hum............................................................................................................................................20
Care and Maintenance ..................................................................................... 21
Wood Faceplate and Top Rails .................................................................................................... 21
Metal Chassis and Top Plate......................................................................................................... 21
Electrical Connections on Rear Plate......................................................................................21
Audio Board (Vacuum Tubes)....................................................................................................... 21
Tenor 175S Specifications...............................................................................22
Warranty ...........................................................................................................23
Product Registration ....................................................................................... 24
Tenor Contact Information..............................................................................25
Owner’s Notes.................................................................................................. 26

6
Introduction
Congratulations
Congratulations on the purchase of your new Tenor 175S Stereo (175S) Ultimate Ref-
erence Amplifier. We are very proud of the extensive engineering, design and
craftsmanship in our amplifiers and are confident that our Tenor 175S will deliver the
musical experience of your lifetime.
Safe Set-up Instructions
This Owner’s Manual is provided to assist in the unpacking, installation and ongoing
care of your Tenor 175S amplifier. It is recommended that you take a few minutes to
acquaint yourself with the contents of this manual before you unpack further so that
you are safe and the amplifier is handled correctly.
Design Principles
The passion and desire to attain the most realistic and live musical reproduction has
been a lifetime goal of Tenor. Building on our classics, the internationally acclaimed
Tenor OTL (Output Transformer-Less) and the Tenor 300 and 150 Hybrids and borrow-
ing from the new technology used in the 350M, the Tenor 175S is the Ultimate Stereo
Reference Amplifier with musicality and transparency beyond any other known single
chassis amplifier.
Tenor’s proprietary research in the field of harmonic structural integrity is the es-
sence behind the transparency and resolution of the Tenor 175S Ultimate Stereo Ref-
erence Amplifier.
Precision Engineering & Assembly
Each Tenor amplifier is custom manufactured in Montreal, Canada by master techni-
cians dedicated to exacting standards. Rigorous testing and component matching is
conducted on all amplifier components prior to assembly. Once assembled, each am-
plifier is rigorously tested for several hundred hours to ensure complete equilibrium
prior to its ultimate calibration. Finally, the Tenor 175S is securely packed in its own
custom travel case for transport to the new owner.

7
Unpacking
Every Tenor Amplifier is carefully fitted for transit into its own custom travel case.
Given the weight and size of each amplifier, it is suggested that careful attention be
given to the following:
Lifting Caution – 148lbs (67Kg)!
Each amplifier and carrying case has a combined weight of 148 lbs (67kg). One must
exercise extreme caution when lifting and moving an amplifier. It is suggested that 2
people unpack and position each amplifier for optimum placement in your system.
Travel Cases
The travel cases have been custom designed to provide the ultimate protection dur-
ing transit and storage of the amplifier. Each empty case weighs approximately 30
lbs. They should be stored away in a safe and dry location when not in use.
Given that you have opened the lids of the travel case to access this manual, please
set them aside while you position your amplifier for installation in your system. Each
amplifier weighs 118 lbs (54kg) and has a heavy transformer located towards the
rear. The balance point of the amplifier is not at the centre of as one might assume
but actually about 2/3 towards the rear creating an awkward load if lifted in the
centre.
Caution should be used in lifting the amplifier upwards out of the lower portion of
the travel case to make sure that nothing scratches the beautiful Tenor finish. It is
recommended that the travel case and amplifier be positioned close to its final loca-
tion using the wheels of the travel case if necessary. Ideally 2 reasonably strong peo-
ple should lift the amplifier upwards from the travel case until the amplifier is com-
pletely clear of the sides of the travel case and positioned carefully in its final loca-
tion for connection to your music system.
List of Items Included with pair of Tenor 175S
•1 Owners Manual
•1 Power Cord
•1 Hex Key
•Package of User Accessible Fuses (1 - 15 Amp Mains)
Moving Amplifier
Each amplifier weighs 118 lbs (54kg) and has the center of its weight located roughly
2/3 towards the rear of the amplifier making it very challenging for 1 person to move
comfortably. The feet of the amplifier have rubber contacts that make it difficult to
slide on carpet or hard surfaces so it is always recommended that the amplifier be
lifted rather than dragged when moving. It is also suggested that 2 people lift the
amplifier from one location to another. If moving the amplifier with one person,
place your hands 2/3 towards the back and underneath each side. To protect the
beautiful metal and woodwork, it is always recommended to use the travel cases
when relocating.

8
Installation
Considerations
The Tenor amplifier needs to be located in a clean, safe and dry environment within
close proximity to AC power mains. Placement on the floor close to your speakers is
an ideal location as long as the amplifier is not in people’s way. Always consider
that a visitor not familiar with your room may stumble upon them if they obstruct
normal pedestrian passage particularly if the lighting is low which is often the case in
a listening room.
3rd Party Isolation Stands
Mechanical isolation of the Tenor 175S is excellent so 3rd party isolation stands are
not mandatory. If 3rd party isolation stands are to be used, please ensure that their
specifications support an amplifier weighing 118 lbs (54kg) and the 2/3 : 1/3 weight
distribution towards the rear is taken into consideration in the design.
Placement
AC power mains should be within reasonable access and although the 175S amplifier
can be installed on one 15 amp circuit @ 120 Volts (8 Amps @ 240 Volts) with your
other equipment, the full dynamic headroom potential of the Tenor 175S amplifier
will only be achieved with a dedicated circuit for the amplifier. The efficiency of your
speakers and the size of your room play a large factor in the current draw necessary
to recreate the recorded musical event to realistic and enjoyable levels.
Ventilation
Ventilation of the Tenor amplifier occurs by convection without the need for electric
cooling fans. Vents in the bottom of the chassis and top cover plate allow sufficient
cooling under normal operating conditions. It is imperative that these vents be kept
clean and unobstructed. Please note, the two amplifier chassis should never be
stacked one on top of the other!
It is normal for the top cover panel to get a warm over the tube audio board located
towards the front of the chassis. It is necessary to keep this top cover installed and
completely clear at all times to ensure maximum ventilation allowing the proper uni-
form cooling of internal components. The heat sinks located on each side of the am-
plifier provide cooling for the mosfet output devices. The heat sinks run reasonably
cool as long as they are kept clean and unobstructed.
Special Note: Operating the amplifier in the bottom half of the travel case will block
the lower air intake vents which could result in overheating and will void the War-
ranty if damage occurs. Failure to keep the top plate clear resulting in overheating
will void the Warranty.

9
Source Components
The transparency and gain of the Tenor 175S amplifier requires your source compo-
nents to be of a sufficient high quality. Any imperfections at the source will most
definitely be noticeable.
In practice, Tenor amplifiers allow most source components to sound their best; nev-
ertheless, the ultimate in sound reproduction is only achieved with the use of the fin-
est digital and/or analogue audio source equipment and cables. Either single ended
RCA or balanced XLR inputs can be used. Sufficiently long cables allow the convenient
location of the source equipment away from the amplifier and in close proximity to
the user. It is our recommendation that single ended cables be used unless intercon-
nects exceed 50 feet or 15 metres whereby external noise may be induced - then it is
recommend to use balanced interconnects.
Generally all source equipment can be powered using a single Mains circuit thereby
minimizing the possibility of ground loop hum. It is recommended that this be a sepa-
rate circuit from the amplifier but have the same overall grounding.
Speakers
The Tenor 175S is capable of driving virtually any speaker with an average impedance
of 4 to 16 Ohms and capable of handling 175 watts continuous power. The impressive
Tenor 175S dynamic headroom necessitates speakers that can handle this power (see
Tenor 175S Specifications) or you will risk damaging your speakers. The re-creation
of the musical event in a realistic manner requires substantial current. Your speak-
ers can be easily damaged if they are not capable of handling this level of power. Al-
though Tenor has very effective protection circuitry, it is still possible to overdrive
your speakers and as such Tenor is not responsible for any speaker damage.
Speakers should be connected with respect for polarity whereby the positive (+) or
red output of the Tenor is attached to the same of the speaker. Similarly the nega-
tive (-) or white of the Tenor should be attached to the negative (-) or black of the
speaker.
Remote Turn On Jack
Providing continuous 12 volts DC to the “Remote Turn On Jack” via a mini phone plug
will automatically turn the amplifier on similar to the front rocker switch located
slightly off centre at the front and just under the wood face plate. This will only
work if the main power switch on the back panel is in the “on” position. Similarly,
providing no voltage will cause the amplifier to turn off. This feature allows the
amplifier to be turned on via a 12 volt trigger provided by an audio/video preampli-
fier as an example. Please be mindful of the volume level of the preamplifier when
the amplifier come “on line” after the standard warm-up time of 3 minutes. Failure
to do so could cause amplifier and speaker damage which would not be covered by the
Tenor Warranty.

10
Power Requirements
AC Mains Voltage
Tenor amplifiers can be powered using conventional power company voltages ranging
from 100 Volts to 250 Volts at either 50 or 60 Hz. The voltage for your application
must be specified at the time of ordering so the transformer can be configured at the
factory accordingly and the correct AC mains cable supplied.
The use of power conditioners on the AC power mains feeding the Tenor 175S ampli-
fier is not recommended due to the current limiting effect of most power condition-
ers.
20 amp circuits at 100 - 120 Volts and 10 amp circuits at 220-250 Volts provide the
ultimate source of power for maximum dynamic headroom of the Tenor 175S but
would require custom cables not provided by Tenor. Appropriate regional Electrical
Codes and Professionals should be consulted regarding any custom electrical configu-
ration beyond the regular domestic wiring of your installation.
Warm-Up
The master Mains Power switch of your Tenor 175S amplifier is located at the top
right of the rear panel - when looking at the amplifier from the front. This engages
the power rocker switch on the front underside of the chassis just behind and below
the front panel. When set to the “on” position, this switch operates the relays pro-
viding power to the Tenor 175S. The lens in the front panel will glow red identifying
the Tenor 175S is now in “mute” for the 3-minute warm-up and stabilization period.
Once 3-minutes has expired the Tenor 175S is now warmed and stabilized so the lens
will then change from red to blue showing the amplifier is now on line and ready for
use. It will take up to 60 minutes for the 175S to reach optimum operating tempera-
ture.
Mute Operation
Mute operation is achieved by pushing the round centre button located on the under-
neath of the chassis just behind the front panel and to the left of the secondary
power switch. The muting function shorts the inputs and removes the DC offsets and
power to the speaker terminals. Mute is not a “standby” in the traditional Instru-
ment or PA Amplifier sense as the Tenor 175S is fully powered but simply muted. It
is not advisable to leave the amplifier in “mute” when not in use as the tube life will
be diminished considerably. The amplifier is designed to provide near full potential
immediately following the 3-minute warm-up and stabilization period following
power up. Maximum dynamic headroom and transparency is achieved following about
60 minutes of playing operation.

11
Break-in Period
Components of the Tenor 175S are broken-in prior to assembly for a period up to 200
hours. Following assembly, each amplifier is burned-in at the Tenor factory for a pe-
riod of no less than 100 hours allowing each electronic component to stabilize and
achieve its optimum electrical and musical potential as a system. Each amplifier is
then calibrated to the factory specification and is designed to remain within toler-
ance for a period up to 10 years or more depending on use and care.
Tube Life
The Tenor 175S is designed to operate within design specifications for a period close
to 10,000 hours. As a typical example, a Tenor 175S used each and every day for 3
hours under normal use will last almost 10 years before it will need a tube refit and
calibration. A meter is located on the back panel showing the hours of enjoyment
this amplifier has delivered and will be shipped from the factory reading “zero”
hours. Most owners will experience a lifetime of listening pleasure without ever
reaching the 10,000 hour maximum. When the 10,000 hours of use has been
achieved, the amplifier should be returned to the factory for re-tubing and calibra-
tion.

12
Special Design Features
Power Supply
The heart of the power supply for the Tenor 175S is a custom designed and manufac-
tured high current transformer that accommodates various international voltages
and frequencies in providing specific line voltages for each stage of the amplification
process. The Tenor 175S Mains voltage must be specified when ordered to match the
voltage and frequency provided by your local power company. This also determines
the proper cable to be shipped with the amplifier.
Audio Amplification
The Tenor 175S combines the voltage output of tubes with the high current output of
mosfet transistors in an ingenious Tenor hybrid design. By leveraging the best of
each technology in a unique proprietary design, the Tenor 175S is the ultimate in
resolution and transparency in a single chassis design.
The first stage of the 175S design is based on the original all tube OTL (Output Trans-
former-Less) proprietary concept pioneered by Tenor in the late 1990’s. This all tube
stage provides 10 watts per channel of pure Class A voltage at a relatively high im-
pedance (by speaker standards) which is ideal input for a bank of mosfet transistors.
The second stage of the 175S circuitry processes this voltage rich 10 watts per chan-
nel and provides additional current to increase the power to 175 watts per channel @
8 ohms (at the speaker terminals). The sonic beauty of the tube with the massive
power of the mosfet is optimized in a unique proprietary Tenor design for an audio
presentation that is simply breathtaking!
Protection
Tenor amplifiers have a sophisticated monitoring and protection circuitry that allows
the amplifier to operate at peak musical potential while continuously monitoring a
number of conditions that could harm the amplifier or attached equipment – all with-
out interfering with the audio signal!
The 6 main conditions being monitored are as follows:
1. Low AC main voltage
2. DC offset at speaker terminals
3. AC at speaker terminals
4. Static discharge
5. Ground pollution
6. RF (Radio Frequency) levels
If any of the above conditions exceed prescribed levels, the amplifier will automati-
cally protect itself by “muting”. The front panel lens will change from blue to red
when this occurs.
“Muting” achieves the following:
•Shorts the RCA and Balanced XLR inputs through resistance to ground
•Removes the bias to the output transistors

13
This effectively removes all DC offsets and AC current to the speaker terminals. In
the event that the offending condition has been removed or corrected, the amplifier
will return to an “on line” status whereby the lens light will now be blue and the
amplifier will function as normal.
Should the fault or condition not be removed, the amplifier will cycle between red
and blue in 1-second intervals until the fault disappears or the amplifier is powered
off by the operator and the condition is remedied.
An internal jumper switch can be set to require a manual reset which keeps the am-
plifier in “mute” after a fault condition which can only be returned to “on line”
status by the operator selecting the mute button under the front panel. If the am-
plifier fault has not been cleared, it will immediately return to the muted state and
the lens will continue to be red. Please consult the Tenor factory for further details.
Environmental Considerations
Considerable effort went into the efficiency of the Tenor 175S and its power con-
sumption. To maximize the efficiency of the amplifier and to minimize its “carbon
footprint”, Tenor undertook a yearlong project to design and test various trans-
former designs. Adhering to close tolerances and state of the art materials, the
new 175S consumes 20% less energy, dissipates less heat and simply sounds better
than standard transformers!

14
Front Panel
Front Panel Layout
The front panel of the Tenor 175S amplifier is made from the finest select cherry
wood. It has been hand finished with 10 coats of clear piano lacquer. Over time the
cherry wood will age by showing a somewhat mellow patina making the amplifier
more beautiful. The same is also true of the decorative cherry rails on top of the
amplifier.
On/Off Switch
There are 2 on/off switches on the Tenor 175S amplifier. If the rear master switch is
in the on position, one can power the amplifier on and off using the secondary rocker
switch located below the front panel slightly to the right of center. If the rear mas-
ter switch is in the off position, the front switch will not function.

15
Front Lens – Indicator Light
The lens on the front panel is an indicator light that is dark (i.e. not lit), red or blue
and, in the event of a fault, blue will change to red in 1-second increments.
Dark means that the amplifier is either not on or there is no power provided to the
amplifier.
Red indicates that the amplifier is in “mute” indicating that:
1. It is warming up after an initial power-up, or
2. It has been muted manually, or
3. A fault condition exists that caused the amplifier to “mute” (given the inside
jumper is set to manual). More specific details on this are provided in the
“Protection” section under “Special Design Features” in this manual.
The lens turning from red to blue in 1-second increments means the inside jumper is
set to “automatic” and the amplifier is attempting to clear the problem and return
to a normal “on-line” state. If the fault condition is not corrected and the amplifier
continues to cycle between red and blue, it is recommended that the amplifier be
turned off until the condition can be identified and corrected properly.
Mute Switch
The mute switch is located below the front panel on the
underside of the chassis. Please refer to “Mute Opera-
tion” under “Power Requirements” to better understand
the operation of this switch and its role in the protection
circuitry.

16
Rear Panel & Internal View
Cautions
AC Mains On/Off & Fuse
Remote Turn On Jack

17
Single Ended and Balanced
Inputs
Loudspeaker Binding Posts
175S Internal View

18
Troubleshooting & Protection Circuitry Overview
Internal Fuses Associated With Protection Circuitry
There are 6 internal fuses associated with the protection circuitry as follows:
1. 10 Amps FB (314) @ +85 volt fuse to left Rib (F1)
2. 10 Amps FB (314) @ -85 volt fuse to left Rib (F2)
3. 10 Amps FB (314) @ +85 volt fuse to right Rib (F1)
4. 10 Amps FB (314) @ -85 volt fuse on right Rib (F2)
5. 200 milliAmps SB, (TR5) @ +125 volt fuse to Power Supply Board (F3)
6. 200 milliAmps SB (TR5) @ –125 volt fuse to Power Supply Board (F4)
Special Note: None of these fuses are user replaceable – all require Tenor Service!
During the initial 3-minutes warm-up, the amplifier will monitor the above fuses as
well as the temperature of the heat sinks. In the event that a fuse is blown and/or
the heat sink is over 75C, the amplifier lens will flash red in 1-second increments.
Each rib fuse has a red LED (Light Emitting Diode) that identifies it has blown which
makes identification very straightforward. If all conditions are met, the amplifier
will un-mute or go “on-line” after 3-minutes when the jumper is set on automatic. If
the jumper is set to manual, after 3-minutes has passed you can press the mute but-
ton to go “on-line” again.
Other Internal Fuses
There are 5 other fuses as follows:
1. 2 Amps SB (TR5) @ 12.8 Volts DC heater voltage (F1)
2. 15 Amps SB (218) @ 6.6 Volts DC heater voltage (F2)
3. 200 milliAmps FB (TR5) @ +285 Volts DC for Audio Board (F5)
4. 200 milliAmps FB (TR5) @ –285 Volts DC for Audio Board (F6)
5. 15 Amps SB (MDA) for 120 Volts or 8 Amps SB (MDA) for 240 Volts for Mains
fuse on rear panel
Special Note: Only fuse 5., the Mains fuse, is user replaceable - all others require
Tenor Service!

19
Example Protection Scenarios
No Audio + Front Panel Lens Light is Dark
The simplest condition for no audio is the amplifier is simply not getting power and
perhaps not plugged into the AC mains. This should be verified before pursuing any
further remedy. If power is provided correctly to the amplifier, the following 5 con-
ditions must be met before the amplifier will proceed to the 3-minute warm-up as
follows:
1. Fuse on Relay Board ok
2. Left Rib temperature less than 80C
3. Right Rib temperature less than 80C
4. Transformer temperature less than 120C
5. Mains Fuse ok
If there is no red lens light on but the red light on the rear switch is on then condi-
tion 2, 3, 4 or 5 need to be addressed. If the there is no front red lens light on as
well as no red light on rear switch then fuse on 1 needs to be addressed. Conditions
2, 3 and 4 can be remedied by simply allowing the amplifier to cool down by powering
off for a sufficient period of time. Failure of condition 1 requires Tenor Service!
No Audio + Front Panel Lens Light is Blue
When there is no audio and the front panel lens light is blue suggests that the input,
RCA or Balanced XLR and/or the speaker cables are not connected properly. Please
power off the amplifier and examine these connections. Please take particular note
of the input toggle on the rear panel to select between RCA and XLR - as it may be
opposite to what you intended.
No Audio + Front Panel Lens Light is Red (continuous)
When there is no audio and the front panel lens light is red suggests that your ampli-
fier has encountered a fault and is now in “mute”. The 6 conditions being monitored
are:
1. Low AC main voltage
2. DC offset at speaker terminals
3. AC at speaker terminals
4. Static discharge
5. Ground pollution
6. RF (Radio Frequency) levels
If the internal protection jumper is set to automatic, the amplifier will return to
Blue after a 3-minute interval if the condition has corrected itself. If the jumper is
set to manual, the amplifier will require you to press the mute button to return to
“on line” status after 3-minutes.

20
No Audio + Front Panel Lens Light is Red (flashing)
During the 3-minute warm-up, the amplifier monitors the 7 following conditions:
1. +80 Volts on left Rib (F1)
2. –80 Volts on left Rib (F2)
3. +80 Volts on right Rib (F1)
4. –80 Volts on right Rib (F2)
5. +125 Volts on front Power Supply Board (F3)
6. –125 Volts on front Power Supply Board (F4)
7. Heat Sink temperature less than 75C
If any condition from 1 – 6 and/or 7are not met, then the front panel lens light will
flash red. The fuses on 1 – 6 are identified under “Troubleshooting” and will have a
red LED (Light Emitting Diode) if they are blown. The amplifier will return “on line”
automatically (or can be manually “un-muted” after 3-minutes) if all conditions have
been cleared.
Audio + Front Panel Lens Light turns briefly from Blue (normal) to Red
On very loud musical passages the current draw from the AC mains available at the
wall could be lowered to 110 Volts when ideally it should be 125 Volts or 220 Volts
when it ideally should be 240 Volts - thereby creating a DC offset in excess of 130 mV
causing the amplifier to “mute” and turn the lens light red. 1-second later the loud
passage is over and the amplifier is now receiving proper voltage and plays normally
again thereby returning to blue. It may be possible to reconfigure your AC wiring to
provide better current if this should happen but you should always consult local Elec-
trical Codes and seek Professional assistance.
Ground Hum
Ground hum can occur for a number of reasons but it generally occurs
when there is a difference in ground potential between one or more
components in the audio chain as a result of components plugged into
different power mains that have different grounding. Ideally for the
best sound the 175S chassis should be plugged into its own circuit and
all other components should be plugged into a separate circuit but this
also has the greatest potential for ground hum. In the event that
ground hum exists, the 175S chassis, through the switches shown at the
right, has the ability to be grounded directly, grounded through a resis-
tor or the ground is “lifted” entirely. Experimentation will prove what
selection is best by the lowest level of ground hum.
Table of contents
Other Tenor Amplifier manuals

