3 hours
not supplied not supplied not supplied
not supplied
PZ2
not supplied
supplied
Warnings
Do’s
Don’ts
Approximate time to assemble
Tradesman’s tips
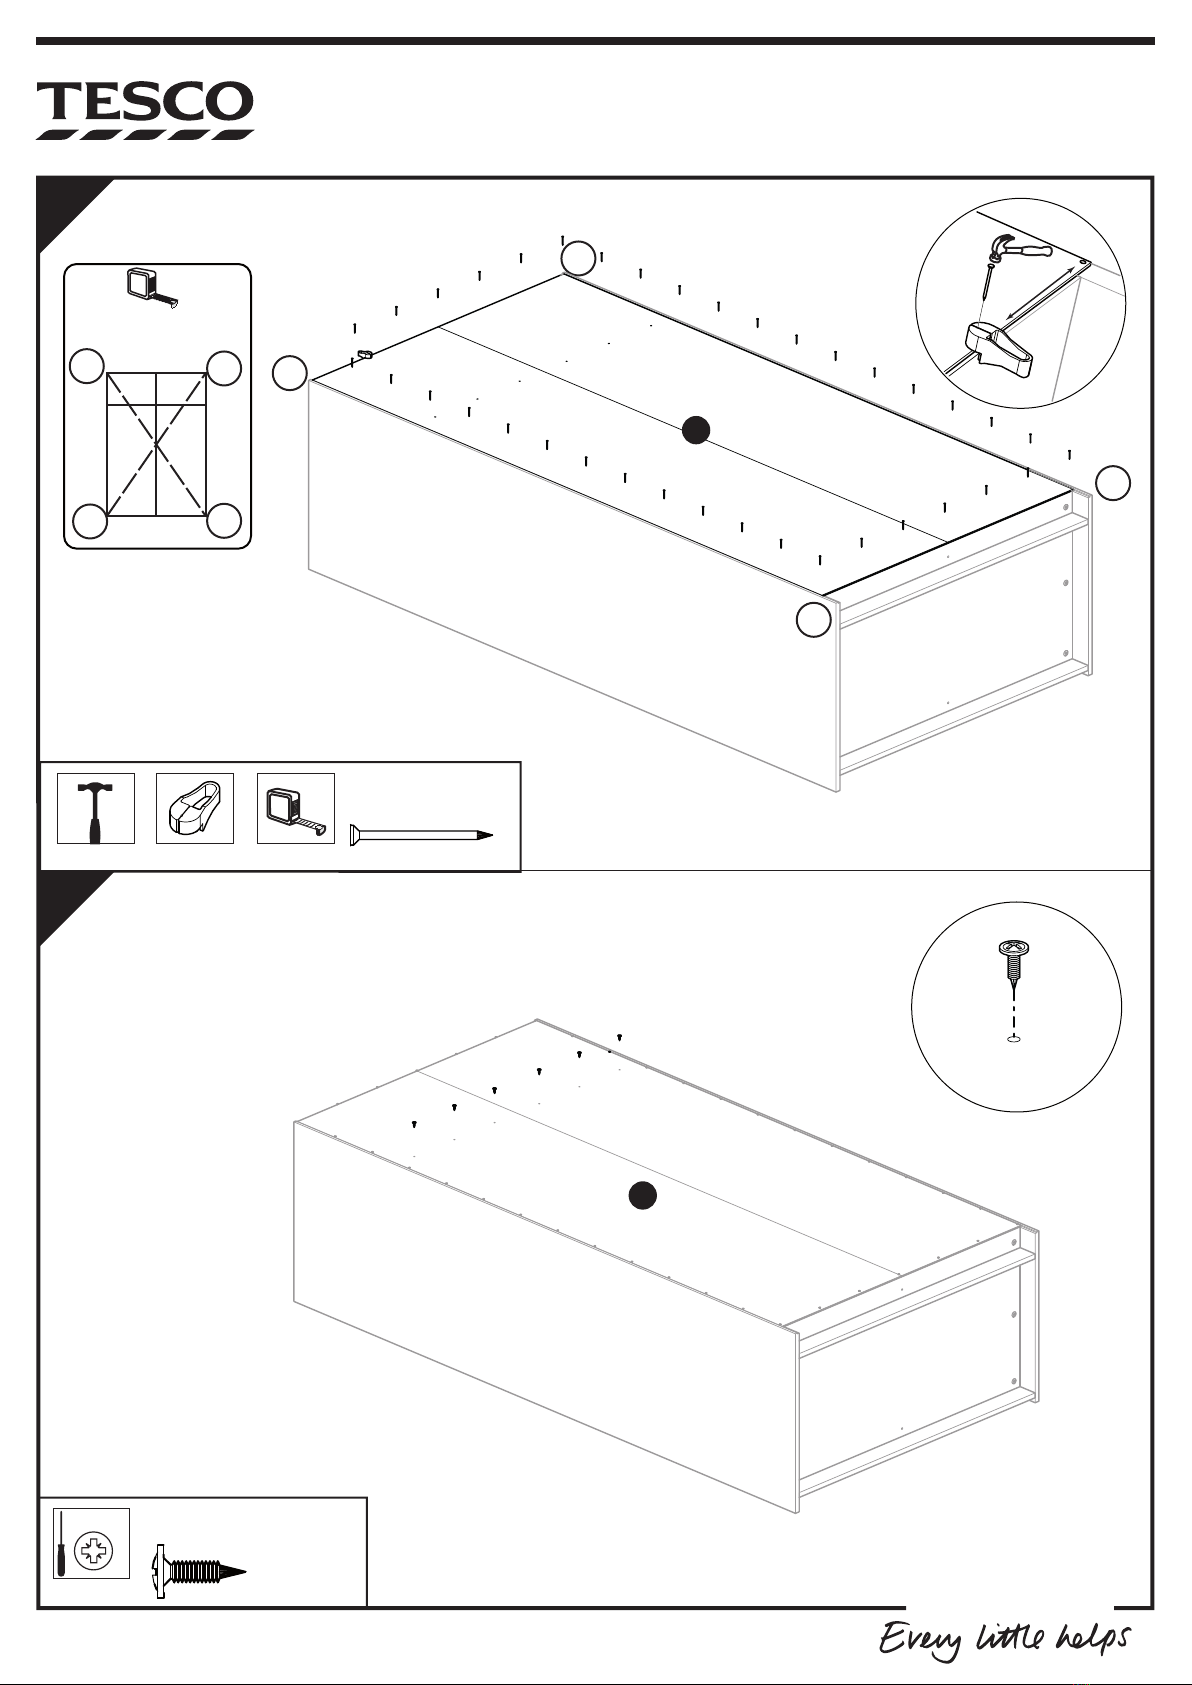
Tools required
IMPORTANT! RETAIN THESE
INSTRUCTIONS FOR FUTURE REFERENCE
Failure to follow the warnings could result in serious
injury.
During assembly children should be kept away from the
product due to possible risk of injury.
Ensure that this product is fully assembled as illustrated
and that all fittings are tightened properly before use
Do not use this product if parts are missing, damaged or
worn.
We recommend the use of the wall strap provided for
safety reasons. N.B. Wall fixings are not included –
please source suitable fixings for your wall type. If in
doubt please consult a qualified tradesperson. Warning:
Always ensure the area to be drilled is free from hidden
electrical wires, water and gas pipes.
Do not sit or stand on the product.
This product should only be used on firm, level ground.
Make sure the legs remain in contact with the ground.
During assembly keep small parts out of reach of
children.
Check all screws or bolts are tightened and inspect
regularly.
When you are ready to start, make sure that you have
plenty of space and a clean, dry area for assembly
Due to the size of this product we recommend that it is
assembled in the room intended for use
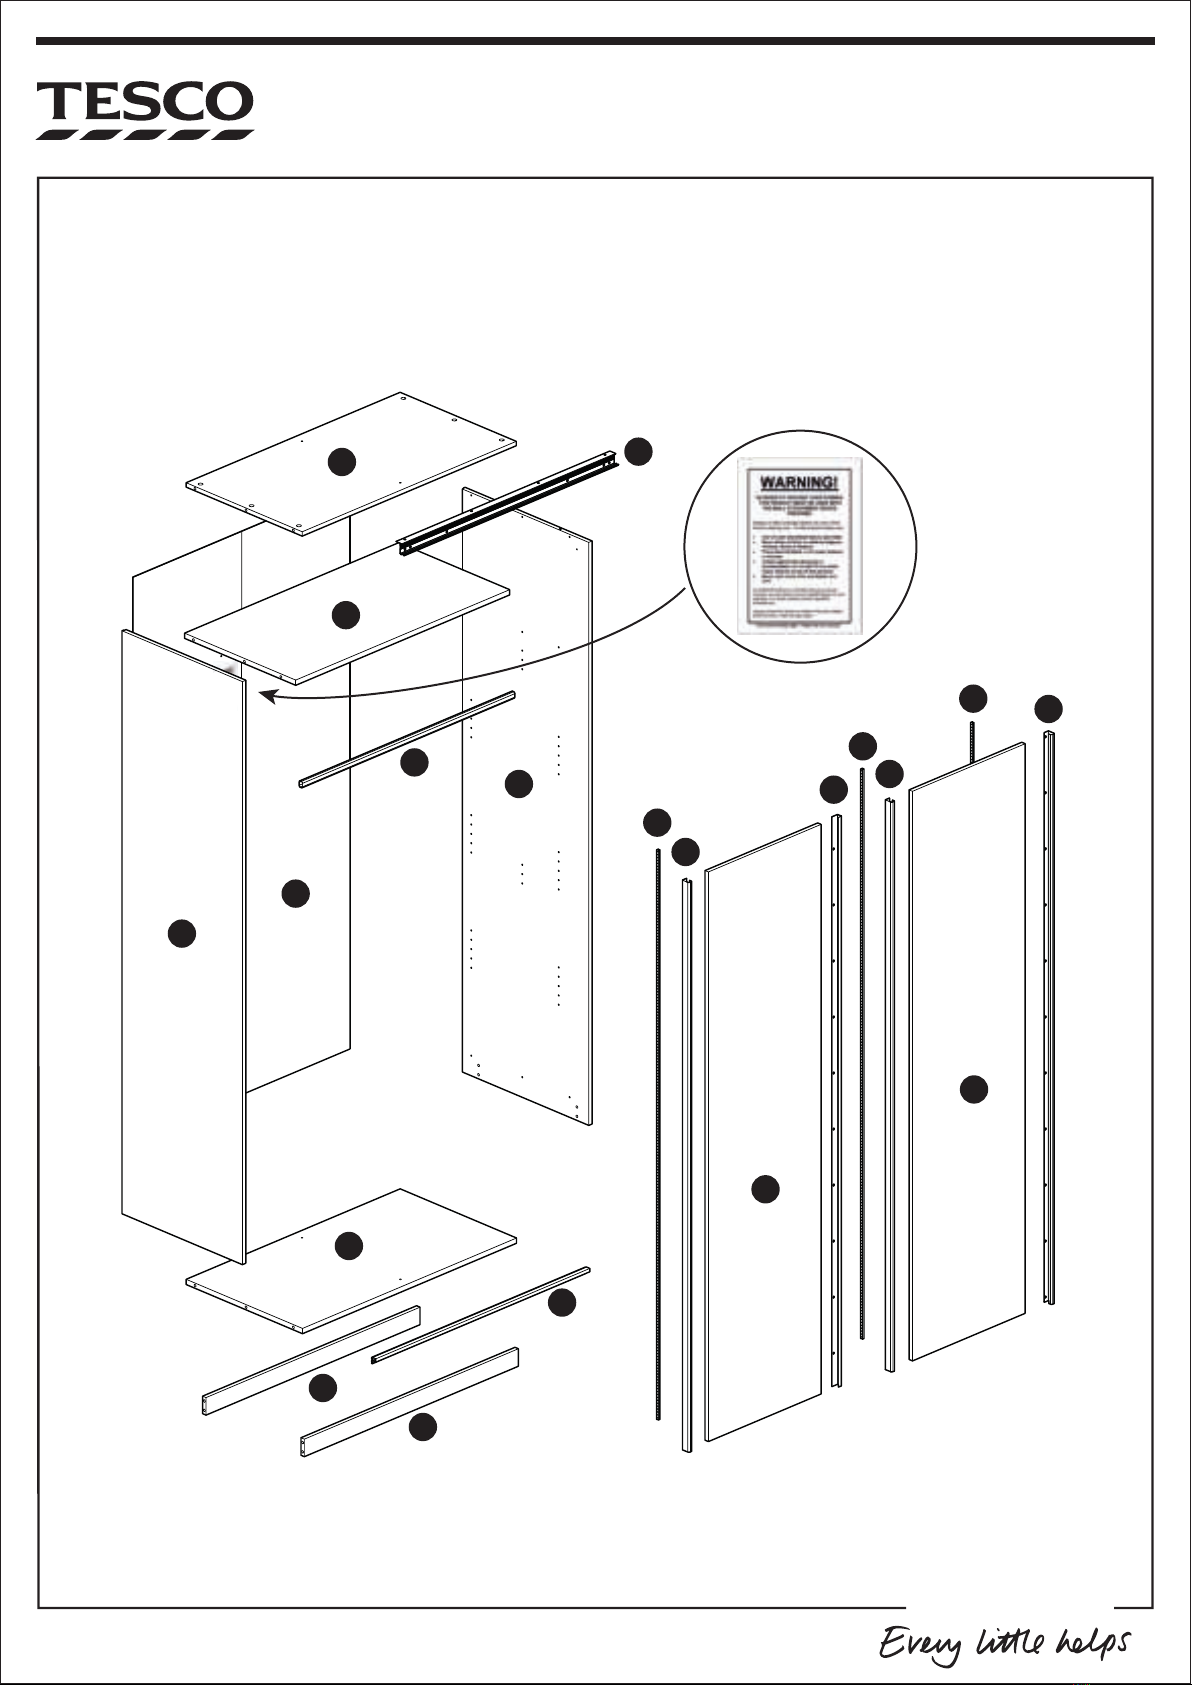
Unwrap all packaging materials and place the compo-
nents on top of the carton box or on a clean floor to
prevent it from scratching
Check the pack and make sure you have all the parts
listed
Do not use power tools to construct this product
To clean wipe with a sponge and warm soapy water.
Do not overtighten screws or bolts.
Do not use scourers, abrasives (including washing
powders), bleach or solvent based cleaners as they can
bleach or damage the product.
Number of people required to assemble
One person to assemble the product and two persons to
lift the product into position.
HI! Look out for me throughout this manual. Wherever
you see my picture I will have a handy tip to help you
with the assembly of your product.
My first tip is... After unpacking the product open out the
carton and lay it on the floor to protect your new product
and the floor during assembly.
2
Smith Slider 100
©Tesco 2016.
Produced in The Netherlands for TESCO Stores Ltd.
www.tesco.com
Before you start