Tiger Telematics Gizmondo User manual
™ and © ‘Gizmondo’, the ‘Gizmondo’ device and ‘Smart Adds™; are
Trademarks of Gizmondo Europe Limited.
© 2005 Gizmondo Europe limited. All rights reserved. FOR NON
COMMERCIAL PERSONAL USE ONLY.
The Bluetooth™ word mark and logos are owned by the Bluetooth™ SIG,
Inc. and any use of such marks by Gizmondo Europe Limited is under
license. © 2005 Microsoft Corporation. All rights reserved. Microsoft,
Windows, Windows Powered and the Windows Logo are either
registered trademarks or trademarks of Microsoft Corporation in the
United States and/or other countries.
The name NVIDIA™ and the NVIDIA™ logo are registered trade-marks
of NVIDIA™ corporation. The name GoForce and the GoForce product
logos are trademarks of NVIDIA™ corpora-tion.
Other trademarks and tradenames are those of their respective owners.
HEALTH WARNING
Take a break of around 10-15 minutes for every hour you play, even if
you feel that you don’t need it. Playing video games also carries the
risk of such conditions as Carpal Tunnel Syndrome, tendonitis and
skin irritation. If your hands, wrists or arms become tired or sore while
playing, stop and rest for a few hours. If symptoms continue during or
after play, stop and consult a doctor as soon as possible.
To avoid eyestrain, use your Gizmondo™ device in reasonably lit areas,
and hold your console at a reasonable distance from your eyes. We also
advise against playing when overly tired or suffering from a lack of sleep.
Please note that playing video games or watching movies can lead to
motion sickness, so if you experience any nausea or dizziness while
playing, stop and take a rest. Do not drive, operate heavy machinery
or engage in any similar mentally demanding activity until you are fully
recovered.
IMPORTANT
Playing video games or watching movies causes a very small number
of people to experience ‘photosensitive epileptic seizures’, the result of
flashing lights or patterns present in many games. You may even be at
risk even if you have never suffered symptoms before. If you or a close
relative have a di-agnosed epileptic condition, consult your doctor before
play-ing video games or watching movies. Similarly, if you experience
any symptoms of epilepsy while playing, you should stop IMMEDIATELY
and visit a doctor as soon as possible. Symptoms include any of
the following: dizziness, altered vision, twitching in the eyes or face,
other involuntary movement, loss of awareness of your surroundings,
disorientation and convulsions.
NOTICE TO PARENTS
Please go over this information with your children before they begin to
use their Gizmondo™ devices. Make sure they are properly supervised
when they are using their Gizmondo™ devices. Ensure they notify you
if they feel symptoms described in the Health Warning notice of this
document and take necessary action as outlined above.
The Gizmondo™ device is not designed and is not suitable for those
under 15.
PIRACY NOTICE
We take piracy seriously: It damages legitimate developers, publishers
and retailers alike. Furthermore, any unauthorized reproduction of all
or any game part of the Gizmondo™ device or unaut-horised use of
registered trademarks is likely to constitute a criminal offence. If you
suspect any game product is an unauthorised copy, or you have any
information about pirated Gizmondo™ device products, please get in
touch with our helpline. Relevant contact details are located at the back
of this manual.
LEGAL | INDEX | WELCOME | GET STARTED | REGISTER | CONTROLS | APPLICATIONS | LOCATION SERVICES | ALERTS | ACTIVE SYNC | SOFTWARE UPDATE | MINIMUM SPEC. | TROUBLESHOOTING
APPENDIX A | APPENDIX B | HELPLINE | PRINT | QUIT
PAGE 1
PAGE 1
LEGAL NOTICES.
LEGAL

HANDLING YOUR GAME MEDIA
While your Gizmondo™ device and supplied games should be reasonably
hard-wearing, you should make sure you handle
your game media with care, in order to get the most from your
Gizmondo™ device.
• DON’T insert any Gizmondo™ game/media card into any device other
than a Gizmondo™ device
• DON’T touch the metallic contact points any game/media card
• DON’T leave any game/media card in direct sunlight or near a radiator
or similar heat source
• DON’T allow water or any other liquid to come into contact with any
media card
• DO store your game/media card in the supplied packaging or simi-lar
protective case
ELECTRIC SHOCK
AVOID ELECTRIC SHOCK. Use only the battery charger supp-lied with
your Gizmondo™ device. Using any charger not
supplied by Gizmondo™ will void your warranty. Do not use your charger
if its connected wires become damaged or the
wires become exposed. When disconnecting from the wall, pull from the
plug casing: do not pull it out using the wires.
RISK OF EXPLOSION.
There is danger of explosion if the battery is placed incor-rectly or
exposed to fire.
AVOID LEAKAGE.
Do not short-circuit your battery. The battery does not have any user-
serviceable parts, and you must NOT try to open the battery casing.
Used batteries must be disposed of appro-priately. We recommend you
take the battery out if you’re not going to use your Gizmondo™ device
for an extended period of time.
AUDIO WARNING
Protect your hearing! Prolonged exposure to excessive noise can lead to
permanent loss of hearing. If you experience ringing in your the ears turn
your Gizmondo™ device volume down, or discontinue use. If symptoms
persist, see a doctor.
NEVER use the Gizmondo device audio features, watch mo-vies, play
games, or use messaging functions whilst driving, cycling or operating
machinery. It is dangerous, and in many territories, illegal.
Smart Adds™
Smart Adds™‘ adhere to the relevant statutes and industry ‘Codes of
Practice’. In particular, these include the Data Pro-tection Act and the
codes covering mobile advertising. Any comments regarding advertising
should be directed in the first instance to:
Smart Adds™
Gizmondo Europe Limited
1 Meadow Gate Avenue
Farnborough Business Park
Farnborough
Hampshire
GU14 6FG
peter[email protected]
T: 01252 557 100
LEGAL | INDEX | WELCOME | GET STARTED | REGISTER | CONTROLS | APPLICATIONS | LOCATION SERVICES | ALERTS | ACTIVE SYNC | SOFTWARE UPDATE | MINIMUM SPEC. | TROUBLESHOOTING
APPENDIX A | APPENDIX B | HELPLINE | PRINT | QUIT
PAGE 2
PAGE 2
LEGAL NOTICES.
LEGAL

LEGAL NOTICES. ........................................................................................... 1
INDEX ............................................................................................................. 3
1.0 INTRODUCTION ...................................................................................... 6
2.0 INSIDE YOUR GIZMONDO™ DEVICE BOX ........................................... 7
2.1 When you open your Gizmondo™ device box: ..................................... 7
2.2 Getting started: SIM card ....................................................................... 7
2.3 Getting started: Your battery and charger ........................................... 7
2.4 I CAN…Gizmondo™ device Keys and Navigation ............................... 8
2.5 Button and functions overview ............................................................. 9
2.6 Your Gizmondo™ device controls in detail ......................................... 10
2.7 Power Menu ........................................................................................... 11
3.0 REGISTERING YOUR GIZMONDO™ DEVICE ..................................... 12
3.1 User Registration .................................................................................. 12
3.2 Personal Details ..................................................................................... 12
3.3 SIM PIN ................................................................................................... 12
3.4 Guardian Registration ........................................................................... 13
4.0 THE GIZMONDO™ DEVICE INTERFACE ............................................. 14
4.1 Status Indicators and Icons ................................................................. 14
5.0 GIZMONDO™ DEVICE APPLICATIONS ............................................... 16
5.1 I CAN PLAY Games ............................................................................... 16
5.2 I CAN WATCH MOVIES .......................................................................... 17
5.2.1 Movie Player Keypad Functionality .................................................. 17
5.2.2 Control Buttons For Movie Player ..................................................... 18
5.2.3 Movie Player Menu Items .................................................................. 18
5.3 I CAN PLAY MUSIC ................................................................................ 19
5.3.1 Music Player Keypad Functionality .................................................. 19
5.4 I CAN TAKE PICTURES ......................................................................... 20
5.3.2 Control Button for Music Player ....................................................... 20
5.3.3 Music Player Menu Items .................................................................. 20
5.4.1 GIZMONDO™ DEVICE Camera Control Buttons ............................. 21
5.4.2 My Pictures Controls .......................................................................... 21
5.4.4 Moving and Copying Images ............................................................. 22
5.4.3 Menu Items for My Pictures .............................................................. 22
5.4.5 Viewing Images ................................................................................... 23
5.4.7 Zoom Mode ......................................................................................... 23
5.4.6 Controls when Viewing Pictures in full screen ................................ 23
5.4.8 Control Buttons for Zoom Function .................................................. 23
5.4.9 Renaming a Folder ............................................................................. 24
5.4.10 Control Buttons for Renaming a Folder ......................................... 24
5.4.11 Saving a renamed folder ................................................................. 24
5.5 Contacts ................................................................................................. 25
5.5.1 Control Buttons for Contacts ........................................................... 25
5.5.2 Menu items for Contacts ................................................................... 25
5.6 I CAN SEND SMS AND PICTURE MESSAGING/MMS ........................ 26
5.6.1 Control Buttons for Messaging ......................................................... 26
5.6.2 Menu items for Messaging ................................................................ 26
5.6.3 SMS ...................................................................................................... 27
5.6.4 Composing an SMS Message ........................................................... 27
5.6.5 Button Control for New SMS ............................................................. 27
5.6.6 Menu Items for New SMS .................................................................. 27
5.6.7 Send Picture Messages ..................................................................... 28
5.6.9 Control Buttons for New MMS .......................................................... 28
5.7 I CAN TELL YOU WHERE YOU ARE .................................................... 29
5.6.10 Menu Items for New MMS ............................................................... 29
LEGAL | INDEX | WELCOME | GET STARTED | REGISTER | CONTROLS | APPLICATIONS | LOCATION SERVICES | ALERTS | ACTIVE SYNC | SOFTWARE UPDATE | MINIMUM SPEC. | TROUBLESHOOTING
APPENDIX A | APPENDIX B | HELPLINE | PRINT | QUIT
PAGE 3
PAGE 3
INDEX
INDEX

5.7.1 Control Buttons for Web Services ................................................... 29
5.7.2 GPS Coverage Data ........................................................................... 30
5.7.3 GeoFence ........................................................................................... 30
5.7.4 Web Services ...................................................................................... 32
5.8 Applications ........................................................................................... 32
5.8.1 Alarm Clock ........................................................................................ 32
5.8.2 Calculator ............................................................................................ 33
5.8.3 Currency Converter ............................................................................ 33
5.8.4 Bluetooth™ Receive Menu ................................................................ 33
5.9 Settings .................................................................................................. 34
5.9.1 Device Info .......................................................................................... 34
5.9.2 Protected Settings .............................................................................. 35
5.9.3 Tracking/Alarm/GeoFence Settings – WRONG TITLE ..................... 35
5.9.6 Device Settings ................................................................................... 36
5.9.7 Re-registering the Device .................................................................. 36
5.9.8 Change Protected PIN ....................................................................... 36
5.9.4 Control Buttons for Tracking/Alarm ................................................. 36
5.9.5 Control Buttons for GeoFence Settings ........................................... 36
5.9.12 Uninstall Programs ........................................................................... 37
5.9.9 Control Buttons for Change Protected PIN ..................................... 37
5.9.11 Control Buttons for Delete Saved Games ...................................... 37
5.9.13 MMS Settings .................................................................................... 38
5.9.14 GPRS Settings .................................................................................. 38
5.9.15 GSM Settings .................................................................................... 39
5.9.16 Change GSM PIN .............................................................................. 39
5.9.17 Enable/Disable PIN Locking ............................................................ 39
5.9.18 Check Balance .................................................................................. 39
5.9.19 SIM Administration ........................................................................... 40
5.9.20 Visual Appearance ........................................................................... 40
5.9.21 Wallpaper Settings ........................................................................... 41
5.9.22 Skins .................................................................................................. 42
5.9.23 Signals & Sounds .............................................................................. 42
5.9.24 Alert Mode ......................................................................................... 42
5.9.25 Message Received Tone .................................................................. 43
5.9.26 Worldwide Time ................................................................................ 43
6.0 LOCATION-BASED SERVICES ............................................................. 44
6.1 Where Am I (WAI) ................................................................................... 44
6.2 Find the Nearest .................................................................................... 45
6.3 Tracking by Guardian ............................................................................ 45
6.1.1 Control Buttons for WAI ..................................................................... 45
7.0 EMERGENCY ALARM/DIRECT ALERT ................................................ 46
8.0 ACTIVESYNC ......................................................................................... 47
9.0 UPDATING YOUR GIZMONDO™ DEVICE’S SOFTWARE ................... 50
9.1 Software update via SD Card .............................................................. 50
9.2 Software update via ActiveSync .......................................................... 51
10.0 SYSTEM REQUIREMENTS ................................................................. 52
11.0 TROUBLESHOOTING .......................................................................... 53
12.0 APPENDIX A ......................................................................................... 56
13.0 APPENDIX B ......................................................................................... 57
13.1 Operational Temperature Range ....................................................... 57
13.2 Physical Dimensions ........................................................................... 57
13.2.1 Size .................................................................................................... 57
13.2.2 Weight ................................................................................................ 57
13.2.3 Audio Socket ..................................................................................... 57
LEGAL | INDEX | WELCOME | GET STARTED | REGISTER | CONTROLS | APPLICATIONS | LOCATION SERVICES | ALERTS | ACTIVE SYNC | SOFTWARE UPDATE | MINIMUM SPEC. | TROUBLESHOOTING
APPENDIX A | APPENDIX B | HELPLINE | PRINT | QUIT
PAGE 4
PAGE 4
INDEX
INDEX

13.2.4 SD Card ............................................................................................. 57
13.3 DC connector ....................................................................................... 57
13.4 GSM ...................................................................................................... 57
13.5 GPRS .................................................................................................... 57
13.6 SIM ........................................................................................................ 57
13.7 Real-time Clock (RTC) ........................................................................ 57
13.8 Optics and Camera ............................................................................. 57
13.9 Supported Audio Formats .................................................................. 57
13.10 Supported Video Formats ................................................................. 58
13.11 Polyphonic Sounds ............................................................................ 58
13.12 Speaker .............................................................................................. 58
13.13 Stereo Headphones ........................................................................... 58
13.14 Memory .............................................................................................. 58
13.15 Display ................................................................................................ 58
13.16 Vibrate mode ...................................................................................... 58
13.17 Power Supply ..................................................................................... 58
13.18 DC Connector .................................................................................... 58
13.19 USB ..................................................................................................... 58
13.20 GPS Specification .............................................................................. 59
13.21 Operating System .............................................................................. 59
14. HELPLINE ............................................................................................... 60
LEGAL | INDEX | WELCOME | GET STARTED | REGISTER | CONTROLS | APPLICATIONS | LOCATION SERVICES | ALERTS | ACTIVE SYNC | SOFTWARE UPDATE | MINIMUM SPEC. | TROUBLESHOOTING
APPENDIX A | APPENDIX B | HELPLINE | PRINT | QUIT
PAGE 5
PAGE 5
INDEX
INDEX

WELCOME
Congratulations on purchasing the most powerful multi-entertainment
console on the planet, the Gizmondo™ device. This guide will show you
how to get the most from your new console.
With your Gizmondo™ device, you will experience the following:
· Games
· Music
· Movies
· SMS and Picture messaging
· Photography
· GPS
In addition to the main functionality you can:
· Experience Multi-player gaming via GPRS and Bluetooth™
· Store and Playback MP3, WMA, WMV and Mpeg4
· Tri-band GSM and GPRS to enable your messaging and email
· Connect via USB 2.0 to your PC
Other functions you’ll find on your unit are:
· Contacts book
· Calculator
· Currency converter
· Clock with Alarm
This guide will provide you with all the information required to make the
most of your Gizmondo™ device.
LEGAL | INDEX | WELCOME | GET STARTED | REGISTER | CONTROLS | APPLICATIONS | LOCATION SERVICES | ALERTS | ACTIVE SYNC | SOFTWARE UPDATE | MINIMUM SPEC. | TROUBLESHOOTING
APPENDIX A | APPENDIX B | HELPLINE | PRINT | QUIT
PAGE 6
PAGE 6
1.0 INTRODUCTION
WELCOME
2.1 WHEN YOU OPEN YOUR GIZMONDO™ DEVICE BOX, YOU SHOULD
FIND THE FOLLOWING:
· Gizmondo™ device
· Charger
· Battery
· Getting Started User Guide
· CD featuring In-Depth User Guide, USB drivers and ActiveSync
software
· Pre Pay SIM card
· Headphones
· USB cable
2.2 GETTING STARTED: SIM CARD
Locate your pre-pay SIM card that has been supplied in your packaging.
You will be required to carefully push your SIM card from its plastic
surroundings.
Your Gizmondo™ device requires a SIM card in order to function.
Insert your SIM card
Remove the battery cover and battery and lift the SIM card holder up
from inside your Gizmondo™ device. Insert your SIM card into the SIM
card holder and replace battery and cover to your device (ensure that
your battery is inserted correctly, with the contact points).
NOTE: Please do this for your children and ensure that the battery and
battery case are replaced correctlly.
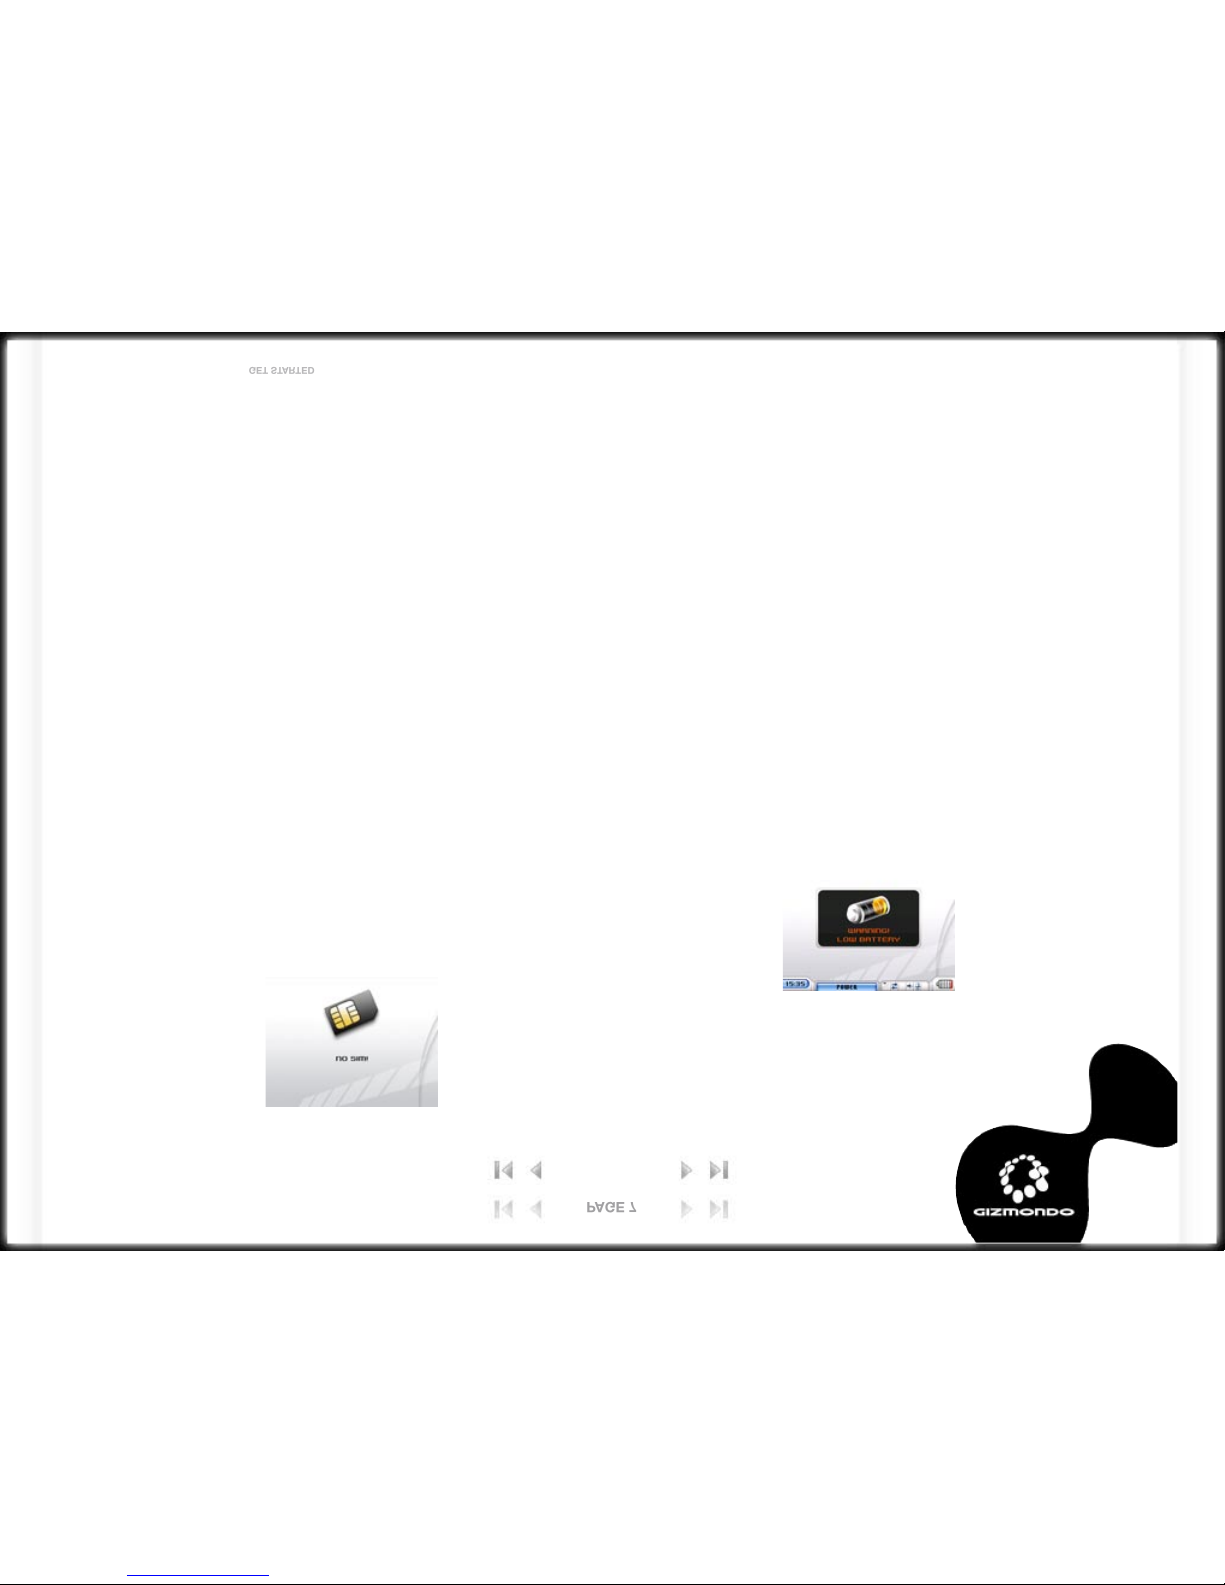
If no SIM is installed, you’ll see the following message displayed:
NOTE: The SIM card must be handled and stored with care in order not
to be damaged. If you lose the SIM card, you must contact the Network
Service Provider. SIM Cards must be kept out of reach of young children.
2.3 GETTING STARTED: YOUR BATTERY AND CHARGER
We recommend that you charge your new Gizmondo™ device for a
minimum of 5 hours in order to achieve optimum performance. Optimum
performance is reached after a few cycles
To charge your battery, do the following:
1. Connect the charger to a socket.
2. Plug the end of the cable into the bottom connector of the Gizmondo™
device unit.
The first time you charge your Gizmondo™ device, your battery indicator
on the screen, will show a scrolling bar indicating that the unit is
charging. When your Gizmondo™ device has completed charged, your
battery indicator will show a full battery icon.
When your battery is running low, your Gizmondo™ device displays the
following messages:
You’ll also see the battery icon flash. You’ll need to quit what
you’re doing and charge your battery for at least 1 hour,
or else you risk losing what you’re doing, such as
writing SMS messages, saving
digital photos and so on.
LEGAL | INDEX | WELCOME | GET STARTED | REGISTER | CONTROLS | APPLICATIONS | LOCATION SERVICES | ALERTS | ACTIVE SYNC | SOFTWARE UPDATE | MINIMUM SPEC. | TROUBLESHOOTING
APPENDIX A | APPENDIX B | HELPLINE | PRINT | QUIT
PAGE 7
PAGE 7
2.0 INSIDE YOUR GIZMONDO™ DEVICE BOX
GET STARTED

NOTE: There is danger of explosion if the battery is placed in an
incorrectly manner or if it is exposed to fire. Do not short-circuit it.
The battery does not have any part that the user can change. The user
must not try to open the battery casing. The user must only use the
appropriate chargers and batteries recommended for this unit. Used
batteries must be disposed of in the appropriate places. Gizmondo
Europe Ltd advises that you take the battery out of the unit if you plan
not to use the unit for long extended periods.
2.4 I CAN…GIZMONDO™ DEVICE KEYS AND NAVIGATION
In order to make your Gizmondo™ device as accessible as possible,
we’ve made all action keys very recognizable and simple to use. Button
behaviour is simple and intuitive so you should be able to predict
controls and navigate throughout the device.
1
2 3 4 5 6 7 8
10
11
12
13
9
14
LEGAL | INDEX | WELCOME | GET STARTED | REGISTER | CONTROLS | APPLICATIONS | LOCATION SERVICES | ALERTS | ACTIVE SYNC | SOFTWARE UPDATE | MINIMUM SPEC. | TROUBLESHOOTING
APPENDIX A | APPENDIX B | HELPLINE | PRINT | QUIT
PAGE 8
PAGE 8
2.0 INSIDE YOUR GIZMONDO™ DEVICE BOX
GET STARTED
1. D-Pad
2. L Shift
3. Home
4. Volume
5. Brightness
6. Alarm
7. Power
8. R Menu
9. Camera
10. Stop/Back
11. Rewind
12. Fasr Forward
13. Play/Accept
14. Battery Cover
15. SD Card Slot
16. Headphone Socket
17. USB Socket
18. Power Socket
15 16 17 18

2.5 BUTTON AND FUNCTIONS OVERVIEW
Button Function Action Description
1. Play Accept Single Tap Selects the highlighted object
2. Stop Decline/Exit Single Tap Exits current feature/application. Delete last
character if inputting
3. Rewind Single Tap
4. Forward Single Tap
5. Home
(Piano Key 1)
Single Tap Takes user to the menu listing all device features/
applications
6. Volume
(Piano Key 2)
Pop-up bar Single Tap Displays volume pop-up bar. This is controlled by
the D-Pad. If no input for 3 seconds then the
onscreen menu closes.
7. Brightness
(Piano Key 3)
Pop-up bar Single Tap Displays brightness pop-up bar. This is controlled
by the D-Pad. If no input for 3 seconds then the
onscreen menu closes.
8. Alarm
(Piano Key 4)
Alert Single Tap Sends an alert SMS to the server
9. Power
(Piano Key 5)
Pop-up bar Single Tap Displays power menu options.
10. D-Pad or Browser Navigation 8 way directional
button
Navigate the highlighted screen or application
11. Shift Held down Provides other functionality to other buttons
12. Menu Pop-up selection Single Tap Menu:
Off
Suspend
Flight Mode
Etc
Then: Turn off yes/no
13. Shift + Home Keypad lock Held down together Locks unit, all buttons become inoperative
until keypad lock is disabled
14. Shift + Volume GPS diagnostics Held down together Displays GPS settings.
15. Home + Power Reset Held down together Resets unit
LEGAL | INDEX | WELCOME | GET STARTED | REGISTER | CONTROLS | APPLICATIONS | LOCATION SERVICES | ALERTS | ACTIVE SYNC | SOFTWARE UPDATE | MINIMUM SPEC. | TROUBLESHOOTING
APPENDIX A | APPENDIX B | HELPLINE | PRINT | QUIT
PAGE 9
PAGE 9
2.0 INSIDE YOUR GIZMONDO™ DEVICE BOX
GET STARTED

2.6 YOUR GIZMONDO™ DEVICE CONTROLS IN DETAIL
The main menu allows you to access all the features of your
Gizmondo™ device
Ones inside the main menu, press the D-pad up and down to navigate
within your menu and choose one of the 9 applications, to select an
application the ACCEPT/SELECT button must be pressed.
The Keypad has four buttons. In order to promote predictability the
ACCEPT action is PLAY and the DECLINE or BACK action is STOP.
Pressing the BACK button allows you to access the previous screen.
This feature means that you won’t get lost while navigating the system.
This functionality remains constant throughout all device operations.
The ACCEPT and BACK/DECLINE feature is triggered by pressing the
allocated keypad button once.
The key-lock can be set by holding SHIFT and then pressing the MENU
piano key button. Upon activation a ‘KEY LOCK ON’ pop-up icon is
displayed before reducing to the task information bar at the bottom of
the page.
If the keypad is locked then any key action will cause “Press Shift and
Pause to unlock the keypad” to be displayed. All button input is ignored
except for the unlock sequence. Setting the keypad lock will not disturb
any device operations from performing, such as media playback.
The hard reset is when you return your Gizmondo™ device to its factory
settings. This will erase all settings you’ve previously entered, and you’ll
need to reregister the unit. You can perform a hard restart by holding
down the HOME and POWER piano key button together for 15 seconds.
Pressing the Volume or Brightness button once causes the volume/
brightness meters to overlay the current screen. To increase volume/
brightness the user must press the D-Pad (east) button. To decrease
volume/brightness the user must press the D-Pad (west) button.
When the POWER button is pressed a pop-up menu will be displayed.
Navigation on the menu is controlled by the D-Pad, pressing the accept
button will select the highlighted option.
LEGAL | INDEX | WELCOME | GET STARTED | REGISTER | CONTROLS | APPLICATIONS | LOCATION SERVICES | ALERTS | ACTIVE SYNC | SOFTWARE UPDATE | MINIMUM SPEC. | TROUBLESHOOTING
APPENDIX A | APPENDIX B | HELPLINE | PRINT | QUIT
PAGE 10
PAGE 10
2.0 INSIDE YOUR GIZMONDO™ DEVICE BOX
GET STARTED

2.7 POWER MENU
Menu Item Description
Stand by Puts the unit into stand by mode. This does not
switch communications off with the device and
is therefore the preferred option when ‘powe-
ring-down’ the terminal.
Power Off Causes the unit to enter Suspend mode. This
does not switch the terminal off.
Flight Mode On Triggers flight mode, i.e. GSM/GPRS modem
de-activated.. You should make sure you do
this before using your Gizmondo™ device on an
aeroplane
Flight Mode Off Deactivates flight mode
Back Returns user to previous page
LEGAL | INDEX | WELCOME | GET STARTED | REGISTER | CONTROLS | APPLICATIONS | LOCATION SERVICES | ALERTS | ACTIVE SYNC | SOFTWARE UPDATE | MINIMUM SPEC. | TROUBLESHOOTING
APPENDIX A | APPENDIX B | HELPLINE | PRINT | QUIT
PAGE 11
PAGE 11
2.0 INSIDE YOUR GIZMONDO™ DEVICE BOX
GET STARTED
1. 2.
3. 4.
5.
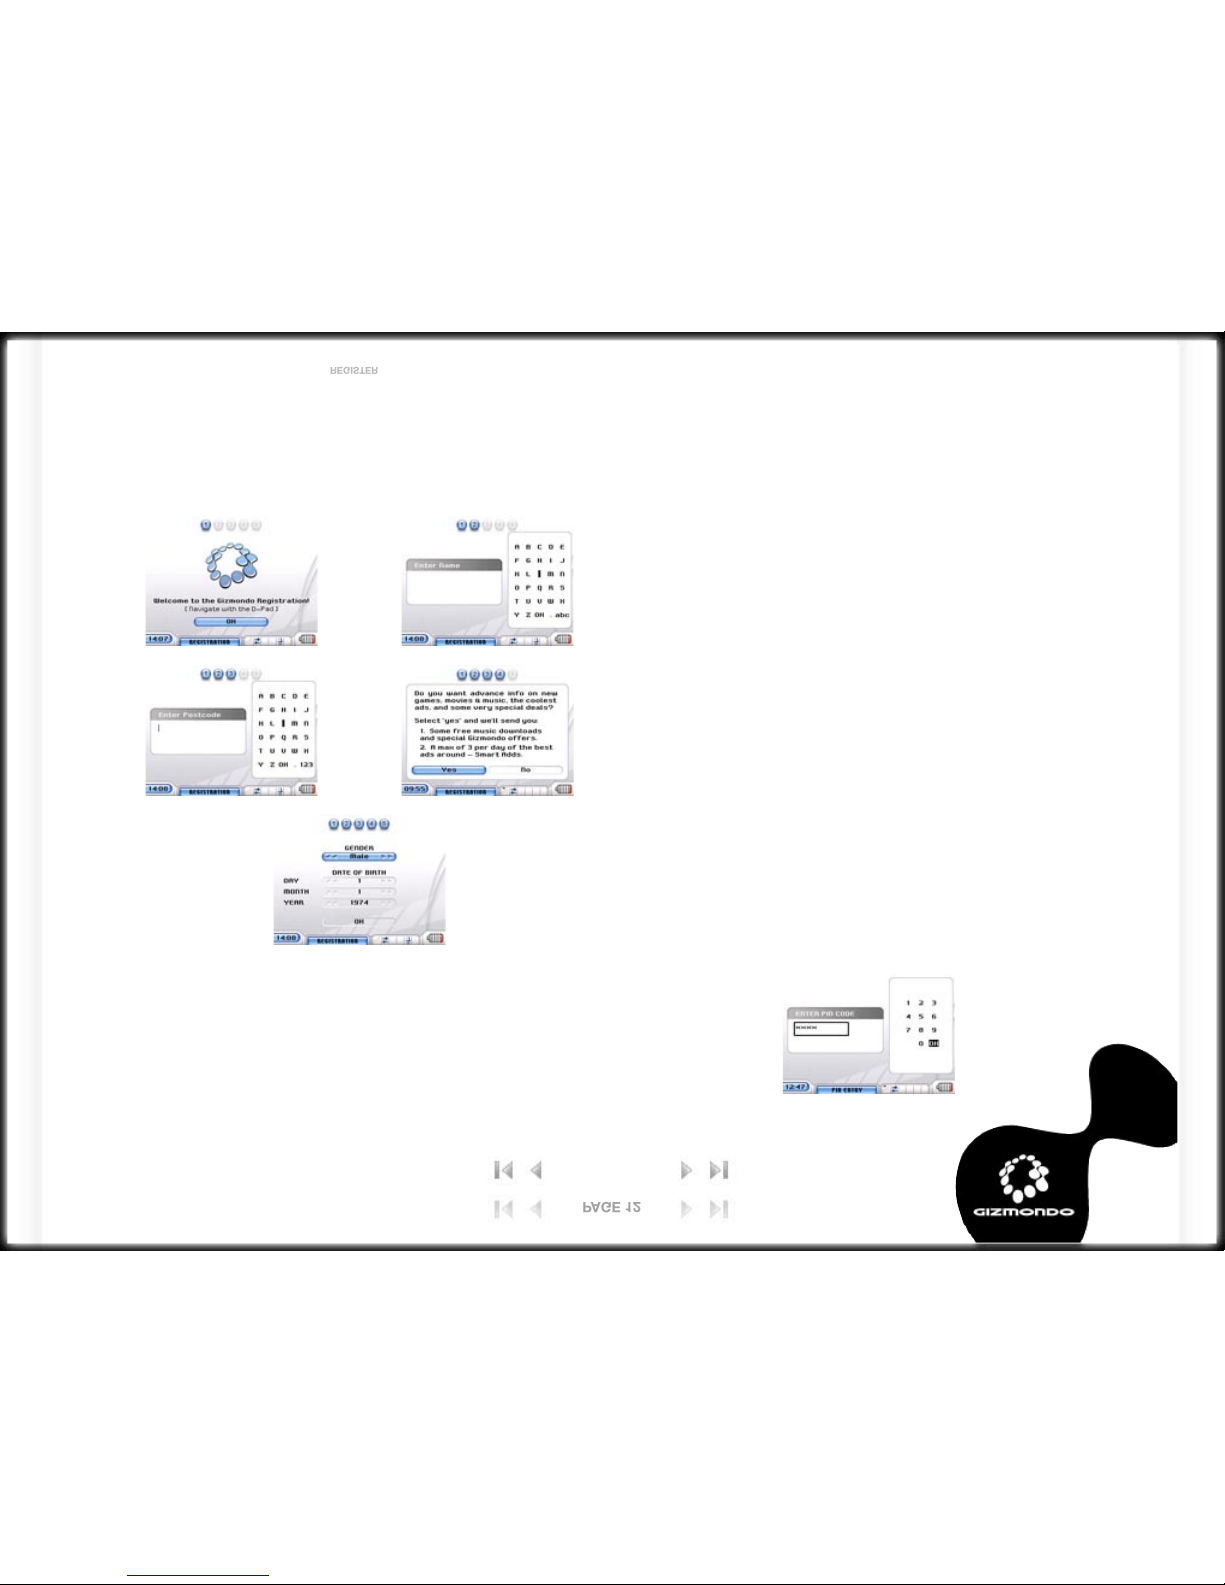
3.1 USER REGISTRATION
Now you’ll need to register your Gizmondo™ device. Be advised that
once you’ve started the registration process, you won’t be able to cancel
it, or access any other application on your Gizmondo™ device.
3.2 PERSONAL DETAILS
Here you should enter personal details such as your name, where you
live, your gender and your date of birth. You’ll also be asked whether you
would like to participate in our Smart Adds‘ program. Smart Adds‘ is a
range of services that will offer you discounts and promotions for goods,
based on the time of day and your current location. They may involve a
voucher to a local restaurant for lunchtime, for example, or a clip of a
movie showing at your local cinema on the upcoming Friday. In return for
opting into the Smart Adds‘ program, you will also receive discounts on
Gizmondo‘ device services, such as money off music downloads or free
ringtones. You will receive no more than 3 such Smart Adds‘ in a day.
The Smart Adds‘ program adheres to the relevant statutes and industry
‘Codes of Practice’. In particular, these include the Data Protection Act
and the codes covering mobile advertising. Any comments regarding
advertising should be directed in the first instance to:
Smart Adds‘ Program
Gizmondo Europe Limited
1 Meadow Gate Avenue
Farnborough Business Park
Farnborough
Hampshire
GU14 6FG
+44 (0) 1252 557 100
Email: peter[email protected]
3.3 SIM PIN
If the subscriber identity module (SIM) card requires a personal
identification number (PIN) for activation then the user will be requested
to input this number via the numeric SIP grid.
LEGAL | INDEX | WELCOME | GET STARTED | REGISTER | CONTROLS | APPLICATIONS | LOCATION SERVICES | ALERTS | ACTIVE SYNC | SOFTWARE UPDATE | MINIMUM SPEC. | TROUBLESHOOTING
APPENDIX A | APPENDIX B | HELPLINE | PRINT | QUIT
PAGE 12
PAGE 12
3.0 REGISTERING YOUR GIZMONDO™ DEVICE
REGISTER

3.4 GUARDIAN REGISTRATION
Guardian registration is done via the Gizmondo™ device website.
Registering as a Guardian is a measure that enables parents to take
advantage of some of Gizmondo™ device’s tracking features. For
example, it enables you to receive urgent/emergency messages from
your children if they use the applicable button. Guardian registration
also enables GeoFences to be set up. These are virtual boundaries of
a particular radius established around a Gizmondo™ device’s current
location. Should it wander outside the set boundary the Guardian
receives an alert. The Guardian sets a time limit within which the
GeoFence is active, as well as a time when the GeoFence should go live.
Registering as a Guardian can by done from the MyGiz link at
www.gizmondo.com.
When your registration is complete, you’ll receive an SMS message with
your terminal’s username and password. This can be used to register for
additional services at www.gizmondo.com.
Once you’ve installed your SIM card and charged your battery, you’re
ready to get going on your Gizmondo™ device
LEGAL | INDEX | WELCOME | GET STARTED | REGISTER | CONTROLS | APPLICATIONS | LOCATION SERVICES | ALERTS | ACTIVE SYNC | SOFTWARE UPDATE | MINIMUM SPEC. | TROUBLESHOOTING
APPENDIX A | APPENDIX B | HELPLINE | PRINT | QUIT
PAGE 13
PAGE 13
3.0 REGISTERING YOUR GIZMONDO™ DEVICE
REGISTER

Once the unit has been registered the user is directed to the MENU
default home page. This screen is usually presented whenever the unit is
powered up.
Status indicators are grouped at the bottom of the screen and remain in
the same position across other screen displays.
4.1 STATUS INDICATORS AND ICONS
Indicator Image Screen Description
Time 24 hour clock dis-
play
All The time will automatically display the local time. The format 12/24 hour clock can be set by
the user via the settings menu.
Date Numeric Homepage Displays date
GPRS
Connected /
disconnected
/blank
All The GPRS indicator has two images that signify connected or disconnected
Signal Strength
(GSM network) All The signal strength indicator has 5 settings representing 0, 25 per cent, 50 per cent, 75 per
cent and 100 per cent.
GSM Antennae ALL Antennae above Signal Strength
Network Name Text All Network name or text indicating flight mode if this enabled.
Battery
strength or
charging (on
AC power)
All The battery indicator will either display a battery strength icon or a charge icon. The battery
strength icon represents 0, 25 per cent, 50 per cent, 75 per cent and 100 per cent charged.
Mute mode All The mute icon only appears when the unit is in mute mode.
New SMS
Message All The envelope icon represents new SMS. This only appears if a new SMS message has been
received. It remains until the message has been opened by the user.
New MMS
Message All The envelope icon represents new MMS. This only appears if a new MMS message has been
received. It remains until the message has been opened by the user.
LEGAL | INDEX | WELCOME | GET STARTED | REGISTER | CONTROLS | APPLICATIONS | LOCATION SERVICES | ALERTS | ACTIVE SYNC | SOFTWARE UPDATE | MINIMUM SPEC. | TROUBLESHOOTING
APPENDIX A | APPENDIX B | HELPLINE | PRINT | QUIT
PAGE 14
PAGE 14
4.0 THE GIZMONDO™ DEVICE INTERFACE
CONTROLS
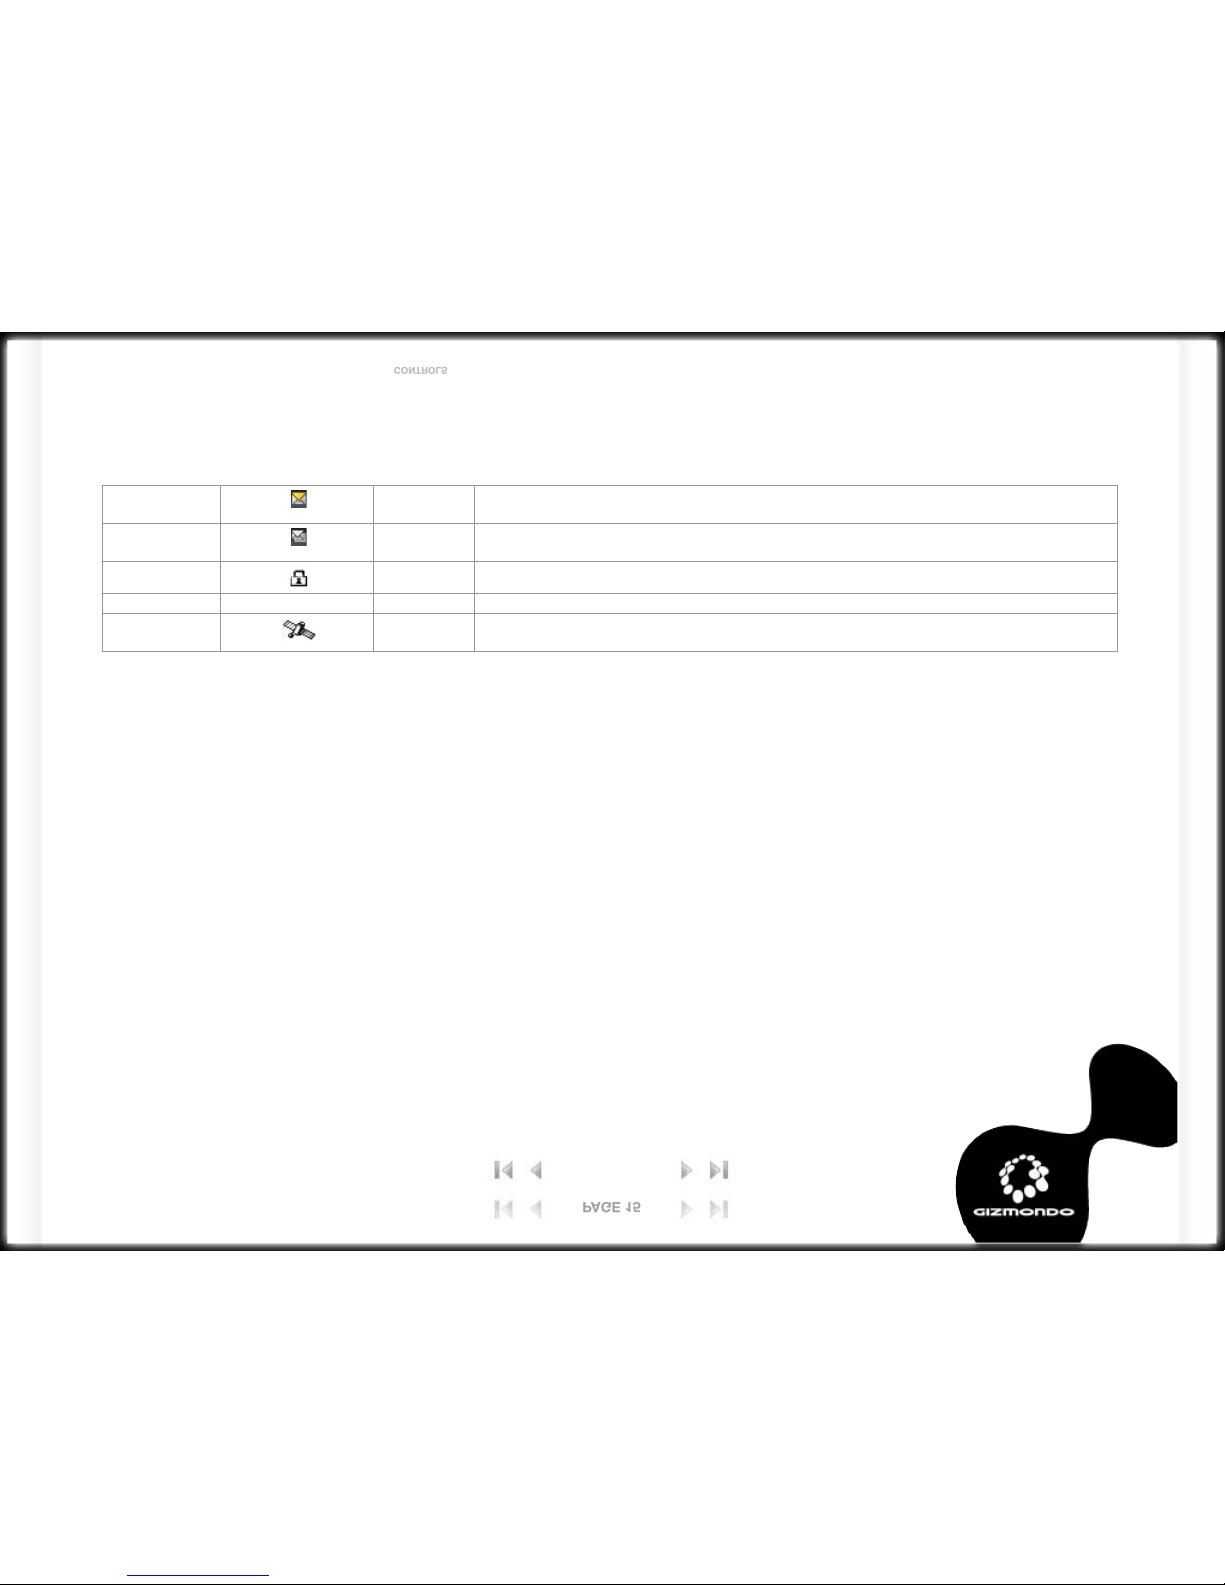
New Email
Message All The envelope icon represents new Email. This only appears if a new Email message has
been received. It remains until the message has been opened by the user.
Several New
Messages All The envelopes icon represents several new messages. This only appears if a several
messages have been received. It remains until the messages have been opened by the user.
Keypad Locked All
Device Paused All
Navigation Fix Homepage Lets you know that your GIZMONDO™ DEVICE unit has established an up-to-date GPS
navigation fix.
LEGAL | INDEX | WELCOME | GET STARTED | REGISTER | CONTROLS | APPLICATIONS | LOCATION SERVICES | ALERTS | ACTIVE SYNC | SOFTWARE UPDATE | MINIMUM SPEC. | TROUBLESHOOTING
APPENDIX A | APPENDIX B | HELPLINE | PRINT | QUIT
PAGE 15
PAGE 15
4.0 THE GIZMONDO™ DEVICE INTERFACE
CONTROLS

There are 9 items in your
Gizmondo™ device’s main MENU.
They are:
1. Games
2. Movies
3. Music
4. Messaging
5. GPS & Web
6. Camera and Images
7. Contacts
8. Applications
9. Settings
5.1 I CAN PLAY GAMES
Gizmondo™ device games are supplied to you on SD cards.
Gizmondo™ Studios’ licence Games for Gizmondo™ device and as
button controls will vary game to game, all games will be shipped with
user manuals for game control functions.
Ensure you READ your game manual when you purchase your first
Gizmondo™ device pre-packed game.
However, when you get your first game for your Gizmondo™ device, you
should:
1. Insert the SD Card to the slot on the underside of your Gizmondo™
device’s underside
2. You’ll be asked whether you’d like to play the game. If you accept, the
game will launch automatically. If you decline, you can leave the SD
Card in and simply choose Game from the main MENU interface later
on.
3. When you’re finished playing, you may remove the SD Card.
Do not try to remove it while the game is in progress
LEGAL | INDEX | WELCOME | GET STARTED | REGISTER | CONTROLS | APPLICATIONS | LOCATION SERVICES | ALERTS | ACTIVE SYNC | SOFTWARE UPDATE | MINIMUM SPEC. | TROUBLESHOOTING
APPENDIX A | APPENDIX B | HELPLINE | PRINT | QUIT
PAGE 16
PAGE 16
5.0 GIZMONDO™ DEVICE APPLICATIONS
APPLICATIONS

5.2 I CAN WATCH MOVIES
With the movie player, you can playback video content stored either on
the device or from an SD card. The list of movie files available shows up
automatically, with those stored on your Gizmondo™ device’s internal
memory appearing first. Files on the SD card will be highlighted in a
different colour.
The movie player screen is divided into three areas. These are:
1. Movie List
2. Preview Screen
3. Function/Control Icons
The keypad buttons are intuitively designed to perform media operations.
For example, press the Accept/Select button to PLAY, the Back/Decline
to STOP, and so on.
5.2.1 MOVIE PLAYER KEYPAD FUNCTIONALITY
Stop
Back
Exit
Rewind
Back to the beginning
of the track
Back one track
Track seeking
Forward
Forward to the
next track
Track seeking
Play
Pause
When a control function has been selected, the associated control icon
is highlighted. Mute and volume are controlled via the piano key buttons.
LEGAL | INDEX | WELCOME | GET STARTED | REGISTER | CONTROLS | APPLICATIONS | LOCATION SERVICES | ALERTS | ACTIVE SYNC | SOFTWARE UPDATE | MINIMUM SPEC. | TROUBLESHOOTING
APPENDIX A | APPENDIX B | HELPLINE | PRINT | QUIT
PAGE 17
PAGE 17
5.0 GIZMONDO™ DEVICE APPLICATIONS
APPLICATIONS
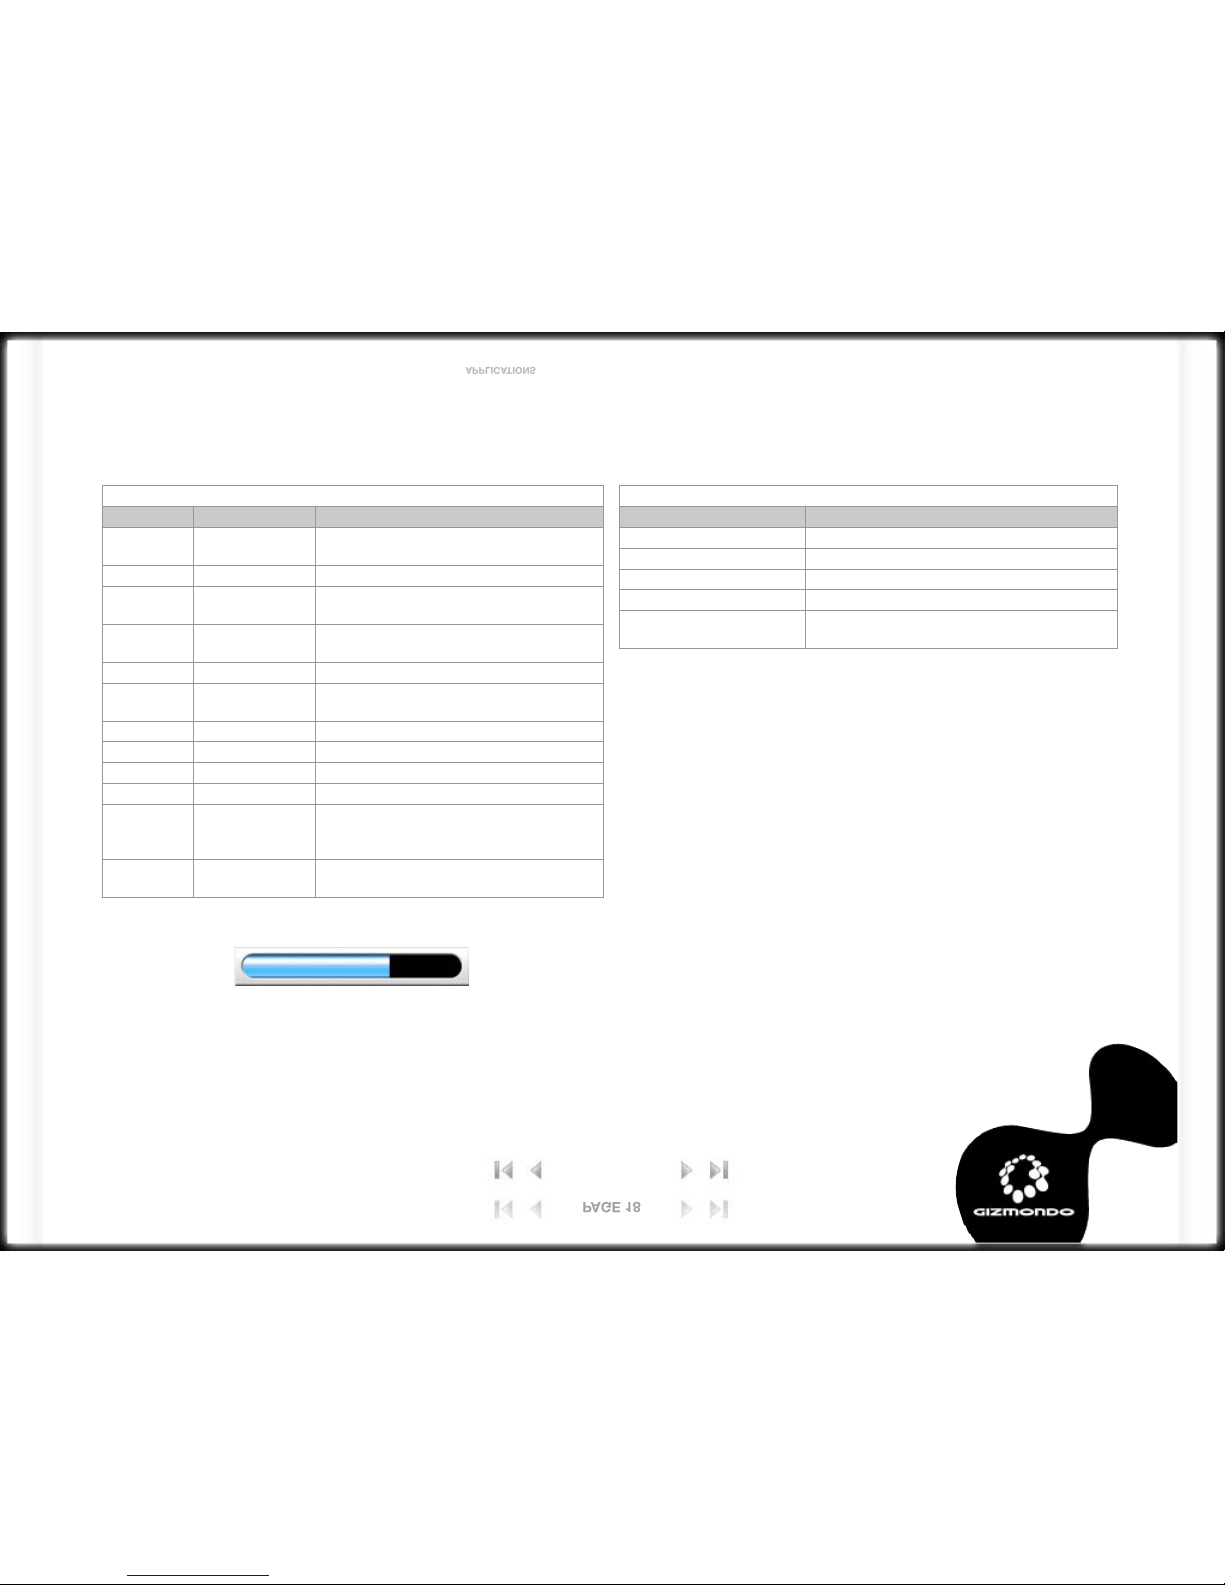
When performing the ‘Seek’ function the below seek bar is displayed:
The colour of the bar is linked to the SKIN type.
NOTE: If you press the MENU HOMEPAGE button while watching a
movie, it will be ‘paused’. When returning to the movie application,
pressing the PLAY/ACCEPT button resumes the movie file. This can
happen in either the full screen or thumbnail preview mode.
NOTE: If the Music Player is playing when a movie file is accepted then
the Music Player will automatically pause. The Music Player cannot be
resumed while the Movie Player is open.
5.2.2 CONTROL BUTTONS FOR MOVIE PLAYER
Button Action Description
Accept/
select
Tap Once Plays Highlighted Movie
Tap Twice Pauses Highlighted Movie
Back/
decline
Tap Once Stops Movie
Tap Twice If In Full Screen Mode, This Will Revert
Back To The Preview Mode
Tap Three Times Exits Application (If In Full Mode Screen)
Rewind Tap Once The Current Played Movie Will Start
From The Beginning
Tap Twice Plays Previous Movie
Held Down Rewinds Current Movie
Forward Tap Once Forwards To The Next Movie
Held Down Forwards Current Movie
Shift &
Accept/
select
Hold Down Shift
And Tap Accept/
select
Plays Movie In Full Screen
D-pad Tap (North/
south)
Moves Between Movie List
5.2.3 MOVIE PLAYER MENU ITEMS
Menu Item Description
Play Plays movie
Stop Stops current played movie
Full Screen Plays movie in full screen
Delete Deletes selected movie
Beam to Device The selected file will be sent via Bluetooth
to another terminal
LEGAL | INDEX | WELCOME | GET STARTED | REGISTER | CONTROLS | APPLICATIONS | LOCATION SERVICES | ALERTS | ACTIVE SYNC | SOFTWARE UPDATE | MINIMUM SPEC. | TROUBLESHOOTING
APPENDIX A | APPENDIX B | HELPLINE | PRINT | QUIT
PAGE 18
PAGE 18
5.0 GIZMONDO™ DEVICE APPLICATIONS
APPLICATIONS

5.3 I CAN PLAY MUSIC
The music player feature enables you to playback music files that are
stored internally or on the SD card. In terms of control and functionality,
the application runs in parallel to the Movie Player. The music player will
first verify each music file and ascertain whether there is a name field.
If it finds none, the file will be presented as “-filename”. The player also
shows the track length in min.sec format. However, if the filename size is
too long then this will impede visibility on the track duration from being
displayed
Album list is shown on a rolling folder from the left-hand side of the
screen. You can view this folder by pressing the east D-Pad button. This
folder makes it possible for more information to be shown on the screen.
Navigation of the album list is governed by the north/south D-Pad.
Albums are listed on the left with the associated track on the right.
Tracks can only be selected when you’re not currently playing a file.
This is controlled by the keypad REWIND and FORWARD buttons, or the
north/south D-Pad when the rolling folder album list is not displayed.
Music control icons are highlighted once a track is playing.
5.3.1 MUSIC PLAYER KEYPAD FUNCTIONALITY
Stop
Back
Exit
Rewind
Back to the beginning
of the track
Back one track
Track seeking
Forward
Forward to the
next track
Track seeking
Play
Pause
LEGAL | INDEX | WELCOME | GET STARTED | REGISTER | CONTROLS | APPLICATIONS | LOCATION SERVICES | ALERTS | ACTIVE SYNC | SOFTWARE UPDATE | MINIMUM SPEC. | TROUBLESHOOTING
APPENDIX A | APPENDIX B | HELPLINE | PRINT | QUIT
PAGE 19
PAGE 19
5.0 GIZMONDO™ DEVICE APPLICATIONS
APPLICATIONS

When performing the ‘Seek’ function, the below seek bar is displayed:
The colour of the bar is linked to the SKIN type.
5.4 I CAN TAKE PICTURES
Take and send photos using your Gizmondo™ device, your device allows
you to take photos and share them with other Gizmondo™ device users
and friends, picture are stored in My pictures folder on the root directory,
you may also store pictures on SD cards.
MyPicture folder will automatically be displayed when you capture an
image
5.3.2 CONTROL BUTTON FOR MUSIC PLAYER
Button Action Description
Accept/
Select
Tap once Plays highlighted track
Tap Twice Pauses highlighted track
Back/
Decline
Tap once Stops track
Tap twice Exits application
Rewind Tap once The current played track will start
from the beginning
Tap twice Plays previous track
Held down Rewinds current track
Tap once When track is not being played, this
selects the previous track
Forward Tap once Forwards to the next track
Held down Forwards current track
Tap once When track is not being played, this
selects the next track in the list
D-Pad Right Opens rolling album folder
Up/Down Scrolls between folder list
5.3.3 MUSIC PLAYER MENU ITEMS
Menu Item Description
Play Plays selected track
Stop Stops current track
Pause Pauses current track
Track
Repeat
Repeats selected track
Folder
Repeat
Repeats selected folder
Random Device Randomly plays any track in all folders
Random Folder Randomly plays any track in selected folder
Continuous Play Plays all tracks throughout the music list conti-
nuously
Beam to Device Sends selected track to another device via
Bluetooth
LEGAL | INDEX | WELCOME | GET STARTED | REGISTER | CONTROLS | APPLICATIONS | LOCATION SERVICES | ALERTS | ACTIVE SYNC | SOFTWARE UPDATE | MINIMUM SPEC. | TROUBLESHOOTING
APPENDIX A | APPENDIX B | HELPLINE | PRINT | QUIT
PAGE 20
PAGE 20
5.0 GIZMONDO™ DEVICE APPLICATIONS
APPLICATIONS
Other manuals for Gizmondo
1
Table of contents
Other Tiger Telematics Game Console manuals

Popular Game Console manuals by other brands


Kogan
Kogan KAHVG43CAMA user manual

Sony
Sony PSVITA instruction manual

Radica Games
Radica Games 76003 instruction manual

Sony
Sony PlayStation 3 (Uncharted: Drake's Fortune Limited Edition... quick reference

Diamond Multimedia
Diamond Multimedia GameCaster GC2000 manual

Hasbro
Hasbro Battleship A3846 Game guide


