Tivoli Audio ART User manual


ConX Wireless Transmitter & Receiver
Multi-language manual
1. English 3
2. Español 33
3. Dansk 63
4. Deutsch 93
5. Français 123
6. Italiano 153
7. Nederlands 183
8. Norsk 213
9. Suomi 243
10. Svensk a 273

__________________________________________________________________________________________________
English - 3
Table of Contents
1. Welcome 4
2. Guide to Features 5
3. Functions:
i. Setup for Android devices 6
ii. Setup for iOS (Apple) devices 11
iii. Changing ConX Name 17
iv. Group Configuration
1. Setting up a Group 19
2. Using Line Out 20
3. Using Line In/Optical In 23
4. Naming the Group 24
5. Volume adjustment of Group 25
6. Volume adjustment of individual speakers 25
7. ConX Configuration Shortcut 26
8. Releasing a group of speakers 27
9. Releasing all speakers 27
v. Add/Drop Button 28
vi. Party Mode Button 28
vii. DDMS Mode 29
4. Updating Firmware 29
5. Care 32

__________________________________________________________________________________________________
English - 4
Welcome
Congratulations on your purchase! ART by Tivoli Audio mixes classic design and the latest
technology to create a simple solution to wireless audio in the home. Encased in a furniture grade
wood cabinet and finished with a high-quality Gabriel® fabric grill, this collection elevates the
craftsmanship and technology of the Tivoli Audio product line.
These wireless and Bluetooth® enabled speakers allow for a variety of configurations to meet
your playback preferences. Whether it’s a single speaker playing Spotify in your kitchen, a stereo pair
in your dining room, or your party playlist throughout your home, ART by Tivoli Audio speakers offer
simple and flexible solutions to best fit your surroundings and enhance your world through music. Start
with one and learn how simple it is to build on and match your style in each room.
We know you are eager to begin listening to your new purchase, but in order to take full
advantage of what it is capable of, please take a moment to read this owner’s manual and the
safety instructions. If you have any questions, please do not hesitate to contact your dealer or Tivoli
Audio.
Please save the original packing should you ever need to ship your radio.
Packed with your ConX you should find:
(1) External Power Supply and accompanying plugs.
Please contact your dealer or Tivoli Audio if any of these items are missing.
__________________________________________________________________________________________________
English - 5
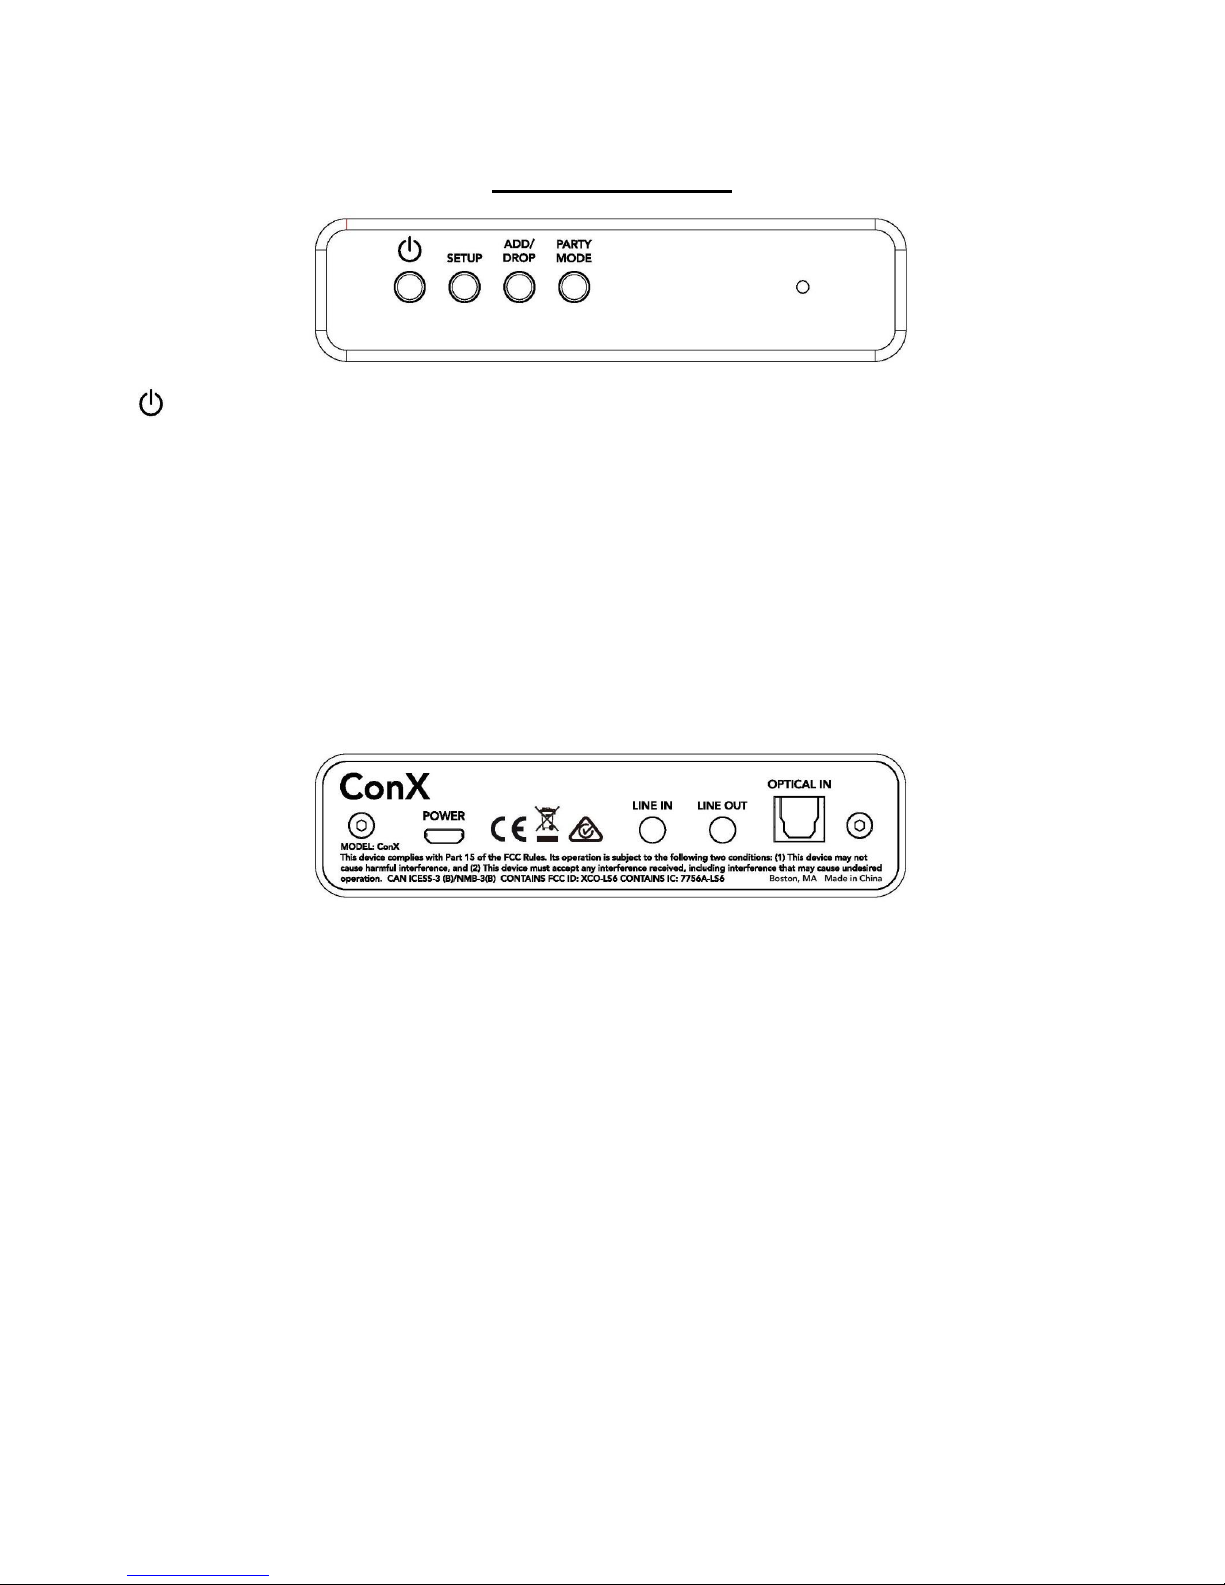
Guide to Features
(On/Off Button): Press to turn on the unit. Hold to turn off.
SETUP: Press to enable your speaker to be connected to your home network.
PARTY MODE: Hold to send the music from this ConX to all other connected ConX and ART speakers.
More information can be found in the “Party Mode” section of this manual.
ADD/DROP: If the ConX is connected to a Group, holding this button removes it from the Group. If the
speaker is not connected to a Group, pressing this button connects it to the next available Group.
More information can be found in the “Add/Drop” section of this manual.
Status LED: Red: Standby
Blue: OPTICAL IN is active
Green: LINE OUT is active
Purple: LINE IN is active
POWER: Plug in your Tivoli power adapter to power your ConX. Use only the power supply provided
with this product. If the power supply becomes damaged or misplaced, use only a like replacement.
Any DC adapter used must be rated at 5VDC 1000mA. Replacement adapters can be purchased
from Tivoliaudio.com.
LINE IN: Use this input if you are using the ConX as a “master” to transmit an analog source (such as
the headphone output of a Model One) to other ART by Tivoli Audio products. The source should be
plugged into this input via a 3.5mm stereo cable.
LINE OUT: Use this output if the ConX is streaming a music service from itself or another ART by Tivoli
Audio speaker.
OPTICAL IN: Use this input if you are using the ConX as a “master” to transmit an optical source (such
as the optical output of a DAC) to other ART by Tivoli Audio products. The source should be plugged
into this input via an optical audio cable.
Table of contents


