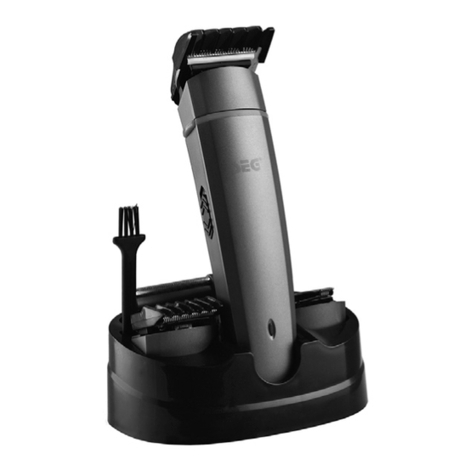
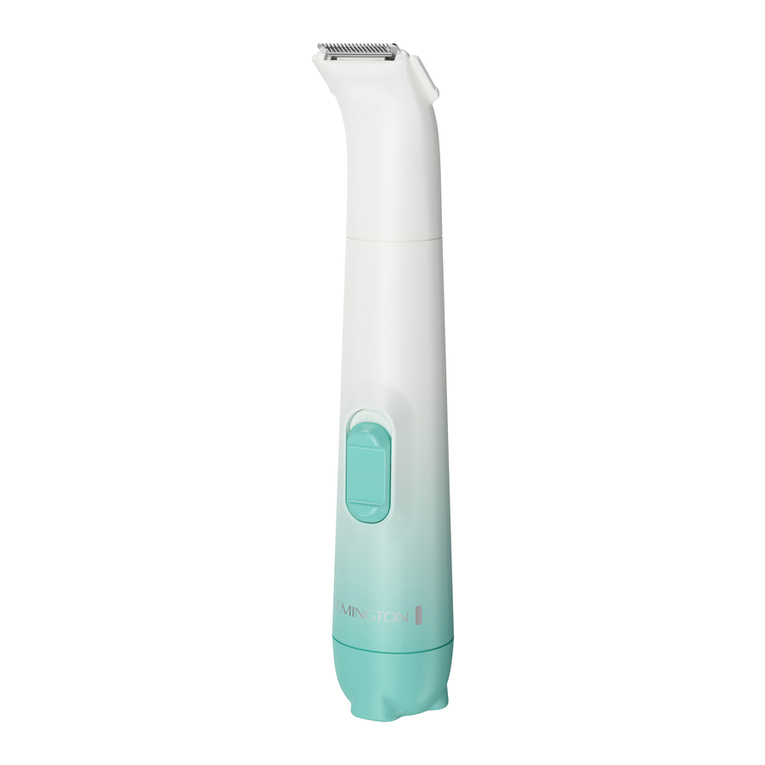
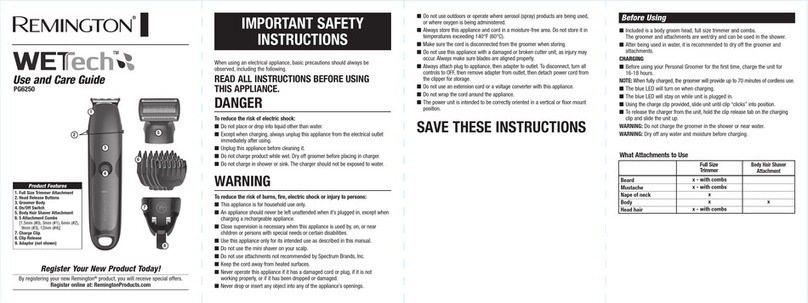
TM Electron TMHC121 User manual


INSTRUCCION MANUAL
Thanks for choosing to buy our Hair Clipper.
Read all instructions of the manual thoroughly before use, even if you are familiar with
this type of product. The safety precautions enclosed herein reduce the risk of re, electric
shock and injury when correctly adhered to. Keep the manual in a safe place for future
reference. If applicable, pass the instructions on to the next owner of the appliance.
7 EN 1 GROOMING KIT
TMHC121

5
INDEX
Features........................................................................................................6
Important safety instructions.....................................................................7
Usage Instructions ......................................................................................8
7 EN 1 GROOMING KIT
TMHC121

ENGLISH
6
CARACTERÍSTICAS
1. On/off switch
2. Power Indicator light
3. Precision trimmer attachment
4. Full size trimmer attachment
5. Nose trimmer attachment
6. USB charging cable
7. Micro shaver attachment
8. Eyebrow trimmer attachment
9. Cleaning brush
10. Lubricating Oil
11. Long comb
12. Cutting guide comb (3-15mm)
13. Cutting guide comb (0.5-10mm)

ENGLISH
IMPORTANT SAFETY INSTRUCTIONS
When using an electric product, basic precautions should always be followed, including
the following:
Read all instructions before using this product.
DANGER
To reduce the risk of electric shock:
· Do not reach for a corded product that has allen into water. Unplug immediately.
· The power cord and the accessories connected to it are not for immersion or for use in shower.
· Do not use an extension cord with this product.
· Do not place or store the product while plugged in where it can fall or be pulled into a tub or
sink. Do not place or drop the product water or other liquid while plugged in.
· Always unplug this product from the electrical outlet immediately after (re)charging.
· Unplug and remove power supply cord from this product before cleaning.
· The batteries used in this product may present a re or chemical burn hazard if mistreated. Do
not disassemble,heat above 100°C (212°F) or incinerate.
WARNING
• To reduce the risk of burns, re, electric shock or injury to persons:
• This appliance is for household use only.
• An appliance should never be left unattended when it’s plugged in, except when charging a
rechargeable appliance.
• Close supervision is necessary when this appliance is used by, on, or near children or persons
with special needs or certain disabilities.
• Use this appliance only for its intended use as described in this manual.
• Keep the cord away from heated surfaces.
• Never operate this appliance if it has a damaged cord or plug, if it is not working properly, if it
has been dropped or damaged, or if it has been dropped into water.
• Never drop or insert any object into any of the appliance’s openings.
• Do not use outdoors or operate where aerosol (spray) products are being used,or where oxygen
is being administered.
• Always store this appliance and cord in a moisture-free area. Do not store it in temperatures
exceeding 60°C(140°F)
• Make sure the cord is disconnected from the groomer stand when storing.
• Do not use this appliance with a damaged or broken cutter unit, as injury may occur. Always
make sure blades are aligned properly.
• Do not use an extension cord or a voltage converter with this appliance.
• Do not wrap the cold around the appliance.
• The power unit is intended to be correctly oriented in a vertical or oor mount position.
7

8ENGLISH
• WARNING: For the purposes of recharging the battery, only use the detachable supply unit
provided with this appliance.
• The appliance is only to be used with the power supply unit provided with the appliance.
• This appliance contains batteries that are non-replaceable.
• The battery must be removed from the appliance before it is scrapped
• The appliance must be disconnected from the supply mains when removing the battery
• The battery is to be disposed of safely.
• Only remove the rechargeable battery when you are intending to discard the appliance and you
have the rechargeable battery removed by a professional.
USAGE INSTRUCTIONS
CHARGING YOUR PERSONAL GROOMER
Before using your personal groomer for the rst time, charge for 14-16 hours.
• Make sure the product is switched off.
• Insert the small plug into the product charge connector and put the USB cable to an adaptor
5V 1A in any 100-240V AC outlet.
• During charging, the indicator will be red color ,once full charged around 2 hours, then the
indicator light will be off from red color.
• After charging, remove the adaptor from the wall outlet and pull the small plug out of the
product.
Your appliance cannot be overcharged. However if the product is not going to be used for an
extended period of time (2-3 months), unplug it from the mains and store. Fully recharge your
appliance when you would like to use it again. To preserve battery life, let them run out every 6
months then recharge for 14-16 hours.
BEFORE YOU BEGIN
Always comb your beard or moustache with a ne comb before you start trimming.
ATTACHING AND REMOVING THE GUIDE COMBS
• With the trimmer blade facing away from you. Slide the guide comb on top of the full size trim-
mer attachment and click into position.
• With the trimmer blade facing away from you , carefully push the guide comb away from the
trimmer blade.
NOTICE: Always make sure that the arrow should be alignment before attaching the guide combs
to trimmer attachments . (Fig.1)

9
ENGLISH
(Fig.1)
Table1. Precision Trimmer
Setting Remaining hair lenght (mm)
10,5
21,0
31,5
42,0
52,5
63,0
73,5
84,0
94,5
10 5,0
11 5,5
12 6,0
13 6,5
14 7,0
15 7,5
16 8,0
17 8,5
18 9,0
19 9,5
20 10,0

10 ENGLISH
Table2. Full size trimmer
Setting Remaining hair lenght (mm)
13,0
25,0
37,0
49,0
511,0
613,0
715,0

11
ENGLISH
TRIMMING EDGE OF SIDEBRUNS (Diagram 1. Attachement 4)
• Hold the personal groomer with full size trimmer attachment facing you.
• Start with edge of sideburn, and with the trimmer blades resting lightly against your skin. Use
motions towards edge of sideburn line to trim to desired locations in facial area.
TRIMMING THE NAPE OF YOUR NECK (Diagram 2 - Diagram 3. Attachement 3/4)
Note: You will need a hand mirror for this operation if performing it alone .
• Before you begin, attach the precision trimmer attachment.
• Use your ngers to lift the hair at the base of your head up off the neck. Your index nger should
be covering the roots of the hairs you are lifting to prevent accidental removal by the personal
groomer.
• Using your other hand, hold the personal groomer to the base of your neck with the cutting unit
facing up, and move the personal groomer up the length of the neck until it touches your nger
covering the hair roots at the base of your head.
• Be sure to move the unit slowly when performing this operation and to keep the hair roots at the
base of your head out of the way of the trimmer.
USING THE MINISCREEN SHAVER (Diagram 4. Attachement 7)
• Attach the mini Screen shaver.
• Hold the groomer so the Mini Screen gently touches your face in a 45 degree angle.
• Use short,well-controlled movements to shaver around your beard or moustache.Use your free
hand to scratch your skin. This encourages the hair to stand upright, making it easier to shave.
NOTE: The Mini Screen shaver was designed to shave the detail areas around your beard/mous-
tache/sideburns. It was not designed to shave your entire face. For a close comfortable shave,
guaranteed, use one of electric shavers.
TO REMOVE HAIR FROM NOSE AND EAR (Diagram 5 & 6. Attachement 5 )
• Attach the nose trimmer attachment.
• Insert the personal groomer gently into nostril or ear.
• Gently move the groomer in and out of the nostril or ear and at the same time rotate.
• Avoid inserting the cutting unit more than 6mm into your nostril or ear .
USING THE DETAIL TRIMMER (Diagram 7. Attachement 14)
• Attach the detail trimmer.
• Gently move the groomer to create a variety of shapes you need.
• It also can trim nose and ear trimmer but avoid inserting the cutting unit more than 6mm into
your nostril or ear.

12 ENGLISH
TO REMOVE HAIR FROM EYEBROWS (Diagram 8. Attachement 8)
• Attach the nose trimmer attachment.
• Gently guide cutting unit to stray, unwanted hairs along the eyebrow line or protruding from
the eyebrow itself.
• To remove the hairs completely lower onto the skin and move over desired area.
• Use slow and well-controlled movements.
ATTACHING AND REMOVING THE TRIMMER COMB ATTACHMENT
NOTE: Always ensure the personal groomer is switched off before changing any attach-
ments.
• To remove, hold the personal groomer with one hand and turn the trimmer head anti-
clockwise with the other.
• To attach, hold the personal groomer with one hand and turn the trimmer head clockwise
with the other.
TIPS FOR BEST RESULTS
• Remove trimmer comb attachment if you are: dening hairline edges such as sideburns.
Trimming the nape of your neck, trimming your beard line on front of neck .
CARE FOR YOUR PERSONAL GROOMER
Care for your product to ensure a long lasting performance. We recommend that you clean
your groomer after each use.
The easiest and the most hygienic way to clean the groomer is by rinsing the product head
after use with warm water. Always keep the trimmer in the “off” position when the shaver is
not in use.
AFTER EACH USE
• Rinse the accumulated hair from the cutters and shake off excess water. Alternatively, use
a brush.
• Gently tap on a at surface to remove hair particles, and brush the remaining hairs away.
• Place one or two drops of cutter oil or sewing machine oil on the blades. Turn the clipper
on to distribute the oil evenly, wipe off any excess oil.
• Wipe the main unit with a damp cloth and dry immediately.
Note: Ensure that the groomer is turned off when applying the oil or rinsing under the tap.
CLEANING CAUSIONS
• The guide comb attachment and trimmer blade may be removed from the product for
cleaning.
• Cleaning should only be done with a soft brush, such as the brush supplied with the pro-
duct. Attachement #9.
• Use the light-grade oil supplied or sewing machine oil on the blades. Attachement #10.
• Do not use harsh or corrosive cleaners on the units or their blades.

13
STORAGE
• Do not wrap the cord of the charging adaptor around the appliance.
DANGER
To reduce the risk of electric shock:
• Do not reach for an appliance that has fallen into water. Unplug it immediately.
• Do not place or drop into water or other liquid.
• Do not place or store this appliance where it can fall or be pulled into a tub or sink.
• Except when charging, always unplug this appliance from the electrical outlet immediately
after using.
• Unplug this appliance before cleaning it.
• WARNING: Keep the appliance dry.
• The appliance can be used by children aged from 3 years under supervision.
• The appliance can be used by children aged from 8 years and above and persons with
reduced physical, sensory or mental capabilities or lack of experience and knowledge if they
have been given supervision or instruction concerning use of the appliance in a safe way
and understand the hazards involved. Children shall not play with the appliance.
• Cleaning and user maintenance shall not be made by children without supervision.-
• For the purposes of recharging the battery, only use the detachable supply unit provided
with this appliance.
• The appliance is only to be used with the power supply unit provided with the appliance.
• This appliance contains batteries that are non-replaceable.
• The battery must be removed from the appliance before it is scrapped.
• The appliance must be disconnected from the supply mains when removing the battery.
• The battery is to be disposed of safely.
• Only remove the rechargeable battery when you are intending to discard the appliance and
you have the rechargeable battery removed by a professional.
• Suitable for cleaning under open water tap-Suitable for use in a bath or shower.
• Detach the hand-held part from the supply cord before cleaning it in water.
• The parts that have to be xed must be installed so that they cannot fall into water.
WARNING
To reduce the risk of burns, re, electric shock or injury to persons:
• This appliance is for household use only.
• An appliance should never be left unattended when it’s plugged in, except when charging a
rechargeable appliance.
• Close supervision is necessary when this appliance is used by, on, or near children or
persons with special needs or certain disabilities.
• Use this appliance only for its intended use as described in this manual.
ENGLISH

CASTELLANO
14
• Keep the cord away from heated surfaces.
• Never operate this appliance if it has a damaged cord or plug, if it is not working properly, if it
has been dropped or damaged, or if it has been dropped into water.
• Never drop or insert any object into any of the appliance’s openings.
• Do not use outdoors or operate where aerosol (spray) products are being used, or where
oxygen is being administered.
• Always store this appliance and cord in a moisture-free area. Do not store it in temperatures
exceeding 60°C(140°F).
• Do not use this appliance with a damaged or broken cutter unit, as injury may occur. Always
make sure blades are aligned properly.
• Do not use an extension cord or a voltage converter with this appliance.
• Do not wrap the cord around the appliance.
• The power unit is intended to be correctly oriented in a vertical or oor mount position.
Battery Removal
NOTE: Always recycle or properly dispose of batteries according to Local and State requi-
rements.
1. Unplug groomer from outlet to avoid risk of electrical shock.
2. Remove rear groomer cover by rst prying the rubber panel from the product with a at head
screwdriver.
3. Next, pry the back panel from the product with a at head screwdriver. This will expose the
batteries.
4. With wire cutters, clip the wires leading to the batteries.
5. Remove the batteries from the product .Contact your local authorities for proper disposal.
CAUTION: THESE BATTERIES MUST BE RECYCLED OR DISPOSED OF IN ACCORDANCE
WITH STATE AND LOCAL REGULATIONS.
Do not burn or mutilate, as they may burst or release toxic materials. Do not short-circuit, as this
may cause burns.
Specications
• Waterproof IPX5
• Power Consumption: 5W
• DC 5V 1A
• Motor Voltage: 3.2V
• Battery Capacity: Li-ion battery 500mAh x 1
• Charging Time: 2 hours
• Working Time: 1 hour
ENGLISH

CASTELLANO 15
This marking indicates that this product should not be disposed with other
household wastes throughout the EU.To prevent possible harm to the en-
vironment or human health from uncontrolled waste disposal,recycle it res-
ponsibly to promote the sustainable reuse of material resources.To return
your used device,please use the return and collection systems or contact the retailer
where the product was purchased.They can take this product for environmental safe
recycling.
ENGLISH

CASTELLANO
16
MANUAL DE INSTRUCCIONES
Muchas gracias por conar en nuestros productos. Para una correcta puesta en
marcha y funcionamiento del producto lea atentamente el manual antes de usar el
aparato.
Es muy importante que conserve este manual de instrucciones para encontrar res-
puesta a futuras consultas.
SET DE CUIDADO 7 EN 1
TMHC121

CASTELLANO 17
INDICE
Características...........................................................................................18
Instrucciones de seguridad......................................................................19
Instrucciones de uso.................................................................................20
SET DE CUIDADO 7 EN 1
TMHC121

CASTELLANO
18
CARACTERÍSTICAS
1. Botón ENCENDIDO/APAGADO
2. Indicador del nivel de batería
3. Accesorio de ajuste de precisión
4. Accesorio de corte de tamaño completo
5. Accesorio para naríz
6. Cable de carga USB
7. Accesorio de afeitadora Micro
8. Accesorio de recorte de cejas
9. Cepillo de limpieza
10. Aceite lubricante
11. Peine largo
12. Peine de guía de corte (3-15mm)
13. Peine de guía de corte (0.5-10mm)

CASTELLANO 19
INSTRUCCIONES DE SEGURIDAD
Al usar un producto eléctrico, siempre se deben seguir precauciones básicas de seguri-
dad, incluyendo las siguientes:
Lea todas las instrucciones antes de usar este producto.
PELIGRO
Para reducir el riesgo de descarga eléctrica:
• No intente usar un producto con cable que tenga agua adentro. Desconecte inmediatamente.
• El cable de alimentación y los accesorios conectados a él no son para sumergir o para usar en
la ducha.
• No use un cable de extensión con este producto.
• No coloque ni almacene el producto mientras esté enchufado, tampoco almacene donde pueda
caerse o ser arrastrado a una bañera o fregadero. No deje caer agua u otro líquido al producto
mientras esté enchufado.
• Siempre desconecte este producto de la toma de corriente inmediatamente después de (re)cargar.
• Desenchufe y retire el cable de alimentación de este producto antes de limpiarlo.
• Las baterías usadas en este producto pueden presentar un riesgo de incendio o quemadura
química si se tratan mal. No las desarme ni caliente por encima de 100°C (212°F).
PRECAUCIÓN
Para reducir el riesgo de quemaduras, incendios, descargas eléctricas o lesiones a personas:
• Este electrodoméstico es solo para uso doméstico.
• Un electrodoméstico nunca se debe dejar desatendido cuando está enchufado, excepto cuando
se carga un dispositivo recargable.
• Se necesita la supervisión estricta de un adulto cuando este dispositivo sea utilizado cerca de
niños o personas con necesidades especiales o ciertas discapacidades.
• Use este aparato solo para su uso previsto como se describe en este manual.
• Mantenga el cable alejado de superficies calientes.
• Nunca utilice este electrodoméstico si tiene un cable o enchufe dañado. Tampoco utilice si no
funciona correctamente, si se ha caído o dañado, o si se ha caído al agua.
• Nunca deje caer ni inserte ningún objeto en ninguna de las aberturas del electrodoméstico.
• No lo use al aire libre ni lo haga funcionar donde se usan productos en aerosol (spray) o donde
se administra oxígeno.
• Guarde siempre este electrodoméstico y el cable en un área libre de humedad. No lo guarde en
lugares con temperaturas superiores a 60°C (140°F).
•Asegúrese de que el cable esté desconectado del soporte de la máquina de afeitar cuando lo
guarde.
• No use este electrodoméstico con una unidad de corte dañada o rota, ya que se puede ocasio-
nar lesiones. Siempre asegúrese de que las cuchillas estén alineadas correctamente.
• No use un cable de extensión o un convertidor de voltaje con este aparato.
• No enrolle el cable alrededor del aparato.

CASTELLANO
20
ADVERTENCIAS:
• El aparato solo se debe utilizar con la unidad de alimentación provista con el mismo.
• Este electrodoméstico contiene baterías que no son reemplazables.
• La batería debe retirarse del dispositivo antes de que se deseche.
• El aparato debe estar desconectado de la red de suministro al extraer la batería.
• La batería debe eliminarse de forma segura.
• Sólo quite la batería recargable cuando tenga la intención de desechar el aparato y deje que un
profesional la retire.
INSTRUCCIONES DE USO
CARGANDO SU AFEITADORA PERSONAL
• Asegúrese de que el producto esté apagado.
• Inserte el enchufe pequeño en el conector de carga del producto y coloque el cable USB en un
adaptador de 5V 1A en cualquier toma corriente de CA de 100-240V.
• Durante la carga, el indicador será de color rojo. Una vez cargada por completo (después de 2
horas) la luz indicadora se apagará.
• Después de cargar, retire el adaptador de la toma de corriente de la pared y desconecte el
enchufe pequeño del producto.
Su electrodoméstico no puede ser sobrecargado. Sin embargo, si el producto no se va a usar du-
rante un período prolongado (2-3 meses), desenchúfelo de la red eléctrica y guárdelo. Recargue
completamente su electrodoméstico cuando desee volver a utilizarlo.
Para preservar la duración de la batería, déjelos agotarse cada 6 meses y luego recargue duran-
te 14-16 horas.
ANTES DE COMENZAR
Siempre peine su barba o bigote con un peine no antes de comenzar a recortar.
¿CÓMO CONECTAR Y QUITAR LOS PEINES GUIA?
• Con la cuchilla cortadora alejada, deslice el peine guía sobre el accesorio de recorte de tamaño
completo y haga clic en su posición.
• Con la hoja de la afeitadora alejada, empuje con cuidado el peine guía alejándolo de la hoja de
la afeitadora.
NOTA: Siempre asegúrese de que la echa esté alineada antes de colocar los peines guía y
accesorios de la afeitadora (Fig.1).

CASTELLANO 21
(Fig.1)
Tabla1. Afeitadora de precisión
C o n g u r a c i o n e s ( m m . ) Tamaño del cabello (mm)
1 0,5
2 1,0
3 1,5
4 2,0
5 2,5
6 3,0
7 3,5
8 4,0
9 4,5
10 5,0
11 5,5
12 6,0
13 6,5
14 7,0
15 7,5
16 8,0
17 8,5
18 9,0
19 9,5
20 10,0
This manual suits for next models
1
Table of contents
Languages:
Other TM Electron Grooming Kit manuals


