tobeone REDON RX9300 Series User manual

-1-
USER’S MANUAL
TREADMILL
RX9300/RX9000 Series

-2-
TABLE OF CONTENTS
1. Getting Started
2. Installation
2.1 Precautions
2.2 Name of each part
2.3 How to install
2.4 Grounding Instructions
2.5 Centering the Belt
3. Using the treadmill
3.1 Display Console
3.2 Using Workouts
4. Service and Technical Data
5. Specifications
6. Parts List

-3-
1. GETTING STARTED
[
[I
IM
MP
PO
OR
RT
TA
AN
NT
T
S
SA
AF
FE
ET
TY
Y
I
IN
NS
ST
TR
RU
UC
CT
TI
IO
ON
NS
S]
]
R
Re
ea
ad
d
a
al
ll
l
i
in
ns
st
tr
ru
uc
ct
ti
io
on
n
b
be
ef
fo
or
re
e
u
us
si
in
ng
g
t
th
he
e
t
tr
re
ea
ad
dm
mi
il
ll
l
DANGER
To reduce the risk of electrical shock. Always unplug this REDON
before cleaning or attempting any maintenance activity.
WARNING
To reduce the risk of burns, fire, electric shock or injury, it is imperative to connect
each product to a properly grounded electrical outlet.
To disconnect, turn power OFF at the ON/OFF switch, then remove plug from
electrical outlet.
Never operate a REDON if it has damaged power cord or electrical plug, or if is has
been dropped, damaged, or even partially immersed in water. Contact TOBEONE
CO., LTD Customer Support Services.
Position this product so the power cord plug is accessible to the user.
Keep the power cord away from heated surfaces. Do not pull the equipment by the
power cord or use the cord as a handle. Do not run the power cord on the floor under
or along the side of the treadmill.
If the electrical supply cord is damaged it must be replaced by the manufacturer, an
authorized service agent, or a similarly qualified person to avoid a hazard.
Do not use this product in areas where aerosol spray products are being used or
where oxygen is being administered. Such substances create the danger of
combustion and explosion.
Always follow the console instructions for proper operation.
Close supervision is necessary when used by, on, or near children, invalids or
disabled persons.
Do not use this product outdoors, near swimming pools or in areas of high humidity.
Never operate a REDON with the air openings blocked. Keep air openings free of
lint, hair or any obstructing material.
Never insert objects into any opening in this product. If an object should drop inside,
turn off the power, unplug the power cord from the outlet and carefully retrieve it. If
the item cannot be reached, contact TOBEONE CO., LTD Customer Support
Services.
Never place liquids of any type directly on the unit, except in an accessory tray or

-4-
holder. Containers with lids are recommended.
Wear shoes with rubber or high-traction soles. Do not use shoes with heels. Leather
soles. Cleats or spikes. Make sure no stones are embedded in the soles.
Keep all loose clothing, shoelaces and towelsaway from moving parts.
Do not use this product in bare feet.
Do not reach into or underneath the unit, or tip it on its side during operation.
Keep the area 2 meters by 1meter behind the treadmill clear of any obstructions,
including walls, furniture, and other equipment.
Handrails may be held to enhance stability as needed, but are not for continuous
use.
Never mount or dismount the treadmill while the running belt is moving. Use the
handrails whenever additional stability is required. In case of an emergency, such as
tripping, the handrails should be grabed and the user should place his/her feet on the
side platforms.
Never walk or jog backwards on the treadmill.
Use this appliance only for its intended use as described in this manual. Do not use
attachments not recommended by the manufacturer.
-5-
2. INSTALLATION
2.1 Precautions
The treadmill should be installed on a flat place with even leveling. If the treadmill is
placed on an unstable pad or carpet, the belt may not be correctly arranged, and will be
a cause to be overloaded. In such a case, be sure to use the machine after you place
the machine on a firm and flat object such as plywood.
Make sure that enough space is secured in front of the treadmill so that you may find it
easy to operate the power switch.
Please be sure to use a standardized plug which should be grounded.
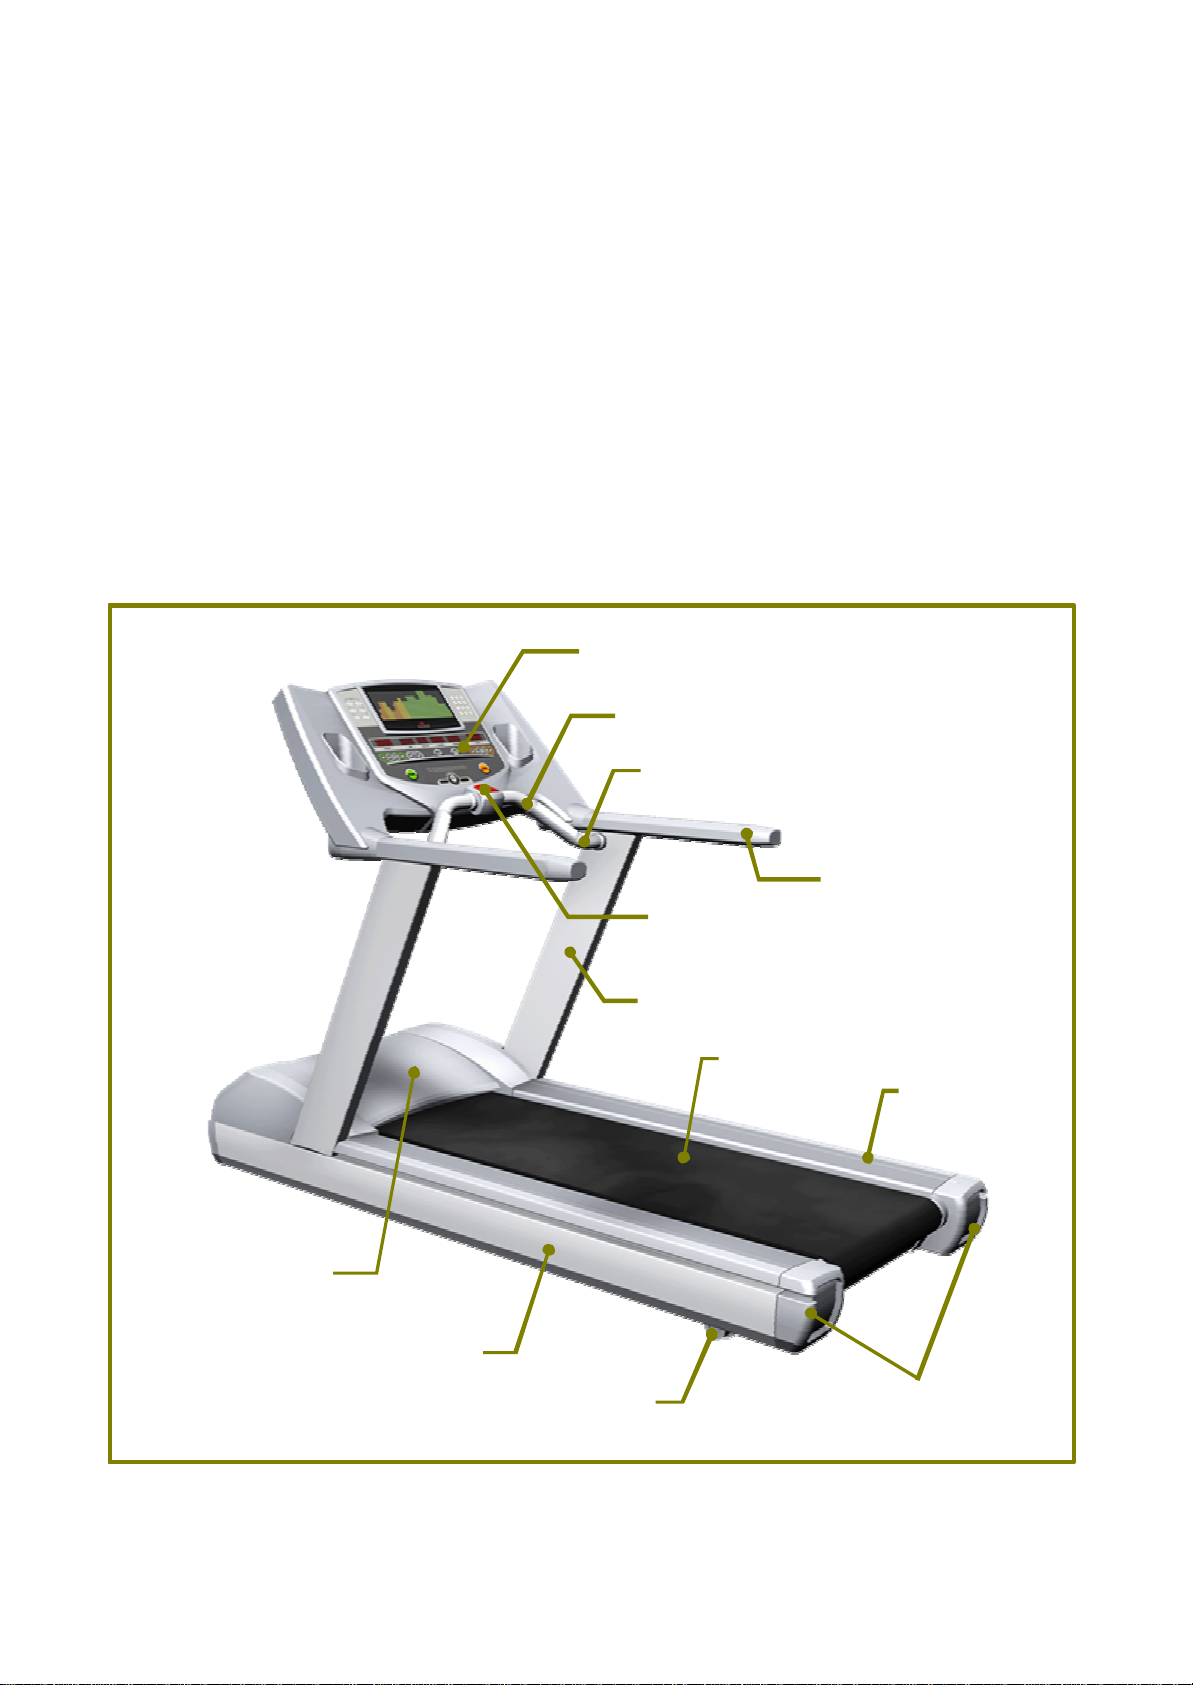
2.2 Name of each part
Foot
Foot Rail
Console Display
Handrail
Touch Heart Rate Sensor
Running Belt
Support
Emergency Key
Motor Cover
Base
Belt Adjusting
Screw
Front Handrail

-6-
2.3 How to install
Please set a suitable place to install REDON according to the following requirements :
(1) A place where the base is flat.
(if the base is not evencondition, it may cause vibrations).
(2) Please place the power cord at a secluded place.
(3) Open the motor cover, insert the support and lock with M12screw.
Please throw the cable to support as follow pictures.
(4) Assemble the handrail with support. Pull out the main cable from right support
throughout the handrail.
(4) Assemble front handrail including Emergency Key and Touch Heart Rate Sensor.
Pull out cables from left Support throughout the left Handrail.
(5) Assemble console back panel by fixing Console Support to Handrail. Cover and
assemble console front panel.
Cation : Before cover console front panel connect Emergency Key cable and Touch
Heart Rate Sensorcable from handrail to console board
(6) Turn the power On and check treadmilloperation

-7-
Console
Support
2.4 Grounding Instructions
This product must be grounded. If it should malfunctions or breaks down, proper
grounding provides a path of least resistance for the electric current, which reduces the
risk of shock to anyone touching or using the equipment. Each unit is equipped with an
electrical cord, which includes an equipment grounding conductor and a grounding plug.
The plug must be inserted into an outlet that has been properly installed and grounded
in accordance with all local codes and ordinances.
DANGER :A risk of electrical shock may result from improper connection of the
equipment-grounding conductor. Check with a qualified electrician if in doubt as to
proper grounding technique. DO NOT modify the plug provided with the product. If it will
not fit an electrical outlet, have a proper outlet installed by a qualified electrician.
This product is for use on a circuit having an nominal rating of 240 volts and is factory
equipped with a specific cord and plug to permit connection to a proper electric circuit.
Make sure that the product is connected to an outlet having the same configuration as
the plug. No adapter should be used with this product. If the product must be
reconnected for use one a different type of electric circuit, the reconnection must be
made by qualified service personnel.
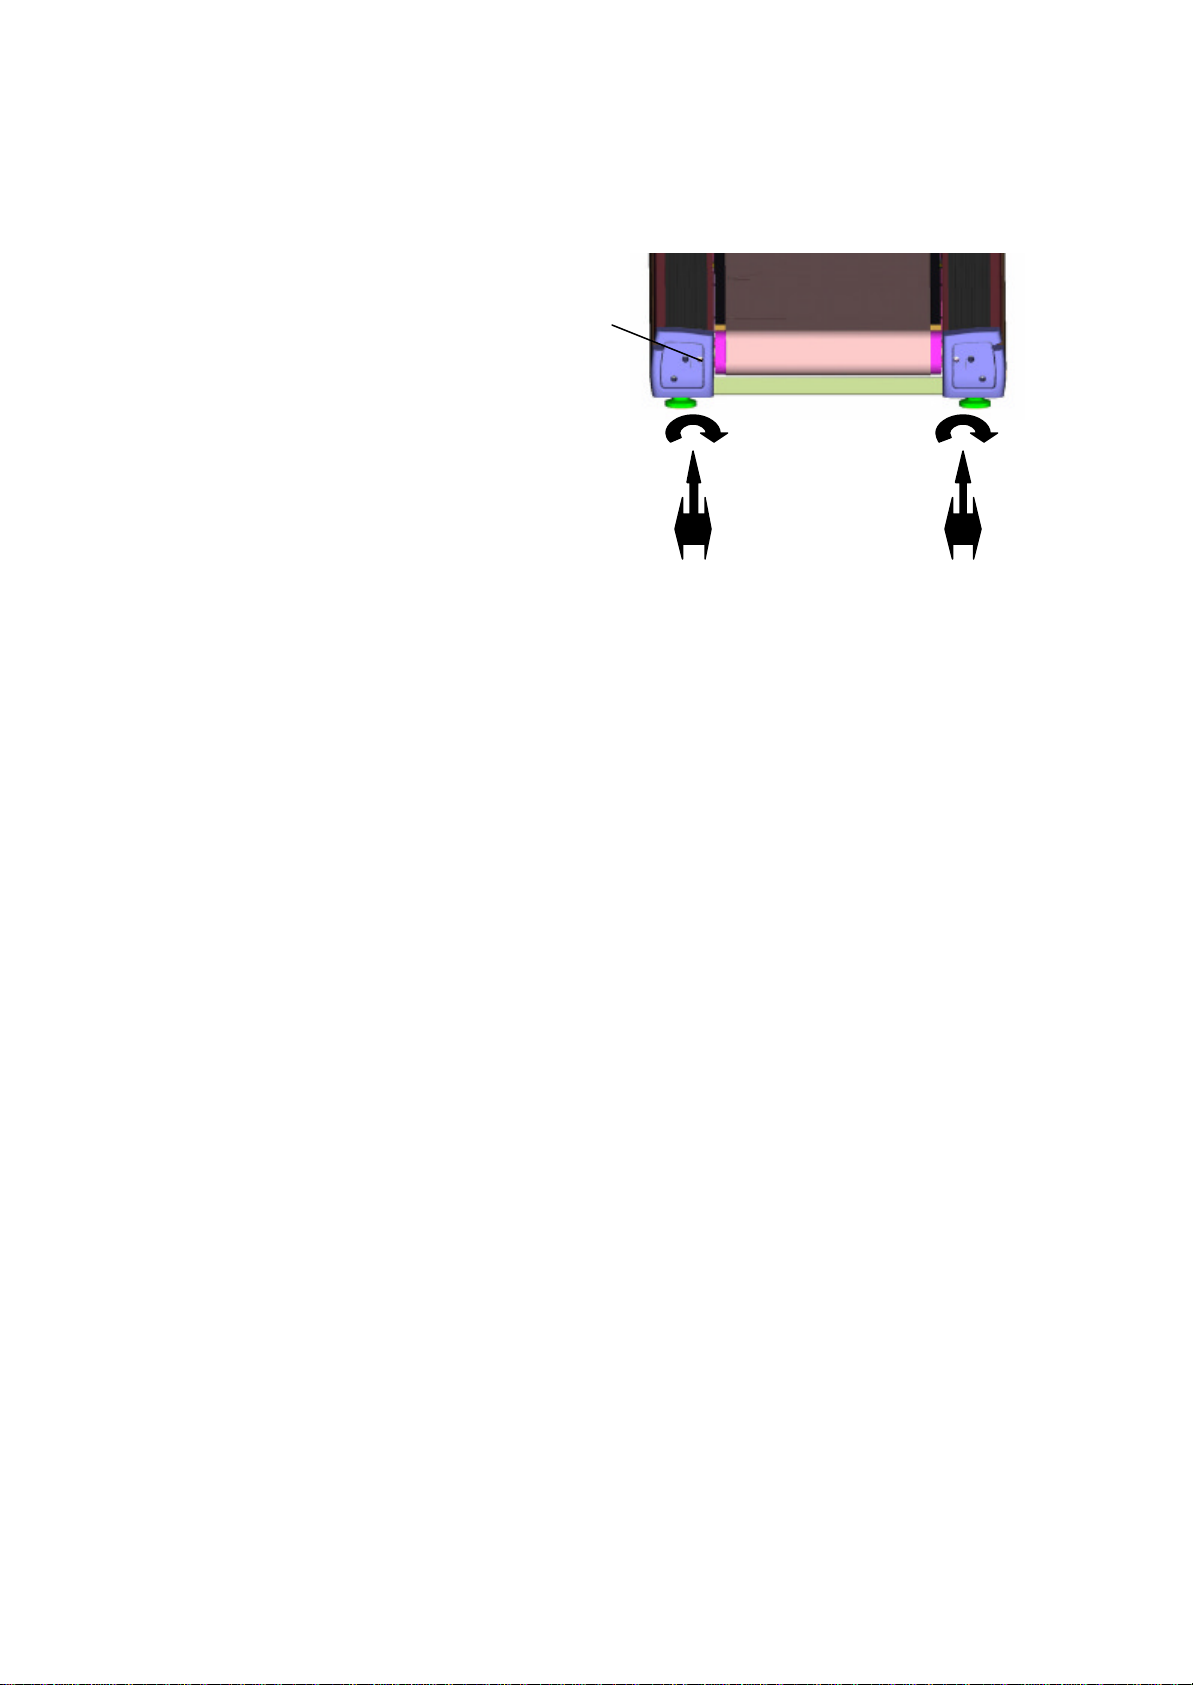
2.5 Centering the Belt
After the treadmill has been installed and leveled, the belt must be checked to confirm
proper tracking. First, plug the power cord into an appropriate outlet and turn the
treadmill ON.
The first person stands on the sides of the treadmill and straddles the belt, not standing
on it at this time. Press the Quick Start key and increase the speed to 4km/h using the
Speed up-arrow.
-8-
While the treadmill is running, if the striding belt moves to the right, the second person
turns the right tension bolt 1/4 turn clockwise and then turns the left tension bolt 1/4 turn
counter-clock-wise(see figure). This sets the striding belt tracking back to center of roller.
If the striding belt moves to the left, turn the
left tension bolt 1/4 turn clockwise and then
turn the right tension bolt 1/4 turn counter-
clockwise to start striding belt tracking back
to center of roller.
Repeat adjustments until striding belt
appears centered. Allow machine to
continue running for several minutes to
observed if tracking remains stabilized.
NOTE: Do not exceed one full turn of the
adjusting screws in either direction. If after one full turn the belt does not track properly,
contact Customer Support Services.
-9-
3. Using the Treadmill
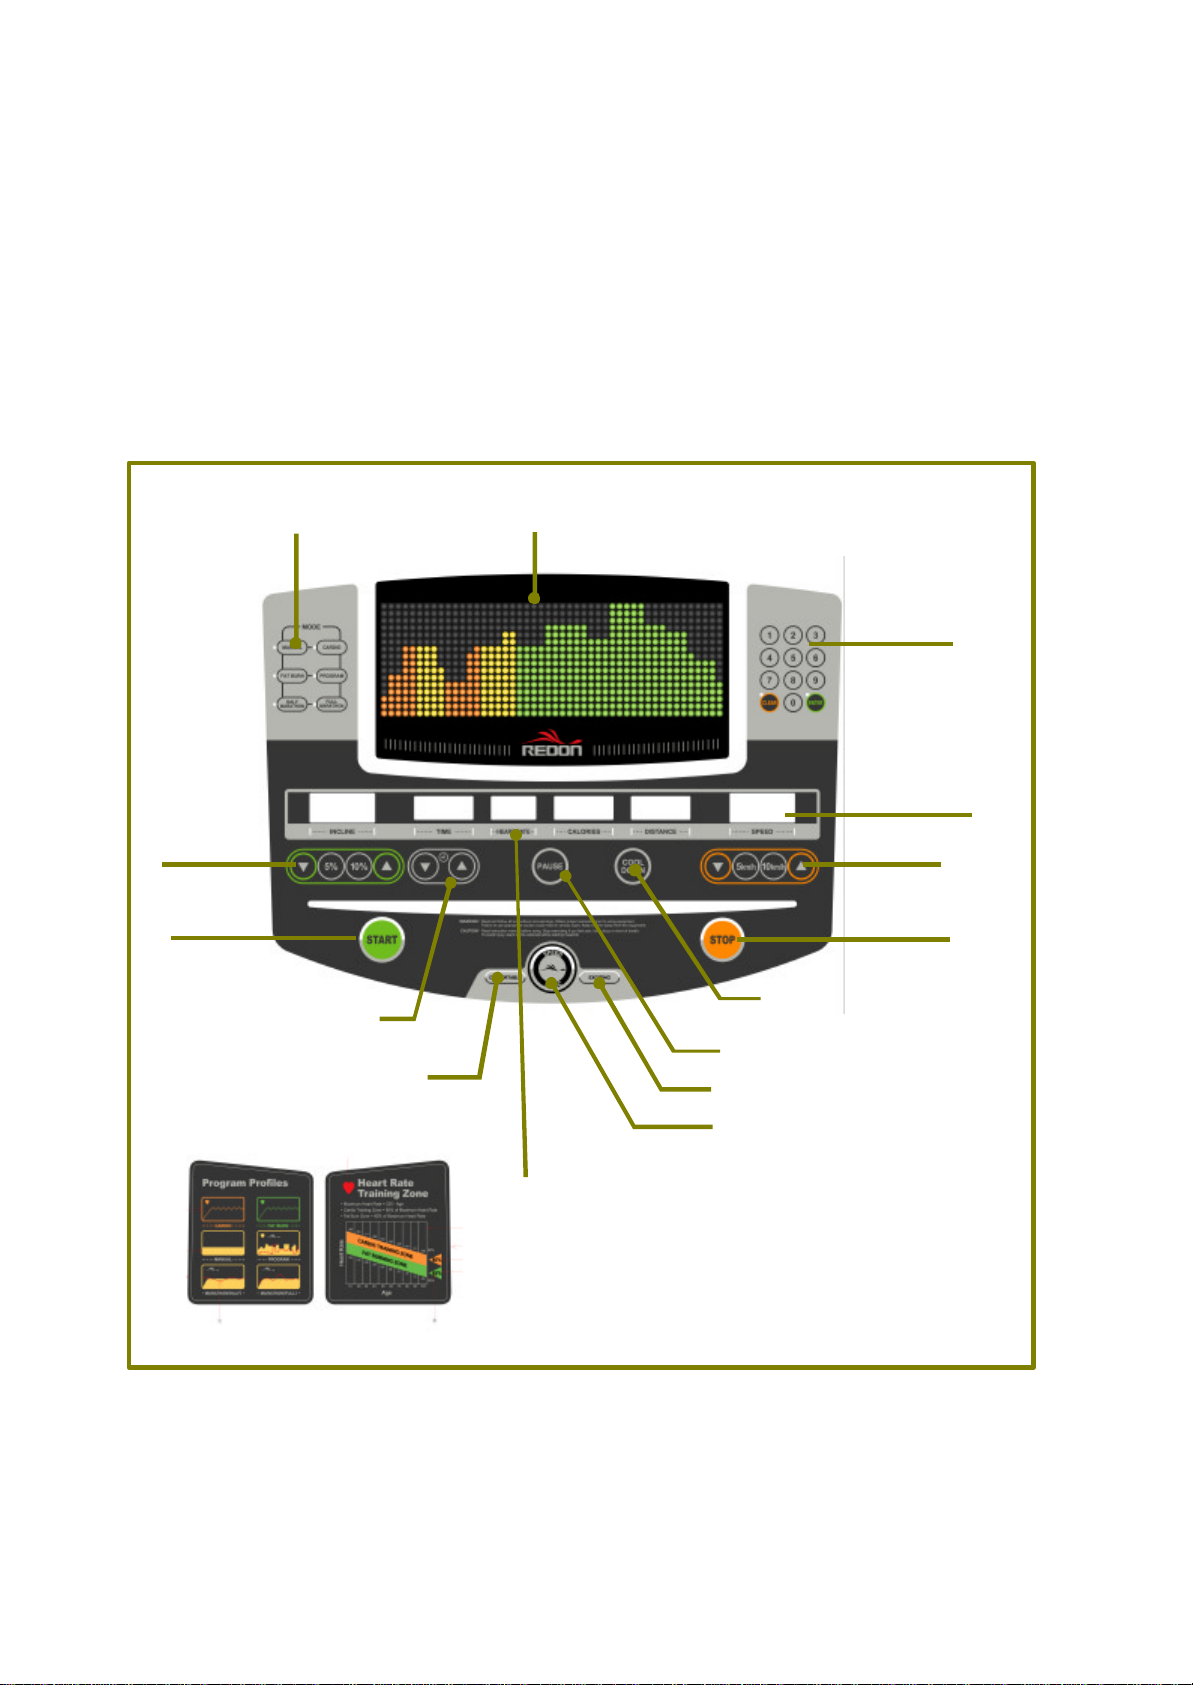
3.1 Display Console
The computerized display console is easy to use. It allows an individual to follow the
progress of a workout. The on-board computer allows a workout to be tailored to
individual fitness capabilities and goals while providing a unique means of measuring
fitness improvement from one workout to the next.
[ RX9300S / RX9300SR ]
④KEY PAD
②
NUMERICAL
WINDOW
⑤SPEED
⑩STOP
①
GRAPHICAL DISPLAY WINDOW
⑬WORKOUT MODE
⑪START
⑥INCLINE
⑧COOL DOWN
⑨
PAUSE
SPEED SYNC EXCITING
SPEED SYNC
COMFORTABLE
⑦TIME
⑫SPEED
③FOCUS KEY
-10 -
①WORKOUT PROFILE WINDOW
Displays a matrix of LED lights displaying the current position and the upcoming
terrain. While striding, the light columns move across the screen from right to left.
The higher the column of lights, the greater the incline and workout intensity..
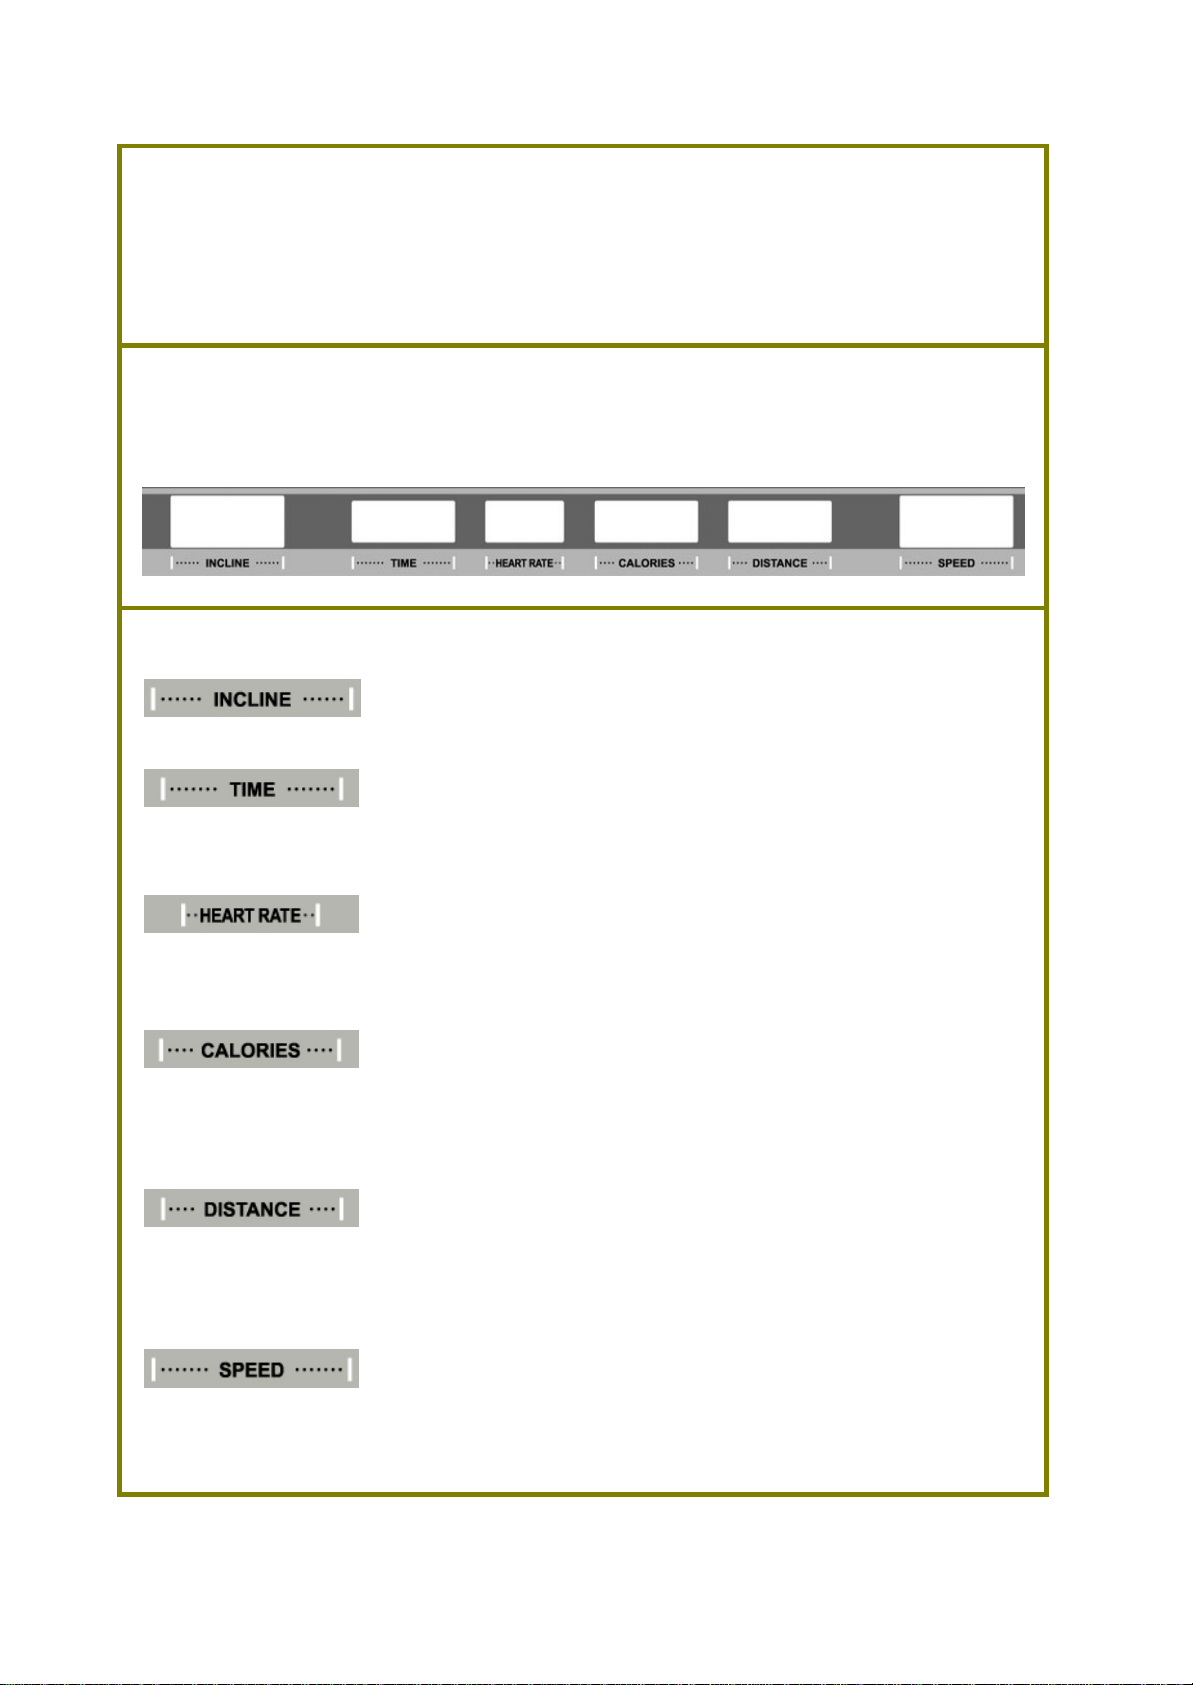
②MESSAGE WINDOW
Provides simple step-by-step instructions motivational messages.
Display :INCLINE TIME HEART RATE CALORIES DISTANCE SPEED
③FOCUS KEY
INCLINE FOCUS KEY : Pressing this key will display the
present incline in Workout Profile Window and easy to see the present incline.
TIME FOCUS KEY : During workout, pressing this key will
display the workout time or remained time in Workout Profile Window and easy to
see the present incline. Pressing this key when stop theTime Goal Workout start.
HEART RATE FOCUS KEY : Pressing this key will display
user’s heart rate in Workout Profile Window if heartrate detected and easy to see
the user’s Heart Rate
CALORIES FOCUS KEY : During workout, pressing this key
will display theworkout calories or remained calories in Workout Profile Window
and easy to see the Calories. Pressing this key when stop the Calories Goal
Workout start.
DISTANCE FOCUS KEY : During workout pressing this key
will display the workout distance or remained distance in Workout Profile Window
and easy to see the present Distance. Pressing this key when stop the Distance
Goal Workoutstart.
SPEED FOCUS KEY : Pressing this key will display the
present speed in Workout Profile Window and easy to see the present Speed

-11 -
④KEY PAD
?Numeric keys : Use these keys to enter exercise time,
difficulty level, belt speed, weight, distance, goal selection and
target heart rate.
?Clear Key : Press this key once to clear data not yet
entered. Press twice in succession while programming to reset
unit and beging the programming sequence again.
?Enter Key : This key is used to enter the data displayed in
the message center.
⑤SPEED
Press these keys to increase or decrease the belt
speed. The adjacent window above keys displays
the input. In addition, any of these keys may be
pressed to begin a workout or programming.
⑥INCLINE
Press these keys to increase or decrease the
incline of the treadmill deck. The adjacent window
above keys displays the input. In Auto Incline
Change mode, pressing ▲or ▼will continuously
incline increase or decrease and pressing same key one more will stop incline .
⑦TIME
Press these keys to increase or decrease the workout
time. The adjacent window above the keys displays the
input. In addition, any of these keys may be pressed to
begin a work-out or programming
⑧COOL DOWN
Begins an automatically customized cool-down protocol.
-12 -
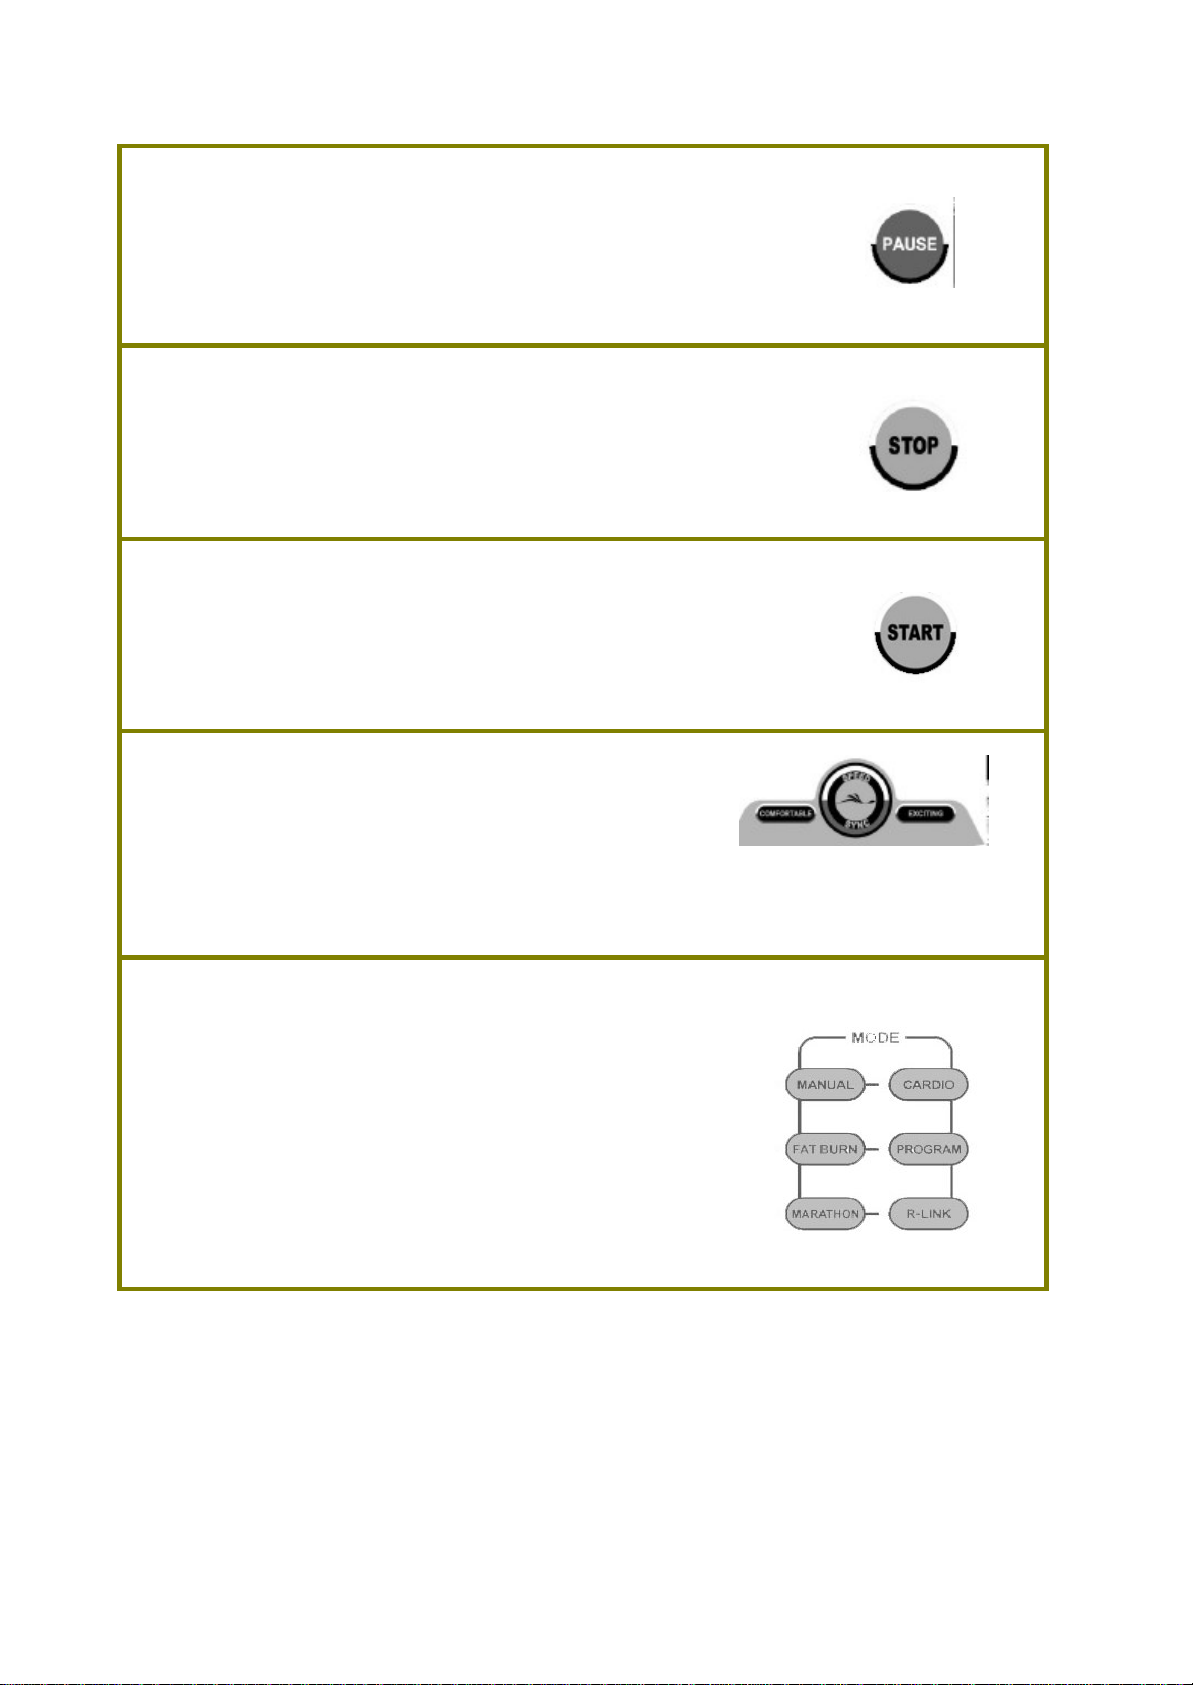
⑨PAUSE
Stops the belt and holds the current workout until resumed
when the Enter key is pressed or the maximum pause duration
is reached.
⑩STOP
Pressing this key will stop the striding belt and end the
current workout
⑪START
Allows user to quickly enter a manual workout with the press
of one key.
⑫SPEED SYNCTM
Press this key to use automatic speed control
system
Speed Sync Exciting : High speed variation using full speed limitation
Speed Sync Comfortable : Low speed variation using 10km/h speed limitation
⑬WORKOUT MODE
Press this key to choose workout mode.
One of MANUAL ( Goal workout), CARDIO
workout( 80% of a theoretical maximum heart rate), FAT
BURN workout (65% of a theoretical maximum heart
rate), MARATHON workout ( Full, Half, 10km/h, 5km/h)
and R-Link( wireless communication, Option) can be
selected
-13 -
3.2 Using Workouts
Selecting the REDON workout is as easy as pushing a key. The following are
preprogrammed workouts for this product.
QUICK START
is the fastest way to begin exercising, and allows the user to start a manual
workout by pressing a single key.
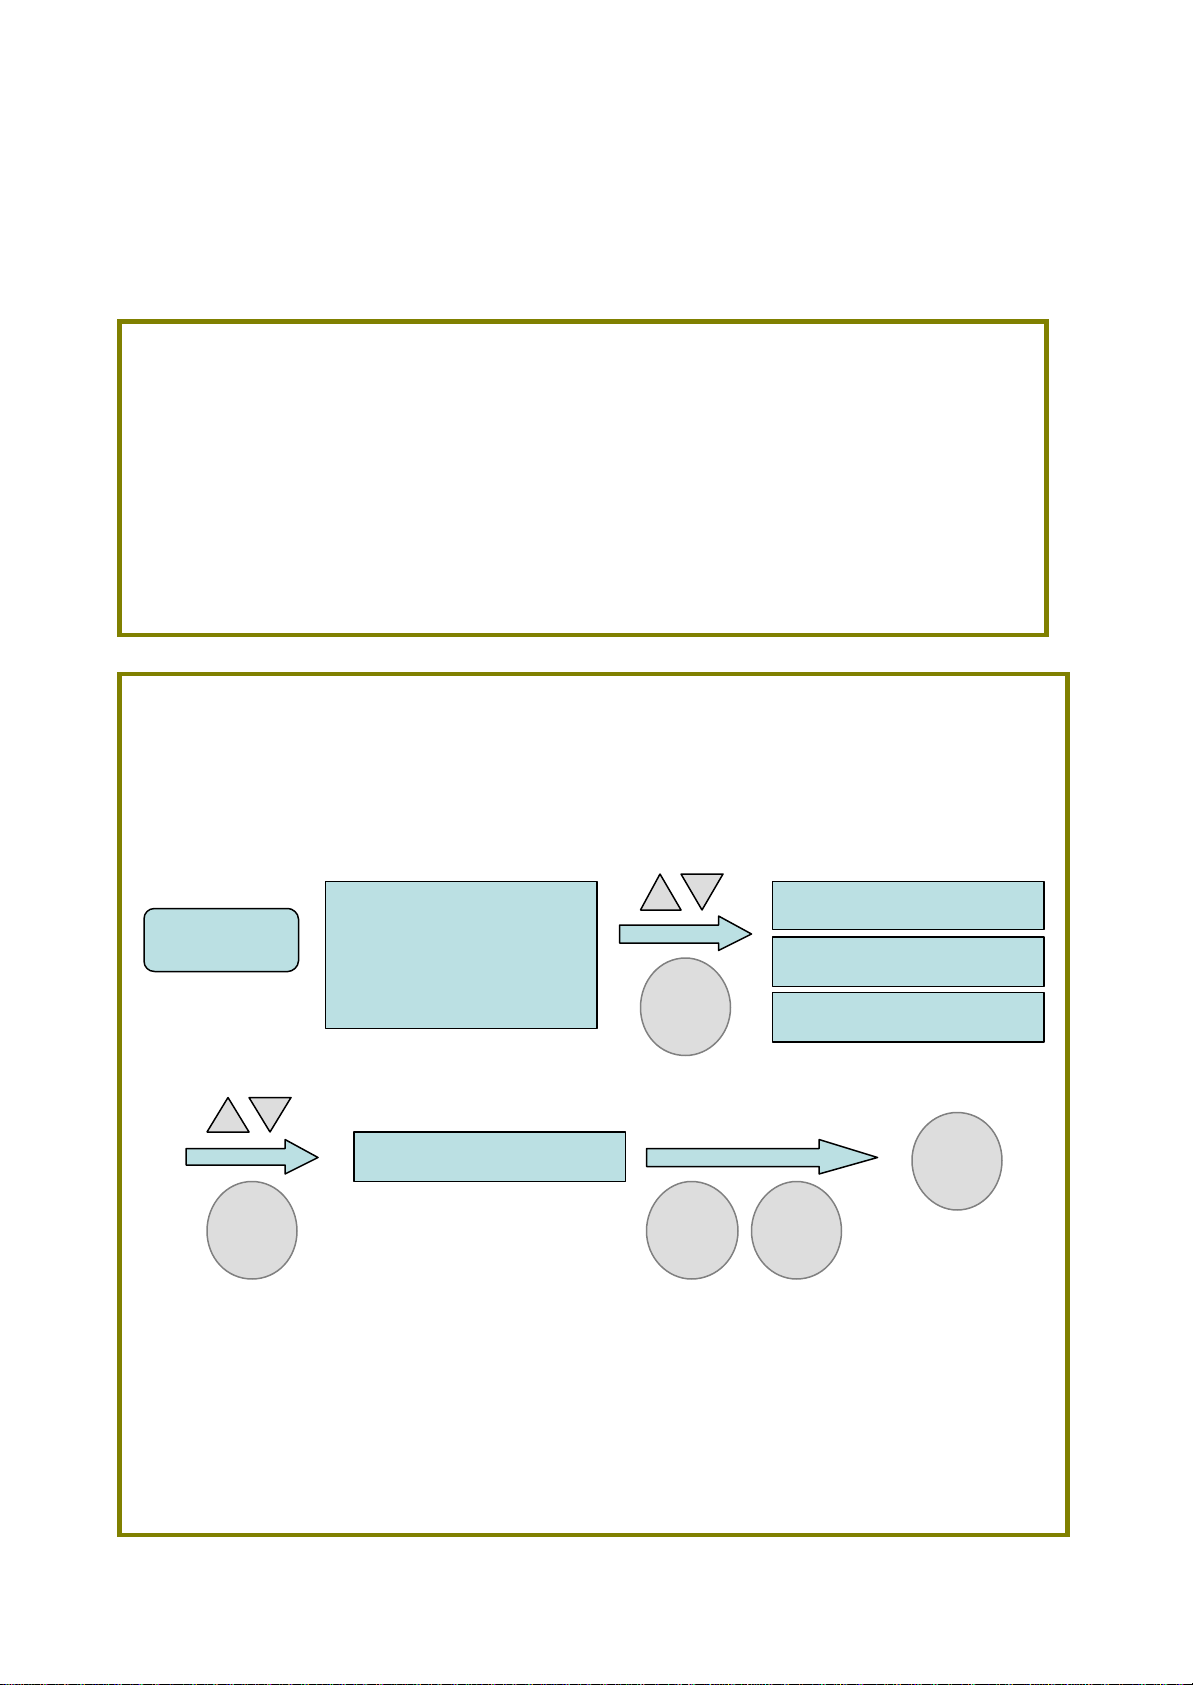
MANUAL MODE (GOAL Workout)
The trainer can define up to 3 different Goal workouts consisting of a pre-defined
incline, target calories or target time.
You can see the mark of Manual Mode in Workout Profile Window during goal
workout.
TIME GOAL
DISTANCE GOAL
CALORIES GOAL
MANUAL
SET TIME
SET DISTANCE
SET CALORIES
SET WEIGHT
Clear
Enter
Enter
Enter
Automatic weight
measuring
START
-14 -
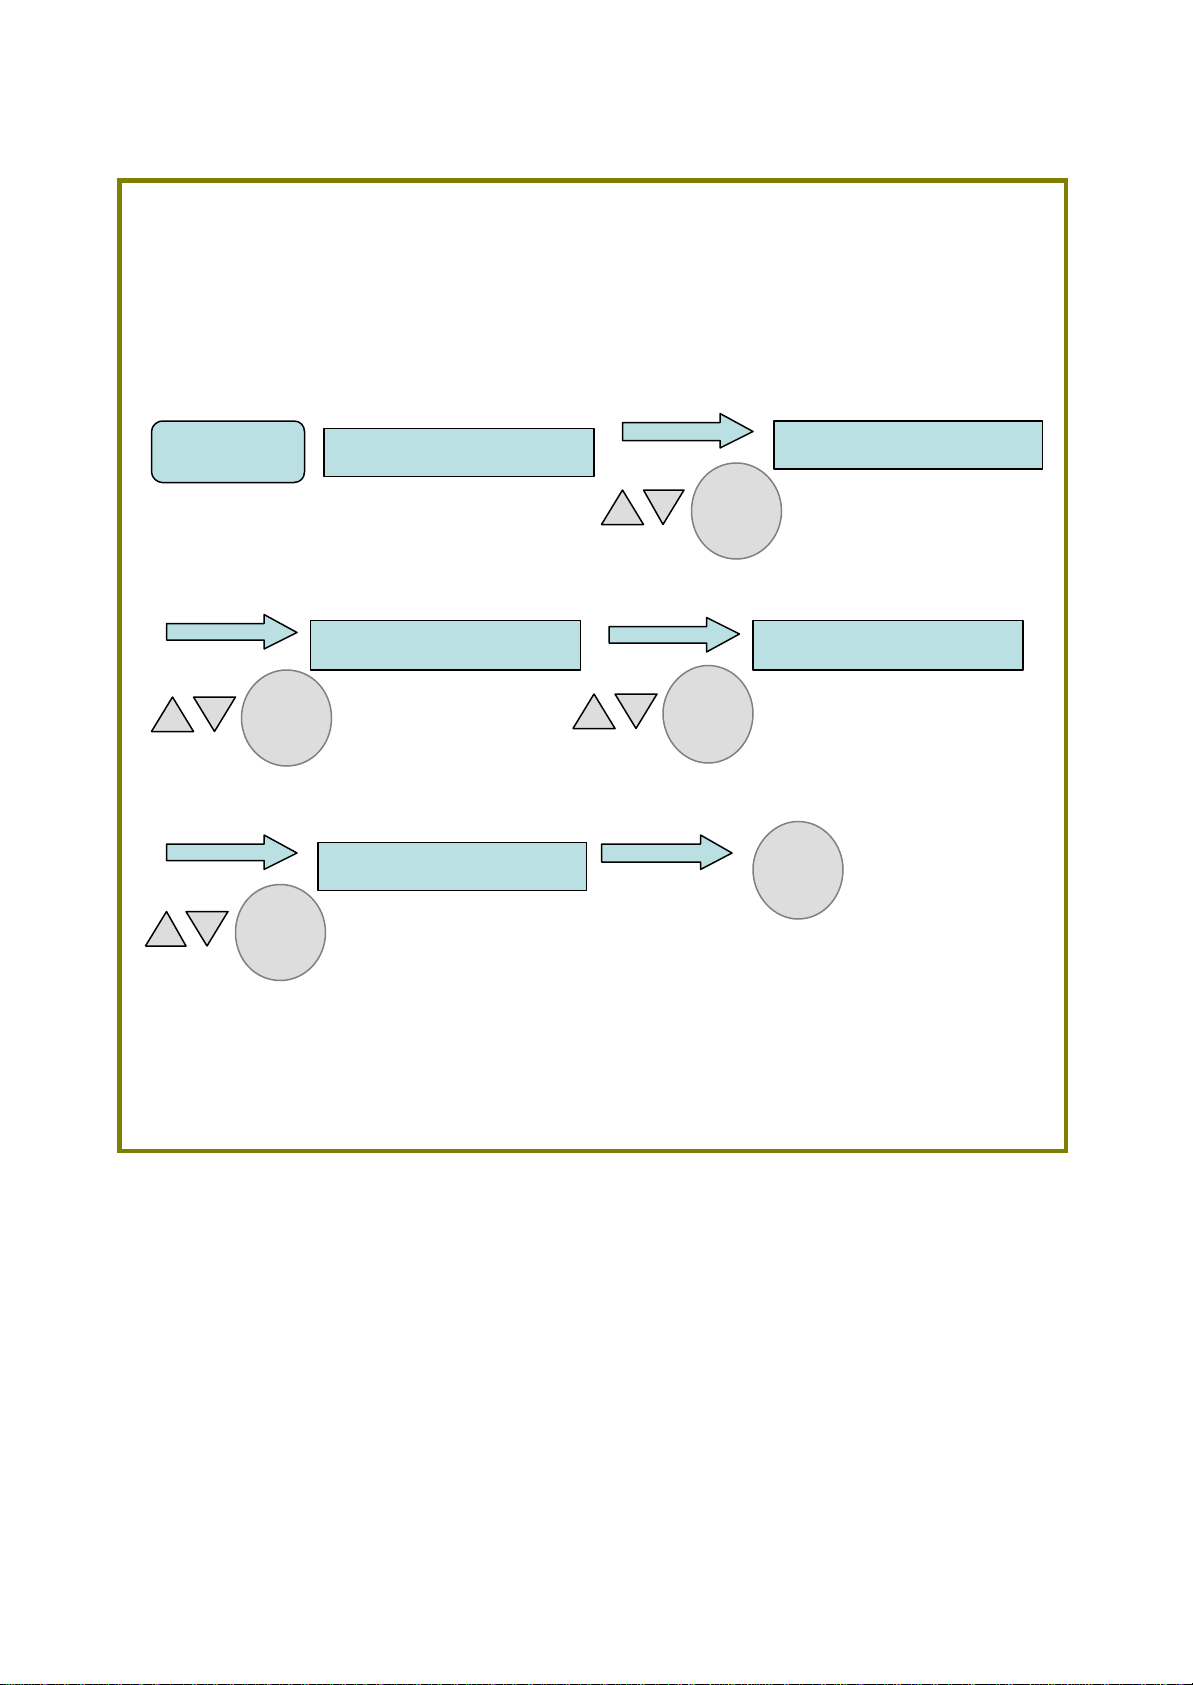
FAT BURN
is a workout offering a low intensity way to burn fat. The Fat Burn workout will
automatically change the resistance level to maintain the heart rate at 65% of
theoretical maximum.
You can see the mark of Fat Burn in Workout Profile Window during Fat Burn
workout.
NOTE :
To use the FAT BURN and CARDIO workout , the user grasps the stainless steel
sensors on the handlebars or use the optional Heart Rate chest strap when the
display console prompts, or any time the user wishes to check the heart rate.
There are four sensors, two on each of the handlebars. Contact must be made
with all four sensors to obtain a heart rate. The console will display a heart rate in
20~30 seconds.
Do not attempt to grasp the touch heart rate sensors above 7km/h. For speeds
above 7km/h, the use of a heart rate chest strap is recommended.
FAT BURN
SET TIME
SETAGE
SET WEIGHT
Enter
START
Setting the start speed
SET HEART RATE
SET SPEED
Enter
Enter
Enter
-15 -
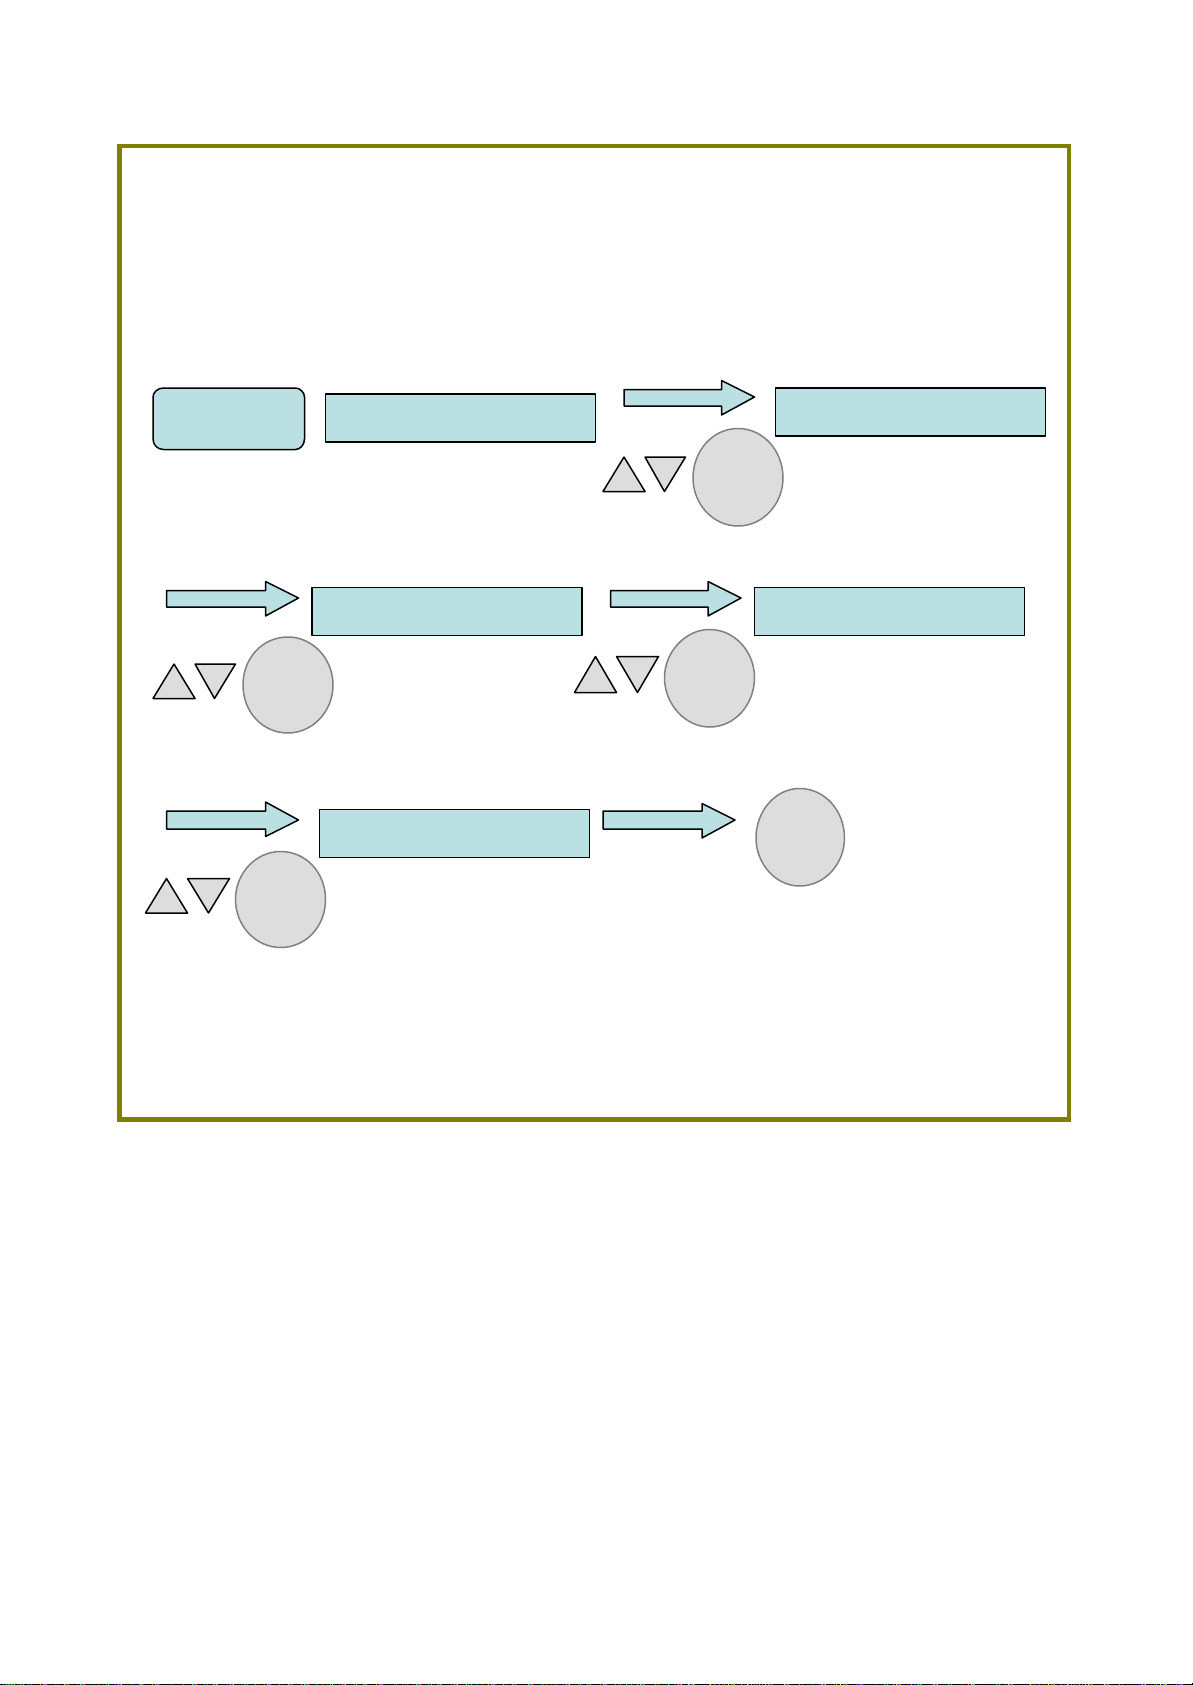
CARDIO MODE
is a higher intensity workout emphasizing cardiovascular benefits and maximum fat
burning for more fit users. The Cardio Workout will automatically change the effort
level to maintain the heart rate at 80% of the theoretical maximum.
You can see the mark of Cardio Mode in Workout Profile Window during Cardio
workout.
NOTE :
Both the Fat Burn and Cardio workouts measure heart rate. Wear an optional
telemetry heart rate chest strap and the heart rate will be transmitted to the on-
board continuously.
The optional heart rate chest strap allows the on-board, Polar compatible,
telemetry heart rate feature of this product to continuously monitor the heart rate
and in many workouts adjusts aspects of the workout such as resistance level.
CARDIO
SE
T TIME
SETAGE
SET WEIGHT
Enter
START
Setting the start speed
SET HEART RATE
SET SPEED
Enter
Enter
Enter

-16 -
PROGRAM MODE
is an interval training workout consisting of a combination of hills and valleys proven
to provide effective, time-efficient cardiovascular results.
MARATHON MODE
is an marathonworkout consisting of aFULL, HALF, 10km, 5km road profile.
FULL 1
FULL 2
HALF 1
HALF2
5 km
10 km
MARATHON
SET WEIGHT
Enter
START
Enter
HILL 1
HILL 2
HILL 2
RUN 1
RUN 2
INTERVAL 1
INTERVAL 2
PROGRAM
SET WEIGHT
Enter
START
Enter
-17 -
4. Manager’s Configuration
4.1 Entering the Manager’s Configuration
To enter the Manager’s Setup, press E-Stop button and press the CoolDown key
and Stop key at the same time. Select the configuration item and configure it.
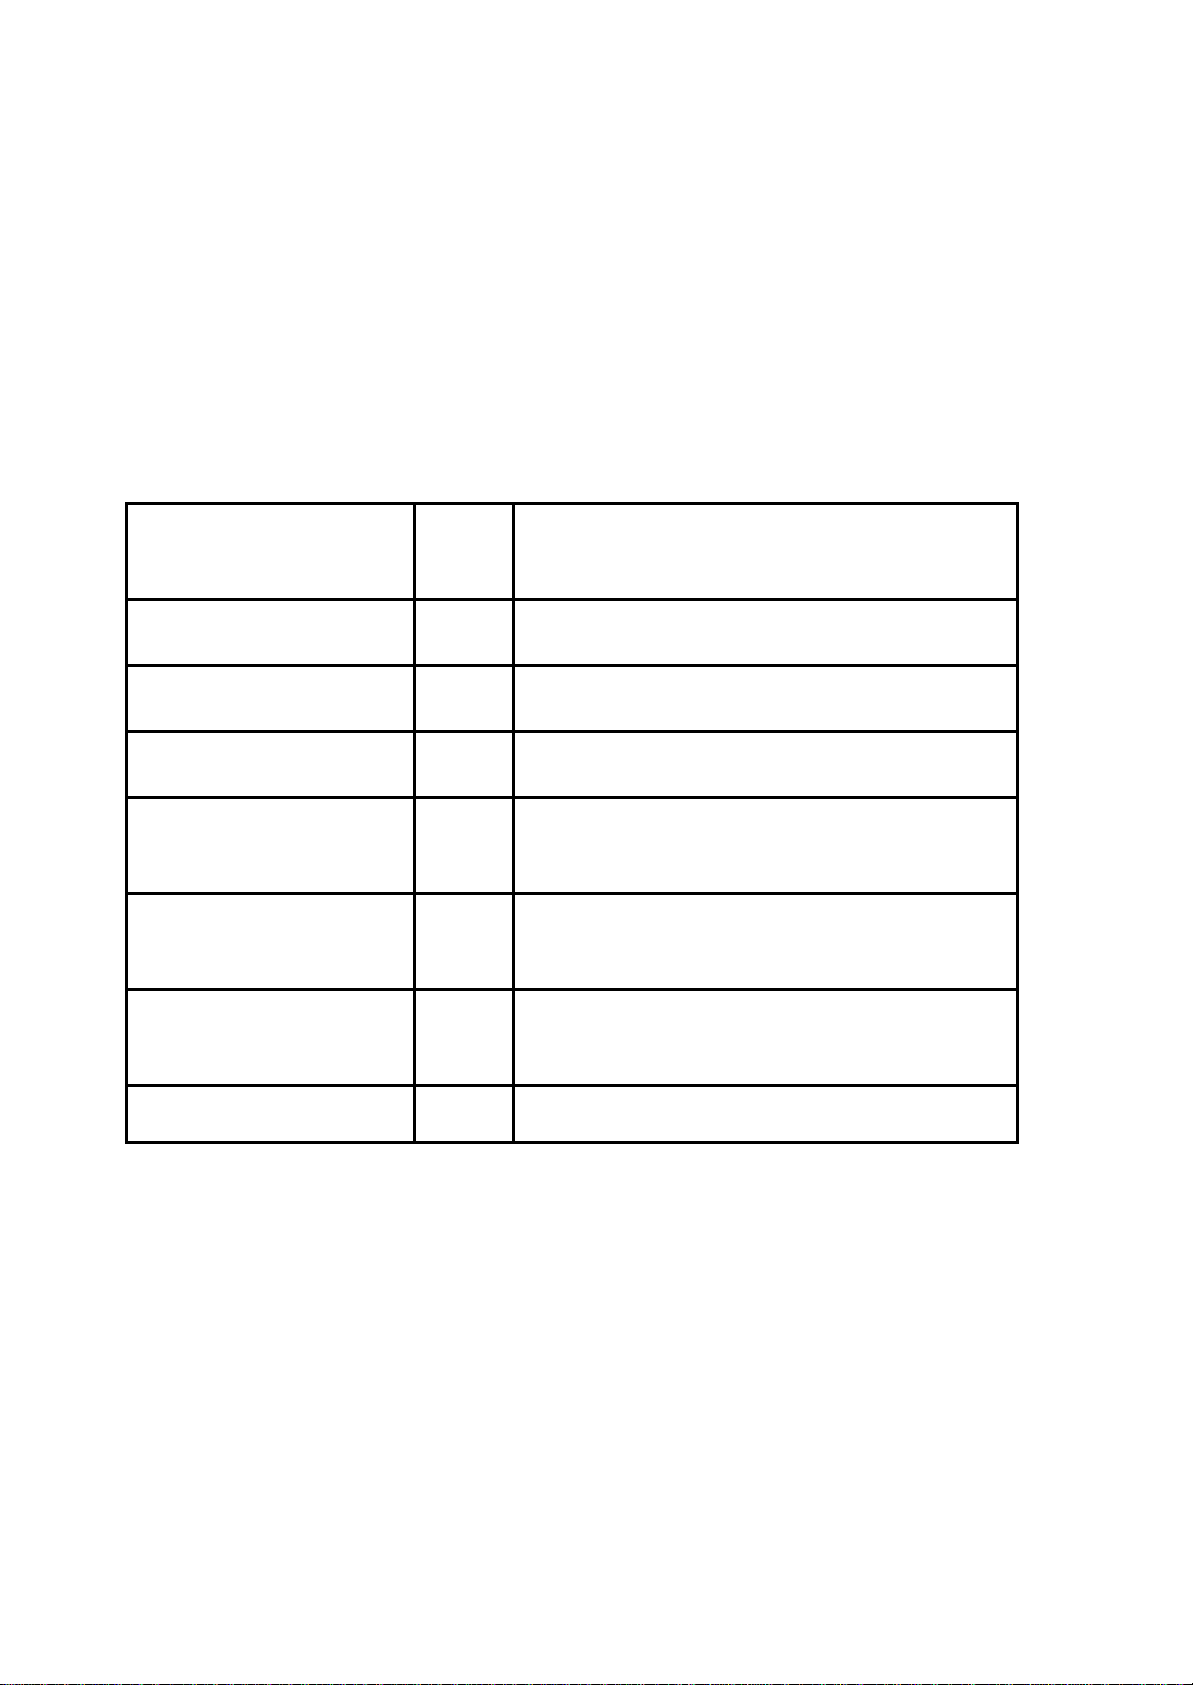
4.2 The Settings
The followings can be configured or displayed.
Configuration Setting Factory
Default
Description
Maximum Speed(km/h) 20.0 Limit of Treadmill Speed
Maximum Incline(%) 20.0 Limit of Inclination
Start Speed (km/h) 0.8 Start speed when start speed is not input
Safe Stop ON When user get off the treadmill during belt
running, belt stop automatically in a few seconds
Maximum Workout Time 0Maximum duration of a workout. Setting 0 allows
no limitation.
Auto Incline Control OFF When incline up or down key is pressed, incline
increase or decrease until next same key.
Total Distance Information Only display of total run distance.
To fix each configuration, press ENTER key.
To exit Configuration, press CLEAR key.

-18 -
5. Specifications
5.1 REDON 9300S Treadmill Specifications
REDON - RX9300S
0.8 ~ 20 km/h
Speed Syncronizing System TM (Patent Pending)
2 Mode Speed Sync - Exciting Mode, Comfortable Mode
0 ~ 20% (Dual Incline System TM - Patent Pending)
AC 3 HP (5HP treadmill duty)
Magentic Flux Vector Control
Inverter : Toshiba VF-S11-2.2K
510 x 1580 mm
930 x 2200 x 1530 mm
195 kg
f110 mm
Multi-color 16x48 Dot Matrix LED, 6 FND
Speed, Incline, Time, Calories, Distance,
Heart Rate Value, Heart Rate Zone, Program Profile,
Pace, Mets, Calories Burned Per Hour
MANUAL, FAT BURN, CARDIO, PROGRAM, MARATHON
Intelligent Heart Rate Control
with Hand Touch Sensor or Polar Telemetry System
180 Kg
220V, 15A, 50/60Hz
2 years
Auto Belt Tension System
Smart Shock Absorption System
Message Focus Display Fuction TM
Polar Telemetry System ●
17" LCD Mointor
Model
Incline
Drive Motor(HP)
Speed
Running Surface(WxL)
Machine Size(WxLxH)
Treadmill Weight
Driving Control
Roller Size
Display Type
Display Readouts
Workout Program
Option
Heart Rate System
Max. Users Weight
Electric Power
Other Feafures
Warranty

-19 -
6. Part List
NO.
Parts Q’ty
NO. Parts Q’ty
1Main Frame Ass`y 116 Deck 1
2Rear Foot Ass`y 217 Tread Belt 1
3. Front Wheel Ass`y 118 Rear Roller 1
4V-Belt 119 Left Rear Cover 1
5Auto Tensioner 120 Right Rear Cover 1
6Driving Roller 121 Motor Ass`y 1
7Left Front Cover 122 Incline Motor Ass`y 1
8Right Front Cover 123 Inverter Ass`y 1
9Control Board Ass`y 124 Motor Cover 1
10
Noise Filter 125 E-Stop Handrail Ass`y 1
11
Brake Resistance 126 Left Handrail Support 1
12
Absorber 827 Right Handrail Support 1
13
Guide Roller 228 Left Handrail Cover 1
14
Left Side Cover 129 Right Handrail Cover 1
15
Right Side Cover 130 ConsoleAss`y 1
This manual suits for next models
3
Table of contents


