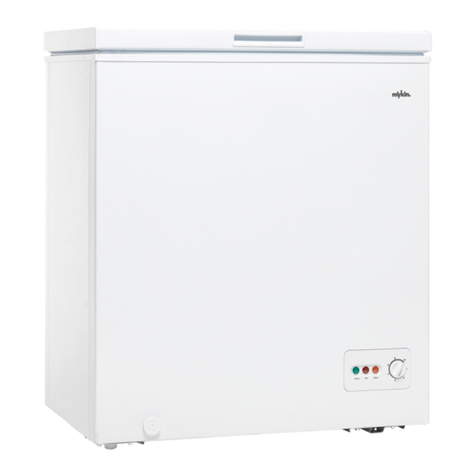
TROPICAL BD-318A User manual

I
n
s
t
r
u
t
i
o
n
f
o
r
u
s
e
C
h
e
s
t
F
r
e
e
z
e
r
TROPICAL
BD-318A
BD-388A
BD-428A
BD-478A

1

English
Directions for use
In the following, you will find all the important
information for the use of your appliance.
The instructions for use apply to several models, which
is why details of the information may differ according to
the type of the appliance.
1 Installation (Choice of position for installation)
Strictly avoid high ambient temperatures and direct
sunlight. We advise you to place your appliance in a
cool, well aired, dry room. Installation in the immediate
vicinity of a heat source (heating, oven etc.) is highly
inappropriate (increased compressor performance
would be necessary and, as a result, power
consumption would be considerably higher).
If the installation near a heat source cannot be avoided,
a suitable insulation plate must be fitted between the
appliance and the heat source (do not use asbestos), or
the following minimum distances must be observed:
from gas or electric cooker 3 cm
from radiator or oven 5 cm
from a wall, piece of furniture or
another appliance 2 cm
Never obstruct the ventilation grille
Larger chest freezers are equipped with a ventilation
grille (F) located below on one side. These appliances
can be placed directly against a wall or a piece of
furniture but not with the side protected with the
ventilation grille.
Freezers without ventilation grille
Leave sufficient space between the rear of the
appliance and the wall to ensure that outward flow of
warm air is able to escape.
The appliance must be placed horizontally and on a
levelled base. Only this way can an impeded circuit of
the refrigerant and optimum function be ensured.
IMPORTANT!
Leave the appliance stand in the final position for
at least 2 hours before switching it on, so that the
refrigerant circuit stabilises and no operating
problems occur.
The odour which is typical of all new appliances is easy
to remove.
Thoroughly clean the interior compartment with a
mixture of lukewarm water and vinegar.
Do not use washing liquids, sharp or granular
cleaning implements, or any cleaning products
containing soda.
Before connecting the appliance, make sure that the
inner area – especially the corners – is absolutely dry.
Danger warning
Depending on its composition, the refrigerant is easily
inflammable. The refrigerant circuit is hermetically
sealed and the density has been subject to repeated
tests.
An improper intervention can cause acute fire hazard.
Instruction for use
Omit any mechanical influence on the cooling system,
especially on the following accessible parts in the
compressor chamber (L):
Rear wall condenser or skin condenser (R)
Compressor (P) (motor)
Capillary tube (Q)
Drying filter (N)
Interventions on the cooling system must be carried out
by professional and authorised personnel only.
IMPORTANT!
Escaping refrigerant can injure your eyes.
In the event of eye contact with the refrigerant, wash
your eyes instantly under plenty of running water and
call/consult an eye specialist immediately.
2 Rating plate
The rating plate (with technical data) is located on the
housing (D) at the rear of the appliance.
Take a note of the technical data
Copy the technical data from the rating plate to here so
that it is at any time readily available, without having to
move the appliance
Model/Type …………….…………………………
Net capacity ………………….……………litres
Operating voltage ………………….……...…...V-50Hz
Maximum absorbed power(W)..……………….Watt
Safety (A) ……………….....………………......Amp
Power consumption………………………….....kWh/24h
Freezing capacity…………………………….....kg/24h
3 Connection to power supply
Your appliance must be connected to a power socked
with grounded connection, which is conform to the
respective standards and has been installed by an
authorised specialist.
Before you connect the plug of the appliance with the
power socket, make absolutely sure that
the voltage (V) on the appliance’s data-plate
corresponds with that of your mains.
If the voltage differs, notify the after-sales-service or
your dealer immediately, and do not on any account
connect the appliance to the mains.
4temperature selection
(Thermostat) (FIG.4)
To prevent temperature being accidentally modified, the
control is intentionally resistant to turning. To vary the
setting, we recommend to use a coin or screwdriver.
To switch on: Turn the control to the right
adjust temperature to the level you require, between:
-
Min. (slight cooling) and
-
max. (lowest temperature)
2

English
Temperature settings must be according to:
-
ambient temperature of the appliance
-
quantity of stored foodstuff
-
frequency of opening
We recommend a medium setting.
You will soon learn which is the most suitable setting for
your requirements.
5 Indicator-lights
(FIG.4)
If your appliance is equipped with indicator-lights, the
following guide explains what is meant by each light up:
-
green = CONTROL
The appliance is under current
and operating
The green control light must always be on when the
appliance is connected to the mains and switched on. It
is very important to pay attention to this, because in the
event of a power failure, the red and yellow lights stop
operating and do no longer provide a warning.
-
- red = ALARM
Interior temperature too high
If the red indicator-light goes on, there may be several
reasons for this, namely:
First start-up of appliance
Restart after defrosting
Filling freezer with fresh food
In these cases it is normal that the red indicator-light
goes on. It goes off automatically when the interior
temperature reaches approximately –15°C.
Switch on the SUPER FREEZE SWITCH (if equipped
with) (FIG.4).(switch off again not more than 24 hours
later or when the red light has gone off).
Reopen the appliance, if possible, only after the red
light has gone off.
If the red control light nevertheless stays on after 12 to
24 hours, there may be serious problems.
Consult the Troubleshooting guide “ what is when...”
chapter at the end of this operating manual.
-
yellow = SUPER FREEZE SWITCH is on and the
thermostat function is disabled.
The compressor continues cooling until the SUPER
FREEZE switch is turned off again.
6 Warning Buzzer (Acoustic alarm)
If your appliance is supplied with a buzzer, it will sound
when the red indicator-light goes on. The buzzer is
silenced automatically when you turn on the SUPER
FREEZER SWITCH.
Instruction for use
7 Start-up
1. Fully unpack the appliance.
2. Remove the polystyrene parts in the compressor
chamber (if supplied).
3. Remove documents and any accessories from the
inside of the appliance.
4. Clean the interior with a mixture of lukewarm water
and vinegar, and dry thoroughly with a cloth.
5. Close the appliance.
6. Insert the plug in the socket
7. Switch on the appliance by turning the temperature
control (FIG.4) to the right (For the time being, turn
the controller fully to the right to Max position).
(green and red lights go on).
8. If equipped with a SUPER FREEZE SWITCH, turn
it on
(yellow light goes on too).
9. Do not open the appliance any more for about 4
hours respectively as long as the red light is on, to
allow the temperature in the inner compartment to
drop to the necessary level.
10. You can now fill the appliance with any amount of
deep frozen food (purchased ready frozen goods).
(Consult the following chapter “Maximum stacking
height”).
11. Turn off the SUPER FREEZE SWITCH again after
24 hours at the latest.
12. If you wish to freeze fresh, unfrozen food, go on to
the following chapter “Freezing/storage of fresh
food”.
Important!
Do not store any bottles containing liquids. Liquid
expands when frozen and the bottle can explode. Never
keep containers with explosive substances (gas
lighters, petrol, ether and the like) in the freezer
compartment of the appliance.
When storing ready frozen food, you must observe the
manufacturer’s instructions on the food packaging.
Deep frozen ice-cream and ice lollies must be eaten
only a few minutes after being taken from the appliance
to avoid injury to lips and tongue (danger of skin
detachment). For the same reason, avoid touching
the inner walls with wet hands. We advise you to use
defrosted or slightly frozen products within short time.
As a rule, such products are not suitable for re-freezing.
8 Freezing / storage of fresh food
Almost all fresh products are suitable for freezing and
storage in the appliance.
For the most common of these products, we provide a
table with instructions on acceptable storage times and
the most suitable packing material (see “storage table”
at the back of this user manual).
Label the fresh products clearly as they are not easy to
identify when deep frozen in transparent freezer-bags.
We advise you to use commercially available labels for
frozen foods.
Pack fresh products in portions suitable for your
household to prevent defrosting of quantities that are
too large for consumption in one day in your household.
3

English
Label the portions with at least the following
information:
Product name (e.g. beef fillet)
Weight of portion
Quantity (total of pieces)
Freezing date
Use by date (consumption date) (
see “storage
table”)
Then continue as follows
a) We recommend you place fresh foods in the pre-
freezing compartment at the side (I) (not all models are
equipped) or on the bottom of the freezer. This is the
coldest part.
Avoid to put fresh foods directly in contact with deep
frozen food. Deep frozen food could defrost and may
not outlast the foreseen storage time.
b) Fill in within 24 hours, only the quantities of fresh
food that are suitable for the freezing capacity of
your appliance.
See information on the rating plate (XX kg/24h).
c) If available, switch on the SUPER FREEZE
SWITCH (FIG.4) (not absolutely necessary when
filling in already frozen (e.g. deep-frozen food)
items.
d) After 24 hours, shift deep-frozen goods from the
freezer bottom or the pre-freeze shelf to a hung
basket (K), so that the pre-freeze shelf or freezer
bottom are available for freezing additional fresh
foods.
e) Turn off the SUPER FREEZE SWITCH (yellow
light goes off).
f) Set the temperature control to one of the
appliance’s relevant filling capacities (see
“Maximum stacking height”).
g) Keep the temperature in the storage shelf (E)
under control, preferably by placing a thermometer
with a scale range of up to –26°C. The storage
temperature must always be at least -18°C.
Refilling of fresh food (not frozen)
Make sure that you refill fresh food, in quantities
adequate to the freezing capacity (XXkg/24h) earliest
24 hours after the previous filling.
(do not exceed maximum stacking height)
9 Maximum stacking height
To ensure correct storage of frozen food, never fill the
storage shelf (E) up to the edge. Always allow space
between the lid and the frozen foods.
Set the temperature control (FIG.4) strictly according to
the filling capacity.
To save energy when operating in normal ambient
temperature (+18 to + 22°C), we recommend the
following settings for the temperature control:
Capacity Stacking mark Setting
pos.
Full upper 12,00 h
Half full medium 10.00 h
1/4 or less lower 08.00 h
Instruction for use
10 Storage time
The storage time for purchased deep-frozen products
varies and depends on the type of product and its
packaging. Therefore, strictly observe the producer’s
instructions on the packaging.
For fresh food that you like to deep freeze, consult the
storage table at the back of this user manual.
After being defrosted, food must be consumed
immediately but latest within the next 24 hours.
11 Precautions and advice
Whenever cleaning or defrosting, remove the
power plug.
After closing the freezer lid, do not open it
immediately and do not force it open under any
circumstances. Any vacuum remaining on the
seal (B) is released after about 1 or 2 minutes, so
that the lid can be opened normally once again.
To prevent condensation and ice forming, allow
cooked food to cool down to ambient temperature
before closing the lid of the dish and before
storage.
Leave the freezer lid open as briefly as possible to
avoid waste of energy and to prevent an excessive
amount of ice forming in the appliance.
ice forming in the appliance.
If the red indicator-light goes on unexpectedly or
stays on for a long period, do not open the lid on
any account and take the appropriate measures
immediately (see guide “what is when ....” at the
back of the this user manual).
Do not use a screwdriver or other metal objects to
remove the layer of ice. The interior walls are very
delicate and will not tolerate any sharp edges. Use
only plastic or wooden scrapers.
12 Cleaning and maintenance
For the upkeep of the external appearance of your
appliance, now and again clean with furniture polish or
other enamel protecting product (never, on any
account, use it in the inside. Clean the seal (B) with
warm water now and again without using any cleaning
product.
If your appliance has a condenser (R) in the rear inside,
from time to time remove dirt and dust. Dust and dirt
impede release of heat from the inner compartment and
considerably increases consumption of energy. For
best results, use a light brush or duster to remove dust
from the condenser on the rear wall.
If you leave your appliance out of use for an extended
period (e.g. when on holidays), leave it open to prevent
odours building up inside. For appliances with locks:
when the chest lid is open, always set the lock in
“closed” position and keep the key well away from small
children to prevent accidents.
When ice and frost layers form on the inner walls up
to a certain thickness, they act as an insulation element
and prevent the coldness being released from the inner
walls. They must be removed from time to time.
4

5

English
In order to receive immediate help, make sure you have
ready the following essential data to identify your
appliance:
Brand of appliance
Model / Type
Kind of trouble
Date of purchase
Purchased from whom?
17 Guarantee
Please note the general guarantee terms and the
guarantee period are stated in the attached guarantee
card.
If the appliance documentation does not include a
guarantee card, please contact your dealer.
18 What is when............
a) No function (appliance not running)
Attention!
In the event of problems or of a power failure, the
insulation of the appliance walls provides 10 to 12
hours storage time after the beginning of such failures.
Considerably more time is available in specially
insulated appliances. Ask your dealer what is the
suitable “storage time after problems” for your
appliance.
If it takes longer to eliminate a problem, the frozen food
in the appliance begins to defrost. Therefore, take
prompt action to eliminate the problem and, if
necessary, shift frozen food into another appliance
(possibly neighbour).
b) Appliance not cooling sufficiently
Freezing process too long
Compressor operating too often
Possible causes/Remedies:
Did you have the appliance t stand for at least 2
hours before switching it on? (stabilise the
refrigerant flow-circuit). See: “Start-up”.
If not: unplug when the chest is closed, lift the chest for
a brief moment and then put it back down to its original
position. After 2 hours put the plug back in. Do not open
the chest during this period and a further 12 hours
afterwards, i.e. until the red light goes off.
Is the plug in good condition and is it properly
plugged into the socket?
Is the socket under current?
(if necessary, test by connecting a small appliance such
as a hand-mixer, etc.).
The lid of the appliance does not close properly.
The seal does not firmly press.
Test: place a piece of writing paper between the seal
and the edge of the chest, and close the lid. It should
be difficult to pull out the paper from any side. If you
can pull out the paper without any resistance from one
ore more sides, notify your after-sales service centre.
Heavy ice formation on the inner walls.
(see “cleaning and maintenance”)
Instruction for use
The appliance is exposed to direct sunlight or is
installed near a heat source (oven, radiator, etc.)
Protect the appliance against direct sunlight; check the
distance to the heat source; place isolating (see “
Installation (Choice of position for installation”)
The filling of food does not correspond with the
excess freezing capacity of your appliance (see
rating plate: XXkg/24h), or you did fill in too warm
food
(see: ” Refilling of fresh food” ).
The manufacturer works constantly at the further
development of all products. Please therefore bear this
in mind as the form, set up and technology are subject
to change, without prior notice.
6

2-3 46810-12
Mincemeat > Polyethylene freezer bag > z
Sausages > Polyethylene freezer bag > z
Small fish > Polyethylene freezer bag > z
Heart / liver > Polyethylene freezer bag > z
Ice cream > Plastic container > z
Fruit > Plastic container > z
Cheese > Polyethylene freezer bag > z
Bread > Polyethylene freezer bag > z
Large fish > Polyethylene freezer bag > z
Cake / biscuits > Glass container > z
Pork > Aluminium foil > z
Beef > Aluminium foil > z
Rabbit > Aluminium foil > z
Lamb > Aluminium foil > z
Mushrooms > Polyethylene freezer bag > z
Asparagus > Polyethylene freezer bag > z
Vegetables (cut) > Polyethylene freezer bag > z
Strawberries > Polyethylene freezer bag > z
Flans > Aluminium foil > z
Chicken > Aluminium foil > z
Turkey > Aluminium foil > z
Duck > Aluminium foil > z
Goose > Aluminium foil > z
Cauliflower > Polyethylene freezer bag > z
Beans > Polyethylene freezer bag > z
Pepperoni > Polyethylene freezer bag > z
Preserves > Glass container > z
Preserved fruit > Glass container > z
Ice lollies > Aluminium foil > z
approx. storage time in months
English
Fresh food Suitable packaging
STORAGE TABLE GB
7

English Components
Availability depending on Mod./Type
AChest lid
BLid seal
CInterior light
DHousing
EStorage shelf
FVentilation grille
GControl panel
HDivider
IPre-freeze shelf
KHanging basket
LCompressor chamber
MCompressor (motor)
NDrying filter
OFan
PCondenser
QCapillary tube
RRear-wall condenser
SStacking mark
TOuter-wall condenser
Control panel versions FIG. 4
Please underline the appropriate version for your appliance
1st version with separate switch for SUPER FREEZE function FIG. 4a
ATemperature control (Thermostat)
BALARM red light
CCONTROL green light
DSUPER FREEZE yellow light
ESUPER SWITCH separate
2nd version with SUPER FREEZE LIGHT SWITCH FIG. 4b
ATemperature control (Thermostat)
BSUPER FREEZE yellow light
CALARM red light
DCONTROL green light
If the indicator-lights on your appliance are laid out in a different way, the following always apply:
green = appliance operating; red = ALARM; yellow = SUPER FREEZE ON
L
M N O P
Q
R
A
B
D
E
G
K
C
E
S
T
F
H
I
FIG. 3
FIG. 2
FIG. 1
A
E
Min. Max..
B
D C
A
Min.
Max..
C
B
C
D

1

Mode d’emploi
Vous trouverez ci-dessous toutes les indications
importantes se rapportant à l’utilisation de l’appareil.
Les instructions du mode d’emploi concernent divers
modèles. C’est pourquoi des différences de détails
peuvent exister selon le type d’appareil.
1 Choix de l’emplacement d’installation
Éviter absolument les températures élevées et les rayons
du soleil. Nous vous conseillons d’installer votre appareil
dans un endroit frais, bien aéré et sec. L’installer à
proximité d’une source de chaleur (chauffage, four, etc.)
est absolument déconseillé (cela provoque une
surcharge du compresseur entraînant une consommation
d’énergie sensiblement plus élevée).
Si vous ne pouvez le placer autrement qu’à proximité
d’une source de chaleur, nous vous conseillons de fixer
une plaque isolante adéquate entre l’appareil et la source
de chaleur (ne pas utiliser de plaques en amiante) ou de
respecter les distances minimales suivantes :
À la cuisinière à gaz ou électrique 3 cm
Au radiateur du chauffage ou du four 5 cm
À la paroi, un meuble ou un autre 2 cm
réfrigérateur
Ne jamais obstruer la grille d’aération
Les congélateurs horizontaux de grandes taille sont
équipés d’une grille d’aération (F) dans la position
latérale inférieure. Les congélateurs peuvent être placés
directement contre une paroi ou un meuble, mais pas du
côté de la grille d’aération.
Congélateurs sans grille d’aération
Respecter une distance suffisante entre l’arrière du
congélateur et la paroi, de sorte que l’air chauffé
s’échappe librement.
L’appareil doit être posé horizontalement sur un sol plat.
Ce n’est qu’ainsi que l’on pourra garantir une circulation
adéquate du réfrigérant et donc le fonctionnement
optimal de l’appareil.
ATTENTION !
Laisser reposer l’appareil à sa place d’installation
définitive au moins 2 heures avant de le brancher,
afin que le circuit de réfrigération se stabilise et
d’éviter d’éventuels problèmes de fonctionnement.
L’odeur dégagée par tous les appareils neufs s’élimine
facilement.
Pour cela, lavez soigneusement l’intérieur de l’appareil à
l’eau tiède additionnée de vinaigre.
Ne pas utiliser de produits corrosifs, de détergents
agressifs, en poudre ou à base de carbonate ou
bicarbonate de sodium.
Avant de brancher l’appareil, le compartiment interne doit
être absolument sec, notamment dans les coins.
Avertissements concernant la sécurité
Suivant sa composition, le réfrigérant s’avère facilement
inflammable. Le circuit du réfrigérant est étanche et sa
densité a été vérifiée à plusieurs reprises.
Les interventions effectuées par un personnel non
qualifié comportent un sérieux danger d’incendie.
S’abstenir de toute contrainte mécanique sur le système
réfrigérant, notamment les composants ci-dessous
accessibles dans le compartiment du compresseur (L) :
Arrière du condensateur (R)
Compresseur (P) (moteur)
Tube capillaire (Q)
Filtre de séchage (N)
Les interventions sur le système réfrigérant doivent être
faites uniquement par du personnel qualifié agréé.
ATTENTION !
Les projections de réfrigérant peuvent causer des
dommages aux yeux.
Si les yeux devaient être atteints par du réfrigérant, les
laver immédiatement à l’eau courante et consulter
immédiatement un oculiste
2 Plaquette d’homologation
La plaquette d’homologation mentionnant les données
techniques est fixée dans le logement (D) à l’arrière de
l’appareil.
Copier les données techniques
C’est ici qu’il faut recopier les données techniques de la
plaquette d’homologation pour en disposer à tout
moment sans devoir déplacer l’appareil.
Modèle/Type n° …………………………………
Capacité nette....................................litres
Tension de service .............................V 50 Hz
Puissance maximum (W)...................Watt
Fusible (A).........................................ampère
Consommation énergétique................kWh/24h
Capacité de congélation.....................kg/24h
3 Connexion électrique
Votre appareil doit être branché exclusivement à une
prise munie d’une mise à la terre, installée
convenablement par un électricien agréé.
Avant d’enfoncer la fiche de l’appareil dans la prise,
vérifier impérativement que la tension (V) reportée sur la
plaquette d’homologation de l’appareil correspond à celle
de votre réseau électrique.
Dans le cas contraire, consulter immédiatement le
service après-vente compétent ou le revendeur agréé
et s’abstenir absolument de brancher l’appareil sur le
réseau.
4Régulateur de température (thermostat)
(FIG. 4)
Pour que le réglage de la température ne puisse être
changé par mégarde, le régulateur a été spécialement
conçu pour être difficilement commutable. Pour le régler,
nous vous conseillons d’utiliser une pièce de monnaie ou
un tournevis.
Connexion : tourner le régulateur vers la droite>.
Suivant les besoins, régler la température entre :
-
minimum (réfrigération minimum).
-
maximum (température la plus basse).
Le réglage de la température doit être proportionnel :
-
À la température à l’emplacement de l’appareil ;
-
À la quantité d’aliments mis dans l’appareil ;
2

3
-À la fréquence d’ouverture de l’appareil.
Nous vous conseillons de choisir une température
moyenne.
Vous pourrez rapidement, par une observation précise,
établir vous-même le meilleur réglage correspondant à
vos besoins.
5 Voyants lumineux
(FIG. 4)
Si votre appareil est équipé de voyants lumineux, voici
leur signification :
-vert = CONTROL (contrôle)
L’appareil est relié au secteur et
fonctionne.
Le voyant vert doit toujours être allumé lorsque l’appareil
est raccordé à l’alimentation électrique et qu’il est
branché. Ce voyant est particulièrement important,
puisqu’en cas de chutes de tension, les voyants rouge
et jaune ne fonctionnent plus et ne peuvent donc rien
signaler.
-rouge = ALARM (alarme)
Température intérieure trop élevée
Si le voyant rouge reste allumé, ce peut être pour
diverses raisons :
Première mise en fonction de l’appareil ;
Remise en fonction après le dégivrage ;
Introduction d’aliments frais.
Dans ces cas, si le voyant rouge reste allumé, c’est
normal. Le voyant s’éteindra automatiquement
lorsque la température intérieure atteint environ –15°C.
Si l’appareil en est équipé, enclencher l’interrupteur de
SUPER-CONGÉLATION (FIG. 4). (Le déconnecter au
maximum après 24 heures ou une fois le voyant rouge
éteint).
Dans tous les cas, n’ouvrir si possible l’appareil qu’une
fois le voyant rouge éteint.
Cependant, si le voyant rouge reste encore allumé après
12-24 heures, il est possible qu’une vraie panne se soit
produite.
Se rapporter pour cela au chapitre :
«Détection des pannes/causes/remèdes » à la fin de ce
mode d’emploi.
-jaune =INTERRUPTEUR DE SUPER-
-CONGÉLATION
Lorsque qu’il est enclenché, le thermostat
est mis hors fonction.
Le compresseur produit sa fonction de refroidissement
jusqu’à ce que l’interrupteur de SUPER-CONGÉLATION
soit à nouveau déclenché.
6 Alarme sonore
Si l’appareil en est équipé, une alarme sonore se fait
entendre en plus du voyant rouge qui s’allume. Elle se
déconnecte automatiquement une fois l’interrupteur de
SUPER-CONGÉLATION enclenché.
7 Mise en fonction de l’appareil
1. Déballer complètement l’appareil.
2. Enlever les parties en polystyrène du compartiment
du compresseur (si c’est le cas).
3. Sortir toute la documentation du compartiment
interne de l’appareil, ainsi que les accessoires
éventuellement présents.
4. Nettoyer le compartiment interne à l’eau tiède
additionnée de vinaigre et essuyer soigneusement
avec un chiffon.
5. Fermer l’appareil.
6. Mettre la fiche dans la prise.
7. Brancher l’appareil en tournant le régulateur de
température sur la droite (FIG. 4) (tourner d’abord le
régulateur à l’extrême droite en position maximale).
(Les voyants vert et rouge s’allument).
8. S’il y en a un, enclencher l’interrupteur de
SUPER-CONGÉLATION (le voyant jaune
s’allume).
9. Ne pas ouvrir l’appareil pendant environ 4 heures ou
jusqu’à ce que le voyant rouge soit éteint, pour que
le compartiment interne soit suffisamment refroidi.
10. Vous pouvez maintenant remplir le congélateur
d’aliments déjà congelés à –18 °C (aliments achetés
congelés). (Voir chapitre « Hauteur maximum
d’empilage »).
11. Au plus tard après 24 heures, déconnectez à
nouveau l’interrupteur de SUPER-CONGÉLATION.
12. Si vous souhaitez congeler des aliments frais, pas
encore congelés, procédez comme indiqué au
chapitre «
Congélation/conservation des aliments
frais ».
Attention !
Ne pas congeler de bouteilles contenant des boissons.
Le liquide se dilate durant la congélation et la bouteille
pourrait éclater.
Ne jamais conserver de récipients contenant des
substances explosives (allume-gaz, essence, éther etc.)
dans le compartiment de l’appareil.
En cas de conservation de produits congelés, suivre
absolument les instructions du fabricant figurant sur leur
emballage.
Glaces et glaçons ne doivent être consommés congelés
que quelques minutes après avoir été sortis de l’appareil,
pour éviter de se blesser les lèvres et la langue (brûlure
de la peau). Pour la même raison, éviter de toucher les
parois internes glacées avec les mains mouillées. Nous
vous conseillons de consommer immédiatement les
produits décongelés ou à moitié
décongelés. La re congélation est en principe
déconseillée.
8 Congélation / Conservation des aliments frais
Presque tous les produits frais peuvent être congelés et
conservés dans votre appareil. C’est pourquoi nous
avons indiqué un tableau des produits les plus
fréquemment congelés en indiquant les durées de
conservation possibles et le matériau d’emballage
préférable (voir «
Tableau de conservation » dans les
présentes instructions de ce mode d’emploi)
Avant de les mettre dans l’appareil, marquer les
emballages des divers produits frais, car en cas d’emploi
de sachets plastique transparents les aliments congelés
sont difficilement reconnaissables.
À ce propos, nous vous conseillons d’utiliser les
étiquettes pour produits congelés que l’on trouve dans le
commerce.
Envelopper les produits frais dans des sachets adéquats,
en les divisant en portions que vous avez l’habitude
d’utiliser, pour éviter de décongeler de grosses quantités
que vous ne consommeriez pas en une journée.
Identifier les portions en marquant au moins les
informations suivantes :
Nom du produit (par exemple : filet de bœuf) ;
3

Poids de la portion ;
Quantité (nombre de pièces) ;
Date de congélation ;
Date de consommation (voir «
Tableau de
conservation »).
Puis procéder comme suit :
a) Placer si possible les aliments frais dans le
compartiment de pré-congélation latéral (1) (pas sur
tous les modèles) ou au fond du congélateur où
règne la température la plus basse.
À ce propos, éviter tout contact en plaçant les aliments
frais et ceux déjà congelés, sinon ils pourraient se
décongeler et la durée de conservation prévue ne serait
plus valable.
b) Dans les 24 heures, mettre les produits de manière à
n’atteindre que la quantité d’aliments frais adéquate
à la capacité de congélation de votre appareil. Se
reporter aux données mentionnées sur la plaquette
d’homologation
(xx kg/24h).
c) S’il y en a un, enclencher l’interrupteur de SUPER-
CONGELATION (FIG. 4) (pas obligatoire si l’on
introduit des aliments déjà congelés (par exemple :
produits congelés).
d) 24 heures plus tard, retirer les produits congelés du
fond du congélateur ou du compartiment de pré-
congélation et les mettre dans un panier (K), de
sorte que le compartiment de pré-congélation ou le
fond du congélateur servent à congeler d’autres
aliments frais.
e) Déconnecter l’interrupteur de SUPER-
CONGELATION (le voyant jaune s’éteint).
f) Régler le régulateur de température selon le degré
de remplissage de l’appareil (voir «
Hauteur
maximale d’empilage »).
g) Surveiller si possible la température du
compartiment de conservation (E) au moyen d’un
thermomètre mesurant les températures jusqu’à –
26°C.
La température de conservation doit toujours
être au minimum de –18 °C.
Remplissage d’aliments frais
(non congelés)
Veiller à ce qu’au plus tôt 24 heures après avoir mis des
aliments frais, l’on puisse ajouter la quantité adéquate à
la capacité de congélation (xx kg/24h) de votre appareil.
(Ne pas dépasser la hauteur d’empilage maximum).
9 Hauteur maximale d’empilage
Pour garantir une conservation optimale des produits
congelés, nous vous recommandons de ne jamais
remplir le compartiment de congélation (E) jusqu’à la
ligne supérieure. Toujours prévoir un certain espace
entre le couvercle et les produits congelés.
Régler toujours le régulateur de température (FIG. 4)
selon la quantité remplie.
À température ambiante normale (entre +18 °C et + 22
°C), nous vous recommandons de placer le régulateur
de la température dans les positions ci-dessous pour
économiser l’énergie :
Capacité Marque d’empilage Position
Plein Dessus Sur 12h.
À moitié plein Milieu Sur 10h.
Un quart plein, ou
moins
Bas Sur 8h.
10 Durée de conservation
La durée de conservation des produits pré-congelés
diffère beaucoup selon le type d’aliment et sa
composition. À ce propos, respecter les instructions du
producteur se trouvant sur l’emballage du produit.
Quant aux aliments frais que vous congelez vous-
mêmes, respectez les indications du tableau de
conservation dans ce mode d’emploi.
Il faut consommer immédiatement les produits déjà
décongelés une fois.
Consommer les produits décongelés dans les 24 heures.
11 Mesures de sécurité et conseils
À chaque nettoyage ou dégivrage, débrancher votre
appareil.
Ne pas ouvrir le couvercle du congélateur juste
après l’avoir fermé, et ne pas l’ouvrir trop fortement.
Un éventuel vide sur la garniture (B) disparaît après
1-2 minutes, le couvercle peut ainsi être ouvert à
nouveau normalement.
Laisser refroidir les aliments cuisinés à la
température ambiante, pour éviter la formation de
condensation et de glace dans l’appareil.
Laisser le couvercle du congélateur ouvert le moins
longtemps possible, pour ne pas gaspiller de
courant et éviter la formation de glace superflue
dans l’appareil.
Au cas où le voyant rouge s’allumerait de façon
inattendue
ou plus longtemps que d’habitude, n’ouvrez en
aucun cas l’appareil, mais prenez les mesures
nécessaires (voir chapitre «
Détection des
pannes/causes/remèdes »).
Ne jamais employer de tournevis ou à autres outils
métalliques pour enlever la couche de glace. Les
parois intérieures sont très sensibles et ne
supportent pas le contact avec des objets pointus.
Se servir exclusivement de grattoirs en plastique ou
en bois non pointus.
12 Nettoyage et entretien
Pour conserver à votre appareil un aspect soigné même
à l’extérieur, utilisez de temps en temps un produit à polir
les meubles ou un produit pour objets vernis (ne jamais
s’en servir à l’intérieur du
congélateur). Nettoyer de temps en temps le joint (B) à
l’eau chaude sans utiliser de détergent.
Si votre appareil est muni d’un condensateur sur la paroi
derrière (R), en enlever de temps en temps la saleté et la
poussière qui pourraient empêcher l’évacuation de la
chaleur du compartiment interne et augmenter
sensiblement la consommation d’énergie. Nous vous
recommandons d’utiliser une brosse souple ou un balai
pour nettoyer le condensateur.
En cas de mise hors service de l’appareil pendant une
longue durée (vacances, etc.), le laisser ouvert pour
éviter la formation de mauvaises odeurs à l’intérieur.
Pour les appareils à serrure : mettre la serrure sur
« fermé » et maintenir le couvercle du congélateur levé.
Garder la clé hors de portée des enfants pour éviter tout
accident durant leurs jeux.
4

5

6

2-3 4 6 8 10-12
Viande hachée > Sachet de congélation en polyéthylène >z
Saucisses > Sachet de congélation en polyéthylène >z
Petits poissons > Sachet de congélation en polyéthylène >z
Coeur / foie > Sachet de congélation en polyéthylène >z
Crème glacée > Récipient en plastique > z
Fruits > Récipient en plastique > z
Fromage > Sachet de congélation en polyéthylène >z
Pain > Sachet de congélation en polyéthylène >z
Gros poissons > Sachet de congélation en polyéthylène >z
Gâteau / biscuits > Récipient en verre > z
Porc > Papier d'aluminium > z
Boeuf > Papier d'aluminium > z
Lièvre > Papier d'aluminium > z
Agneau > Papier d'aluminium > z
Champignons > Sachet de congélation en polyéthylène >z
Asperges > Sachet de congélation en polyéthylène >z
Légumes (coupés) > Sachet de congélation en polyéthylène >z
Fraises > Sachet de congélation en polyéthylène >z
Tartes > Papier d'aluminium > z
Poulet > Papier d'aluminium > z
Dindonneau > Papier d'aluminium > z
Canard > Papier d'aluminium > z
Oie > Papier d'aluminium > z
Chou-fleur > Sachet de congélation en polyéthylène >z
Haricots > Sachet de congélation en polyéthylène >z
Peperoni > Sachet de congélation en polyéthylène >z
Conserves > Récipient en verre > z
Fruits en conserve > Récipient en verre > z
Esquimaux > Papier d'aluminium > z
Durée appr. de conservation (mois)
Français
Aliments frais Emballage approprié
TABLEAU DE CONSERVATION
F
7

Français Composants
Les composants illustrés peuvent ou
non être installés, selon les modèles.
ACouvercle du congélateur
BGarniture du couvercle
CEclairage intérieur
DBoîtier
ECompartiment de conservation
FGrille de ventilation
GPanneau de commande
HCloison
ICompartiment de pré-congélation
KPanier
LCompartiment du compresseur
MCompresseur (moteur)
NFiltre de séchage
OVentilateur
PCondensateur
QTube capillaire
RArrière condensateur
SMarque d’empilage
TParoi externe du condensateur
Variantes dans les panneaux de commande FIG.4
Prière De marquer les variantes concernant votre appareil.
1ère variante avec interrupteur séparé pour fonction super-congélationFIG.4a
ARégulateur de température (thermostat)
BALARM Voyant rouge
CCONTROL (en marche) Voyant vert
DIndicateur de super-congélation Voyant jaune
EInterrupteur de super-congélation séparé
2e variante avec interrupteur de super-congélation FIG. 4b
ARégulateur de température (thermostat
BInterrupteur de super-congelation Voyant jaune
CALARM Voyant rouge
DCONTROL (en marche) Voyant vert
Si les voyants sont disposés autrement sur votre appareil, ce qui suit reste valable :
voyant vert = contrôle du fonctionnement / voyant rouge = alarme / voyant jaune = fonction de super-congélation
L
M N O P
Q
R
A
B
D
E
G
K
C
E
S
T
F
H
I
FIG. 3
FIG. 2
FIG. 1
A
E
Min. Max.
B
D C
D
A
Min.
Max.
C
B
8

This manual suits for next models
3
Table of contents
Languages:
