Trueview T18132 User manual

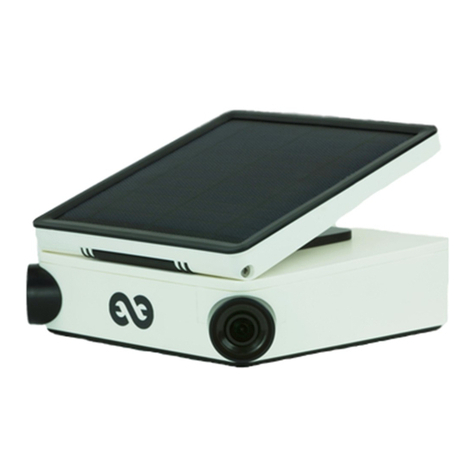
Solar PT Camera
Please read the Quick Guide carefully before
T18132

1
Bracket x 1 no Iron Bracket x 1 no
Hoops x 2 no
Dome Camera x 1 no Solar Panel x 1 no Quick Operation
QR Card x no1
Quick Start Guide
Certificate x1
Camera x 1 no Solar Panel Mount x 1 no
Solar Panel x 1 no
Quick Operation QR Card
x 1 no
Quick Start Guide
Certificate
x 1 no Fixtures x1 set
Fixtures x1 set
T18132
T1

Reset Button - SD Card Slot -
USB Charging Port
Solar Panel
Indicator Light
Lens
Photosensitive
4
1
11
7
8
6
3
MIC
Antenna
9
5
10
Base
2
Human Infrared
Sensor (PIR)
Speaker
Note:
1. Connect the camera to the solar panel and confirm that the solar
panel switch is ON.
2. Turn ON the camera switch.
3. Dial the solar panel switch to "ON" to turn on and "OFF" turn off.
2
(*Note: Please open the speaker cover when using the reset button / SD cardslot.)
Power output
Indicator Light
Lens
Infrared & Spot Light
Speaker
Reset Button - 4G Card Slot - SD Card Slot
4
12
7
2
1
3
MIC
Antenna
Solar Panel 11
9
5
10
Base
8
6
Human Infrared
Sensor (PIR)
Photosensitivity Sensor
T1
T18132

Button operations
• r lG een ight flashes for 2s and turn out :
The device is powered on and connecting to the network
• Green light + Red light is always on : Amber
The camera is being previewed remotely (privacy light)
• Green light is always on :
The device is connected to the network or awakened
• Green light flashes continuously : Upgrading
• Green light flashes continuously and slowly : When Camera
in Stand by Mode & Charging
• The traffic light is always OFF : On Stand-by
• Press the reset button and hold for 10-15 sec in the
power-on state: Reset
APP Installation and Login
3.1 APP Download and Installation :
Users can search “TrueCloud” on APP Store or PlayStore.
You can also install the app by scanning the below QR codes.
3
Note : The app requires iOS 9.0 version / Android 4.4 or above
LED Indictations
iosAndroid

3.2 Account Login :
On the Login interface, input
account /phone number/email,
& the corresponding password,
and click the "OK" button to
log in.
Installing the Sim Card
Note: Please check the SIM & SD card slots and insert the
SIM and SD card in proper positions and directions. Make
sure the SIM card is activated with an appropriate data plan.
1. When the device is powered
OFF, Insert a 4G SIM card that can
access the internet into the device;
4
Third-party login: TrueCloud app
supports third-party login. Click
Local experience icon to jump to
the TrueCloud app and complete
the authorization and log in.

5
1. Open the APP and click
on the “+” icon on the upper
right corner to enter the scan
code interface.
2. Scan the QR code
available on the camera.
3. On the search device
interface, click "Add"
6:00 PM 77%
Continue
Set device name
Give the device xxxxxxxx a name
Device
The following can be directly selected
Living room Bedroom
Office
Study room
Confirm
4. Set the name and the
password for your device.
Adding the Camera in App

When the QR code on the device is not available or
does not work follow the below instructions.
6
2. Enter the deivce ID and
Password, And click Finish in
the upper right corner to add
1. Select “Add by ID/IP” in
“Other ways to add”

7
To add the camera using wired connectivity
Note: Please remove the 4G SIM card before using the
above configuration method.
6:00 PM 77%
Continue
Set device name
Give the device xxxxxxxx a name
Device
The following can be directly selected
Living room Bedroom
Office
Study room
Confirm
2. After setting the name
and password for the device,
it will be added successfully.
1. Power ON the device.
Connect it to a router with
internet access using a
network cable. Scan the
QR code of the device and
click "Add"
6:00 PM 77%
Search device
Search code is successful, please click “Add”
Add
ID: xxxxxxxxxx
(*The picture is only for reference, please
refer to the actual product)
PIR is sensitive to hot and cold disturbances,
please note:
Avoid installing the camera where the air flow is agitated. For eg:
the air outlet of the air conditioner, the heat dissipation port of the
equipment, the side of the fan, the vicinity of the curtain, etc.
Please do not install the camera in front of the glass or mirror.
The height of the camera installation should be 2.5M-3M, the
best distance of PIR trigger.
Do not install the camera upside down.
Installation method

1. Ceiling Installation / Wall Installation
1. Camera installation - Use the installation positioning
guide sticker to make holes in the wall. Use the plastic
plugs for cement walls and install the camera.
2. Solar holder installation - Appropriately install the
solar panel outdoors using the metal stand only and
connect the same to the camera.
Wall Installation
1. Fix the metal plate behind the
battery compartment of the camera
using the screws provided.
2. Install the camera on
the pole using the metal
holding hoop.
3. Similarly install the
solar panel in the
appropriate direction
to the pole using the
metal holding hoop
2. The pole installation
Suggest
Recommended
installing the
camera about
2.5-3M
8
Ceiling Installation

www .true view.co.in
Table of contents
