manuals.online logo
Brands
  1. Home
  2. •
  3. Brands
  4. •
  5. Tunstall
  6. •
  7. Music Mixer
  8. •
  9. Tunstall ComStation IP 76 0605 50 User manual

Tunstall ComStation IP 76 0605 50 User manual

00 8803 89, 03/22 (Rev. 1.0) - 1 -
© Tunstall GmbH, Orkotten 66, 48291 Telgte, Germany, www.tunstall.de
DE - Installationsanleitung EN - Installation Instructions
ComStationIP, Best.-Nr. 76 0605 50
1. Bestimmungsgemäßer Gebrauch
Die ComStationIP ist vorgesehen zum steckbaren Anschluss an
das IP-Netzwerk einer FlamencoIP+-Rufanlage.
Die ComStationIP ist eine Stationsabfragestelle mit den Funktio-
nen:
Abfrage und Bearbeitung von Rufen
Durchsagen
Ein- und Ausschalten von Stationszusammenschaltungen
Ein- und Ausschalten von Schichten
Wahlweise freies oder diskretes Sprechen
Die ComStationIP basiert auf einem IP-Tischtelefon von Herstel-
ler GRANDSTREAM mit angepasstem Android-Betriebssystem.
Die Lichtruffunktion ist als App vorinstalliert. Alle anderen Funk-
tionen sind inaktiv (Kiosk-Modus).
ComStationIP, order no. 76 0605 50
1. Intended use
The ComStationIP is intended for plug-in connection to the IP
network of a FlamencoIP+ nurse call system.
The ComStationIP is a ward console with the following functions:
Answering and processing of calls
Announcements
Switching ward couplings on and off
Switching shifts on and off
Optional free or discreet speech
The ComStationIP is based on an IP desk telephone from manu-
facturer GRANDSTREAM with adapted Android operating sys-
tem. The nurse call functionality is pre-installed as an
application. All other functions are inactive (kiosk mode).
2. Wichtige Dokumente
Flamenco-Systemfamilie, Technisches Handbuch (00 8803 97)
Die vollständige Installation des Systems ist in dem Technischen
Handbuch beschrieben. Das Handbuch kann von der Internet-
seite www.tunstall.de heruntergeladen werden.
App-Hilfe
In der ComStationIP-App ist eine Hilfe integriert, in der die Bedie-
nung des Geräts ausführlich beschrieben ist.
Gebrauchsanweisung (00 8803 85)
Von der Internetseite www.tunstall.de kann eine ausführliche
Gebrauchsanweisung als PDF heruntergeladen werden.
Kurzanleitung (00 8803 87)
Eine Kurzanleitung befindet sich im Lieferumfang der
ComStationIP und kann von www.tunstall.de heruntergeladen
werden.
Dokumentation von GRANDSTREAM
Im Lieferumfang der ComStationIP befinden sich Dokumente des
Geräteherstellers GRANDSTREAM. Heben Sie diese auf. Für das
Pflegepersonal sind diese Dokumente nicht vorgesehen.
2. Important documents
Flamenco system family, Technical Manual (00 8813 97)
The complete installation of the system is described in the tech-
nical manual. The manual can be downloaded from the
www.tunstall.de website.
App help
The ComStationIP app has an integrated help, which describes
the operation of the device in detail.
User guide (00 8813 85)
A detailed user guide can be downloaded as PDF from the
www.tunstall.de website.
Quick reference guide (00 8813 87)
A quick reference guide is included with the ComStationIP and
can be downloaded from www.tunstall.de.
Documentation by GRANDSTREAM
The ComStationIP is supplied with documents from the device
manufacturer GRANDSTREAM. Keep these. These documents
are not intended for nursing staff.
3. Lieferumfang
(Abb. A)
[1] Hauptgerät
[2] Handhörer
[3] Handhörerkabel
[4] Netzwerkkabel
[5] 12-V-Netzteil
[6] Wandhalterung
[7] Bildschirm-Reinigungstuch
[8] Installationsanleitung (die-
ses Dokument)
[9] Kurzanleitung
[10] Dokumente von GRAND-
STREAM
3. Scope of supply
(fig. A)
[1] Main case
[2] Handset
[3] Handset cord
[4] Ethernet cable
[5] 12 V power adaptor
[6] Wall mount
[7] Screen cleaning cloth
[8] Installation instructions
(this document)
[9] Quick reference guide
[10] Documents by GRAND-
STREAM
12
76 0605 50
00 8803 89, 03/22 (Rev. 1.0) - 2 -
© Tunstall GmbH, Orkotten 66, 48291 Telgte, Germany, www.tunstall.de
4. Fehlanwendung
Die ComStationIP basiert auf einem IP-Tischtelefon von Herstel-
ler GRANDSTREAM mit angepasstem Android-Betriebssystem.
Die Lichtruffunktion ist als App vorinstalliert. Alle anderen Funk-
tionen sind inaktiv (Kiosk-Modus).
Beachten Sie:
Das IP-Tischtelefon darf nur als ComStationIP verwendet
werden. Es dürfen keine weiteren Apps installiert oder ver-
wendet werden.
Das IP-Tischtelefon darf nicht mit dem Internet verbunden
werden. Auf das IP-Tischtelefon dürfen nur Updates von
Tunstall aufgespielt werden.
Das Android-Betriebssystem darf nicht auf Werkseinstellun-
gen zurückgesetzt werden. Dabei würden die Änderungen
am Betriebssystem verloren gehen, die nur von Tunstall vor-
genommen werden können.
4. Misuse
The ComStationIP is based on an IP desk telephone from manu-
facturer GRANDSTREAM with adapted Android operating sys-
tem. The nurse call functionality is pre-installed as an
application. All other functions are inactive (kiosk mode).
Take note:
The IP desk telephone may only be used as ComStationIP. No
other applications may be installed or used.
The IP desk telephone must not be connected to the Inter-
net. Only updates from Tunstall may be installed on the IP
desk telephone.
The Android operating system must not be reset to factory
settings. This would result in the loss of changes to the oper-
ating system that can only be made by Tunstall.
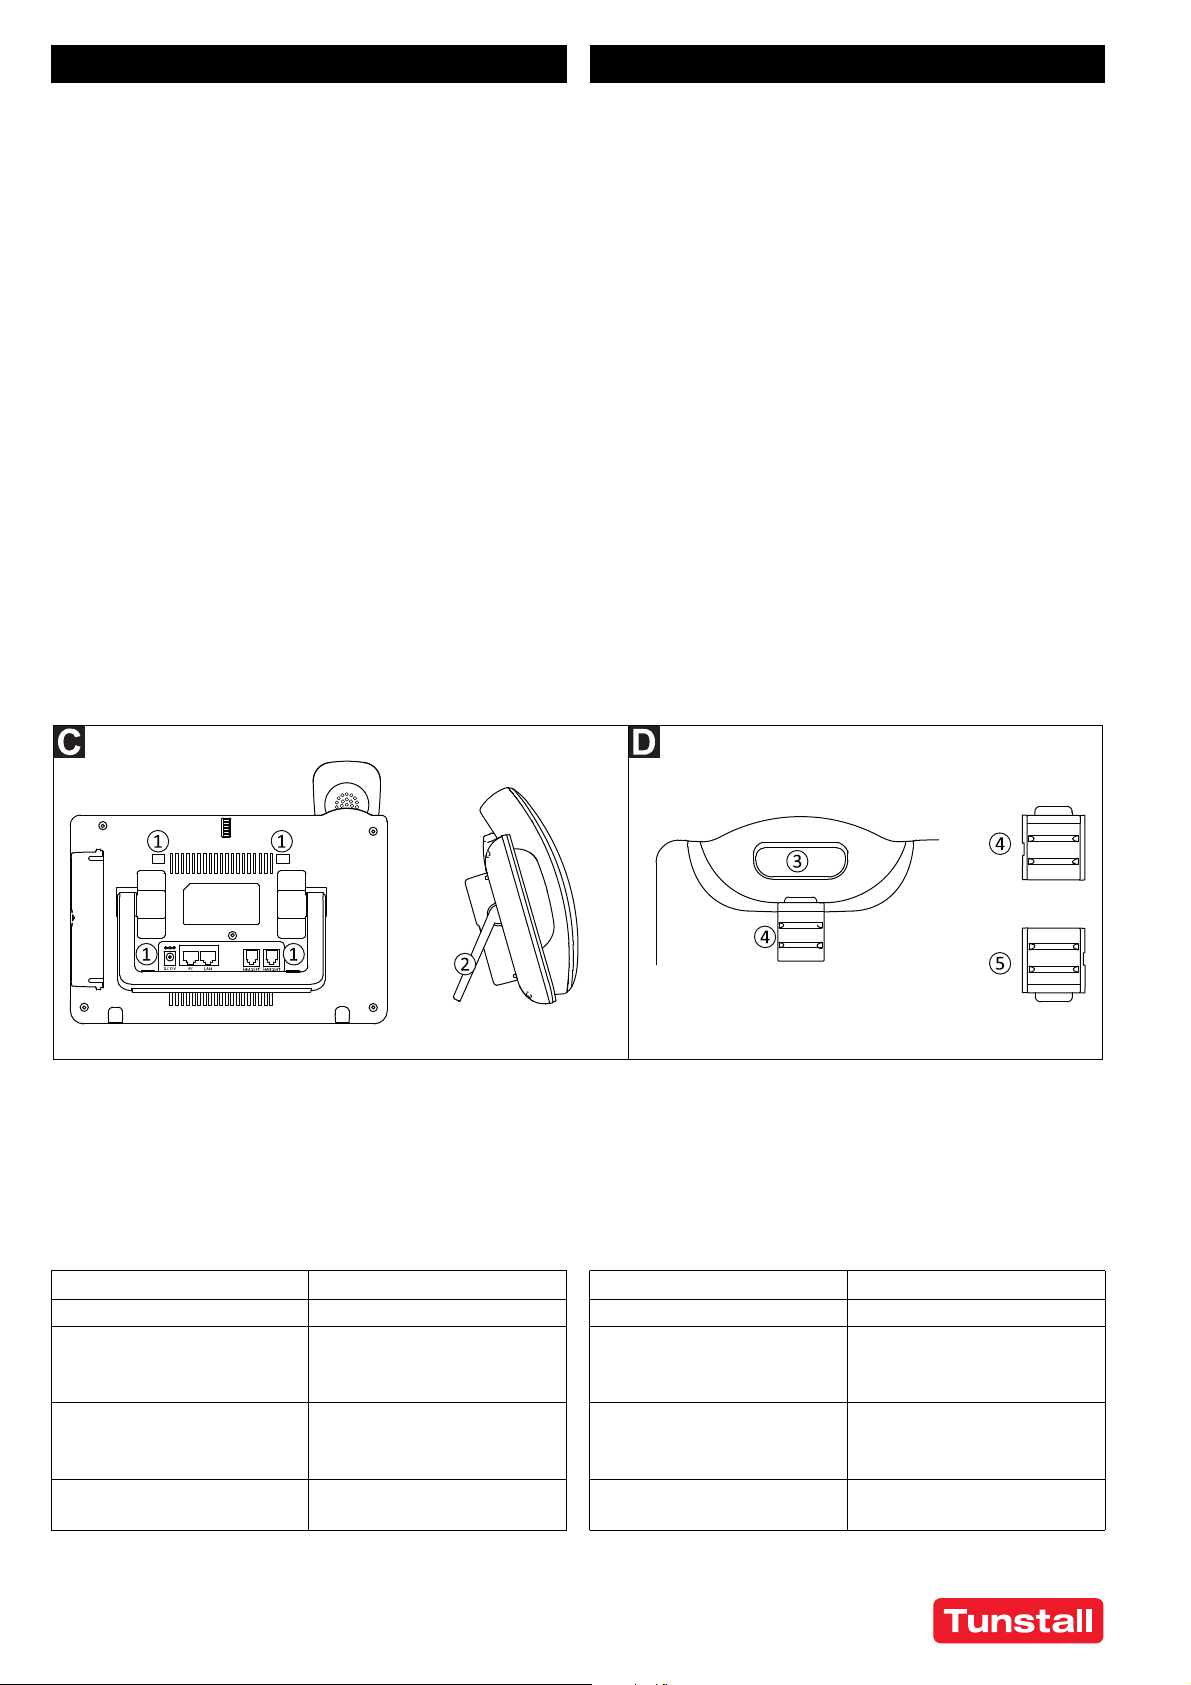
5. Stromversorgung
5.1 Stromversorgungsoptionen
Das Gerät kann wahlweise wie folgt mit Strom versorgt werden:
Mit dem mitgelieferten 12-V-Netzteil* (Eingang: 100 –
240 V AC, 50 – 60 Hz; Ausgang 12 V DC, 1,5 A).
in einem LAN mit PoE oder PoE+ (PoE 802.3af Klasse 3, PoE+
802.3at, Klasse 4).
5. Power supply
5.1 Power supply options
The device can optionally be supplied with power as follows:
with the supplied 12 V power adaptor* (input: 100 – 240 V
AC, 50 – 60 Hz; output 12 V DC, 1.5 A).
in a LAN with PoE/PoE+ (PoE 802.3af Class 3, PoE+ 802.3at,
Class 4).
*) Verwenden Sie nur das im Lieferumfang enthaltene 12-V-DC-
Steckernetzteil. Die Verwendung eines anderen Netzteils kann
das Gerät beschädigen.
*) Only use the 12 V DC power adaptor included in the scope of
delivery of the device. Use of another power adapter may dam-
age the unit.
5.2 Stromquelle für Sicherheitszwecke
Die deutsche Norm DIN VDE 0834 schreibt vor, dass bei Störung
der allgemeinen Stromversorgung die Rufanlage aus einer
Stromquelle für Sicherheitszwecke versorgt werden muss. Das
bedeutet die 230-V-AC-Steckdose bzw. der PoE+ Switch/PoE+
Injektor muss mit einer USV/Netzersatzanlage verbunden sein.
5.2 Power source for safety purposes
The German standard DIN VDE 0834 stipulates that in the event
of a failure of the general power supply, the nurse call system
must be supplied from a power source for safety purposes. This
means that the 230 AC socket respectively the PoE/PoE+ net-
work switch or injector must be connected to an UPS/auxiliary
power supply.
6. Standort für das Gerät
Mindestabstand 20 cm zwischen dem Gerät und dem Körper
des Benutzers.
Bereich vor dem Mikrofon (vorne rechts) muss frei bleiben.
Der optimale Abstand für das Freisprechen beträgt 50 cm.
Nicht in einen Raum mit hoher Staubentwicklung, weil die-
ses die Lebensdauer des Geräts erheblich mindern kann.
Keine direkte Sonneneinstrahlung oder anderer Wärme-
strahlung, weil dieses die elektronischen Komponenten und
das Kunststoffgehäuse beschädigen kann.
Nicht in Umgebungen mit Dampfbildung.
6. Location for the device
Minimum distance of 20 cm between the device and the
body of the user.
The area in front of the microphone (front right) should be
kept clear. The optimum distance for hands-free talking is
50 cm.
Do not place the device in a room with high dust generation,
as this can considerably reduce the service life of the device.
No direct sunlight or other heat radiation, as this can dam-
age the electronic components and the plastic housing.
Not in environments where steam is generated.
DE - Installationsanleitung EN - Installation Instructions
00 8803 89, 03/22 (Rev. 1.0) - 3 -
© Tunstall GmbH, Orkotten 66, 48291 Telgte, Germany, www.tunstall.de
7. Gerät anschließen (Abb. B) 7. Connecting the device (fig. B)
7.1 Anschlüsse
[1] Anschluss für 12-V-DC-Ste-
ckernetzteil (wird nur
benötigt, wenn das Gerät
nicht über das Netzwerk-
kabel (PoE) mit Strom ver-
sorgt wird)
[2] Anschluss Netzwerkkabel
(LAN)
[3] Anschluss Handhörerkabel
(HANDSET)
7.1 Ports
[1] Power jack for 12 V DC
power adaptor (only
required if the device is not
powered via the Ethernet
cable (PoE))
[2] LAN port
[3] RJ9 handset connector
port
7.2 So gehen Sie vor
Voraussetzung für die Nutzung der ComStationIP ist,
dass die Rufanlage für deren Nutzung mit der Konfigura-
tionssoftware SystemOrganizer konfiguriert wurde.
1. Das Handhörerkabel am Handhörer und am Anschluss Hand-
hörerkabel [3] anschließen.
2. Das Netzwerkkabel am LAN-Anschluss [2] und an die RJ45-
Anschlussdose im Raum anschließen. Die RJ45-Anschlussdo-
se muss gemäß dem Technischen Handbuch mit der Rufan-
lage verbunden sein.
VORSICHT! Achten Sie darauf, dass die Rastnase der RJ-
Stecker einrastet, damit die Stecker nicht herausrut-
schen können.
3. Wenn die Stromversorgung des Geräts nicht mit PoE oder
PoE+ erfolgt (PoE-Switch), das 12-V-DC-Steckernetzteil an
den Anschluss [1] und an eine 230-V-Steckdose anschließen.
VORSICHT! Schalten Sie das Gerät beim Systemstart
oder bei einem Firmware-Update NICHT aus. Andernfalls
könnte die Firmware beschädigt werden.
Das Gerät fährt hoch. Der Anmeldebildschirm der
ComStationIP-App erscheint automatisch.
4. Tippen Sie auf „ANMELDEN“.
Sie werden angemeldet. Der Home-Bildschirm der
ComStationIP-App erscheint. Die ComStationIP ist in Betrieb.
7.2 Proceed as follows
A prerequisite for using the ComStationIP is that the
nurse call system has been configured for the use using
the SystemOrganizer configuration software.
1. Connect the handset cord to the handset and to the port for
handset cord [3].
2. Connect the Ethernet cable to the LAN port [2] and to the
RJ45 connection box in the room. The RJ45 connection box
must be connected to the nurse call system according to the
Technical Manual.
CAUTION! Make sure that the latch of the RJ plugs
engages so that the plugs cannot slip out.
3. If the device is not powered by PoE or PoE+ (PoE network
switch), connect the 12 V DC power adaptor to the power
jack [1] and to a 230 V socket.
CAUTION! DO NOT switch off the device during system
start-up or when updating the firmware. Doing so may
damage the firmware.
The device is starting up. The ComStationIP app login screen
appears automatically.
4. Tap “LOG IN”.
You will be logged in. The Home screen of the ComStationIP
app appears. The ComStationIP is operating.
VORSICHT! Sie müssen alle Stecker (Netzwerkkabel, 12-
V-Steckernetzteil) gegen unbeabsichtigtes Herausziehen
sichern. Es empfiehlt sich, die RJ45-Anschlussdose und
die 230-V-Steckdose mit einem Warnhinweis zu verse-
hen: „GEFAHR! Stecker nicht abziehen! Gerät ist Teil der
Rufanlage”.
CAUTION! You have to secure all plugs (Ethernet cable,
12 V power adaptor) against unintentional removal. It is
recommended to label the RJ45 connection box and the
230 V socket with a warning: “DANGER! Do not pull out
the plug! Device is part of the nurse call system”.
Wie Sie die ComStationIP bedienen oder Voreinstellungen än-
dern, entnehmen Sie der Hilfe in der App. Um die Hilfe zu öffnen,
auf das Fragezeichen im Home-Bildschirm tippen.
Bevor die ComStationIP benutzt werden kann, muss eine Funkti-
onsprüfung durchgeführt werden, wie in dem Technischen
Handbuch beschrieben.
For information on how to operate the ComStationIP or change
default settings, please refer to the App Help. To open the help,
tap on the question mark in the home screen.
Functional checks must be carried out as described in the tech-
nical manual, before the ComStationIP can be used.
DE - Installationsanleitung EN - Installation Instructions
1 2 3
00 8803 89, 03/22 (Rev. 1.0) - 4 -
© Tunstall GmbH, Orkotten 66, 48291 Telgte, Germany, www.tunstall.de
8. Tischaufstellung / Wandmontage (Abb. C, D)
8.1 Tischaufstellung
Das Gerät hat einen integrierten Standfuß [2]. Um diesen zu nut-
zen, klappen Sie ihn rückseitig aus dem Gerät und stellen den ge-
wünschten Standwinkel ein. Achten Sie auf einen sicheren Stand
des Gerätes.
8.2 Wandmontage
1. Wandhalterung an den vier Montageschlitzen [1] auf der
Rückseite des Gerätes befestigen.
2. Gerät an den beiden Schlüssellöchern der Wandhalterung
an der Wand befestigen.
3. Stecker unterhalb der Hörergabel [3] entnehmen und in die
Position für Wandmontage [4] wieder einstecken.
8. Desktop installation / wall mounting (fig. C, D)
8.1 Desktop installation
The device has an integrated stand [2]. To use it, fold it out of the
back of the device and adjust it to the desired angle. Ensure that
the device is in a secure position.
8.2 Wall mounting
1. Attach the wall mount to the two mounting slots [1] on the
back of the device.
2. Attach the device to the wall via the two key holes in the wall
mount.
3. Pull out the tab from the handset cradle [3].
4. Rotate the tab and plug it back into the slot with the exten-
sion up [4].
8.2 Wandmontage
1. Wandhalterung an den vier Montageschlitzen [1] auf der
Rückseite des Gerätes befestigen.
2. Gerät an den beiden Schlüssellöchern der Wandhalterung
an der Wand befestigen.
3. Stecker unterhalb der Hörergabel [3] entnehmen und in die
Position für Wandmontage [4] wieder einstecken.
8.2 Wall mounting
1. Attach the wall mount to the two mounting slots [1] on the
back of the device.
2. Attach the device to the wall via the two key holes in the wall
mount.
3. Pull out the tab from the handset cradle [3].
4. Rotate the tab and plug it back into the slot with the exten-
sion up [4].
[1] Vier Montageschlitze zur
Befestigung der Wandhal-
terung
[2] Eingebauter Standfuß für
die Tischaufstellung
[3] Hörergabel
[4] Stecker in Position Wand-
montage (Ansatzstück
zeigt nach oben)
[5] Stecker in Position Tisch-
aufstellung (Ansatzstück
zeigt nach unten)
[1] Four mounting slots for
fixing the wall mount
[2] Built-in stand for desktop
installation
[3] Handset cradle
[4] Tab in the position for wall
mounting (tab with exten-
sion up)
[5] Tab in the position for
desktop installation (tab
with extension down)
DE - Installationsanleitung EN - Installation Instructions
9. Technische Daten
Abmessungen (HxBxT) 84 x 252 x 211 mm
Gewicht 1080 g
Leistungsaufnahme: – über PoE: ca. 11 W
– über Steckernetzteil:
ca. 9 W
Umgebungstemperatur:
- Transport, Lagerung
- Betrieb
-10 °C bis +60 °C
0 °C bis +40 °C
Relative Luftfeuchtigkeit 10 % – 90 %
(nicht kondensierend)
9. Technical data
Dimensions (HxWxD) 84 x 252 x 211 mm
Weight 1080 g
Power consumption – via PoE: approx. 11 W
– via Power adaptor:
approx. 9 W
Ambient temperature:
- Transport, storage
- Operation
-10 °C to +60 °C
0 °C to +40 °C
Relative humidity 10 % – 90 %
(non condensing)

Popular Music Mixer manuals by other brands

Fairlight Prodigy 2 user guide

Fairlight

Fairlight Prodigy 2 user guide

SM Pro Audio PM8 operating manual

SM Pro Audio

SM Pro Audio PM8 operating manual

Tripp Lite B021-000-19-HD2 owner's manual

Tripp Lite

Tripp Lite B021-000-19-HD2 owner's manual

WorkPro PA 9500 CDT Series user manual

WorkPro

WorkPro PA 9500 CDT Series user manual

IMG STAGE LINE MPX-204E/SW instruction manual

IMG STAGE LINE

IMG STAGE LINE MPX-204E/SW instruction manual

PULSE+ MLX402 manual

PULSE+

PULSE+ MLX402 manual

IMG STAGE LINE MPX-222BPM instruction manual

IMG STAGE LINE

IMG STAGE LINE MPX-222BPM instruction manual

HQ Power PROMIX60 manual

HQ Power

HQ Power PROMIX60 manual

StoneAge Saturn manual

StoneAge

StoneAge Saturn manual

IMG STAGE LINE PMX-162 instruction manual

IMG STAGE LINE

IMG STAGE LINE PMX-162 instruction manual

Alto S-12 user manual

Alto

Alto S-12 user manual

IMG STAGE LINE MMX-602 instruction manual

IMG STAGE LINE

IMG STAGE LINE MMX-602 instruction manual

SignVideo ENG-44 Operator's manual

SignVideo

SignVideo ENG-44 Operator's manual

Show Tec Creator 1024 manual

Show Tec

Show Tec Creator 1024 manual

Mode Machines SID user manual

Mode Machines

Mode Machines SID user manual

Etec Congo Jr Service documents

Etec

Etec Congo Jr Service documents

ACU-RITE MILL PWR G2 Software update

ACU-RITE

ACU-RITE MILL PWR G2 Software update

IMG STAGE LINE MPX-206/SW instruction manual

IMG STAGE LINE

IMG STAGE LINE MPX-206/SW instruction manual

manuals.online logo
manuals.online logoBrands
  • About & Mission
  • Contact us
  • Privacy Policy
  • Terms and Conditions

Copyright 2025 Manuals.Online. All Rights Reserved.