ULT FREEZER
SET
Silence
Note
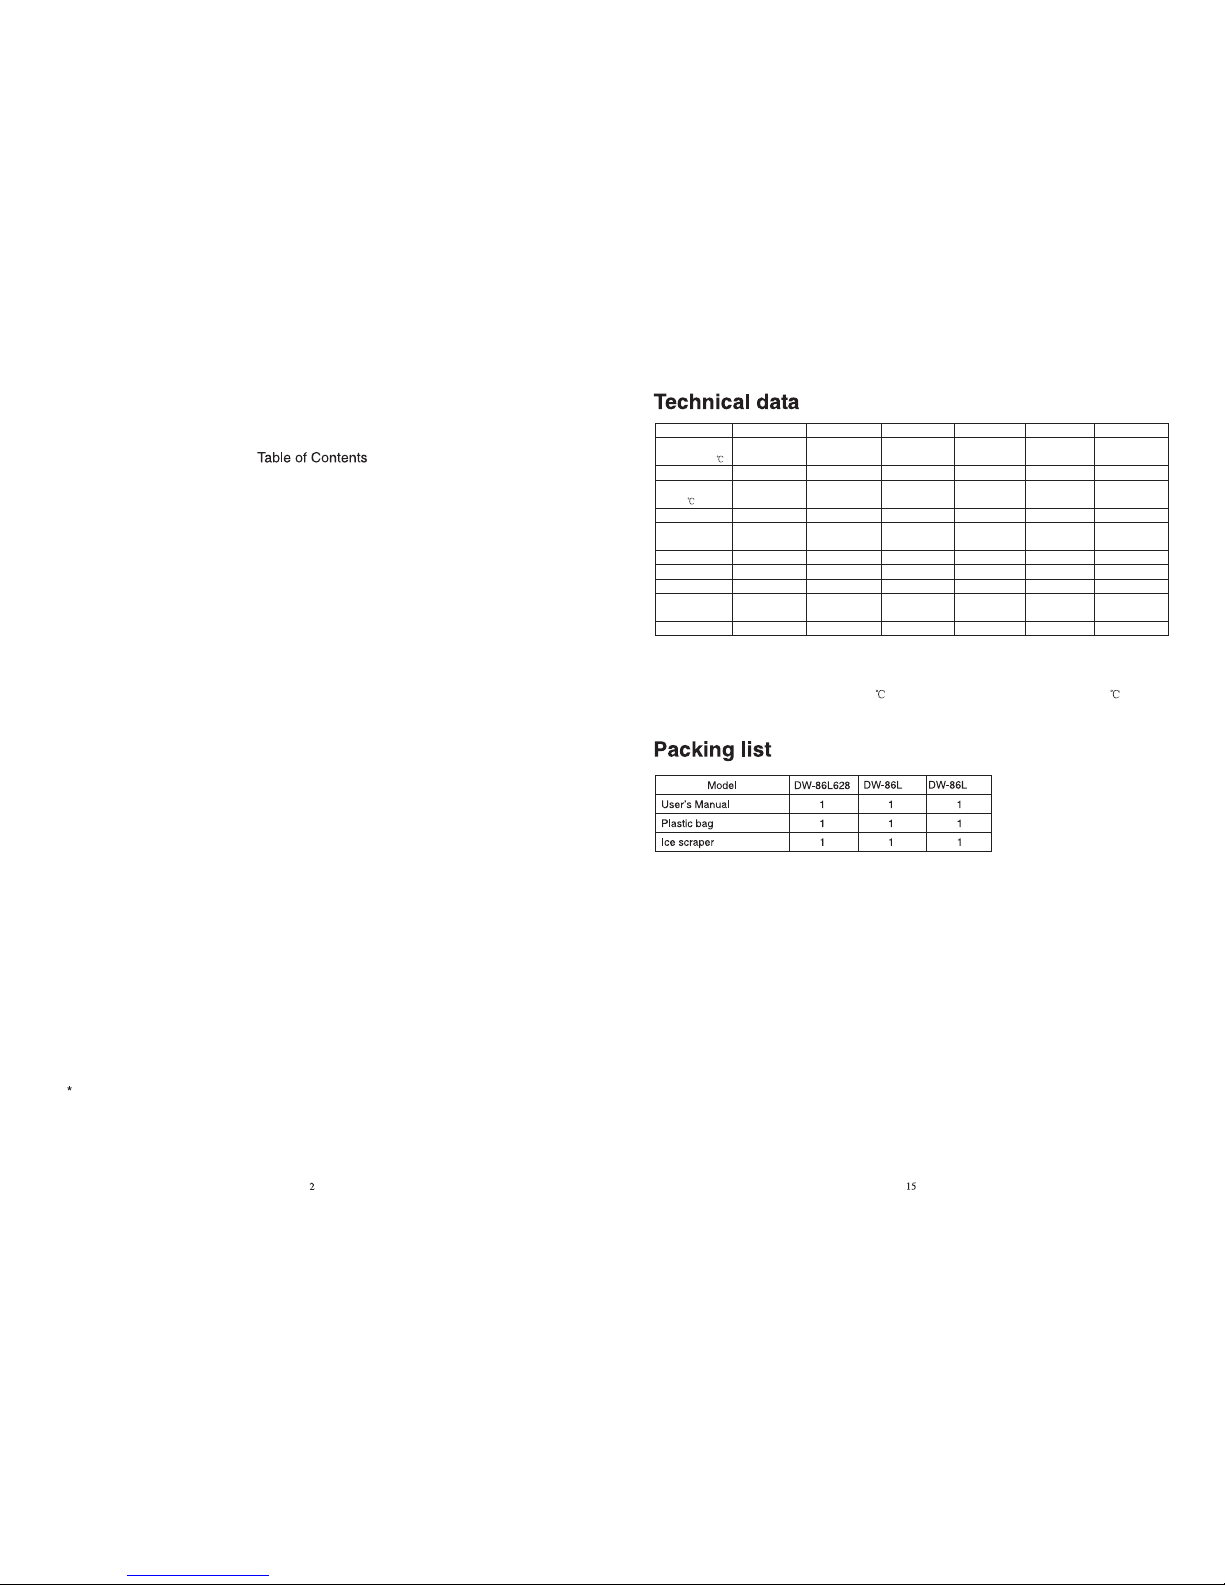
A routine maintenance of cleaning
the filter every two or three months
should be conducted to ensure a better
working performance ,especially before
summer.
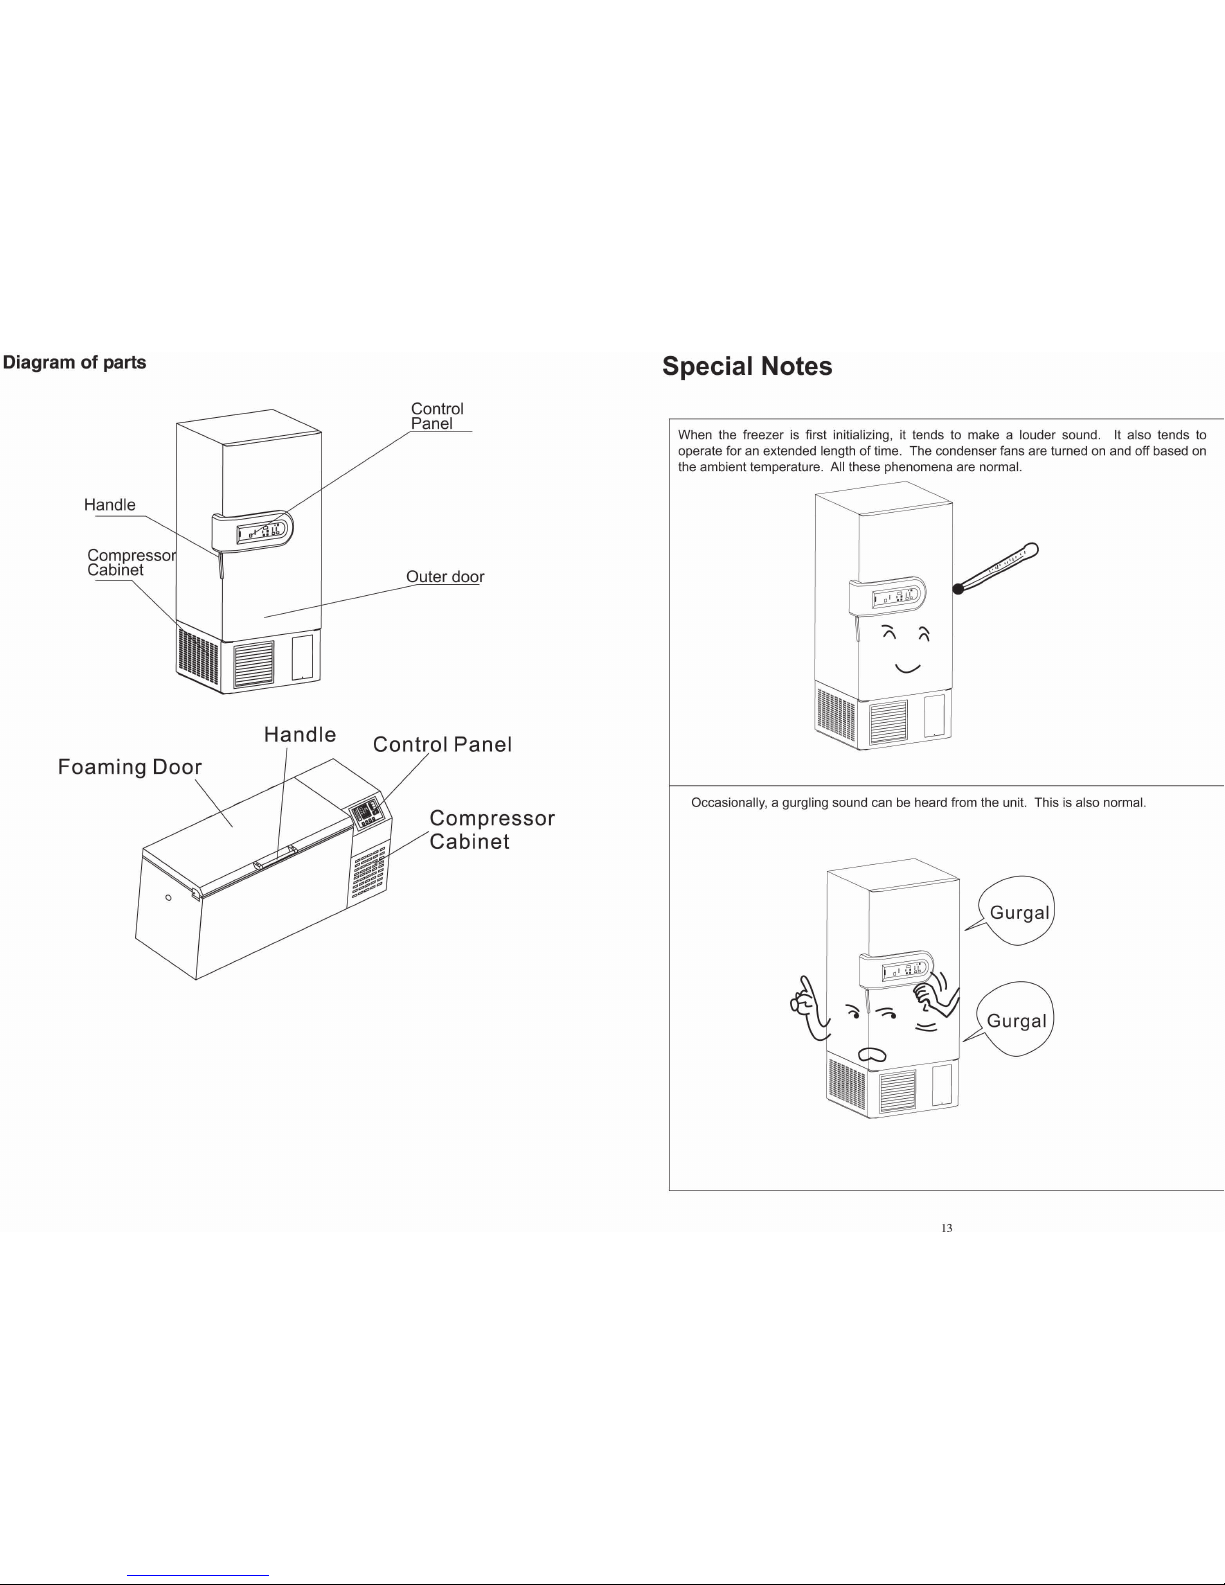
The control panel is mounted on the door of the unit.
The following diagram depicts the control panel display.
Funtion and operating instructions of the control panel
1.Panel Display
1.1 Work status
A. Locking Indicator
B.Network Indicator
C.Operating Indicator
D.Voltage Regulator
E.Backup System Indicator
1.2Alarm Indicator
A.High Temperature Indicator
B.Low Temperature Indicator
C.Abnormal Voltage Indicator
D.High Ambient Temperature
E.Sensor Failure Indicator
F.Power Failure Indicator
G.Dirty Condenser Indicator
H.Low Battery Indicator
This signal indicates the equipment control is in the locked mode.
This is to prevent mistakenly operating the unit control.
This signal indicates that the equipment's network system is in
good working order.
This signal indicates that the equipment is in good working
condition.
This light indicates that the voltage regulator is either boosting or
bucking the voltage.
This signal indicates that the backup system is in work condition.
When a failure develops on the unit during its operation, the alarm on the system will sound.
When this indicator is on, the unit's temperature reaches
the warm alarm limit.
When this indicator is on, the unit's temperature reaches
the cold alarm limit.
When this signal is on, the unit's supply voltage is
beyond the normal range.
When this signal is on, the surrounding ambient is
higher than 32 .
This signal suggests there is a failure associated with
temperature sensors. The temperature display will alternate displaying the sensor temperature
and the failure code. The failure code for heat exchanger sensor is E3, the failure code for
main control sensor is E2, the failure code for condenser sensor is E1, and finally, the failure
code for the ambient sensor is E0.
When this signal is on, it suggests there has been a power outage.
If this light is turned on, it means the condenser filter is
blocked with dirt. It must be cleaned for the proper operation of the unit.
When this light is turned on, the battery light is at low capacity.
The charging process starts automatically if the unit is powered up.
Operating
Voltage Regulator
Please note that a flashing alarm light cannot be canceled unless the root cause for the alarm is
eliminated. The buzzing alarm can be temporarily silenced for 30 minutes by pressing the alarm
silence button. However, if the problem is not fixed, the buzzer alarm will resume after 30
minutes.
When the unit is first setup to operate, the security code to unlock the control is “06”. After
unlocking the unit, simultaneously push “Function Selection” and “Buzzer Cancel” for 5
seconds. The display will show 06. Use the up and down arrow keys to change the security
code. The choices are 05, 06, 07----29, and 30. After a number is chosen, do not touch the
unit for 5 seconds. The control system will enter locked mode. The new code is effective.
When the unit is in the locked mode, all keys are in the locking mode. This is to prevent the
unit from mis-operation. To adjust the control, the keys must be unlocked first. The procedure
is as follows. Push the up arrow, the temperature display flashes. Push the up or down arrow
again to change the display to security code (the initial value is 06). Push the “Function
Selection” key for 3 seconds. The locking sign turns off. This means the unit is in unlocked
mode. Push the “Function Selection” key again to show the temperature set point value, high
temperature alarm value and low temperature alarm value.
Push the “Function Selection” key. Once the interior
temperature setting indicator is on, the temperature display area flashes. To change the
temperature of unit, push the up and down arrow intermittently to increase or decrease the
temperature setting by 1 . To rapidly increase or decrease the temperature setting, keep
pushing the up or down arrow . After the adjustment is done, do not make any further
changes for 10 seconds. The temperature display stops flashing. The unit enters the locked
mode.
Push the “Function Selection” key to turn on
the “high temperature alarm setting” light. The temperature display flashes.To change the
high temperature alarm of unit, push the up and down arrow intermittently to increase or
decrease the temperature setting by 1 . To rapidly increase or decrease the temperature
setting, keep pushing the up or down arrow. After the adjustment is done, do not make any
further changes for 10 seconds. The temperature display stops flashing. The unit enters the
locked mode. When the freezer temperature is warmer than the high temperature alarm set
point, the unit's alarm sounds, and the high temperature alert light flashes. High temperature
alarm set point can only be set to a value of at least 5 warmer than the set point
temperature of the unit.
Push the “Function selection” key to turn on
the “low temperature alarm setting” light. To change the high temperature alarm of unit, push
the up and down arrow intermittently to increase or decrease the temperature setting by 1 .
To rapidly increase or decrease the temperature setting, keep pushing the up or down arrow.
After the adjustment is done, do not make any further changes for 10 seconds. The
temperature display stops flashing. The unit enters the locked mode. When the freezer
temperature is colder than the low temperature alarm set point, the unit's alarm sounds, and
the low temperature alarm light flashes. The low temperature alarm set point can only be set
to a value of at least 5 colder than the set point temperature of the unit.
2.Selection of Security Code
3.Adjustment of Control Panel
3.1Function Selection
A.Freezer temperature set point
B.Setting of high temperature alarm
C.Setting of low temperature alarm