VBOX Video HD2 User manual

VBOX Video HD2 - Quick Start Guide
Product introduction
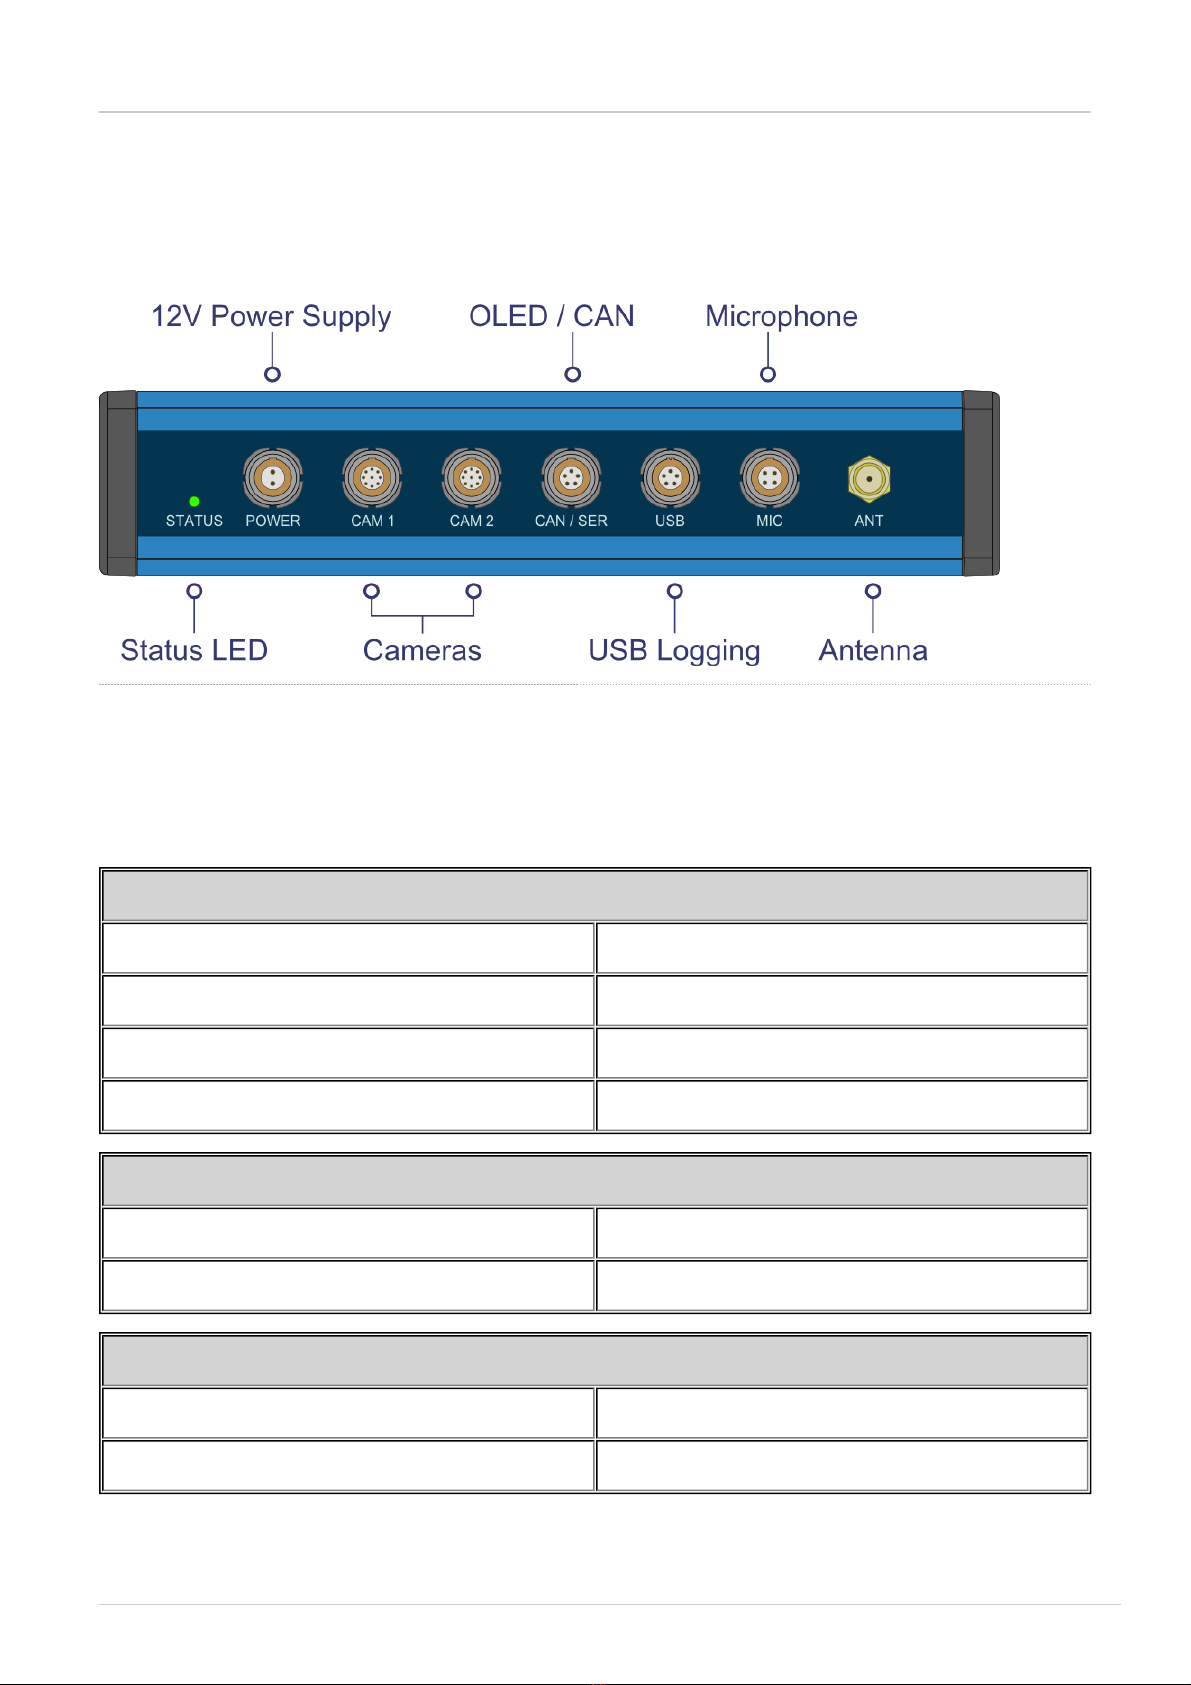
The VBOX Video HD2 system is a twin camera 1080p video system, with a live time graphical overlay display.
The HD2 is compatible with existing OLED systems, as well as Racelogic modules such as the Micro Input
Module and Mini Input Module.
The system is supplied with VBOX Video HD2 setup software, which allows the user to fully customise the
graphical overlay and configure CAN channels to be captured from a connected vehicle CAN bus, or Racelogic
module.
VBOX Video Registration
So that Racelogic can continue to provide you with notification of the latest software releases, firmware
upgrades and to offer technical support, please register your Video VBOX.
Please register your unit here: http://vboxmotorsport.com/index.php/...r-your-product
What’s included in the kit:
The standard inventory and optional extras available for the VBOX Video HD2 are listed below.
VBOX Video HD2 Standard Inventory
1 x VBVDHD2-V1 VBOX Video HD2 Unit
2 x RLACS222 VBOX Video 1080p Camera (3m)
1 x RLACS231 32GB SD Card - Including VBOX Video Software
2 x RLACS125 Lightweight Windscreen Suction Mount
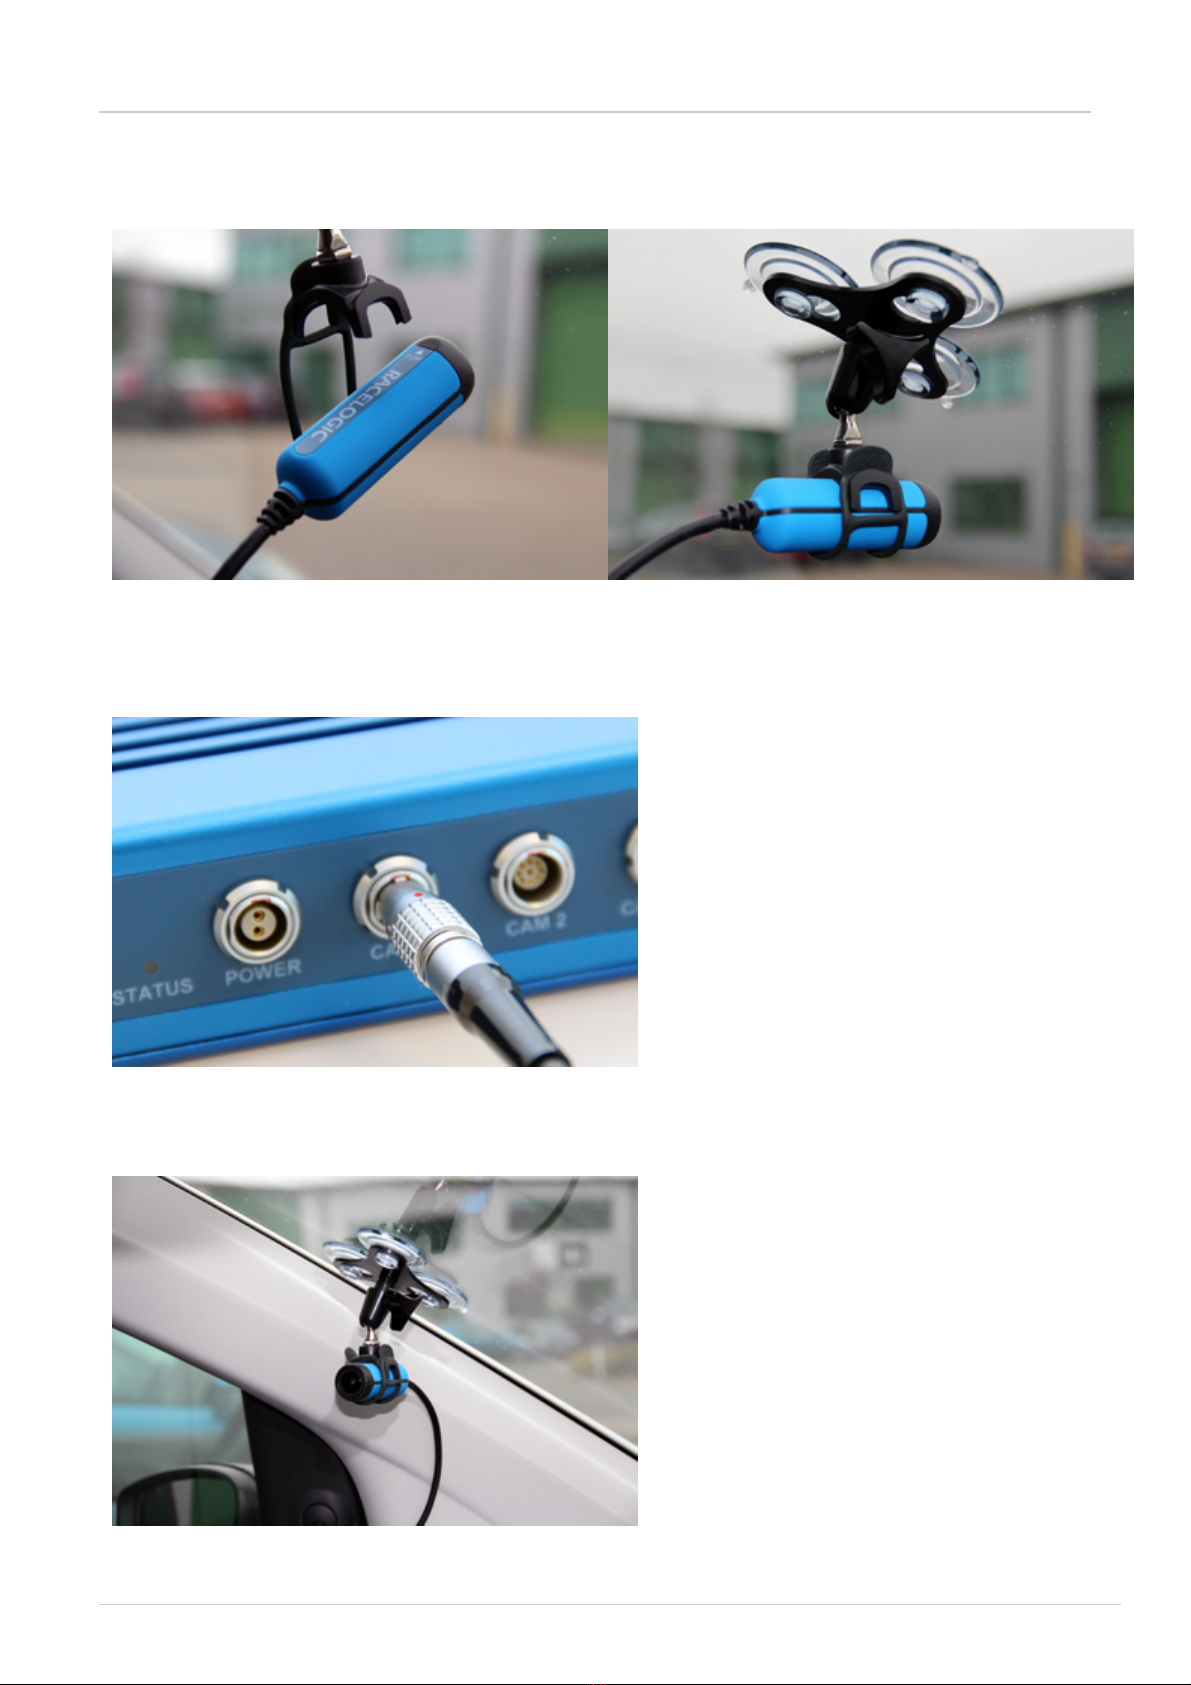
1 x RLACS221 Mono Microphone (2.5m)
1 x RLACS220 GPS/GLONASS Magnetic Antenna (3m)
1 x RLCAB010L Cigar Plug Power Supply (2m)
RACELOGIC Support Centre (https://racelogic.support)
1

VBOX Video HD2 Optional Extras
RLCAB081 CAN / Serial Splitter
RLCAB073 USB Logging Cable
RLCAB132 Stereo Microphone Splitter
RLACS133 Stereo Microphones
RLVBDSP05 / 04 OLED Laptiming Display
RLVBMICIN01L Micro Input Module
RLVBMIM01 Mini Input Module
RLCAB069L / RLCAB015L CAN Cables – OBD/Unterminated
RLACS182-L Clip on CAN bus Interface
RLACS224 Bluetooth Remote Start/Stop Logging Switch
RLACS150 Forward facing camera roll cage mount
RLACS149 PiP camera roll cage mount
RLACS112 Li-ion battery pack
Hardware Overview
Front Panel
RACELOGIC Support Centre (https://racelogic.support)
2

Rear Panel
LED Behaviour
If two solid green LEDs are shown, the system is ready to record.
If the system is permanently fitted to a vehicle, it should be possible to view the front panel when it is mounted.
A brief overview of the LED behaviour is below.
OK LED
Green – Fast Flash System powering up
Green – Slow Flash Fully powered - No SD Card
Green – Solid SD Card OK – READY TO LOG
Amber – Slow Flash Requires reboot
GPS LED
Green – Slow Flash Searching for Satellites
Green – Solid GPS Lock OK – READY TO LOG
REC LED
Blue - Solid Recording – DO NOT REMOVE MEDIA
Blue – Fast Flash Closing Files – DO NOT REMOVE MEDIA
There is a fourth LED on the rear of the system. If the mounting solution only allows the back panel to be visible,
this status LED works on a simple ‘traffic light’ style system.
RACELOGIC Support Centre (https://racelogic.support)
3

Status LED
Red System Error
Amber Not ready to record (either no GPS or no SD Card)
Green Ready to record – system all OK
Blue Recording – DO NOT REMOVE MEDIA
VBOX Video iOS/Android Application
To easily check and fine tune camera mounting positions, the VBOX Video application can be downloaded from
the Apple App Store or the Google Play Store.Search for 'VBOX Video'.
Once you have downloaded the application to your phone, you will be able to pair with the HD2 unit’s wifi
connection, and see a live camera preview. Note: - password is the serial number of the HD2 - VVH[******].
Hardware Setup
The VBOX Video system is ready to use straight out of the box.
The VBOX Video HD2 is designed to disperse heat from internal components through the lid of the box,
as such the unit will become hot to the touch when running.
The enclosure is designed to use airflow to cool the unit down, so do ensure that the top of the HD2 is
left open to the air.
RACELOGIC Support Centre (https://racelogic.support)
4

3. Attach one of the cameras to the windscreen using the forward facing camera mount. Keep the camera
level by ensuring ‘Racelogic’ faces upwards.
4. Connect this camera to ‘CAM1’.
5. Connect the second camera to the window, or desired mounting position.
RACELOGIC Support Centre (https://racelogic.support)
6

6. Connect this camera to ‘CAM2’.
7. Connect the microphone to the ‘MIC’ input.
8.Connect the power connector, the HD2 takes about 45 seconds to fully boot.
RACELOGIC Support Centre (https://racelogic.support)
7

9.Insert the SD card into the SD card slot – the OK LED should show solid green.
10. Connect your iOS or android device to the HD2 unit via wifi. The WiFi name (SSID) of the VBOX Video
will be 'VVH' followed by the serial number, eg. 'VVH00063'. The password will also be 'VVH' followed by the
serial number.
For customers not on the latest version of Firmware (V 1.2.45 onwards), the SSID of the unit will be
'VBoxVideo' followed by the serial number and the password is ‘racelogic’.
*Note - We recommend that customers update to the latest firmware version as the Apps are not fully
backwards compatible.
Open the VBOX Video camera preview app on your phone and fine tune the setup of the two camera
positions.
RACELOGIC Support Centre (https://racelogic.support)
8

11. Take the car outside and wait for the VBOX Video HD2 to gain satellite lock. The GPS LED should show
solid green.
12. Now, the system is ready to record. VBOX Video HD2 will start recording when travelling over 15km/h,
and stop recording once the vehicle has been under 15km/h for 10 seconds. Note: There is a 10 second pre-
buffer, so video data will be captured for 10 seconds before recording is triggered.
13. The Blue Record LED will be on when recording video. When you come to a stop, it will then flash as the file is
closed.
IMPORTANT – NEVER remove the SD card when the Blue Record LED is on or flashing – you will lose video. If you
have come to a stop, but the LED is on, press the RECORD button to stop the video before removing the card.
Sometimes, due to poor satellite visibility in a garage or close to a building, the box may start recording, even if the car is
stationary. Always check the Blue LED before ejecting the card.
Logging Media
RACELOGIC Support Centre (https://racelogic.support)
9

SD Cards
The VBOX Video HD2 is supplied with a 32GB SD card. The format needed for cards is FAT32 - if any cards
larger than 32GB are used, they will need to be reformatted, as FAT32 is not the standard format for larger
cards. For more info on doing this, click here.
When purchasing SD cards, always buy a quality brand such as SanDisk, Kingston or Lexar.
USB Stick
If data is to be logged to a USB memory device, the optional RLCAB073 cable is required. Racelogic
recommend good quality USB sticks - write speeds above 16MB/s and good USB chip sets are essential. As
with SD Cards, the format needed for USB sticks is FAT32 - if any USB devices larger than 32GB are used,
they will need to be reformatted. For more info on doing this, click here.
RACELOGIC Support Centre (https://racelogic.support)
10
Table of contents
Other VBOX Car Video System manuals