Vechline Visio Evo Dual User manual

1
FR Système Video de recul
Manuel d’utilisation……………………………………………………………………..……………………………………………..………2
EN Reverse Camera System
Instruction manual………………………………………………………………………………………………………………………..…..4
IT Sistema video per retromarcia
Istruzioni per l’uso……………………………………………………………………………………………………………………....……..6
ES Sistema de cámara de visión trasera
Instrucciones de uso………………………………………………………..…………………………………………………..…………….8
NL Achteruitrijcamera set
Gebruiksaanwijzing…………………………………………………..………………………………………………………………………10
DE Rückfahrvideosystem
Bedienungsanleitung…………………………………………………………………………………………………………………………12
.
15936312
Visio Evo Dual
EURO ACCESSOIRES ZAE Parc Champagne BP89 Tournon sur Rhône FRANCE

2
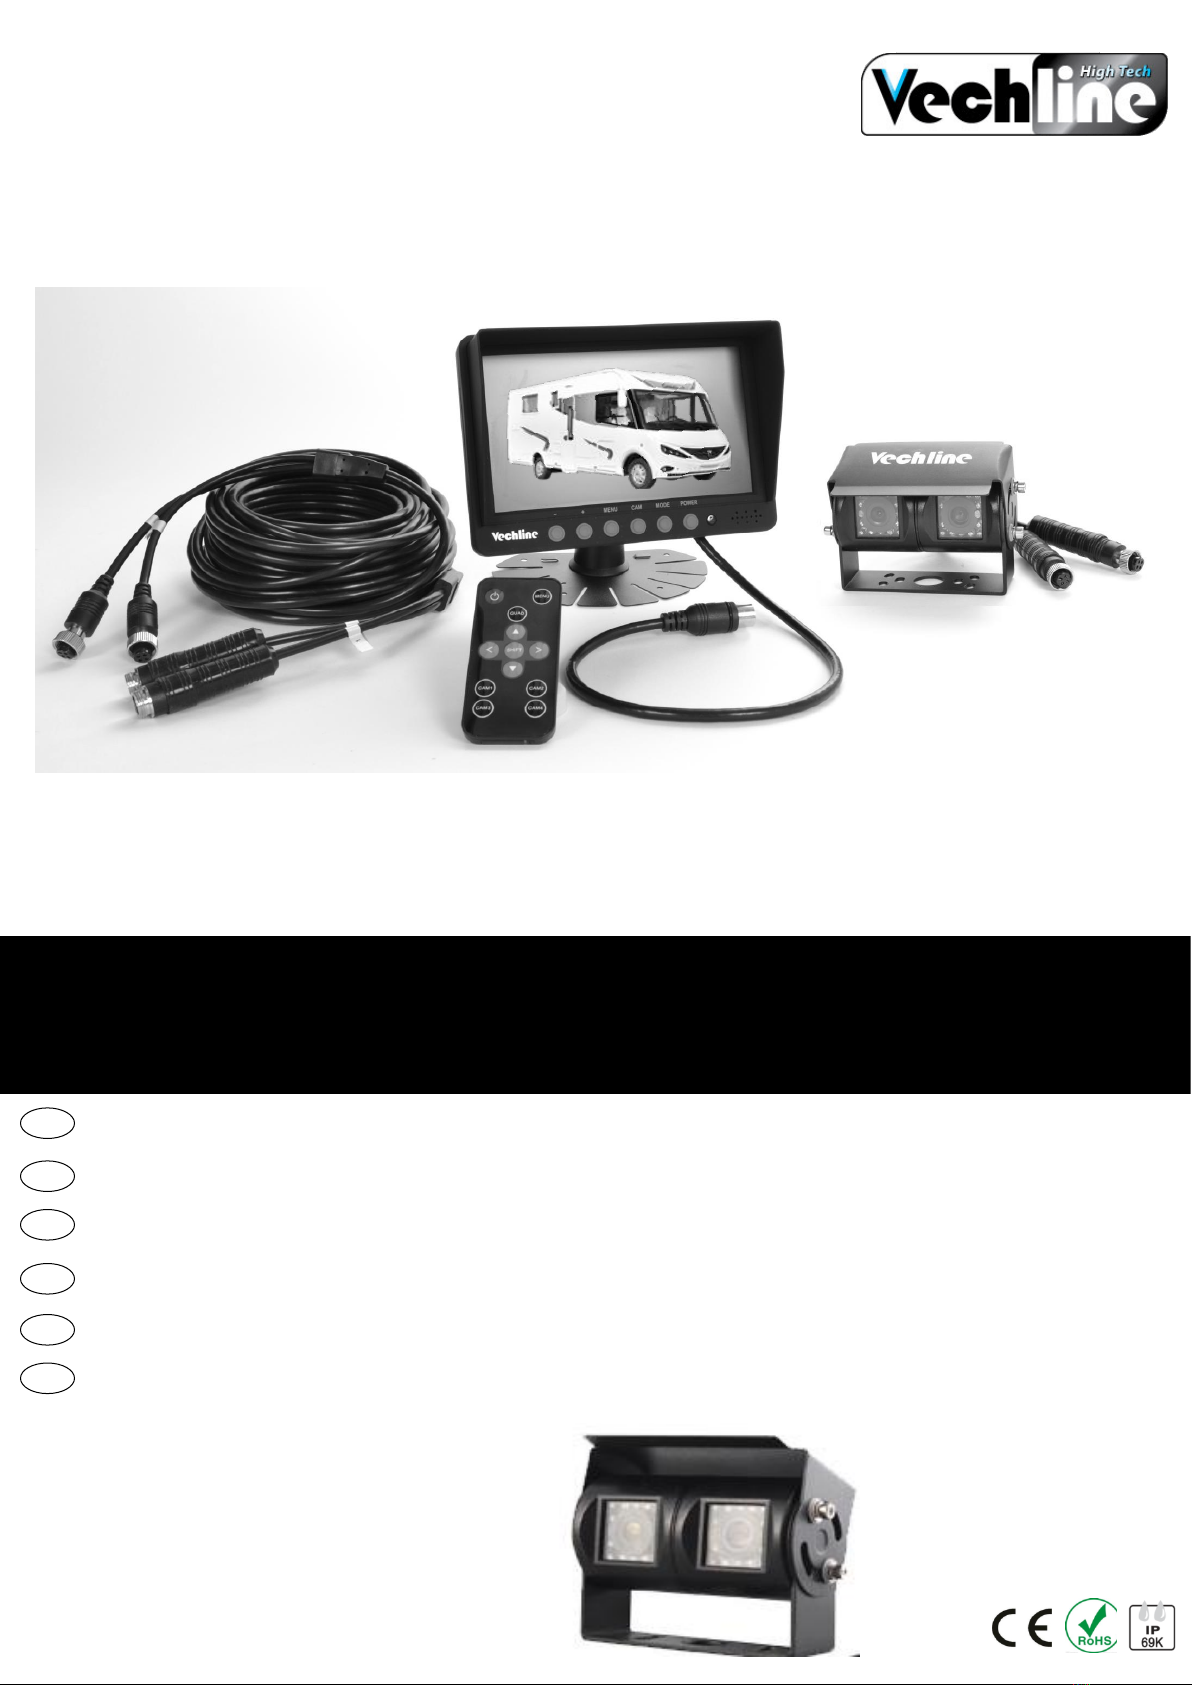
1. Principe de fonctionnement
VISIO EVO DUAL est un système vidéo de recul spécialement adapté aux véhicules de loisirs et notamment aux camping cars.
Nos produits ont été conçus et fabriqués pour votre satisfaction totale.
Notre engagement de fiabilité assure de longues années d’intégrité à votre véhicule. Nous vous recommandons de faire installer ce produit par un
professionnel ; nous vous conseillons aussi vivement la lecture de ce guide pour une utilisation optimale du produit.
2. Précautions d’emploi
▪Débrancher toutes les batteries du véhicule avant d’installer la vidéo.
▪Lors de l’installation, veiller à ne pas créer de courts-circuits sur les différents équipements d’origine du véhicule.
▪Prendre connaissance et respecter les prescriptions de sécurité du constructeur du véhicule.
▪L’installation de l’écran ne doit pas gêner le déploiement de l’air bag en cas de choc.
▪L’écran doit être installé de manière à ne pas être projeté en cas d’arrêt brutal du véhicule
3. Avant l’installation
▪Nous vous remercions de suivre les conseils suivants avant l’installation du système :
▪Vérifier la présence du 12v ou 24v batterie qui servira à l’alimentation de la vidéo.
▪Vérifiez si tous les éléments du véhicule fonctionnent correctement tels que FEU DE RECUL ARRIERE, contact et démarrage moteur, allumage des
codes, feux et phares, clignotants, chauffage, climatisation, verrouillage des portes, ... Vérifiez après installation que tous ces mêmes éléments
fonctionnent correctement.
▪Utilisez un multimètre afin de repérer les polarités des fils
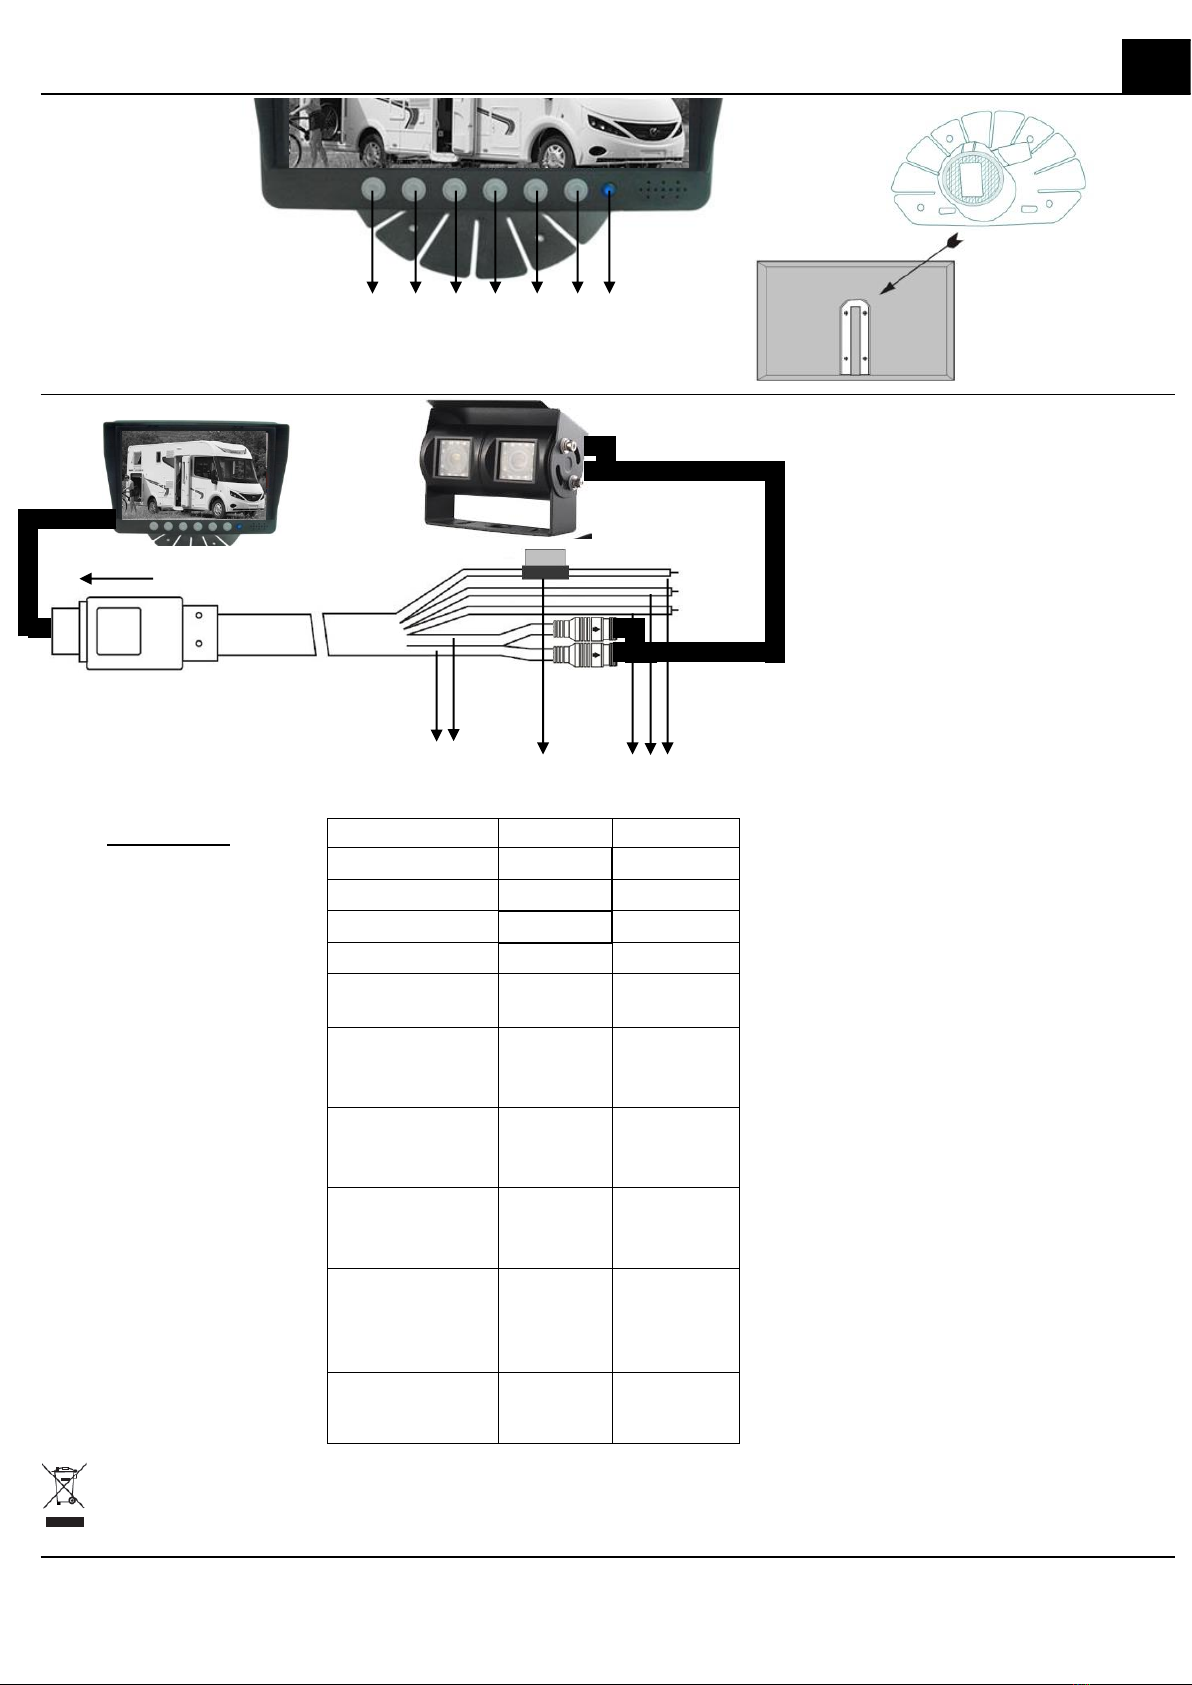
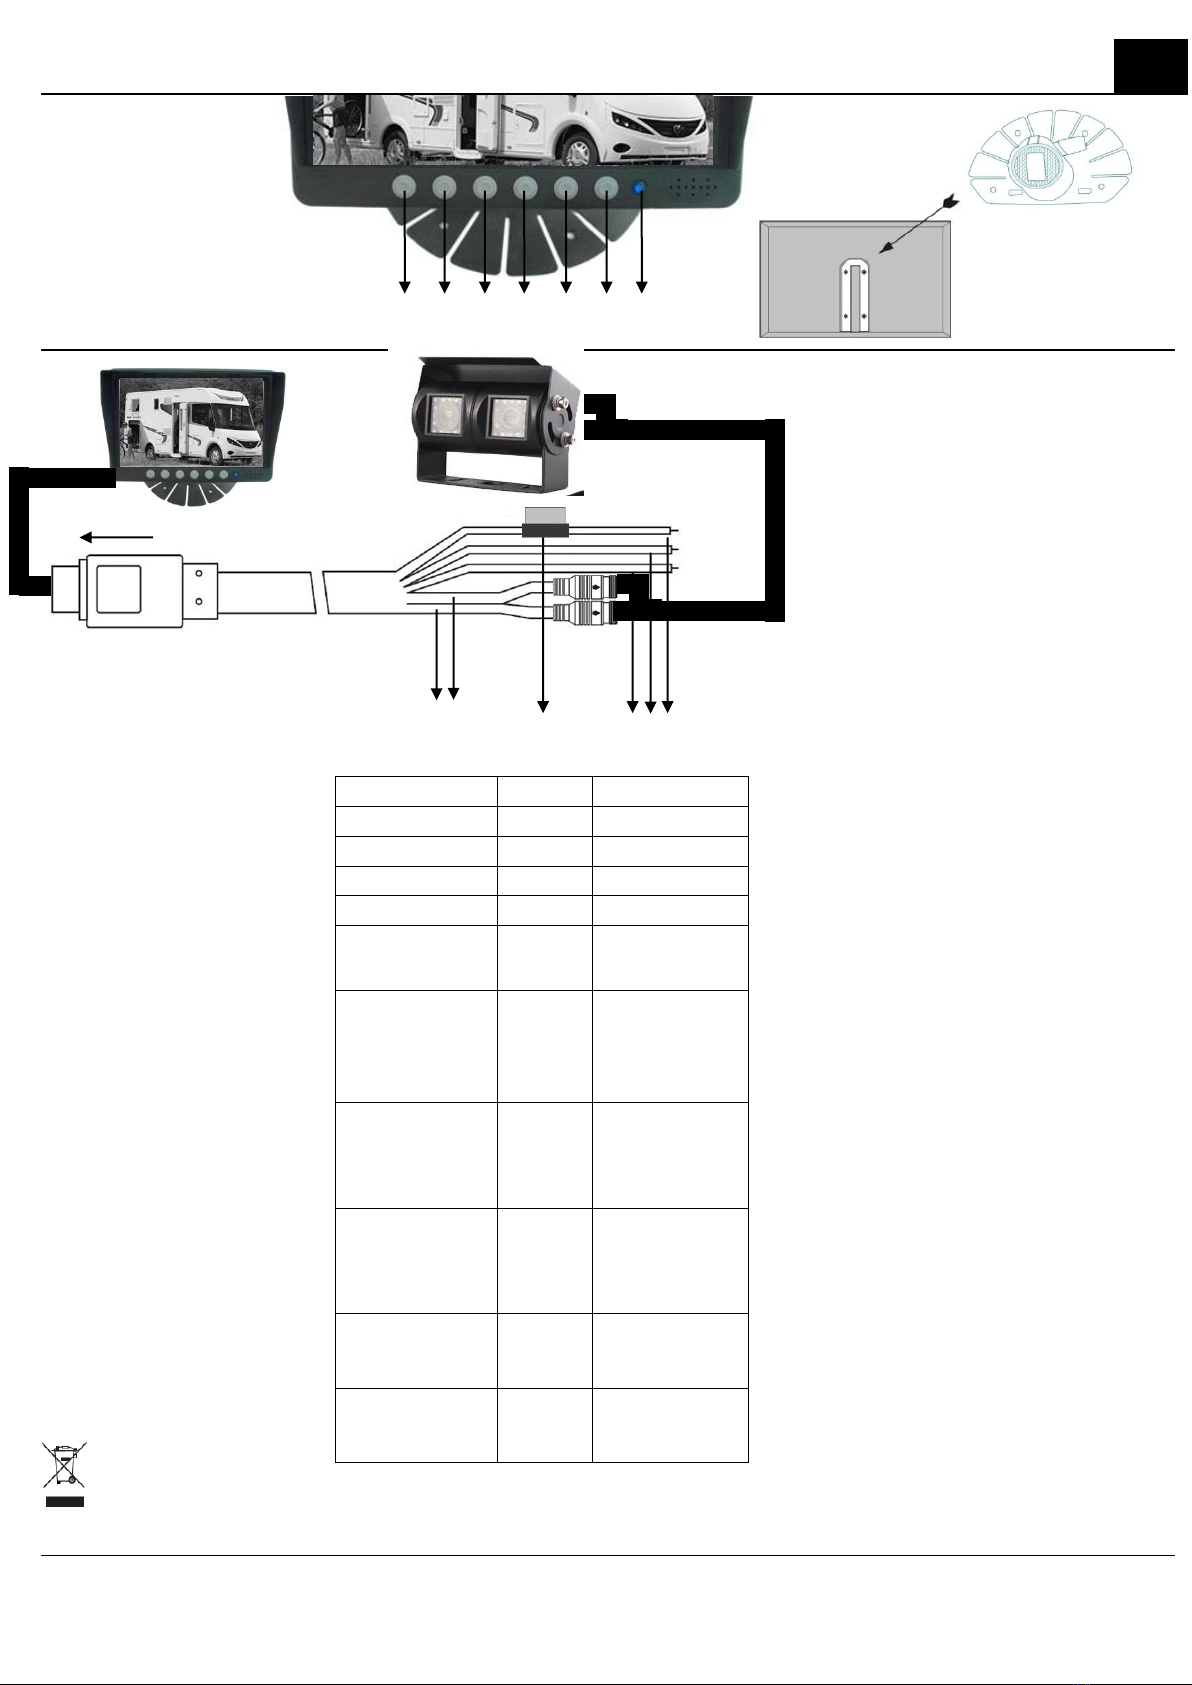
4. Caractéristiques techniques
Tension d’alimentation de l’écran : 12/32 VDC Puissance de l’écran : 5W
Format écran : 7’’, 16/9 Standard vidéo : NTSC/PAL
Luminosité: 400 cd/ m2Fonction miroir : Oui
Fonction Audio : Oui Fonction anti-givre : Oui
Température de fonctionnement: -20 / 50°C Résistance aux vibrations : 10G
Dimensions de l’écran(Lxlxh) : 182x38x124mm Poids de l’écran : 1100g
Tension alimentation de la caméra : 12 VDC Angle de vision de la caméra : 120°+45°
Vision de nuit / portée : 30 LED infra rouge / 20m
Poids de la caméra : 420g Câble : 15m
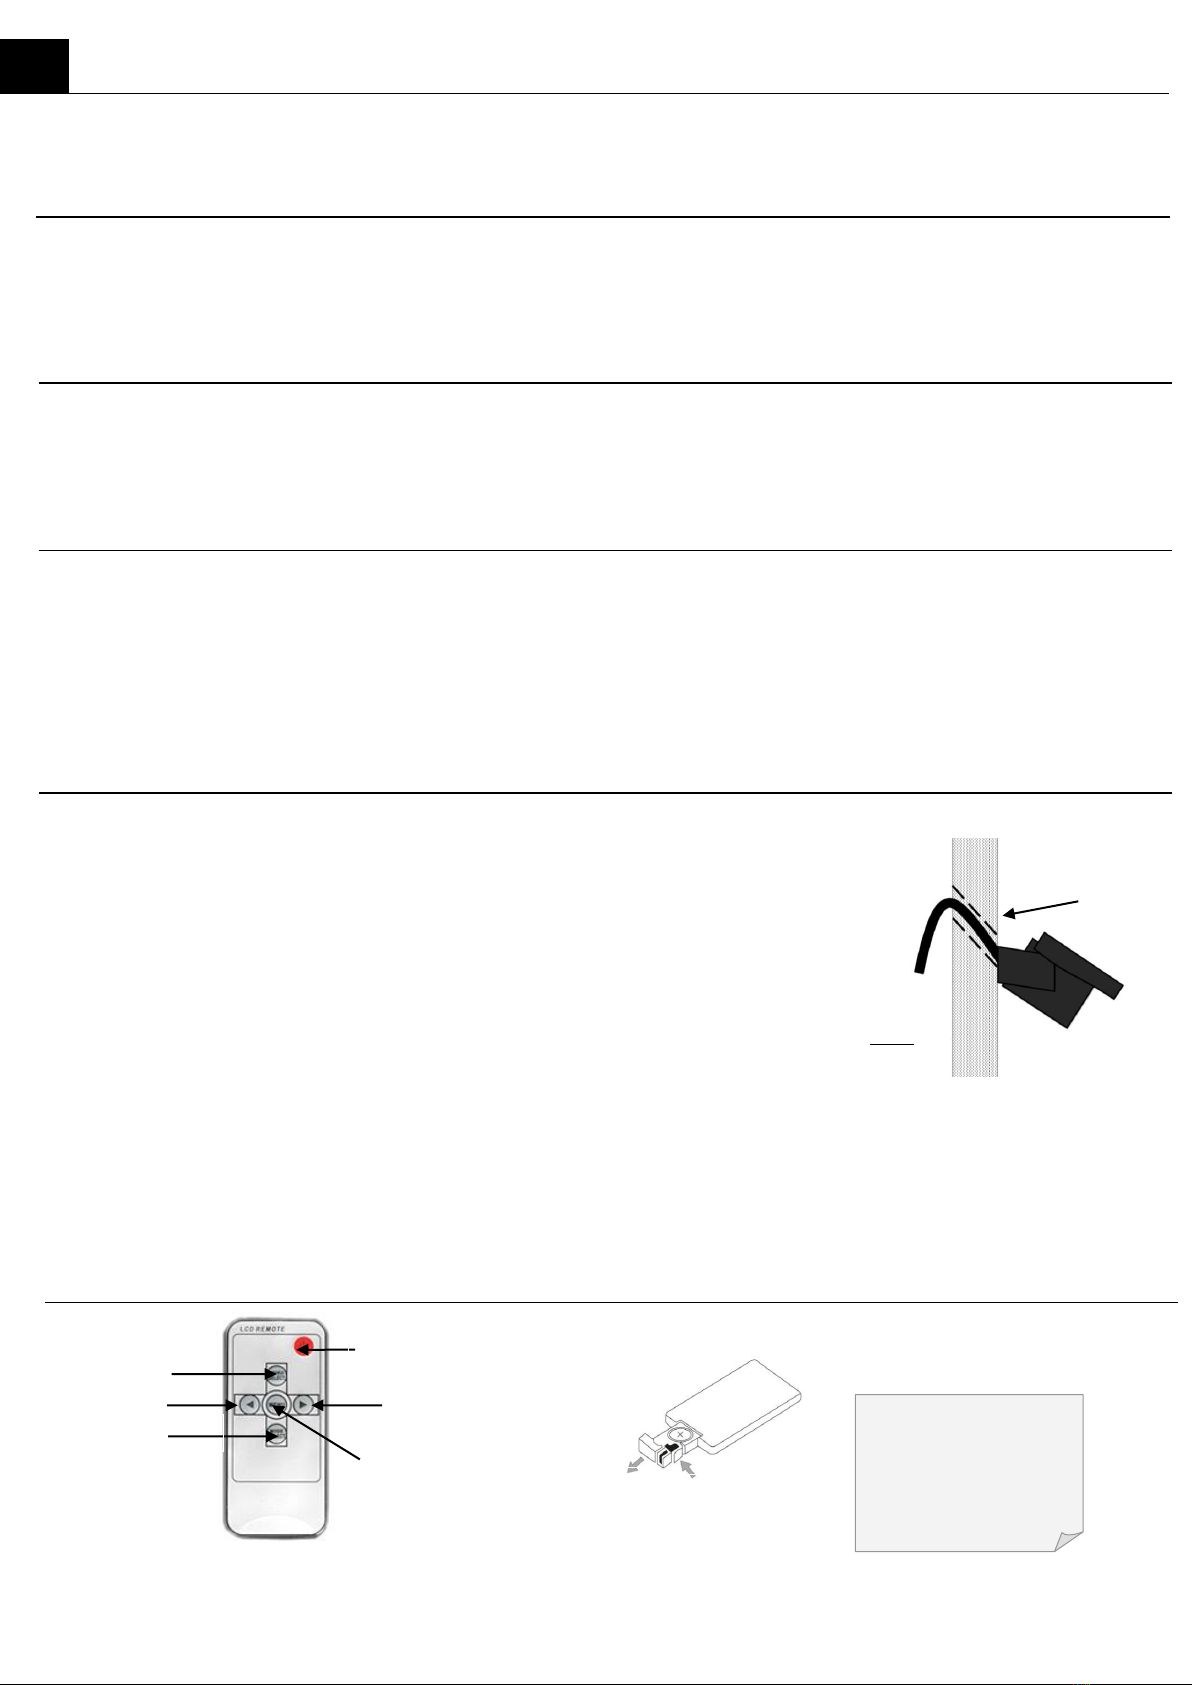
5. Conseils d’installation
▪Ne pas installer l’écran dans le champ de vision du conducteur
▪Faire cheminer la rallonge de 15 mètres dans le véhicule. Si cela est impossible, prévoir un système de fixation
et une protection mécanique adaptée pour éviter l’arrachement du câble.
▪Installer la caméra à une hauteur minimale de 2 mètres pour avoir un champ de vision optimal
▪Lors des perçages et vissages, s’assurer que la vis ou la mèche ne risque pas d’occasionner des dégâts sur
les éléments se trouvant dans et derrière le panneau (câble électrique, tuyau…)
▪S'assurer que les câbles ne soient pas en contact avec des arêtes tranchantes qui pourraient les détériorer.
▪Isoler tous les raccords électriques que nécessite l’installation.
▪Après perçage des panneaux pour permettre le passage du câble, refaire une étanchéité avec l’aide d’un
mastic adéquat. Prévoir un trou de 15 mm.
▪Ne pas installer la caméra sur le toit (risque d'arrachage par des branches d’arbres). Préférer la face arrière du
véhicule.
▪Ne pas diriger sur la caméra un jet de nettoyeur haute pression.
▪Ne jamais ouvrir le boîtier de la caméra car son étanchéité pourrait être réduite.
▪Ne pas exercer de traction sur le câble de la caméra. Cela pourrait l’arracher et nuire à l’étanchéité.
▪Ne pas immerger la caméra
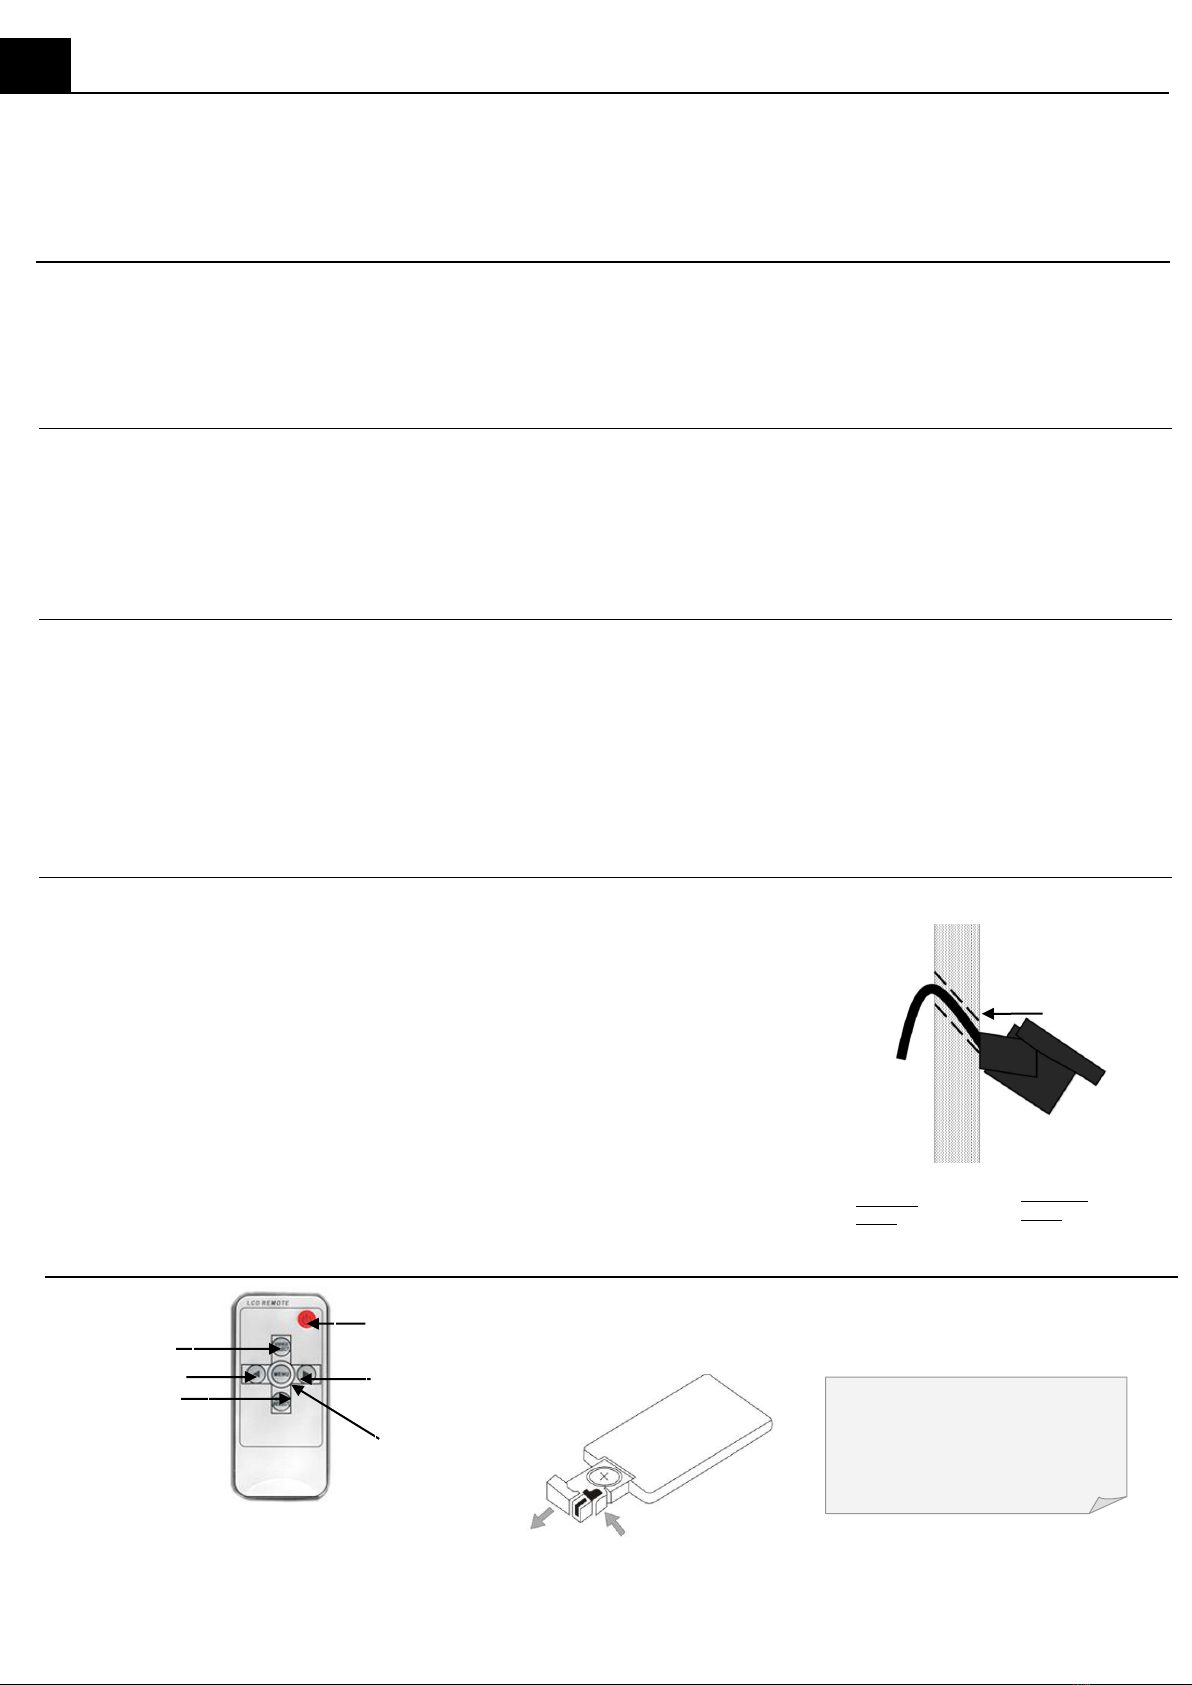
6. Télécommande
2
FR
Intérieur
Paroi du véhicule
Trou dans la paroi à
45° vers le bas pour
éviter les infiltrations
Sélection caméra
Sélection du mode
Bas (-)
Haut (-)
Marche / arrêt
Menu
1
2
Extérieur
Remplacez la pile (CR0205) lorsque
la télécommande faiblit.
Ne pas faire tomber et ne pas
marcher sur la télécommande.
Ne pas utiliser près de l’eau.

3
7. Ecran
1 2 3 4 5 6 7
8. Branchements
1 2 3 4 5 6
Menu de l’écran :
L’équipement en fin de vie doit être éliminé par une filière de traitement adaptée.
Il ne doit en aucun cas être jeté dans une poubelle domestique car il est soumis aux impératifs de la directive européenne 2002/96/EC.
9. Garantie
La garantie couvre uniquement les pannes intervenant dans un contexte d’utilisation normale.
Ne sont pas couverts par la garantie : les défaillances causées par une utilisation inappropriée ou à un manque d’entretien.
FONCTION
ACTION
REGLAGE
Marche / Arrêt
POWER
Choix de la caméra
CAM
Choix du mode d'écran
MODE
Volume
+ et -
Luminosité
x3 MENU
+ et -
MENU pour
valider votre
choix
Contraste
x2 MENU
x1 (-)
x1 MENU
+ et -
MENU pour
valider votre
choix
Couleur
x2 MENU
x2 (-)
x1 MENU
+ et -
MENU pour
valider votre
choix
Langue
x1 MENU
x2 (-)
x1 MENU
+ et -
MENU pour
valider votre
choix
Miroir
x1 MENU
x3 (-)
x1 MENU
+ et - pour
choisir la camera
MENU pour
changer le
réglage
Reset
x1 MENU
x8 (-)
x1 MENU
+
1- Caméra 1
2- Caméra 2
3- Fusible 3A
4- CAM 1 à raccorder à la
borne « + » du feu de recul
(noir) et CAM 2 à raccorder
à la borne « + » du feu de
recul (marron)
5- Masse (Noir)
6- +12V ou +24V
Ecran
1- Bas (-)
2- Haut (+)
3- Menu
4- Sélection caméra (CAM1/CAM2)
5- Mode (CAM1/CAM2/CAM1+CAM2)
6- Marche/arrêt
7- Témoin de tension
15m
FR

4
1. Introduction
VISIO EVO DUAL is a reverse camera system designed for motorhomes.
Our products have been manufactured for your full satisfaction. Our liability commitment ensures many years of your vehicle's integrity.
We advise you to have this product installed by a professional; we also advise you to read carefully this guide for an optimal use of this product.
2. Safety Information
▪Before mounting the video system, disconnect all the batteries of your vehicle.
▪During the installation, avoid causing short circuits between all standard equipments of the vehicle.
▪Read carefully and follow the safety instructions from your vehicle's manufacturer.
▪The screen must be placed in a way that it will not interfere with the trigger action of the air bag.
▪The screen must be installed in a fixed place in case of sudden stop of the vehicle.
3. Before installing
▪Please follow carefully these instructions prior to the installation:
▪Make sure that your vehicle is equipped with a 12 or 24 volts battery ; screen power supply.
▪Check if all electric functions of your vehicle are working well, such as indicators, brake lights, horn, ignition, lights…. Make sure all these functions
are still working well after the mounting.
▪Find wire negative and positive terminals by using a voltmeter.
4. Technical Specifications
Screen operating voltage : 12/32 VDC Screen power : 5W
Screen size : 7’’, 16/9 Video system : NTSC/PAL
Brightness: 400 cd/ sqm Audio : Yes
Heating function : Yes Operating temperature: -20 / 50°C
Vibration resistance : 10G Screen size(LxWxH): 182x38x124mm
Screen weight : 1100g Camera operating voltage : 12 VDC
Camera viewing angle : 120°+45° Night vision / range: 2x15 infra red LED / 20m
Camera weight : 420g Cable length : 15m
5. Installation Tips
▪Do not install the screen in the driver's field of view.
▪Reeve the 15 m cable into the vehicle. If not possible use a fixing system and protect the cable in order to avoid
any damage.
▪To provide a suitable viewing angle, the camera must be fixed at a minimum height of 2m.
▪Before drilling (a 15 mm hole) check that you will not damage any component inside behind the panel.
▪Make sure the cables are not close to sharp edges or objects
▪Insulate all electrical supplies you need for the installation.
▪After drilling the hole for the cable, start sealing through-holes with a suitable sealant.
▪Do not install the camera on the roof (tree branches could damage the camera) but at the back of the vehicle.
▪Do not clean the camera with a high-pressure cleaner.
▪Do not open the camera : this may damage its waterproof properties and functioning.
▪Do not pull on the cables, as this may damage its waterproof properties and functioning.
▪Do not immerse the camera into water.
6. Remote control
GB
Inside
Camera
45° downward hole to
avoid infiltrations
Camera selection
Mode selection
Down (-)
Up (-)
ON / OFF
Menu
Replace the battery
(CR0205) as soon as the
remote control is
weakening.
Do not drop nor step on.
Do not use next to water.
1
2

5
Screen
1 2 3 4 5 6 7
7. Wiring diagram
1 2 3 4 5 6
Screen Functions :
When this product has reached the end of its useful life dispose of it in a disposal centre or at your community waste facility.
Do not dispose of this product in your normal domestic waste as it must be recycled in accordance with European Directive 2002/96/EC.
8. Warranty
The warranty applies to faults occurring during normal working conditions.
The warranty will become void when the device is damaged by improper use or care.
FUNCTION
ACTION
ADJUSTMENT
ON / OFF
POWER
Camera selection
CAM
Screen mode
MODE
Volume
+ and -
Brightness
x3 MENU
+ and -
MENU to confirm
Contrast
x2 MENU
x1 (-)
x1 MENU
+ and -
MENU to confirm
Color
x2 MENU
x2 (-)
x1 MENU
+ and -
MENU to confirm
Language
x1 MENU
x2 (-)
x1 MENU
+ and -
MENU to confirm
Mirror effect
x1 MENU
x3 (-)
x1 MENU
+ and –to
select the
camera
MENU to change
set up
Reset
x1 MENU
x8 (-)
x1 MENU
+
GB
15m
cable
1- CAM 1 Black
2- CAM 2 Brown
3- 3A Fuse
4- CAM 1 (brown) CAM2 (black)
5- Ground (Black)
6- +12V or +24V (Red)
Screen
6
1- Down (-)
2- Up (+)
3- Menu
4- Camera selection
(CAM1/CAM2)
5- Mode
(CAM1/CAM2/CAM1+CAM2)
6- ON / OFF
7- Power indicator

6
1. Principio di funzionamento
VISIO EVO VAN è un sistema di retrocamera indicato per i veicoli ricreazionali.
I nostri prodotti sono stai creati e studiati appositamente per la vostra soddisfazione.
Il nostro impegno per l'affidabilità garantisce lunghi anni di integrità nel vostro veicolo.
Si consiglia di installare questo prodotto da un professionista;
Si consiglia inoltre vivamente di leggere questa guida per un uso ottimale del prodotto.
2. Precauzioni d’uso
▪Scollegare tutte le batterie del veicolo prima di installare la retrocamera
▪Durante l'installazione, fare attenzione a non creare cortocircuiti sulle apparecchiature originali diverso del veicolo.
▪Prendere conoscenza e rispettare tutte le prescizioni di sicurezza del costruttore del veicolo
▪L’installazione dello schermo della retrocamera non deve interferire con la posizione dell’air-bag
▪Lo schermo deve essere installato in modo tale che non arrechi danni a cose e persone in caso di urto del veicolo
3. Prima dell’installazione
▪Vi ringraziamo di seguire i nostri consigli concernenti le modalità di installazione del sistema:
▪Verificiare la presenza del 12V o del 24V che servirà all’alimentazione del video..
▪Verificare se tutti gli elementi del veicolo funzionano correttamente. Come i fari posteriori della retromarcia, contatti e spegnimento del motore,
fari, indicazioni di direzione, climatizzazione, riscaldamento ecc. Verificare che gli stessi elementi funzionino anche dopo l’installazione della
retrocamera.
▪Utilizzare un multimetro per verificare la polarità dei fili.
4. Caratteristiche tecniche
Tenzione alimentazione schermo : 12/32 VDC Potenza dello schermo : 5W
Formato schermo: 7’’, 16/9 Standard video : NTSC/PAL
Luminosità: 400 cd/ m2 Funzione specchio : Si
Funzione Audio : Si Funzione anti-gelo : Si
Temperatura di funzionamento: -20 / 50°C Resistenza alle vibrazioni : 10G
Dimenzioni dello schermo(Lxlxh) : 182x38x124mm Peso schermo : 1100g
Tenssione di alimentazione camera : 12 VDC Angolo visione camera : 120°+45°
Visione notte / portata : 9 LED IR / 15m Peso camera : 420g
Cavo : 15m
5. Consigli installazione
▪Non installare lo schermo nel campo visivo del guidatore.
▪Distribuire la prolunga di 15 mt nel veicolo. Se questo è impossibile, prevedere un sistema di fissaggio ed
una protezione meccanica adatta per evitare che si laceri il cavo.
▪Installare la camera ad un’ altezza minima di 2 metri per avere un campo visivo ottimale.
▪Al momento di forare e mettere viti attenzione a non danneggiare nessun elemento all’iinterno del
pannello/fiancata. ( cavi elettrici, tubi acqua ecc )
▪Assicurarsi che i cavi non siano in contatto con parti taglienti o spigolose che possono danneggiarle.
▪Isolare tutti i raccordi elettrici che necessitano di installazione.
▪Dopo l’apertura dei fori sui pannelli, ristabilire la tenuta all’acqua utilizzando un prodotto adeguato ( mastice o silicone
).Prevedere un foro di 15mm.
▪Non installare la camera sul tetto del veicolo. (rischio di danni dai rami su alberi). E’ preferibile il montaggio sulla parte
posteriore.
▪Non orientare sulla camera il getto diretto di un’idropulitrice.
▪Non aprire mai lo chassis della camera che è a tenuta stagna.
▪Non esercitare trazione sui cavi della camera.
▪Non immergere la camera.
6. Telecommande
2
IT
Camera
Sostituire le pile (CR0205) se il
telecomando non funziona
correttamente. Non far cadere il
telecomande o non camminarci sopra
Non utilizzare vicino all’acqua.
Selezione camera
Selezione modalità
Basso (-)
Alto (-)
ON / OFF
Menu
1
2
Esterno del
veicolo
Interno del
veicolo
Parete del veicolo
Foro della parete a
45° verso il basso per
evitare le infiltrazioni

7
7. Schermo
1 2 3 4 5 6 7
8. Allacciamento
1 2 3 4 5 6
Menu dello schermo :
La fine della vita attrezzature deve essere rimosso da un trattamento stampo adatto.
Non deve essere smaltito nei rifiuti domestici in quanto è soggetta ai requisiti della Direttiva Europea 2002/96/CE
9. Garanzia
La fine della vita attrezzature deve essere rimosso da un trattamento stampo adatto.
Non deve essere smaltito nei rifiuti domestici in quanto è soggetta ai requisiti della Direttiva Europea 2002/96/CE
FONZIONE
AZIONE
IMPOSTAZIONE
On / off
POWER
Scelta camera
CAM
Scelta menu schermo
MODE
Volume
+ e -
Liuminosità
x1 MENU
x1 (+)
x2 MENU
+ e -
MENU per confermare
Contrasto
x1 MENU
x1 (+)
x1 MENU
x1 (-)
x1 MENU
+ e -
MENU per confermare
Colore
x1 MENU
x1 (+)
x1 MENU
x2 (-)
x1 MENU
+ e -
MENU per confermare
Lingua
x1 MENU
x1 (+)
x1 MENU
x2 (-)
x1 MENU
+ e -
MENU per confermare
Specchio
x1 MENU
x2 (-)
x1 MENU
Selezionare la camera
con + o -
MENU per passare da
da ON a OFF
Modalità
x1 MENU
x6(-)
MENU per passere da
ON a OFF
(posizione OFF
reccomandata)
1- Camera 1
2- camera 2 (Option)
3- Fusibile 3A
4- CAM1 (Brown) CAM2 (black)
5- Massa (Nera)
6- +12V o +24V
Schermo
8- Basso (-)
9- Alto(+)
10-Menu
11-Selezione camera (CAM1/CAM2)
12-Modalità
13-ON / OFF
14-Spia di tenzione
10m
Fissaggio schermo
su supporto
IT

8
1. Introducción
VISIO EVO DUAL es un sistema cámara de visión trasera especialmente adaptado para los vehículos de ocio y en particular para las Auto
Caravanas.
Nuestros productos han sido diseñados y fabricados para su total satisfacción.
Nuestro compromiso con la fiabilidad asegura largos años de integridad en su vehículo. Le recomendamos que instale este producto por un
profesional; También recomendamos que lea esta guía para el uso óptimo del producto.
2. Precauciones
▪Quite todas las baterías del vehículo antes de la instalación del sistema.
▪Durante la instalación, tenga cuidado de no crear un cortocircuito con en el equipo original del vehículo.
▪Ser conscientes y cumplir con los requisitos de seguridad del fabricante del vehículo.
▪La instalación de la pantalla no debe interferir con el despliegue del Air Bag.
▪La pantalla se debe instalar de manera que no puede propulsarse en caso de accidente de vehículo.
3. Antes de la instalación
Le pedimos que siga estos consejos antes de instalar el sistema :
▪Compruebe 12v o 24v de la pila utilizada para alimentar el video.
▪Comprobar que todas las partes del vehículo están funcionando adecuadamente como fuego volver atras, toque y arranque motor, codigos de
iluminación, luces y faros, intermitentes, calefacción, aire acondicionado, cierre centralizado de puertas, …
Compruebe después de la instalación que todos estos elementos funcionan correctamente
▪Use un multímetro para determinar las polaridades de los hijos.
4. Datos tecnicos
Tensión de alimentación de la pantalla : 12/32 VDC Potencia de la pantalla : 5W
Formato de la pantalla : 7’’, 16/9 Estándar de video : NTSC/PAL
Brillo: 400 cd/ m2 Función espejo : Si
Función Audio : Si Función anti hielo: Si
Temperatura de trabajo: -20 / 50°C Resistencia a la vibración: 10G
Dimensiones de la pantalla(Lxlxh) : 182x38x124mm Peso de la pantalla : 1100g
Tensión de alimentación de la cámara : 12 VDC ángulo de visión de la cámara : 120°+45°
Visión nocturna / distancia : 30 LED infrarojo / 20m Peso de la cámara : 420g
Cable : 15m
5. Consejos para la instalación
▪No instale la pantalla en el campo de visión del conductor.
▪Colocar la extensión de 15 metros en el vehículo.
Si esto no es posible, proporcionar un sistema de fijación/ protección mecánica para impedir el
desgarro del cable.
▪Instale la cámara a una altura mínima de 2 metros para un máximo campo de visión.
▪Durante la perforación y atornillado, asegúrese de que el tornillo o el taladro no cause daños a los
elementos dentro y detrás del panel (cable eléctrico, tubería ...)
▪Asegúrese de que los cables no entren en contacto con bordes afilados que puedan dañar.
Aislar todas las conexiones eléctricas que la instalación requiere.
▪Después de perforar los paneles para permitir el paso de cable, sellada con un sellador adecuado.
▪No instale la cámara en el techo (riesgo de romper con las ramas de los árboles). Prefiera la cara
trasera del vehículo.
▪No limpie la cámara con agua a alta presión.
▪Nunca abra la carcasa de la cámara. El sello puede ser reducido.
▪No ejerza tracción en el cable de la cámara. Esto podría romper y dañar el sello.
▪No sumerja la cámara.
6. Mando a distancia
2
Fuera del
vehículo
Interior del
vehículo
Panel del
vehículo
Cámara
Agujero a 45 ° hacia
abajo en el panel para
evitar infiltraciones
Selección de la
cámara
Selección de modo
Bajo (-)
Alto (+)
Encendido / Apagado
Menu
1
2
ES
Vuelva a colocar la batería (CR0205)
cuando el mando a distancia se está
debilitando.
No deje caer ni pise el mando a distancia.
No utilice cerca del agua.

9
7. Pantalla
1 2 3 4 5 6 7
8. Conexiones
1 2 3 4 5 6
Cuando el producto se ha llegado al final de la vida, llévelo a un centro de eliminación. No lo tire a la basura doméstica normal. Debe ser reciclado por la
Directiva Europea 2002/96
9. Garantia
La garantía se aplica a los fracasos que se producen durante las condiciones normales de utilización.
La garantía queda anulada si el aparato se daña después de una utilización o cuidado inapropiado.
Función
Acción
Ajuste
ON / OFF
POWER
Selección de la
cámara
CAM
Screen mode
MODE
Volumen
+ y -
Brillo
x1 MENU
x1 (+)
x2 MENU
+ y -
MENU para confirmar
Contraste
x1 MENU
x1 (+)
x1 MENU
x1 (-)
x1 MENU
+ y -
MENU para confirmar
Color
x1 MENU
x1 (+)
x1 MENU
x2 (-)
x1 MENU
+ y -
MENU para confirmar
Idioma
x1 MENU
x1 (+)
x1 MENU
x2 (-)
x1 MENU
+ y -
MENU para confirmar
Espejo
x1 MENU
x2 (-)
x1 MENU
Selecciona la camara tocando el + o -
MENU para ir de ON a OFF
Modo
x1 MENU
x6(-)
MENU para ir de ON a OFF
( les recomenda la posicion OFF)
1- cámara 1
2- cámara 2
3- Fusible 3A
4- CAM1 (Brown) CAM2 (black)
5- Tierra (Negro)
6- +12V o +24V (Rojo)
Pantalla
1- Bajo (-)
2- Alto (+)
3- Menu
4- Selección de la cámara
(CAM1/CAM2)
5- Modo
6- Encendido / Apagado
7- Indicador de tensión
15m
ES

10
1. Introductie
VISIO EVO DUAL is een achteruitrijdcamera, ontworpen voor campers.
Onze producten zijn vervaardigd voor uw volledige tevredenheid. Onze aansprakelijkheidsbelofte zorgt voor vele jaren integriteit van uw voertuig.
We adviseren u om dit product te laten installeren door een professional, tevens raden wij het u aan om deze gids zorgvuldig door te lezen voor
optimaal gebruik van dit product.
2. Veiligheidsinformatie
▪Ontkoppel alle batterijen van uw voertuig voordat u het videosysteem monteert.
▪Voorkom tijdens de installatie kortsluiting tussen de standaard uitrusting van het voertuig.
▪Lees de veiligheidsinstructies van de fabrikant van uw voertuig zorgvuldig door en volg ze op.
▪Het scherm moet zodanig geplaatst worden dat het de werking van de airbag niet wordt verhinderd.
▪Het scherm moet op een vaste plaats worden geïnstalleerd, voor het geval het voertuig een onverwachtse stop maakt.
3. Voor de installatie
▪Volg aandachtig deze instructies voor de installatie plaatsvindt.
▪Zorg ervoor dat uw auto is uitgerust met een 12 of 24 Volt accu; beeldscherm voeding.
▪Controleer of alle elektrische functies van uw voertuig goed werken, zoals indicatoren, remlichten, claxon, ontsteking, lichten… Zorg ervoor
dat deze functies het nog steeds goed doen na de installatie.
▪Zoek de negatieve en positieve aansluitingen met behulp van een voltmeter.
4. Technische gegevens
Werkspanning scherm: 12/32 VDC Scherm: 5W
Grootte van het scherm: 7’’, 16/9 Video systeem : NTSC/PAL
Helderheid: 400cd/ sqm2 Verwarmingsfunctie: Ja
Audio: Ja Werktemperatuur: -20/50 °C
Trillingsweerstand: 10G Schermgrootte (LxBxH): 182x38x124mm
Scherm gewicht: 1100g Camera werkspanning: 12 VDC
Camera kijkhoek: 120 °+45° Nachtzicht/bereik: 2x15 infrarood LED/ 20m
Camera gewicht: 420g Kabellengte: 15m
5. Installatie tips
▪Bevestig het scherm niet in het gezichtsveld van de bestuurder.
▪Instaleer de 15m kabel in het voertuig. Gebruik een bevestigingssysteem indien dit niet mogelijk is en bescherm de kabel om schade te
voorkomen.
▪Om voor een geschikte kijkhoek te zorgen, moet de camera op minimaal twee meter hoogte worden vastgesteld.
▪Controleer voor het boren (een 15 mm gat) of er geen kans is dat een onderdeel van het voertuig achter het paneel beschadigd raakt.
▪Zorg ervoor dat de kabels zich niet in de buurt van scherpe randen of objecten bevinden zonder bescherming
▪Isoleer alle elektrische benodigdheden die u nodig heeft voor de installatie.
▪Dicht doorgaande gaten dicht met geschikte kit nadat u een opening voor de kabel heeft geboord.
▪Installeer de camera niet op het dak (takken kunnen de camera beschadigen), maar aan de achterkant van het voertuig).
▪Reinig de camera niet met een hoge druk reiniger.
▪Open de camera niet; dit kan de waterdichte eigenschappen en de werking beschadigen.
▪Trek niet aan de kabels; dit kan de waterdichte eigenschappen en de werking beschadigen.
▪Laat de camera niet onderwater dompelen.
6. Afstandsbediening
Camera selectie
Modusselectie
Omlaag (-)
Omhoog (-)
AAN/UIT
Menu
1
2
NL
6
Vervang de batterij zodra de afstandbediening
verminderd. Stap niet op de afstandsbediening,
laat hem niet vallen en gebruik hem niet bij het
water.

11
7. Scherm
1 2 3 4 5 6 7
8. Bedradingsschema
Schermfuncties:
Wanneer dit product het einde van zijn levensduur heeft bereikt, breng het dan naar een afvalverwerkingsbedrijf of gooi deze weg bij uw gemeentereiniging.
Gooi dit product niet weg bij uw normale huishoudelijke afval, omdat dit product moet worden gerecycled in overeenstemming met de Europese richtlijn 2002/96/EC.
9. Garantie
De garantie geldt voor fouten die optreden bij normale werkomstandigheden.
De garantie vervalt als het apparaat beschadigd is door onjuist gebruikt of verzorging.
FUNCTIE
ACTIE
INSTELLING
AAN/UIT
POWER
Camera selectie
CAMERA
Schermmodus
MODUS
Volume
+ en -
Helderheid
x3 MENU
+ en -
MENU om te
bevestigen
Contrast
x2 MENU
x1 (-)
x1 MENU
+ en -
MENU om te
bevestigen
Kleur
x2 MENU
x2 (-)
x1 MENU
+ en -
MENU om te
bevestigen
Taal
x1 MENU
x2 (-)
x1 MENU
+ en -
MENU om te
bevestigen
Spiegeleffect
x1 MENU
x3 (-)
x1 MENU
+ en –om de
camera te
selecteren
MENU om set up
te veranderen
Reset
x1 MENU
x8 (-)
x1 MENU
+
15m
kabel
1- CAM 1
2- CAM 2
3- 3A zekering
4- CAM1 (brown) CAM2 (black)
5- Massa (Zwart)
6- +12V of +24V (Rood)
Scherm
1- Omlaag (-)
2- Omhoog (+)
3- Menu
4- Camera selectie (CAM1/CAM2)
5- Modus (CAM1/CAM2/CAM1+CAM2)
6- AAN / UIT
7- Spanningsindicator
1 2 3 4 5 6
NL

12
1. Einleitung
VISIO EVO DUAL ist ein Rückfahrvideosystem, das für Wohnmobile konzipiert ist.
Unsere Produkte wurden mit größter Sorgfalt hergestellt. Unsere Zuverlässigkeitsgarantie sichert Ihnen viele Jahre ein intaktes Fahrzeug.
Wir empfehlen Ihnen, dieses Produkt durch einen Fachmann installieren zu lassen und diesen Leitfaden für eine optimale Verwendung dieses Produkts sorgfältig zu
lesen.
2. Sicherheitsinformation
▪Entfernen Sie alle Fahrzeugbatterien, bevor Sie das Videosystem montieren.
▪Vermeiden Sie während der Installation Kurzschlüsse zwischen den Standardgeräten des Fahrzeugs.
▪Lesen Sie die Sicherheitsanweisungen des Fahrzeugherstellers sorgfältig und befolgen Sie sie.
▪Der Bildschirm muss so aufgestellt werden, dass er das Auslösen des Airbags nicht beeinträchtigt.
▪Der Bildschirm muss an einem festen Ort installiert werden, falls das Fahrzeug plötzlich anhält.
3. Vor der Installation
▪Bitte befolgen Sie diese Anleitung sorgfältig vor der Installation:
▪Stellen Sie sicher, dass Ihr Fahrzeug über eine 12- oder 24-Volt-Batterie verfügt; Stromzufuhr für Bildschirm.
▪Prüfen Sie, ob alle elektrischen Funktionen Ihres Fahrzeugs korrekt ausgeführt werden (Blinker, Bremslichter, Hupe, Zündung, Lichter, …). Stellen Sie sicher, dass
diese nach der Montage weiterhin funktionieren.
▪Bestimmen Sie die negativen und positiven Pole mittels eines Voltmessers.
4. Technische Spezifikationen
Bildschirmbetriebsspannung: 12/32 VDC Bildschirmstrom: 5W
Bildschirmgröße: 7’’, 16/9 Videosystem: NTSC/PAL
Helligkeit: 400 cd/ sqm Audio: Ja
Erwärmungsfunktion: Ja Betriebstemperatur: -20 / 50°C
Schwingungswiderstand : 10G Bildschirmgröße(LxBx): 182x38x124mm
Bildschirmgewicht: 1100g Kamerabedienungsspannung: 12 VDC
Kamerasichtwinkel: 120°+45° Nachtsicht / Bereich : 30 infrarot LED / 20m
Kameragewicht: 420g Kabellänge 15m
5. Installationstipps
▪Installieren Sie den Bildschirm nicht im Sichtfeld des Fahrers.
▪Verlegen Sie das 15 m lange Kabel in das Fahrzeug. Wenn dies nicht möglich ist, verwenden Sie ein Befestigungssystem, um das Kabel vor Schäden zu schützen.
▪Um einen korrekten Sichtwinkel zu ermöglichen, muss die Kamera in einer Mindesthöhe von 2 m befestigt werden.
▪Bevor Sie ein Loch (15 mm) bohren, prüfen Sie, dass kein Risiko besteht, hinter der Abdeckung Fahrzeugteile zu
beschädigen.
▪Stellen Sie sicher, dass die Kabel sich nicht ohne Schutz in der Nähe von scharfen Kanten oder Gegenständen
befinden.
▪Isolieren Sie alle elektrischen Zuleitungen, die Sie für die Installation benötigen.
▪Dichten Sie die Durchführungen nach dem Bohren des Lochs für das Kabel mit einem geeigneten Dichtungsmittel
ab.
▪Installieren Sie die Kamera nicht auf dem Dach (Zweige könnten die Kamera beschädigen), sondern hinten am
Fahrzeug.
▪Säubern Sie die Kamera nicht mit einem Hochdruckreiniger.
▪Öffnen Sie die Kamera nicht, da hierdurch die Wasserdichtigkeit und Funktion beeinträchtigt werden können.
▪Ziehen Sie nicht an Kabeln, da hierdurch die Wasserdichtigkeit und Funktion beeinträchtigt werden können.
▪Tauchen Sie die Kamera nicht in Wasse
6. Fernbedienung
7. Bildschirm
1 2 3 4 5 6 7
DE
Außen
Innen
45° nach unten geneigte
Öffung, um Filtrationen
zu vermeiden
Kamera-
kabel
Kamera
Kameraauswahl
Modusauswahl
Nach unten (-)
Nach oben (-)
ON / OFF
Menü
Ersetzen Sie die Batterie (CR0205), sobald
die Fernbedienung schwächer wird.
Nicht fallen lassen oder darauf treten.
Nicht in der Nähe von Wasser benutzen.
1
2
1- Nach unten (-)
2- Nach oben (+)
3- Menü
4- Kameraauswahl (CAM1/CAM2)
5- Modus
6- ON / OFF
7- Betriebsanzeige

13
8. Anschlussplan
1 2 3 4 5 6
Hat das Produkt seine Verwendbarkeitsdauer überschritten, entsorgen Sie es an einem Wertstoffhof Ihrer Gemeinde.
Werfen Sie das Produkt nicht in den normalen Hausmüll! Es muss nach Vorgaben der Europäischen Richtlinie 2002/96/EG recycelt werden.
9. GARANTIE.
Die Garantie greift bei Mängeln, die unter normalen Betriebsbedingungen auftreten.
Die Garantie verfällt, wenn das Gerät aufgrund unsachgemäßen Gebrauchs oder falscher Pflege beschädigt wird.
FUNKTION
MODUS
EINSTELLUNG
ON / OFF
POWER
Kameraauswahl
CAM
Bildschirmmodus
MODE
Lautstärke
+ und -
Helligkeit
x1 MENU
x1 (+)
x2 MENU
+ und -
MENU zum Bestätigen
Kontrast
x1 MENU
x1 (+)
x1 MENU
x1 (-)
x1 MENU
+ und -
MENU zum Bestätigen
Farbe
x1 MENU
x1 (+)
x1 MENU
x2 (-)
x1 MENU
+ und -
MENU zum Bestätigen
Sprache
x1 MENU
x1 (+)
x1 MENU
x2 (-)
x1 MENU
+ und -
MENU zum Bestätigen
Spiegeleffekt
x1 MENU
x2 (-)
x1 MENU
Wählen Sie die Kamera
mit + oder -
MENU zum Wechseln
zwischen ON und OFF
Modus
x1 MENU
x6(-)
MENU zum Wechseln
zwischen ON und OFF
(OFF-Position wird
empfohlen)
15m
Kabel
1- CAM 1
2- CAM 2 (Option)
3- 3A-Sicherung
4- CAM1 (brown) CAM2 (black)
5- Erdung (schwarz)
6- +12V oder +24V (rot)
Bildschirm
1 2 3 4 5 6
Table of contents
Languages: