VERITAS 3U16 Manual

Purpose
This document provides instructions for replacing a faulty power supply in the 3U16 / 2U12 Storage
Shelves that are connected to a NetBackup 5230 Appliance.
Electrical Safety
The static discharged by human bodies can damage static-sensitive components on the boards.
When installing and maintaining the equipment, observe appropriate electrostatic safety precautions
to prevent personnel injuries or device damage.
When operating a device in an electrostatic sensitive area, you must take electrostatic-discharge
(ESD)-preventive measures. These include wearing ESD-preventive gloves, an ESD-preventive wrist
strap, and ESD-preventive clothes to avoid personnel injury or device damage.
To prevent damage to the device, pay attention to the following during operations:
• Do not touch devices with bare hands because ESD from the human body may damage the
electrostatically sensitive elements on a board.
• When dealing with the server or any of the internal components, wear an ESD-preventive wrist
strap, ESD-preventive gloves, and ESD-preventive suit.
Hardware part replacement procedure
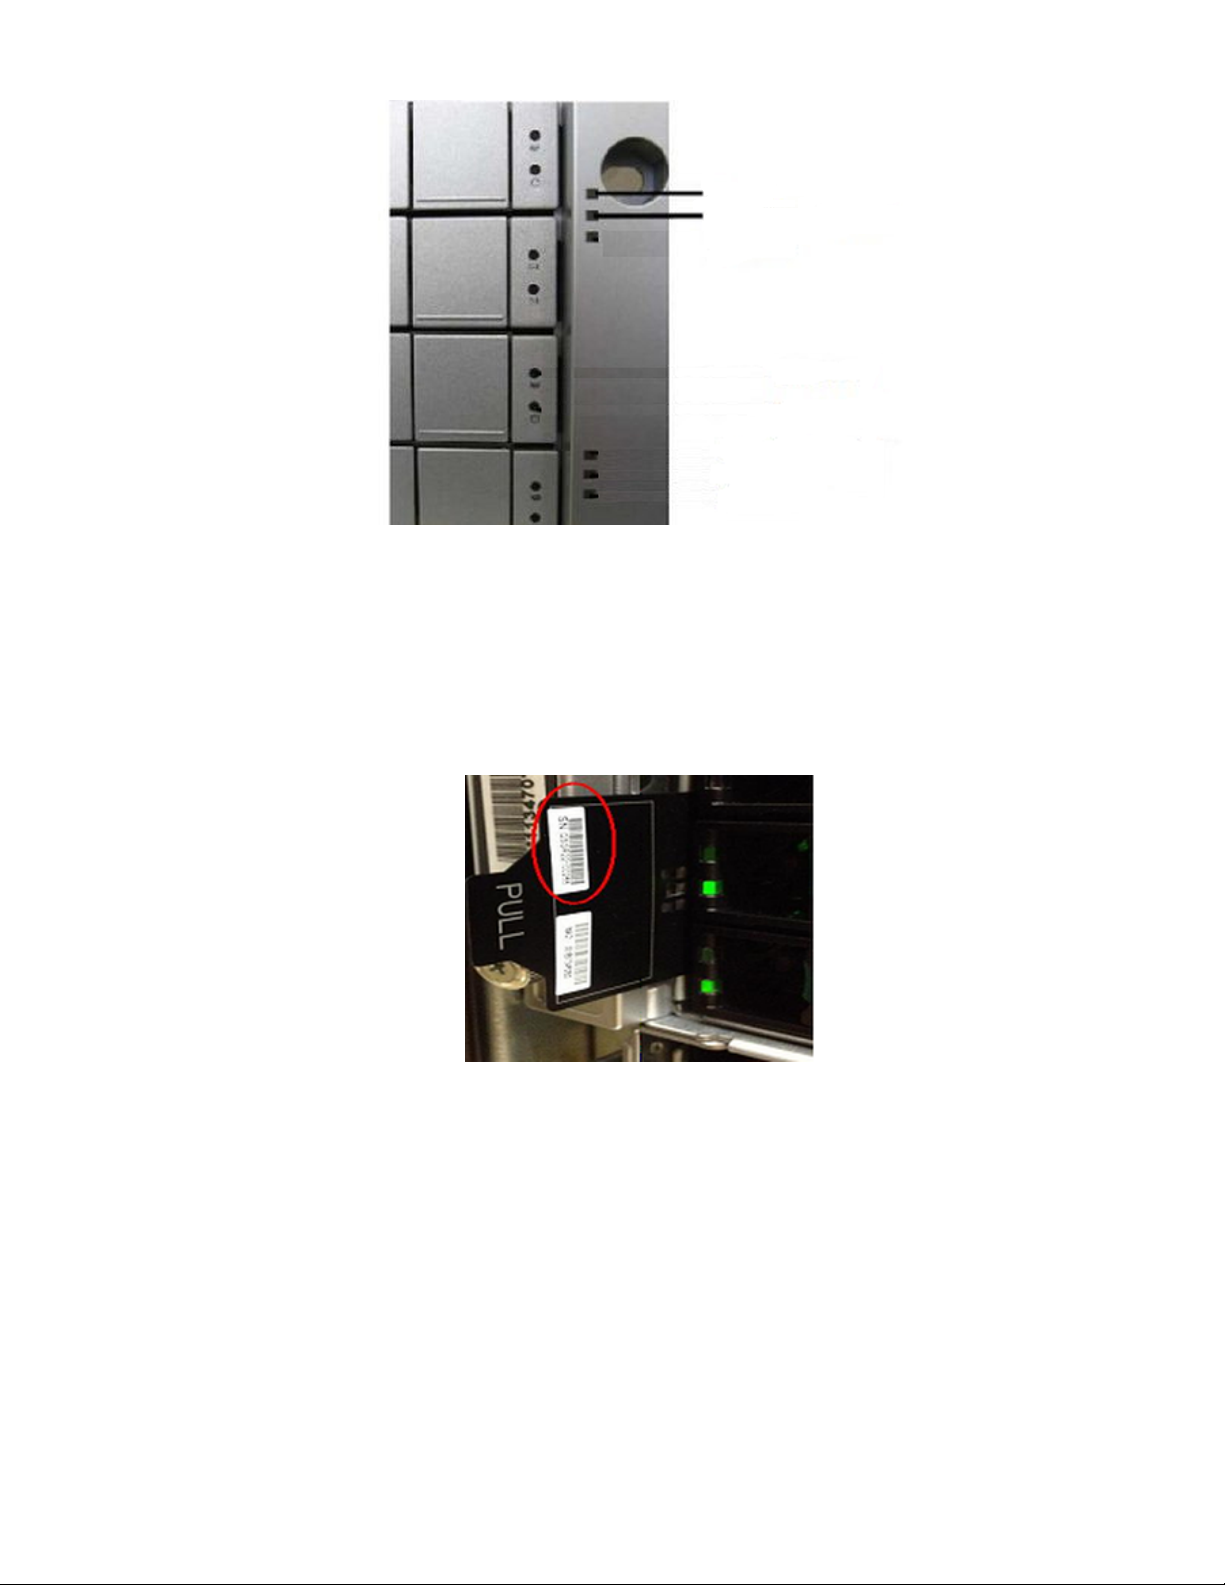
About removing and replacing a storage shelf power supply
This section describes how to remove and replace a faulty power supply in a Veritas 3U16 24/36TB
Storage Shelf or a Veritas 2U12 49TB Storage Shelf. These storage shelves are used with NetBackup
5230 Appliances.
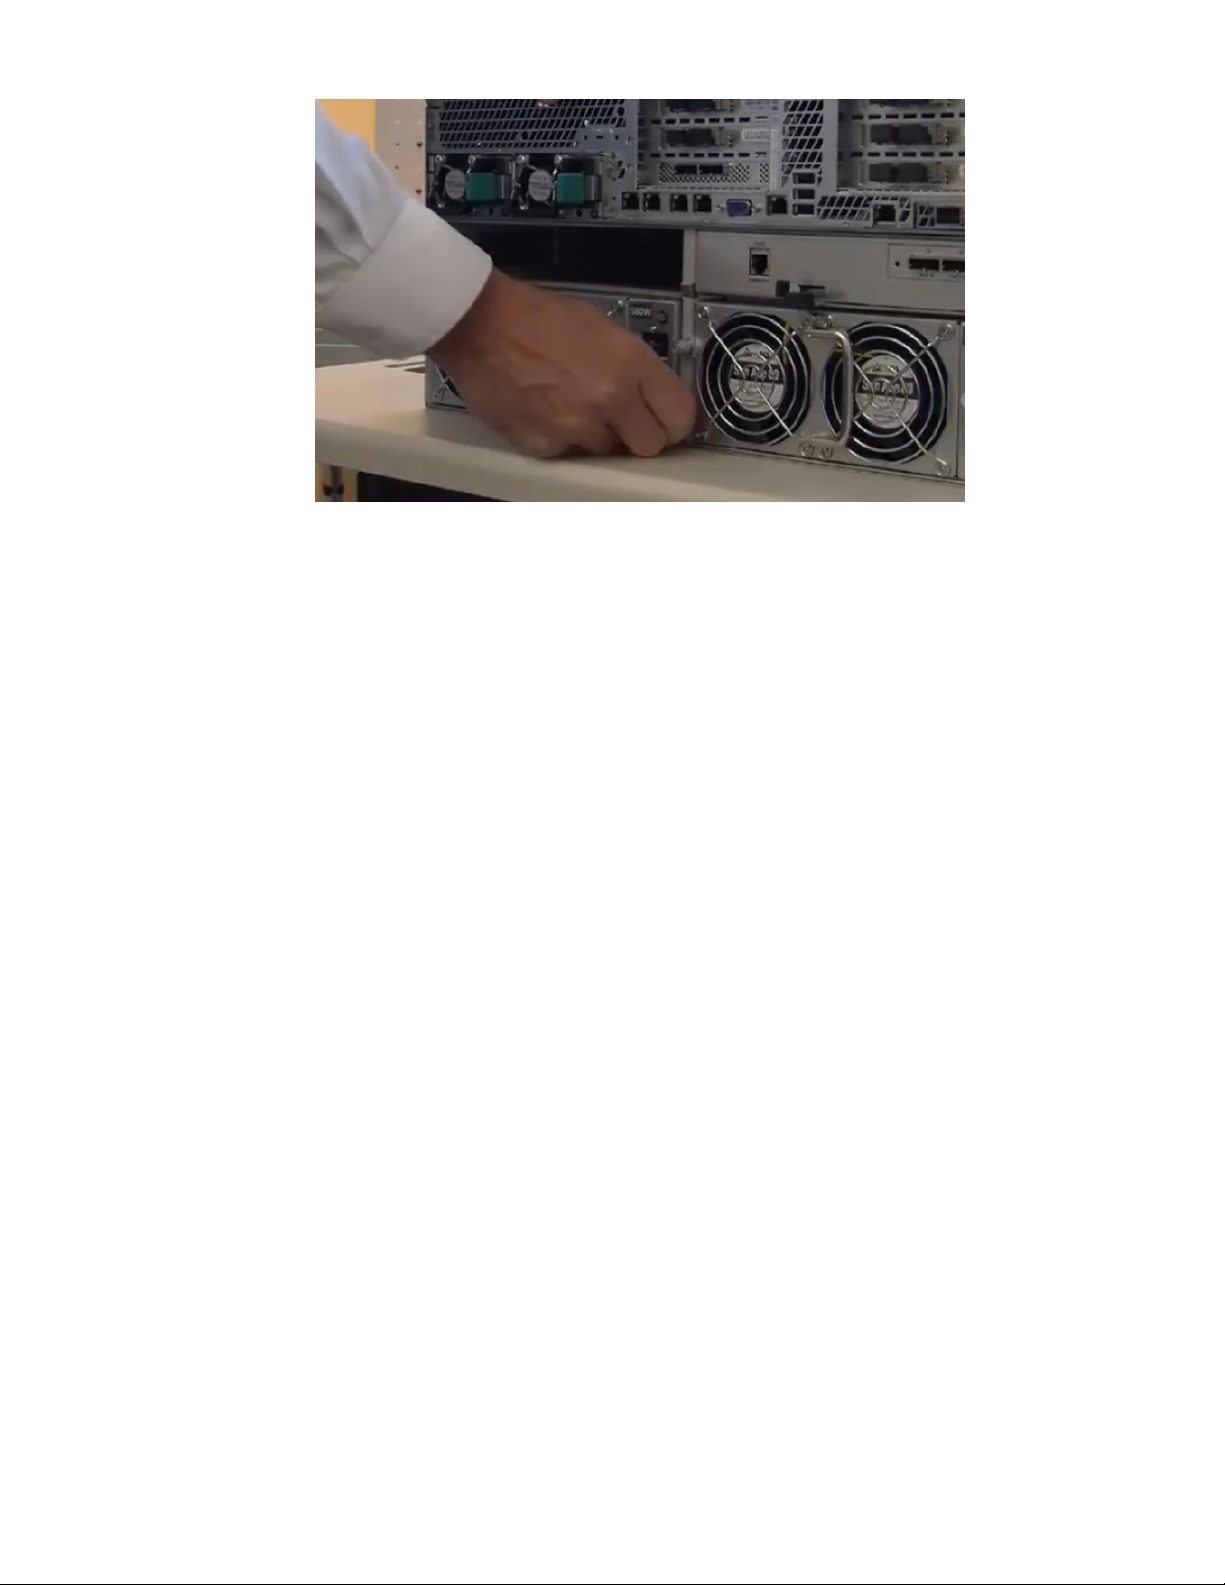
Caution: You must complete a power supply swap within three minutes. Leaving the power supply
slot open for longer than three minutes can cause the storage shelf to overheat, which can cause
other components to fail.
Caution: Only remove one power supply at a time to prevent the overheating of the internal
components of the storage shelf.
1
Veritas Appliance
Hardware Service Procedure

Getting started
To replace a faulty power supply in a Veritas 3U16 24/36TB Storage Shelf, see
Figure 1 Veritas 3U16 24/36TB Storage Shelf
To replace a faulty power supply in a Veritas 2U12 49TB Storage Shelf, see
Figure 2 Veritas 2U12 49TB Storage Shelf
Requirements
Use the following to verify the requirements of the service.
Verify you have the following items
• Replacement power supply•
• ESD wrist strap
• Phillips screwdriver
locating the faulty power supply in a Veritas 3U16 24/36TB Storage Shelf
To locate the faulty power supply in the storage shelf
1Check the global enclosure status LED on the storage shelf front panel. The LED glows amber
when a power supply has failed. The global enclosure LED is the second LED from the top on
the frame of the storage shelf chassis.
2
QRB #200 - NetBackup 5230 Appliance: Replacing a faulty power supply in connected storage shelves

Power
Global Enclosure Status
If the LED does not glow amber or is red, contact Veritas Support.
2Verify the serial number of the storage shelf or the appliance to which the storage shelf is
connected.
3On a 5230 appliance, the serial number is located on a black tab on the left side of the front panel.
Pull out the tab to display the serial number.
4The storage shelf serial number is located on a white tab on the lower right side of the rear panel,
between the right-hand power supply and the chassis case. Pull out the tab to display the serial
number.
3
QRB #200 - NetBackup 5230 Appliance: Replacing a faulty power supply in connected storage shelves

Contact Veritas Support if the correct storage shelf cannot be identified.
5Verify that the LED on the faulty power supply is red. The other power supply should be operating
normally.
Hand-tightened screw Handle LED
Hand-tightened screw
Removing a faulty Veritas 3U16 24/36TB Storage Shelf power supply
To remove a faulty Veritas 3U16 24/36TB Storage Shelf power supply
1Put on an ESD-compliant wrist strap.
2Turn off the power on the faulty power supply using the power switch.
3Unplug the power cord from the failed power supply.
4Loosen the two hand-tightened screws that secure the power supply in the storage shelf. You
may need a screwdriver to loosen the screws.
4
QRB #200 - NetBackup 5230 Appliance: Replacing a faulty power supply in connected storage shelves

5Use the handle between the fans to pull the unit out of the bay.
Caution: The power supply may be hot. Be careful when handling the unit.
Installing the Veritas 3U16 24/36TB Storage Shelf replacement power supply
To install the Veritas 3U16 24/36TB Storage Shelf replacement power supply
1Put on an ESD-compliant wrist strap.
2Remove the replacement power supply from the wrapping.
3Turn off the power switch.
4Slide the power supply into the bay until it clicks.
5Secure the power supply in the storage shelf using the two hand-tightened screws.
5
QRB #200 - NetBackup 5230 Appliance: Replacing a faulty power supply in connected storage shelves

6Connect an AC power cord to the power supply.
7Turn on the power switch.
8Verify that the LED on the replacement power supply is green and that air is flowing from the
power supply.
9
Locating the faulty power supply in a Veritas 2U12 49TB Storage Shelf
To locate and identify the appliance that has the faulty power supply in the storage shelf
1
2Go to the unit with the failed component.
3Check the LEDs on the power supply that has failed. Verify that the LED on the faulty power
supply is red. The other power supply should be operating normally. If the LED is not amber or
is red, contact the Veritas Field Service Coordinators.
6
QRB #200 - NetBackup 5230 Appliance: Replacing a faulty power supply in connected storage shelves

4Verify that the storage shelf is the unit identified in the work order.
If the work order provides the appliance serial number, verify that the serial number on the work
order matches the serial number on the appliance that the storage shelf is connected to.
On a NetBackup 5240 Appliance, the serial number begins with the letters VTAS, and is located
on a label on the rear panel of the appliance.
If the work order provides the storage shelf serial number, verify that the serial number on the
work order matches the serial number on the storage shelf. The storage shelf serial number is
located on a white tab on the left side of the rear panel, between the left-hand power supply and
the chassis case. Pull out the tab to display the serial number.
7
QRB #200 - NetBackup 5230 Appliance: Replacing a faulty power supply in connected storage shelves

Contact the Veritas Field Service Coordinators if the correct storage shelf cannot be identified.
Removing a faulty Veritas 2U12 49TB Storage Shelf power supply
To remove a faulty Veritas 2U12 49TB Storage Shelf power supply
1Put on an ESD-compliant wrist strap or take other ESD-protective measures.
2Turn off the power to the faulty power supply using the power switch.
3Do the following to verify that it is safe to remove the power supply before you disconnect the
power:
• Check that the power switch on the faulty power supply is turned off. Both the LED status
lights and the power supply fan should be off.
• Check that the LED on the opposite power supply is green.
8
QRB #200 - NetBackup 5230 Appliance: Replacing a faulty power supply in connected storage shelves

4Disconnect the power cable from the faulty power supply. Do not disconnect the power cable
from the power supply that is running.
5Grasp the handle and pull the power supply out of the slot.
9
QRB #200 - NetBackup 5230 Appliance: Replacing a faulty power supply in connected storage shelves

Installing a Veritas 2U12 49TB Storage Shelf replacement power supply
To install a Veritas 2U12 49TB Storage Shelf replacement power supply
1Remove the replacement power supply from any wrapping.
2Insert the power supply into a power supply slot.
10
QRB #200 - NetBackup 5230 Appliance: Replacing a faulty power supply in connected storage shelves

3Slide the power supply into the slot complete. The power supply clicks when it is properly installed
11
QRB #200 - NetBackup 5230 Appliance: Replacing a faulty power supply in connected storage shelves

4Plug the power cable into the power supply.
5Turn on the power supply switch. Verify that the LED on the replacement power supply is green
and that the air flows from the power supply fan.
12
QRB #200 - NetBackup 5230 Appliance: Replacing a faulty power supply in connected storage shelves
Other manuals for 3U16
1
This manual suits for next models
1
Table of contents