Victory MATV-48 Quick reference guide

ASSEMBLY & OPERATING
INSTRUCTIONS
MATV-48 & MATV-60
Flail Mower 48”- 60”
with Gasoline Powered Motor
VERSION 1.0 - EN 2023

MATV 2023 Assembly & Operating Instructions - Page 2 of 46 - Version 1.0
COLOPHON
Visitor and Postal address:
65 Pine Ave #857, Long Beach, CA 90802, United States.
E-mail address:
Business hours:
Monday-Friday 9:00 am - 5:00 pm
Phone:
(562) 534-8182
Internet address:
https://etractorimplements.com
Manual info:
These are the original Safety Regulations and Instructions. The English language is binding.
No part of this documentation may be reproduced in any form without the written permission of Victory Tractor
Implements.
History of changes:
Assembly & Operation Instructions:
Date:
Chapters:
Description:
V1.0
2023
-
First edition.
TABLE OF CONTENTS
1 VICTORY TRACTOR IMPLEMENTS WARRANTY ........................................................................................................... 4
1.1 Warranty Provisions ......................................................................................................................................... 4
1.2 Liability ............................................................................................................................................................. 4
2 SAFETY ....................................................................................................................................................................... 5
2.1 Warning Messages in this Manual ................................................................................................................... 5
2.2 GENERAL SAFETY INFORMATION ..................................................................................................................... 5
2.2.1 Introduction ................................................................................................................................................. 6
2.2.2 Generally Applicable Safety Rules ............................................................................................................... 6
2.2.3 General Safety Rules for Machines ............................................................................................................. 6
2.3 ADDITIONAL SAFETY RULES FOR FLAIL MOWERS ............................................................................................ 7
2.4 More Safety Tips for Safe Operation ................................................................................................................ 8
2.5 Safety Precautions Continued for ATV ............................................................................................................. 8
2.6 Not Allowed Use ............................................................................................................................................... 9
2.7 Safety decals that may be present on your tractor implement ....................................................................... 9
3 ASSEMBLING and OPERATION ................................................................................................................................. 11
3.1 Important Assembly Notes: ........................................................................................................................... 11
3.2 Assembling the MATV Flail Mower ................................................................................................................ 11
3.3 Operation ....................................................................................................................................................... 15
3.3.1 Warnings and Rules for Safe Operation .................................................................................................... 15
3.3.2 Additional Rules for Safe Operation .......................................................................................................... 15

MATV 2023 Assembly & Operating Instructions - Page 3 of 46 - Version 1.0
3.3.3 Emergency stop procedure ........................................................................................................................ 16
3.3.4 General Operating Warnings: .................................................................................................................... 16
3.3.5 Preparation ................................................................................................................................................ 17
3.3.6 Hooking the mower to a vehicle ................................................................................................................ 17
3.3.7 Inspection checklist .................................................................................................................................... 17
3.3.8 Test the flail mower ................................................................................................................................... 17
3.4 Starting and stopping the engine ................................................................................................................... 18
3.4.1 Start the engine ......................................................................................................................................... 18
3.4.2 Stopping the mower .................................................................................................................................. 18
3.5 Start Mowing .................................................................................................................................................. 18
4 ADJUSTMENTS ......................................................................................................................................................... 18
4.1 Adjust the drawbar angle concerning ATV hook height ................................................................................. 18
4.2 Adjusting the mowing height ......................................................................................................................... 19
4.3 Adjusting the skids height .............................................................................................................................. 20
4.4 Drive belts tension check and adjustment ..................................................................................................... 20
4.5 Drive belts tension check and Adjustment ..................................................................................................... 21
4.5.1 Drive belts tension check ........................................................................................................................... 21
4.5.2 Drive belts adjustment ............................................................................................................................... 21
5 MAINTENANCE ......................................................................................................................................................... 22
5.1 Service ............................................................................................................................................................ 22
5.2 Service Period ................................................................................................................................................. 23
5.2.1 General troubleshooting list for gasoline engines ..................................................................................... 25
5.2.2 General troubleshooting list for mower functions .................................................................................... 25
6 TRANSPORT AND STORAGE ..................................................................................................................................... 26
6.1 Essential Rules for Transport: ......................................................................................................................... 26
7 EXPLODED VIEW DRAWINGS ................................................................................................................................... 27
7.1 Torque Specifications ..................................................................................................................................... 30
8 SPECIFICATIONS ....................................................................................................................................................... 31
8.1 Briggs & Stratton® Engine ............................................................................................................................... 33
9 APPENDIX ................................................................................................................................................................. 34
9.1 General troubleshooting list for gasoline engines .......................................................................................... 34
9.2 Copy of Briggs & Stratton® Operator’s manual ............................................................................................... 35

MATV 2023 Assembly & Operating Instructions - Page 4 of 46 - Version 1.0
1 VICTORY TRACTOR IMPLEMENTS WARRANTY
Warranty
Victory Tractor Implements warrants to the original purchaser that this Victory product will be free from defects
in material and workmanship beginning on the date of purchase by the end-user according to the following
schedule when used as intended and under regular service and conditions for personal use.
Overall Unit: Two years of Parts.
Flail blades, belts, clutch Considered wear items.
This Warranty is limited to the replacement of any defective part and the installation by VTI of any such
replacement part and does not cover common wear items. Victory reserves the right to inspect any equipment or
parts claimed to have been defective in material or workmanship.
This Warranty does not apply to any part or product that, in Victory’s judgment shall have been misused or
damaged by an accident or lack of regular maintenance or care or which has been repaired or altered in a way
that adversely affects its performance or reliability, or which has been used for a purpose for which the product
is not designed. Misuse also specifically includes failure to properly maintain oil levels, grease points, and
driveline shafts.
Claims under this Warranty should be made directly to Victory Tractor Implements, and all warranty adjustments
must be made through an authorized Victory dealer. Victory reserves the right to make changes in materials or
design of the product at any time without notice.
This Warranty shall not be interpreted to render Victory liable for damages of any kind, direct, consequential, or
contingent to property. Furthermore, Victory shall not be responsible for damages resulting from any cause
beyond its reasonable control. This Warranty does not extend to the loss of crops, any expense or loss for labor,
supplies, rental machinery, or for any other reason.
No other warranty of any kind whatsoever, expressed, or implied, is made with respect to this sale, and all
implied warranties of merchantability and fitness for a particular purpose that exceed the obligations set forth
in this written warranty are hereby disclaimed and excluded from this sale.
This Warranty is not valid unless registered with Victory within 30 days from the date of purchase by the end-
user. Registration link: https://etractorimplements.com/register-product/
1.1 Warranty Provisions
Victory Tractor Implements guarantees the proper functioning of the provided equipment.
However, Victory is not responsible for unsafe situations, accidents, or damage, which are the result of:
n ignoring warnings and regulations as stated on the machine or in this Operator's manual;
n the use of the device for other applications or under other circumstances than stated in this documentation;
n mutations to the machine; this also includes the application of different replacement parts as specified;
n insufficient or careless maintenance.
1.2 Liability
Victory Tractor Implements can't be held liable for consequential damage (business interruption, product
damage, etc.).

MATV 2023 Assembly & Operating Instructions - Page 5 of 46 - Version 1.0
2 SAFETY
2.1 Warning Messages in this Manual
Please read this manual carefully before using your Tractor Implement to understand how to use it safely.
n After reading, store the manual in a safe place, easily accessible for everyone working with the machine.
n Incorrect handling of the equipment could result in personal injury or physical damage.
n The manufacturer assumes no responsibility for any damage caused by mishandling beyond normal usage
defined in this Safety manual.
DANGER!
• This symbol indicates a potentially and imminently hazardous situation that, if not
avoided, will result in death or severe injury.
This RED symbol indicates All DANGER notifications.
WARNING!
• This symbol indicates a potentially hazardous situation that, if not avoided, could
result in death or severe injury, or machine damage.
This ORANGE symbol indicates All WARNING notifications.
CAUTION!
• This symbol indicates a potentially hazardous situation that, if not avoided, may result
in minor or moderate injury.
This YELLOW symbol indicates All CAUTION notifications.
n Always adhere to this manual's safety instructions, regulations, and warnings. They are the
recommendations of Victory Tractor Implements and several essential component manufacturers. If you
ignore these regulations, there will be no warranty.
n Any warranty claim will be rejected if you exceed the maintenance intervals for the essential machine
components claim.
n Tractor implements are not intended for use by persons with reduced physical, sensory or mental capabilities
or lack experience and knowledge.
2.2 GENERAL SAFETY INFORMATION
WARNING!
• Read and understand all Safety instructions, regulations, and Warnings before
carrying out any assembly, operation, or adjustments.
• Untrained persons who have not thoroughly read and understood this manual might
never approach the machine.
• Refer to all safety decals in this manual. Please read all instructions noted on them.

MATV 2023 Assembly & Operating Instructions - Page 6 of 46 - Version 1.0
2.2.1 Introduction
The machine design is such that safe use and maintenance are possible. Anyone who works with it must know
the instructions and regulations stated in this manual.
The owner ensures that users know the Safety instructions, regulations, and observations.
While handling, assembling and maintaining the implement adhering to all recommended safety instructions and
ensuring that the correct Personal Protective Equipment (PPE) is used.
Always wear:
n Safety helmet for head protection and prevention from falling objects.
n Safety gloves for hand protection and prevention of cuts from sharp edges.
n Steel-tipped safety boots for foot protection from falling objects.
n Wrap-around safety glasses for eye protection and to prevent damage caused by shooting particles.
n Safety vest for recognizable presence, visibility and safety.
n Any other Personal Protection Equipment that might be required, specified, or dictated by the working
environment.
n Your Company can prescribe additional (safety) instructions. This Manual does not describe how to comply
with this.
2.2.2 Generally Applicable Safety Rules
This list contains general safety measures which must be complied with for personal safety reasons.
n Only persons who have read and understood the operating instructions might be in the machine's vicinity.
n Tractor implements are not intended for use by persons with reduced physical, sensory or mental capabilities
or lack experience and knowledge.
n Make sure children and animals cannot come into the machine's vicinity.
n Unauthorized persons may not perform acts if the machine is in use.
n Never work alone; always ensure that at least one person is nearby.
n Do not remove the brought warning stickers or markings.
n Always clean the machine properly and keep the workplace free of dirt and obstacles.
n Always ensure sufficient ambient lighting. Operate only in daylight.
2.2.3 General Safety Rules for Machines
n Always wear safety glasses and protective shoes when carrying out the operation.
n Ensure the work area around the equipment is smooth, clean and free from any obstacles. Keep in mind that
a dangerous situation can always arise. Long loose hair is not allowed.
n Never wear loose or torn clothing. Permanently remove jewelry.
n Do not make any repairs if you are tired or consume alcohol or drugs, affecting your ability to work perfectly.
n When lifting heavy parts of more than 22 kg, use a hoist or ask for help, to prevent personal injury.
n Incorrect practice or lack of care can cause burns, wounds, mutilation, suffocation, bodily injuries, or death.

MATV 2023 Assembly & Operating Instructions - Page 7 of 46 - Version 1.0
n Ensure that all hoisting equipment, such as lifting straps, hooks, or ropes, is in a good state of repair and can
safely bear the equipment's weight.
n Never bypass door interlocks or safety sensors and switches.
n Leaking chemicals, oil, or water on electrical equipment can result in severe damage or fire.
n Watch for hot parts on switched-off components and hot liquids in lines, pipes, and compartments to
prevent burns.
n Never open any vent or drain valve or remove any plugs under pressure.
n Ensure that oil pumps are isolated from the system and relieve the pressure before disassembling a pump,
removing plugs, or disconnecting piping.
n Always use tools that are in a good state of repair. Ensure you know how to use tools before doing any work.
n ONLY use replacement parts from the same brand as the relevant part.
n Always use replacement fittings having the same part number. Do not use fitting of inferior quality.
n PROTECT THE ENVIRONMENT: The handling and cleaning of spent oil or chemicals may be subject to national
or local laws and regulations. Use authorized waste processing services, including Municipal facilities and
garages, which provide official facilities for collecting oil and chemicals.
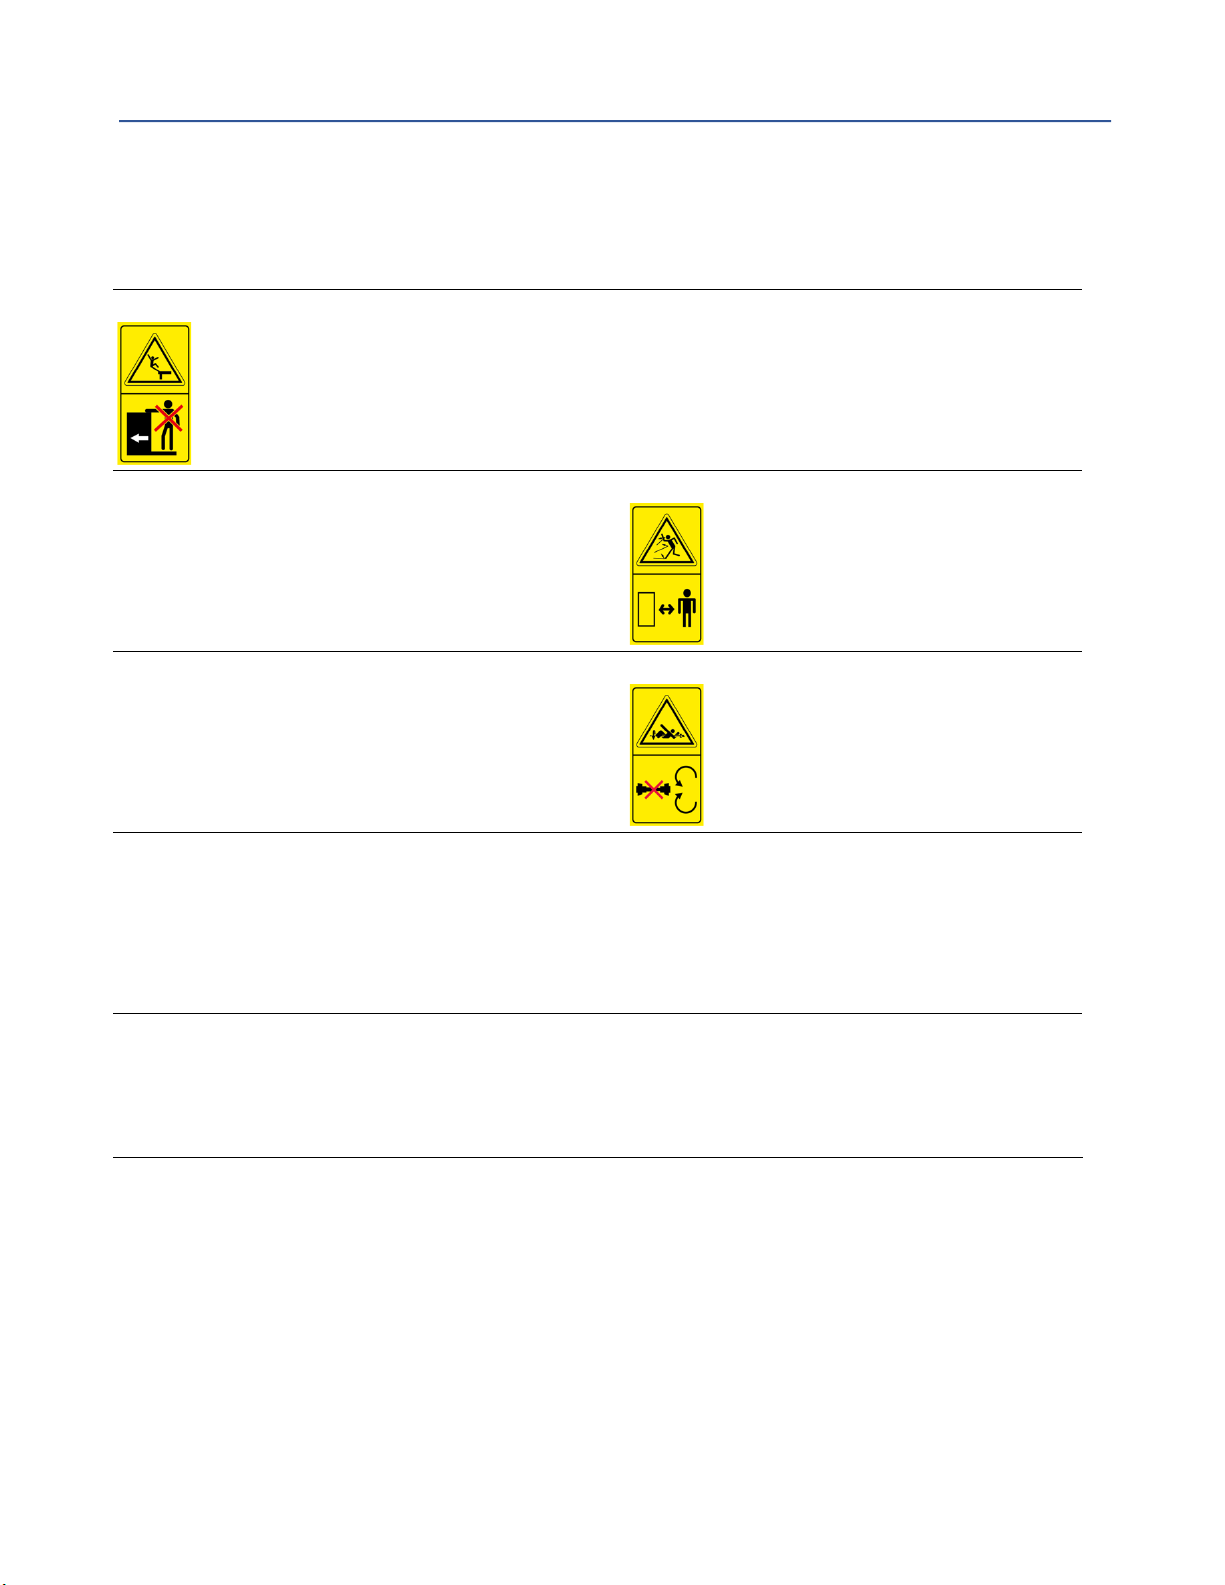
n Parts that rotate can cause cuts, mutilations or strangulation.
n Always switch OFF the main power before performing service and maintenance.
n Switch the power ON only after closing all machine protection guards and covers.
n Never use a high-pressure water beam for cleaning electrical components and cabinets.
n Do not aim a high-pressure water beam directly at wiring, breathers, or hydraulic components' sealings of
drive components.
n Do not allow water or any other fluid to contact electrical components.
n Always protect venting spots from the inlet of large amounts of water.
n Contact the provincial or Municipal authorities or the Environmental Protection Service for guidelines about
handling correctly and cleaning up spent oil and chemicals if in doubt.
2.3 ADDITIONAL SAFETY RULES FOR FLAIL MOWERS
n The operator should be familiar with all functions of the device.
n Mow with the implement from the ATV driver’s seat only.
n Persons under 18 should NEVER operate or be near the mower during operation.
n Do not operate the MATV Flail mower while under the influence of drugs or alcohol, as severe injury or death
could result.
n Bystanders must keep a safe distance from an operating Flail mower (5 m.)
n Ensure all guards and shields are secured before operating the equipment.
n Do not operate the device for any purpose other than what it is meant for. (See warranty for details.)
n Never open safety guards when the machine is working.
n Never bypass safety sensors or switches.
n Immediately push the emergency stop and switch off the engine if system parts emit smoke, unusual odor,
or unusual sounds. Otherwise, fire may start.
n Never leave the MATV flail mower unattended while it is running.
n Dismounting from a moving vehicle could cause severe injury or death.
n Pay special attention when working with the machine not to touch fixed objects such as wood, wires, stones,
shafts, guard rails, tracks, etc. It could cause the breakage of the blades, which would be thrown out of the
machine at a very high speed.

MATV 2023 Assembly & Operating Instructions - Page 8 of 46 - Version 1.0
n If wires, rope, or chains should become entangled in the rotor, stop immediately to prevent damage or
dangerous situations; stop the mower and towing machine. Take out the starting key or safety cut-out. Put
working gloves on; clear the rotor with pliers or shears. Don't try to disentangle it.
n Make sure all persons are clear of the working area.
n Turning the ATV too tight can result in injury or equipment damage.
n Inspect the flail mower regularly; check all fasteners and securing parts.
n Operating the mower in temperatures below freezing is NOT recommended. Hardened steel
n Do not use the machine when excessive vibration is experienced; this may cause breakage and severe
damage. Find the cause of the beat and eliminate it before using the device again.
2.4 More Safety Tips for Safe Operation
n Always switch off the engine before attempting alterations, repairs, or (height) adjustments.
n Keep hands, feet, clothing, and other extremities away from engine-driven parts. Wear snug-fitting clothing
to avoid entanglement with moving parts.
n Do not wear long hair and/or loose clothing when working around the Flail mower. Personal injury can occur.
n Never exceed the limits of the machinery.
n The MATV is not road legal. DO NOT tow on public highways.
n Never transport the MATV with the engine running, even for small distances.
2.5 Safety Precautions Continued for ATV
Raising the deck to the highest position is advisable if you move the mower from one site to another.
n Stop the engine and the blades at a standstill before you adjust the height to the transport position.
n Remove any crop debris from the deck before leaving the field.
n Never move from one site to another with the engine running
WARNING!
• Comply with State and local laws governing highway safety and movement of farm
machinery on public roads.
• Driving on public roads, slow-moving tractors, self-propelled equipment, and towed
implements can create a hazard. They are challenging to see, especially at night.
• Please note the MATV Flail mower is not road legal. You are not allowed to use it on
public roadways.
• Use flashing warning lights if you cross public roads.
n The maximum transport speed for any Victory implement is twenty mph on paved surfaces and ten mph
maximum on an unpaved surface. Do not exceed. Never travel at a rate that does not allow adequate control
of steering and stopping.
n Rough terrain requires a slower speed. Traveling excessively on uneven terrain that causes violent shaking or
bouncing will damage the attachment point on the mower and/or the vehicle. This type of damage is not
covered under warranty.
n Use the following maximum speed - for paved surfaces only:
- 20 mph when weight is less than or equal to the vehicle's weight.
- 10 mph when the weight is more than the vehicle's weight.

MATV 2023 Assembly & Operating Instructions - Page 9 of 46 - Version 1.0
n The use of flashing amber lights is acceptable in most localities. However, some localities prohibit their use.
Local laws should be checked for all lighting and marking requirements.
n Never exceed 20 m.p.h. (32 km/h). Reduce speed on rough surfaces.
n Plan your route to avoid public roads.
n Always install transport locks, pins, or brackets before transporting.
n Do not drink and drive.
n Be a safe and courteous driver. Always yield to oncoming traffic in all situations, including narrow bridges,
intersections, etc. Watch for traffic when operating near or crossing roadways.
n Turn curves or go up or down hills at a low speed and gradual steering angle. Always check the vehicle’s User
manual for proper use on slopes.
n Use extreme care and maintain minimum ground when operating near ditches or fences. Be careful when
turning sharp corners. Never allow riders on the mower.
2.6 Not Allowed Use
It is not allowed to use Victory implements for other activities than described under ‘Intended use’ in the User
Manual.
2.7 Safety decals that may be present on your tractor implement
Your Victory tractor implement comes equipped with all necessary safety decals in place. The decals are designed
to help you safely operate your implement.
n Watch, read and follow instructions on all safety decals. Try to understand them entirely.
n Keep all safety decals clean and legible.
n Replace all damaged or missing decals or labels. To order new ones, contact Victory Tractor Implements.
n New equipment installed during repair requires safety labels to be affixed to the replaced component as
specified.
n When ordering new components, ensure the correct safety labels are included in the request.
Safety Decals:
WARNING Decal
• Read the operator’s manual before
operating maintenance and repair.
DANGER Decal
• Do not stand behind the tractor or
implement.
DANGER Decal
• High-Pressure Fluid Hazard.
• Wear proper hand and eye
protection.
• Relieve pressure on the system
before repairing or adjusting.
WARNING Decal
• Max. Operating PTO shaft speed
540 rpm.

MATV 2023 Assembly & Operating Instructions - Page 10 of 46 - Version 1.0
WARNING Decal
• Danger of being caught by rotating
parts.
WARNING Decal
• Swinging devices, keep a safe
distance.
WARNING Decal
• Do not stand on moving
implements.
WARNING Decal
• Danger of cutting off body parts.
WARNING Decal
• Hazard of rotating components.
WARNING Decal
• Do not come too close to the
machine.
WARNING Decal
• Finger Pinch Hazard; Driving belts
Danger.
WARNING Decal
• PTO Shaft Hazard.
WARNING Decal
• Remove the Ignition key before
adjustments, repair, or
maintenance, and read the manual.
WARNING Decal
• Finger Pinch Hazard; turning
components.
ATTENTION POINT Decal
• Ad grease regularly to the
desired nipple.

MATV 2023 Assembly & Operating Instructions - Page 11 of 46 - Version 1.0
3 ASSEMBLING and OPERATION
The machine comes from the factory in a shipping configuration. Before starting, clear the area of bystanders,
especially children, and animals. Ensure sufficient clearance to access the machine from all sides during
assembly.
3.1 Important Assembly Notes:
NOTICE:
•Before shipping the flail mower to you we have inspected the implement’s functions. However,
please make sure prior to operation you check the level of oil in the gearbox, grease all
bearings, check that all flails are installed, and bolts are torqued according to specifications.
3.2 Assembling the MATV Flail Mower
1. Drawbar with sole plate weldment.
2. Towing coupling (ø50 mm).
3. Drawbar side-shift adjusting handle.
4. Drive belt guard.
5. Gasoline engine.
6. Start battery box.
7. Cutting height adjustment lever.
8. Hinged Rear Gate.
9. Wheel carriage arm.
10. Wheel.
11. Skid plate, left side.
12. Mower body.
13. Mower leveling adjustment screw

MATV 2023 Assembly & Operating Instructions - Page 12 of 46 - Version 1.0
STEP 1: Unpack
Unpack the crate and check that all parts are secure. Please contact us immediately if any part is missing or
damaged at Victory Tractor Implements.
Scope of delivery:
n Mower body with a gasoline engine and flail shaft
installed.
n Two wheels and two wheel support brackets.
n Drawbar with sole plate weldment.
n Drawbar adjustment components.
n Assembling manual.
STEP 2: Wheels Setup and Adjustment
You have three options for mounting the wheels:
1. Inside the mower frame border, on the rear
side.
2. Outside the mower frame side border, on the
rear side.
3. Outside the mower frame, in line with the rotor
shaft.
n Install the support brackets with wheels on
both sides in your desired position.
n Mount the wheel racks (4) on both sides.
(This is not necessary for option (1).
n Adjust the mower frame to the highest
position.
Step 3: Install the Sole plate weldment, including drawbar
The drawbar can only be attached one way, as
shown in the figure.
n Hold the sole plate in position and connect
it to the mower body using two M16x40
bolts, washers, and nuts.
n Do not yet tighten the nuts. Tighten after
drawbar angle adjustment as described
further on.

MATV 2023 Assembly & Operating Instructions - Page 13 of 46 - Version 1.0
Step 4: Obtain different drawbar offset angles
n Loosen central bolt (1).
n Pull out the locking lever handle (2) and turn it in the desired direction.
n Release the locking lever handle before the corresponding fitting hole.
n Tighten bolt (1).
STEP 5: Check the hinged rear gate
The hinged rear gate (1) allows easier cleaning,
flail replacement, and general maintenance.
n Ensure the rear gate is closed and secured
with both handles (2).
- A closed gate provides additional
mulching.
- An open gate allows for more
straightforward disposal of the mowed
material.
Step 6: Check the drive belt tension
n Remove the belt cover to check the belt tension. Adjust if necessary; see chapter Adjustments.

MATV 2023 Assembly & Operating Instructions - Page 14 of 46 - Version 1.0
Step 7: Check the engine oil
This engine was shipped from manufacturer Briggs & Stratton® without oil. Mower manufacturers or dealers may
have added oil to the engine.
Before you start the engine for the first time, check the oil level and add oil according to the instructions in this
manual. If you start the engine without oil, it will be damaged beyond repair and not covered under warranty.
n Before adding or checking the engine oil, always ensure the engine is level.
Short dipstick, if equipped
1. Remove the dipstick and wipe it with a clean cloth.
2. Install the dipstick. Do not turn or tighten.
3. Remove the dipstick and check the oil level. The correct oil level is at the top of the full indicator on the
dipstick.
4. If the oil level is low, slowly add oil to the overflowing engine oil fill point.
5. Reinstall and tighten the dipstick.
Ensure the correct type of oil is added. See also the Briggs & Stratton manual.
n SAE 30: Below 40°F (4°C), using SAE 30 will result in hard starting.
n 10W-30: Above 80°F (27°C), using 10W-30 may cause increased oil consumption. Check the oil level more
frequently.
Rear Roller Info:
NOTICE:
• The Rear roller (ø88 mm) is factory mounted in a fixed position to ensure the rotor &
blades do not contact the ground if one wheel falls into a rut.
• Always set the mower to the correct height to prevent damage to the machine.
The minimum height of the cut should be 1 inch
(2-3 cm).
Any lower than this, you risk damaging the
machine & blades and increasing the chance of
stones ejected at high speed from the device.
Step 8:
n Check that all fasteners are tightened correctly and all securing pins are in place.

MATV 2023 Assembly & Operating Instructions - Page 15 of 46 - Version 1.0
3.3 Operation
3.3.1 Warnings and Rules for Safe Operation
WARNINGS!
• Ensure you understand all operating procedures for the MATV Heavy-duty Flail mower.
• Never operate the Flail mower while under the influence of drugs or alcohol.
• Use extreme caution when driving the vehicle. Blind spots can be the cause of severe
damage, injury or death.
• Watch for people, pets, potholes, stones, rocks, and puddles of water.
• Keep all helpers and bystanders at least 100 feet from an operating Flail mower.
• Ensure all mower shields and guards are closed before operation. Check daily for
missing or broken chain links, protection, or guards. (Replace worn items at once to
reduce the possibility of injury.)
• Never exceed the limits of a piece of machinery. If its ability to do a job or do so safely
is in question - DON’T TRY IT.
• Always stay clear of all moving parts.
• Never place hands or feet under the mower with the engine running.
• Never allow riders on the mower at any time. There is no safe place for any riders.
• ALWAYS CHECK the cutting area is free from iron wire, cable, rope, or chain objects
before working. These objects can become entangled in the operating parts of the
mower. Never assume an area is clear!
• Always try to prevent the mowing tines from coming into contact with solid objects to
reduce the possibility of property damage, serious injury, or even death.
3.3.2 Additional Rules for Safe Operation
Most accidents occur because of neglect or carelessness. Keep all helpers and bystanders at least several
hundred feet from an operating Flail mower. Only properly trained people should operate this machine.
Most accidents involve the injury of bystanders by objects thrown by the rotating tines and operators being
knocked off the vehicle by low-hanging limbs and then run over by the mower.
Accidents are most likely to occur with machines loaned or rented to someone who has not read the Operator’s
manual and is unfamiliar with a Flail mower.
n If you use the mower in populated areas where thrown objects could injure persons or property, stop
immediately mowing when anyone comes within a hundred feet.
n Do not reach or place any part of your body under the equipment until it is locked and secured correctly.
n Do not operate the mower unless all personnel, livestock, and pets are several hundred feet away to prevent
injury by thrown objects.
n Never operate vehicles and mowers under trees with low-hanging limbs. Operators can be knocked off the
vehicle and run over by rotating tines.
n The rotating parts of this machine have been designed and tested for rugged use. However, they could fail
upon impact with heavy, solid objects such as steel guardrails and concrete abutments. Such impact could
cause the broken things to be thrown outward at very high velocities.
n Stop the Flail mower and the vehicle immediately upon striking an obstruction. Turn the engine off, remove
the ignition key, and inspect and repair any damage before resuming operation.

MATV 2023 Assembly & Operating Instructions - Page 16 of 46 - Version 1.0
n Stay alert for uneven terrain, holes, rocks, roots, and other hidden hazards. Keep away from drop-offs and
dangers that could cause a rollover. Use extreme care and maintain minimum ground speed when
transporting or operating on hillsides, over rough ground, and when working close to ditches or fences. Be
careful and slow down when turning sharp corners and changing direction on slopes. Do not start or stop
suddenly on slopes. Avoid operation on steep slopes. In highly uneven terrain, rear-wheel weights, vehicle
weight, and/or tire ballast must be used to improve stability.
n Pass the Flail mower diagonally through sharp dips and avoid sharp drops to prevent ‘hanging up’ the vehicle
and mower. Practice will improve your skills in maneuvering on rough terrain. Always cut down slopes, never
across the face.
n Never leave equipment unattended with the ATV running.
n Act as follows before dismounting the MATV. Lower the mower to the ground, shut off the engine, and allow
the rotating pieces to come to a complete stop.
WARNINGS and DANGER!
• Persons under the age of 18 should not operate the MATV.
• DO NOT operate the MATV under the influence of drugs or alcohol, as severe injury or
death could result.
• Read the Operators manual for the ATV. Follow all safety and maintenance guidelines
in this manual when dealing with a towing vehicle.
• DO NOT operate the Flail mower for any purpose other than what it is meant for.
• DO NOT operate the Flail mower unless all safety guards and protection plates are in
place.
• DO NOT leave the machine unattended while it is running.
CAUTION:
• Keep your hands away from all moving components. Rotating parts can cause severe
injury.
• Don't stand too close to the MATV. A safe distance is approx. 1 m.
• No other persons are allowed around the equipment during the operation.
• Follow ALL safety guidelines and procedures to ensure the safe use of the MATV.
3.3.3 Emergency stop procedure
n Refer also to your ATV manual for instructions. Read and understand how to quickly stop the vehicle and the
mower movement in an emergency.
3.3.4 General Operating Warnings:
WARNINGS!
• Read and understand all instructions in this manual before operating.
• Do not allow the vehicle engine or Flail mower to bog down or stall. This causes undue
wear and tear on the mower and vehicle.

MATV 2023 Assembly & Operating Instructions - Page 17 of 46 - Version 1.0
If this continues to happen, reduce ground speed and raise the working depth of the Flail
mower.
• Always stop the engine before removing objects from the rotor shaft.
• Never travel at a fast ground speed while using the mower; this could damage the
mower.
3.3.5 Preparation
n Ensure you understand all Safety rules and Warnings in this manual and the vehicle’s manual.
n Ensure you understand all safety decals on the vehicle and the flail mower.
n Adhere to PPE safety regulations as described in both manuals.
n Prolonged exposure to loud noise may cause permanent hearing loss!
WARNING!
• Hearing loss from loud noise (from lawn tractors, chainsaws, radios, and other sources
close to the ear) is cumulative over a lifetime without hope of natural recovery.
3.3.6 Hooking the mower to a vehicle
n Ensure the ATV and the MATV mower rest on solid level ground.
n Move the vehicle back in position and fit the towing coupling to the 2” hook.
n Adjust the drawbar angle to level the mower to the ground.
n Adjust the working depth.
3.3.7 Inspection checklist
n Inspect the whole MATV visually and check all vital components and their connections for damage, kinking,
wear or dirt. Review the machine checklist.
n Ensure the engine is filled with oil.
n Ensure all lubrication points are greased.
n Check that the working area is relatively smooth and free of obstacles.
n Always maintain a full view of the working area during operation.
n Ensure that persons and animals are far away from the machine.
3.3.8 Test the flail mower
n Place the machine horizontally where no loose sand or other material could harm yourself or others or
damage the device.
n Ensure that the machine flails do not get caught while rotating anywhere.
n Start the engine. When the engine is idling, increase the engine speed and rise to the fixed engine value of
2150 rpm.
n Check that everything works smoothly, correctly, and safely. Correct if necessary.

MATV 2023 Assembly & Operating Instructions - Page 18 of 46 - Version 1.0
3.4 Starting and stopping the engine
3.4.1 Start the engine
Ensure you understand all the information described in Chapter ‘Safety,’
n Open the fuel cock.
n Push the start button.
3.4.2 Stopping the mower
If you want to stop the engine after intensive use, let it idle for at least 4 minutes to cool down.
n When the engine has cooled down (approx. 1 hour after the last use), remove all the grass from the engine’s
cooling fins, drive belt cover fins, and rotor shaft before operating the machine again.
3.5 Start Mowing
n Ensure the cutting height is well-adjusted for the job. The mower should operate at an acceptable height to
conduct precise work. You must set the mowing height properly to save power and reduce the wear.
n Ensure the drawbar angle is well adjusted, so the mower is level with the ground.
n Ensure the offset mowing width adjustment is correct.
n Start the engine, and engage the drive by increasing the throttle to full fixed power, allowing it to build up to
the correct working speed before mowing off.
n Start at the slowest speed possible; the forward mower speed will depend significantly on the working
conditions and the nature of the material being cut. The optimal speed will be 3-8 km/h (2-5 mph).
Ensure the mower works efficiently with the engine running at fixed rate. The amount of grass or weeds to
be cut dictates the forward speed; a slow forward speed gives better results.
n Leave at least 24 hours between 1st and 2nd cut to allow the grass to dry out.
n It is crucial to always listen to the engine's sound to ensure the engine and mower are operating efficiently;
slow down or stop as soon as the engine speed begins to slow down, indicating overload.
NOTICE:
• Overloading will result in clutch slip and severely damage the drive clutch and belts.
• When moving from normal working conditions to heavier cutting, it may be evident
that the engine dies down and loses revs.
SLOW DOWN IMMEDIATELY to allow the engine revs to build up again.
4 ADJUSTMENTS
4.1 Adjust the drawbar angle concerning ATV hook height
An attached mower must always touch the ground in a flat position. You can achieve this by adjusting the angle
of the drawbar. It is only helpful if the mower is attached to your ATV.

MATV 2023 Assembly & Operating Instructions - Page 19 of 46 - Version 1.0
n Make sure both machines are on a flat piece
of ground.
n Untighten the securing nuts (1) to loosen the
two-way lead screw pipe (2).
n Turn the two-way lead screw pipe until the
bottom of the sides of the mower aligns with
the ground.
n Tighten the securing nuts (1) to secure the
two-way lead screw pipe.
n Tighten both sole plate mounting bolts (3), as
mentioned in the previous step.
n Ensure the center bolt (4) is tightened.
4.2 Adjusting the mowing height
NOTICE:
• The mower must be set to the correct height to prevent damage to the machine.
• The rear roller is factory set to a fixed position to ensure the rotor and flails do not
contact the ground if one wheel falls into a rut.
The height of the cut depends greatly on the working conditions and volume of material. It is also affected by the
forward speed of the towing vehicle, as cutting large volumes of material will require a slower forward speed to
achieve a good cut in a single pass.
n Turn the Cutting height adjustment lever
clockwise to increase the mowing height.
n Turn the Cutting height adjustment lever
anti-clockwise to decrease the mowing
height.
NOTE:
The minimum height of the cut is 1 inch.
Any lower than this, you risk damaging the
machine and flail blades and increasing the
chance of stones being ejected at high speed
from the machine.

MATV 2023 Assembly & Operating Instructions - Page 20 of 46 - Version 1.0
4.3 Adjusting the skids height
Mower skids, or mower shoes or runners, are added to the bottom of a lawn mower deck to help prevent the
blades from scalping the lawn. They are typically made of solid metal and are positioned on either side of the
mower deck. The skids allow the mower to glide over uneven terrain and prevent the blades from encountering
the ground. The skids are adjustable, allowing you to set the height of the mower deck to ensure a consistent cut
across your lawn.
n Raise and support the mower with suitable
wooden blocks beside both skids.
n Untighten nut (1) and nut (2).
n Remove both bolts and move the skid to the
desired position for the mowing height.
n Fit bolts (1) & (2).
n Tighten both bolts with nuts and washers.
n Repeat this action on the other mower side.
4.4 Drive belts tension check and adjustment
WARNING!
• Switch off the engine before checking and adjusting the belts.
• Ensure the drive belts are cold before checking and adjusting.
• Never run the machine with the pulley cover removed.
Belts drive system with centrifugal clutch
The newly developed MATV-flail mower has made crucial safe design improvements. Introducing the belt-drive
system with a high precision clutch leads to a drive system with a virtually 100% power transfer rate and almost
0% belt slippage over the years. Belt slippage on belt systems is a major issue leading to belt failure.
The drive belt tension on a flail mower refers to the amount of stress or pressure applied to the belt that
connects the engine to the rotor shaft. Maintaining the correct tension on the drive belt is essential as it allows
the mower to operate efficiently and smoothly.
First, ensure the engine is off before checking the drive belt's tension. Then, locate the belt tension roller that
puts pressure on the belt.
If the belt tension is too loose, the belt may slip or come off during operation, which can cause damage to the
mower and affect its performance. If the belt tension is too tight, it can strain the engine and bearings
excessively, leading to premature wear and tear. Adjust the tightness as necessary by loosening or tightening the
tensioner roller until the correct tension is achieved. It's a good idea to periodically check the drive belt tension
as part of regular mower maintenance.
This manual suits for next models
1
Table of contents
Other Victory Lawn Mower manuals