Vimar 00447.CK.B User manual

Instruction manual
Art. 00447.CK.B
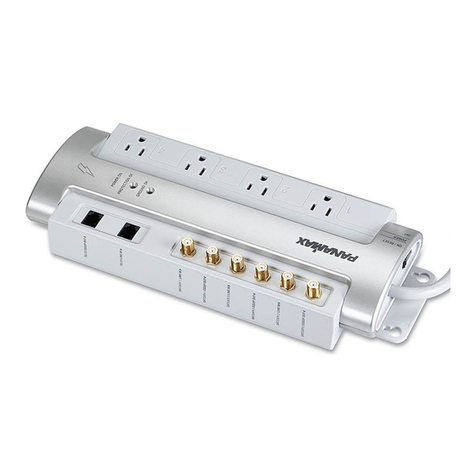
Smart portable multiple socket outlet
PLUGS AND SOCKET OUTLETS

2
00447.CK.B
PLUGS AND SOCKET OUTLETS
Smart portable multiple socket outlet oper-
ating disclaimer.
The portable multiple socket outlet (art. 00447.
CK.B) allows utilities to be managed on the
purchaser's (hereinafter the 'Customer's')
smartphone and/or tablet by simply installing
the Vimar View Product App.
To do this, a domestic Wi-Fi network with Inter-
net access must be present in the home/build-
ing, with the following characteristics:
• IEEE 802.11 b/g/n standard (2.4 GHz)
Operating mode:
• Networks: WEP, WPA and WPA2.
• TKIP and AES encryption protocols are sup-
ported for WPA and WPA2 networks.
• Hidden SSIDs are not supported.
In order to use the service, the Customer must
obtain the technical equipment necessary for
the Internet connection and sign a contract
with an ISP (Internet Service Provider), which
may involve costs. Vimar has absolutely no in-
volvement in the choice of technical equipment
or the ISP (Internet Service Provider) contract.
The cost of the data trac necessary for use of
the Vimar View Product App, both inside the
home/building and beyond the Wi-Fi network
created by the Customer for its installation, will
be payable by the Customer.
Remote interaction and correct operation via
the Vimar View Product App, using the Inter-
net network of the chosen telephone/mobile
data service provider and the portable multiple
socket outlet (art. 00447.CK.B) may depend
on:
a) type, brand and model of smartphone or
tablet;
b) Wi-Fi signal quality;
c) type of household contract for accessing
the Internet;
d) type of data contract on the smartphone
and tablet;
The portable multiple socket outlet (art. 00447.
CK.B) supports a P2P connection, and Cus-
tomers must therefore check that their chosen
ISP (Internet Service Provider) does not block
connections of this type.
Vimar has no liability for any malfunctions due
to failure to comply with the minimal techni-
cal specications necessary for operation of
the product, as specied above. To solve any
problems, please refer to the complete manual
and to the "FAQs" section on the product page
on the following website: faidate.vimar.com.
Vimar reserves the right to change the charac-
teristics of products illustrated, at any time and
without prior notice.

3
00447.CK.B
PLUGS AND SOCKET OUTLETS
The Apple, iPhone and iPad logos are trade-
marks of Apple Inc., registered in the United
States and in other Countries and Regions.
App Store is a service trademark of Apple
Inc. Google and Google Play are trademarks
of Google LLC. Amazon, Alexa and all related
logos are trademarks of Amazon.com, Inc. or
its aliates.
Regulatory Compliance
RED Directive. RoHS directive. ErP directive.
Standards EN 62368-1, EN 60669-2-1, CEI 23-
124, EN 301 489-17, EN 300 328, EN 62479,
EN IEC 63000.
Vimar SpA declares that the radio equipment
complies with Directive 2014/53/EU. The full
text of the EU declaration of conformity, the
instruction manual and the conguration soft-
ware are available on the product sheet from
the following website: faidate.vimar.com
(EU) Regulation for external power supply units
no. 2019/1782.
REACH (EU) Regulation no. 1907/2006 –
Art.33. The product may contain traces of lead.
WEEE - User information
The crossed bin symbol on the appliance or on its packaging
indicates that the product at the end of its life must be col-
lected separately from other waste. The user must therefore
hand the equipment at the end of its life cycle over to the
appropriate municipal centres for the differentiated collec-
tion of electrical and electronic waste. As an alternative to
independent management, you can deliver the equipment
you want to dispose of free of charge to the distributor when
purchasing a new appliance of an equivalent type. You can
also deliver electronic products to be disposed of that are
smaller than 25 cm for free, with no obligation to purchase,
to electronics distributors with a sales area of at least 400
m2. Proper sorted waste collection for subsequent recycling,
processing and environmentally conscious disposal of the
old equipment helps to prevent any possible negative im-
pact on the environment and human health while promoting
the practice of reusing and/or recycling materials used in
manufacture.

4
00447.CK.B
PLUGS AND SOCKET OUTLETS
ON/OFF 1-way
switch
German Standard
SICURY socket
outlets
USB socket outlets
1. Characteristics
•Italian standard heat-welded S17 16 A axial
plug
•H05VV-F exible 1.5 m cable with 3 conduc-
tors size 1.5 mm² (3G1.5)
•Max output power: 3680 W
•3 German Standard SICURY outputs
•Output voltage: 5.0 V D.C. (± 5%) ES1 and/
or SELV
•Max individual output load: 2.4 A
•Max multiple output load: 4.0 A
•Max output power: 20.0 W
• Average eciency in active mode: 81.5%
• Eciency with low load (10%): 88.7%
•Power with no load: 0.09 W
•Protection degree: IP20
•Frequency range: 2412-2472 MHz
• RF transmission power: < 100 mW (20dBm)
• Remote management via Vimar View Prod-
uct App
• Switching connected devices ON/OFF
• Separate management of USB and electrical
socket outlets
•ON/OFF timer setting
• Creating scenarios and automations
• Monitoring consumption
• O-line device notication
•Manageable with Amazon Alexa and Google
Home
1.1 Installation and use
•Use in dry, dust-free places
•Check the condition of the power supply
cable on a regular basis and replace the
device if damaged
•Fixing possibilities:
- using the slot-hole onto a nail, hook or screw
- using cable ties with risers
- using through-holes for stable surface
mounting

5
00447.CK.B
PLUGS AND SOCKET OUTLETS
1) Open the Vimar View Product App and log in
using your MyVIMAR credentials
2. Power supply and configuration
2.1 Powering the portable multiple socket
outlet
Take the portable multiple socket outlet out of
the pack and insert the plug into an appropriate
electrical socket outlet.
2.2 Installing the App on your smartphone
Download the Vimar View Product App from
the reference App Stores and install it on your
smartphone.

6
00447.CK.B
PLUGS AND SOCKET OUTLETS
2) If you don’t have any MyVimar credentials,
create a new account by clicking on the
dedicated option: “Create a new account”.
3) After you have entered your e-mail address,
a verication code will be sent to your
e-mail address. Please log into your e-mail
account and use the code to complete
registration.

7
00447.CK.B
PLUGS AND SOCKET OUTLETS
4) After you have registered a new account,
you can add information about your family/
home, enter the name, the position, add
any rooms and conrm.
If you have forgotten your password, you can
click on "Forgotten password" to receive a
new password via e-mail verication.
3. Configuring the portable multiple
socket outlet
Once you have logged in and the portable
multiple socket outlet is powered, choose he
environment and click on “Add device 1
Select model 2Continue by following
the instructions on the screen”.
1

8
00447.CK.B
PLUGS AND SOCKET OUTLETS
Once you have checked that the edge of the
1-way switch on the portable multiple socket
outlet is ashing rapidly, enable “Next step”.
Alternatively, select “Automatic scan” and
start scanning. The device will automatically
be recognised and you will be able to continue
with the instructions on the screen.
If the edge is not ashing, press the 1-way
switch for 5 seconds or in any case until it
starts ashing.
Enter your Wi-Fi password 3continue
by clicking “Next” 4“.
2
3
4

9
00447.CK.B
PLUGS AND SOCKET OUTLETS
The edge of the 1-way switch will continue
to ash rapidly. From this moment on, the
countdown of the percentage progress in
the search of devices awaiting connection
begins. Repeat the procedure for all those to
be associated. When association is complete,
the edge of the 1-way switch on the devices
will stop ashing; you can now rename each
portable multiple socket outlet as you see t.
Then click on “End”.
Select the icon for the portable multiple socket
outlet among the devices in the list to see a
preview of the functions available.

10
00447.CK.B
PLUGS AND SOCKET OUTLETS
In addition to the EZ mode (prompted by the
App) you can choose to link up to the device
via Bluetooth.
For Bluetooth mode, select the respective
option and then follow the instructions on
the screen: make sure the edge of the 1-way
switch is ashing rapidly and click on “Next”.
Wait for the device search and then select the
desired product. Choose the Wi-Fi network
and add the password. Wait for the device
synchronisation and then conrm the addition.

11
00447.CK.B
PLUGS AND SOCKET OUTLETS
The following options are displayed:
•1-way switch: switch the entire portable
socket outlet on and o. Click on each
individual socket outlet to control it separately
•Programming: used to associate timed
programmes which switch the portable
multiple socket outlet on and o.
•Consumption: used to display the energy
consumption.
4. Functions of the portable multiple
socket outlet
After selecting the portable multiple socket
outlet, the screen relating to its management
is displayed.
ON/OFF: select to switch the device ON
or OFF.
1

12
00447.CK.B
PLUGS AND SOCKET OUTLETS
4.1 Programming
The following options are available:
•Countdown: used to set a time after which
the socket outlet reverses its state (if it is ON
it switches OFF; if it is OFF it switches ON).
• Timer: used to indicate a specic moment at
which you want the socket outlet to switch
OFF or ON.
N.B. Programming can be done individually
on each socket outlet to obtain dierentiated
operation.
Click on the “Settings” icon 1 to dene the
state assumed by the socket outlets when
the multiple socket outlet is switched on/o
from the main 1-way switch. You can choose
between all ON, all OFF or to maintain the
state they had before you operated the main
1-way switch.

13
00447.CK.B
PLUGS AND SOCKET OUTLETS
5. Editing the portable multiple sock-
et outlet
Select to display all the device
management options.
5.1 Integrations
The devices can be connected to the Amazon
Alexa and Google Assistant voice assistants
1For detailed instructions, click on the logo
of the desired assistant.
5.2 O-line notication
Activating the 2function allows you to receive
a notication on your smartphone after the
device has remained o-line for more than 30
consecutive minutes.
5.3 Sharing devices
A portable multiple socket outlet will initially be
added to a single administrator account, but
the administrator may subsequently share their
devices with other accounts too.
This function is used to share the management
of the device with other users, for instance
members of the same family.
1
2

14
00447.CK.B
PLUGS AND SOCKET OUTLETS
1.From the Settings menu, scroll down and
select “Shared Device” and click on “Add
Sharing”; enter the account with which you
wish to share the device (this account must
rst be successfully registered using the
Vimar View Product App) and click on “End” to
conrm sharing.

15
00447.CK.B
PLUGS AND SOCKET OUTLETS
2. The shared account will receive a message
on the Vimar View Product App and the user
will have to conrm this sharing request.
5.4 Creating a group
1. From the Settings menu, scroll down and
select “Create a group”
2. All the available devices which can be added
to the group are displayed. Select the devices
and click on “Save”. Enter a name for the group
and click on “End” to conrm.
3. Once a group has been created, you will
automatically access the group management
screen; this will allow you to create scenarios
and automations which simultaneously involve
all the devices included in this group.
•Scenario: consists in performing one or more
actions which can be activated by a specic
control.
6. Creating scenarios and automa-
tions
From the main screen, select “Smart”
. From here, you can congure scenarios
and automations, or automatically perform
actions on the devices depending on specic
conditions and in given time intervals.

16
00447.CK.B
PLUGS AND SOCKET OUTLETS
•Automation: consists in one or more
operations that can be carried out
automatically under certain conditions; in
practice, when one or more conditions arise,
one or more actions are triggered.
N.B.: Scenarios and Automations can in turn be
activated by others scenarios and automations.
6.1 Scenarios
Select “Scenarios” and dene the devices
involved and the action to be performed.
- Rename scenario: the name of the scenario
can be modied for easy recognition.
- Add an action to perform: used to set the
action to be performed.
6.2 Automations
Select “Automations” and dene the elements
and devices involved in the automation.
- Select a condition among the options availa-
ble (temperature, etc.).
- Select when to trigger the action (when only
one or all the conditions set are satised).
- Set the actions to be carried out by selecting
them among those available in the list.
- Set the validity time of the automation creat-
ed (times and days).
N.B.: The conditions (or triggers) which can trig-
ger an automation are:
• Any notication from a sensor, a detector or
a camera.
• Any state of a device set manually or auto-
matically.
• A specic time of day (can be repeated on
selected days).
• Sunrise or sunset (which varies depending
on the location).
• Weather conditions, such as the tempera-
ture, humidity and weather (depending on
the location set).
The actions that can be carried out following a
specic condition are:

17
00447.CK.B
PLUGS AND SOCKET OUTLETS
• Activation of a scenario.
• A dierent automation (to enable or disable
an existing automation).
• Activation / deactivation of a device set.
• Setting a device in a specic mode.
• Sending a notication.
7. Device reset
The device is reset by holding down the 1-way
switch until the edge ashes. This way the
device is ready to be associated with a dierent
user.
The device can also be reset from the Vimar
View Product App in the following two ways:
• directly from the main screen by holding down
the device you wish to delete from the home;
• from the edit section of the individual device
by clicking on “Removing a device”.

Viale Vicenza 14
36063 Marostica VI - Italy
www.vimar.com
00447.CK.BEN 01 2111
Table of contents
Other Vimar Surge Protector manuals