10
5) OPERATIONAL SAFETY PROCEDURES
READ BEFORE USING THE MACHINE
When using electrical tools, basic safety precautions should always be followed to reduce the risk of electric shock, fire and
personal injury.
Ensure the magnet is off before plugging in the machine.
Do not use in wet or damp conditions. Failure to do so may result in personal injury.
Do not use in the presence of flammable liquids, gases or in high risk environments. Failure to do so may result in personal
injury.
Before activating the machine, inspect all electrical supply cables (including extension leads) and replace if damaged. Do not
use if there are any signs of damage.
Only use extension cables approved for site conditions.
Before activating the machine, always check the correct function of all operational systems, switches, magnet etc.
Before operating, the machine must be securely restrained to a fixed independent feature by using safety strap and stationary
rings. Affix the stationary rings into the magnet, uppermost side hole to reduce the potential free movement, should the
magnet become detached from the work piece. Failure to do so may result in personal injury.
Always wear approved eye protectors, ear defenders and recommended PPE when operating the machine.
Disconnect from power source when changing cutters or working on the machine.
Cutters and swarf are sharp, always ensure that hands are adequately protected when changing cutters or removing swarf.
Use a tool or brush where necessary to remove any swarf or the cutter from the arbor.
Before operating the machine, always ensure cutter-retaining screws are secured tightly.
Regularly clear the work area and machine of swarf and dirt, paying particular attention to the underside of the magnet base.
Always remove tie, rings, watches and any loose adornments that might entangle with the rotating machinery before
operating.
Always ensure that long hair is securely enclosed by an approved restraint before operating the machine.
Should the cutter become stuck in the work piece, stop the motor immediately to prevent personal injury. Disconnect from
power source and turn arbor to and from. Do not attempt to free the cutter by switching the motor on and off. Wear safety
gloves to remove the cutter from the arbor.
If the machine is accidentally dropped, always thoroughly examine the machine for signs of damage and check that it functions
correctly before resuming drilling.
Regularly inspect the machine and check for any damaged or loose parts.
Always ensure when using the machine in an inverted position that only the minimum amount of coolant is used and that care
is taken to ensure that coolant does not enter the motor unit.
Cutting tools may shatter, always position the guard over the cutter before activating the machine. Failure to do so may result
in personal injury.
On completion of the cut, a slug will be ejected.
When not in use always store the machine in a safe and secure location.
Always ensure that approved Walter agents conduct repairs.
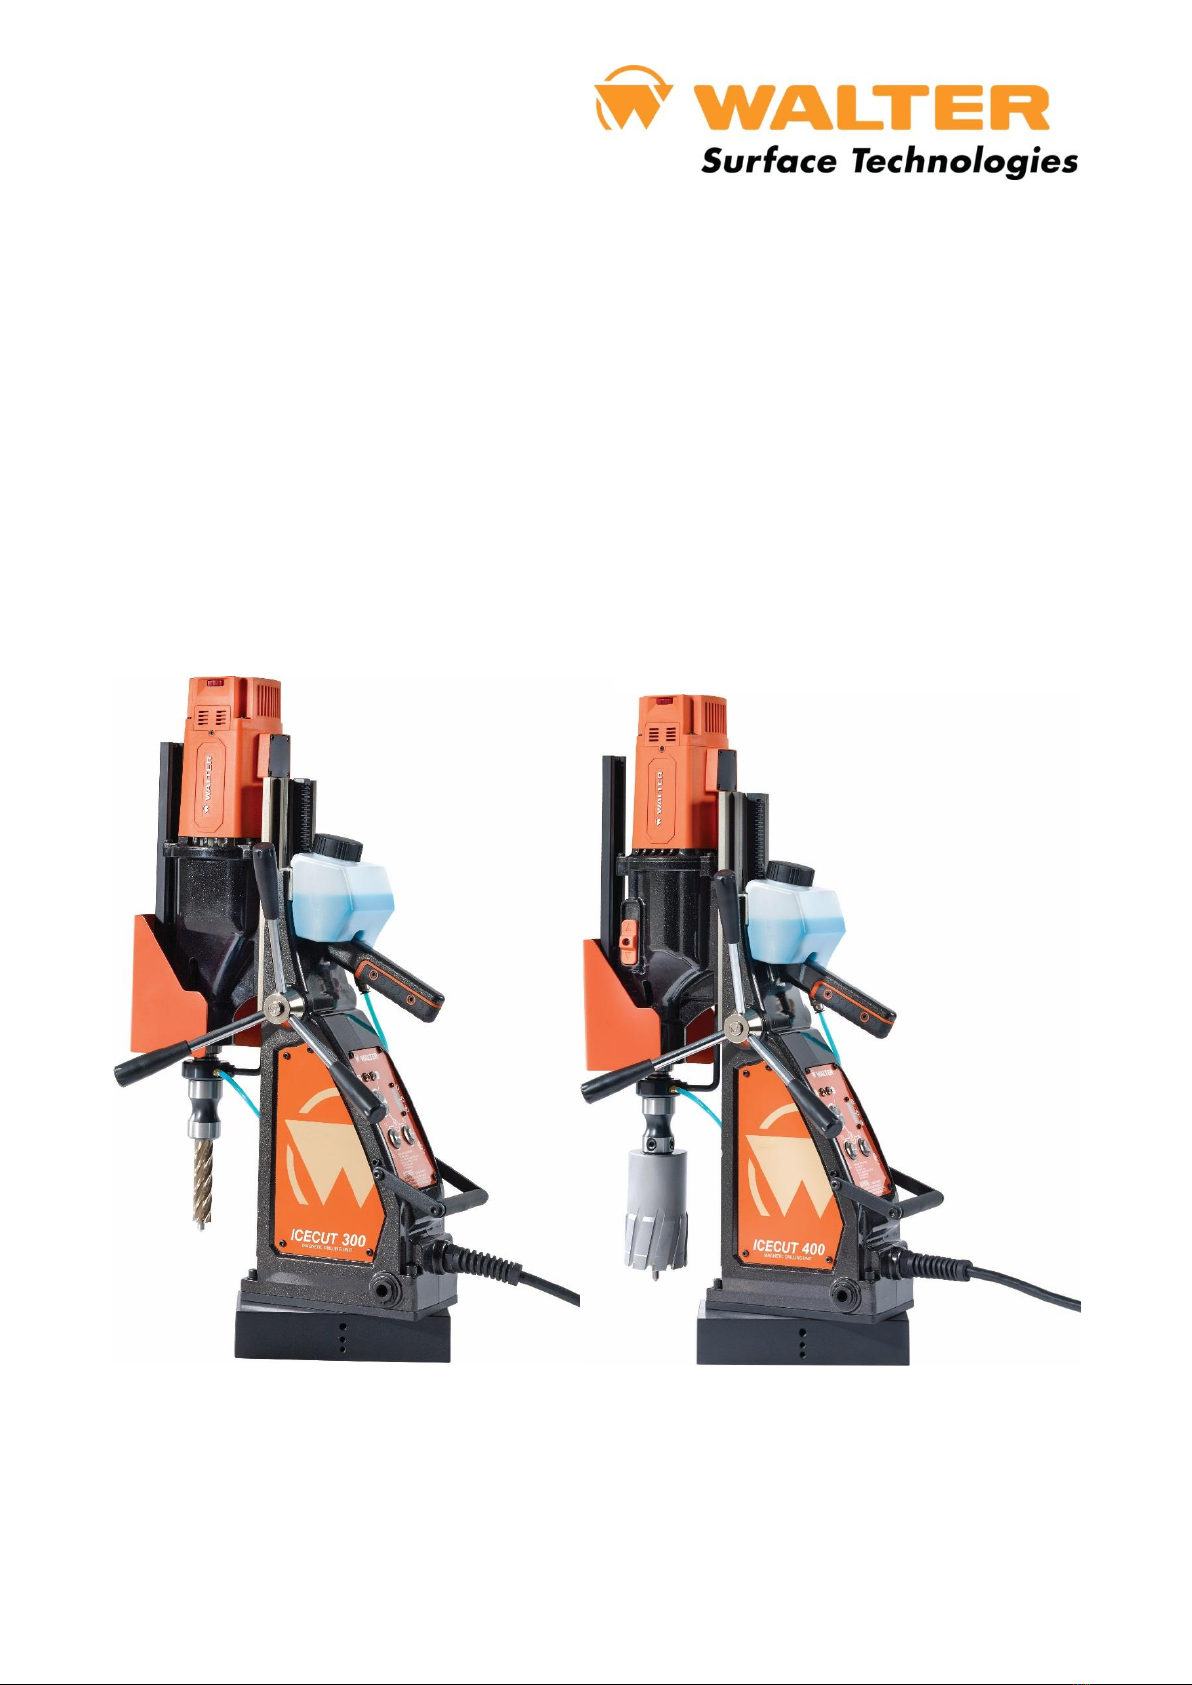
6) OPERATING INSTRUCTIONS
Keep the inside of the cutter clear of swarf. It restricts the operating depth of the cutter.
Ensure that the coolant bottle contains sufficient cutting oil to complete the required operating duration. Refill as required.
Occasionally depress the pilot to ensure cutting fluid is being correctly metered.
To start the machine, follow the control panel operation instructions. The ICECUT machine is fitted with a dual motor
protection system to fully ensure safety and extended life of the motor. The ACCUDRILL technology (found on the control
panel) gives a clear and visible indication to the user of torque being applied to the motor, once the prescribed level is reached
the motor is protected by automatic cut out. To restart your machine, the operator will simply press the start button again
(blue tapping button should a protection mode occur during tapping). If, however the speed controller protection is activated,
this is torque sensor regulated at a pre-determined value above ACCUDRILL (should ACCUDRILL fail to operate) the operator is
required to press the start button twice to re-activate the machine.
Always switch off the motor by depressing the green start/stop button or blue button depending upon the operation. Do not
switch off the motor by pressing the magnet switch.
Apply light pressure when commencing the cut of a hole until the cutter is introduced into the work surface. Pressure can
then be increased sufficiently to load the motor. Excessive pressure is undesirable, it does not increase the speed of
penetration and will cause the safety overload protection device to stop the motor (the motor can be restarted by operating
the motor start button) and may cause excessive heat which may result in inconsistent slug ejection.
Always ensure that the slug has been ejected from the previous hole before commencing to cut the next.
If the slug sticks in the cutter, move the machine to a flat surface, switch on the magnet and gently bring the cutter down to
make contact with the surface. This will usually straighten a cocked slug and allow it to eject normally.
Apply a small amount of light oil lubricant regularly to the slide.
Cutter breakage is usually caused by insecure anchorage or a loosely fitting slide. (Refer to routine maintenance instructions).
Only use approved cutting fluid. Walter cutting fluid has been specially formulated to maximise the cutters performance.