WatchOvers PetTrackie User manual

1
WatchOvers PetTrackie GPS Tracker
For GSM 2G Network
User’s Manual

2
Features Page 3
WatchOvers SIM Card 4
Charging the Device 4
Powering on the Device 5
Getting Set Up - 6 Step Quick Set Up 5
Step 1 - Activate SIM Card 6
Step 2 - Charge the Device & Power On 6
Step 3 - Download the WatchOvers PetTrackie APP 7
Step 4 - Register your Administrator App Account 7
Step 5 - Pairing your device with the App 8
Step – 6 Setup & Manage your PetTrackie 9
Main functions 9
Home Screen 9
Add a Device 10
Account Settings 10
Location Map Screen 10
Locate 11
Display your phone location 11
Location History 11
Master Administrator 11
Edit an Administrator number or Delete a Backup Administrator 12
Delete the Device 12
How to transfer the Administration rights to another person 12
How to block the device being adding to other accounts 12
Messages /Alerts 13
Manage Device Setting 13
Device User Information 13
Tracking Mode 14
Fence list 15
Powering off the Device Remotely 15
Device Date & Time 16
Find the Device 17
Restore Factory Setting 17
Warranty 17
Box Contents 17
Safety & General Warnings 17
App Versions 18

3
Please read this user’s manual carefully before use.
Thank you for purchasing PetTrackie from WatchOvers Limited. For best use of your
PetTrackie, please read the following instructions carefully before starting, and
operate the device accordingly. Screens may vary for Android and iOS and as
updated App versions are released.
Features
WatchOvers PetTrackie GPS Location Tracking Device.
Ø Live GPS Location -Real-time tracking – See the device location on your
smartphone in real time. Location updated every 60 seconds.
Ø Geo-Zones – create virtual outdoor boundaries and receive boundary breach
alerts. Multiple Geo-zones with square, rectangular or circular fence settings.
Location updated every 60 seconds for enhanced Geo-Zone accuracy.
Ø 100% Waterproof to -1 meter with an IP67 waterproof rating.
Ø Device & Smartphone location displayed – See where you are in proximity to your
pet, making it easy to find the quickest route to them.
Ø Location History– Playback the location history of the device today, last week or
last month.
Ø Very Secure with 128 Bit Encryption for transmission and storage of all data. Our
App and device registration is secure to protect your data and prevent access to
your device except by people approved by you.
Ø Alert Messaging – receive SOS, Low Battery and Geo-Zone alerts directly to the
App on your smartphone.
Ø Multi User – Add up to 16 users, for all your family, friends and pet sitters.
Ø Pre-fitted Sim Card – Open the box and get started straight away. WatchOvers
Sim cards use the strongest network available, getting signal even in weak signal
areas’, vital in an emergency.
Ø Low-power consumption – up to 4 days general use or up to 6 days in manual
location mode, depending on mobile coverage and local signal strength.
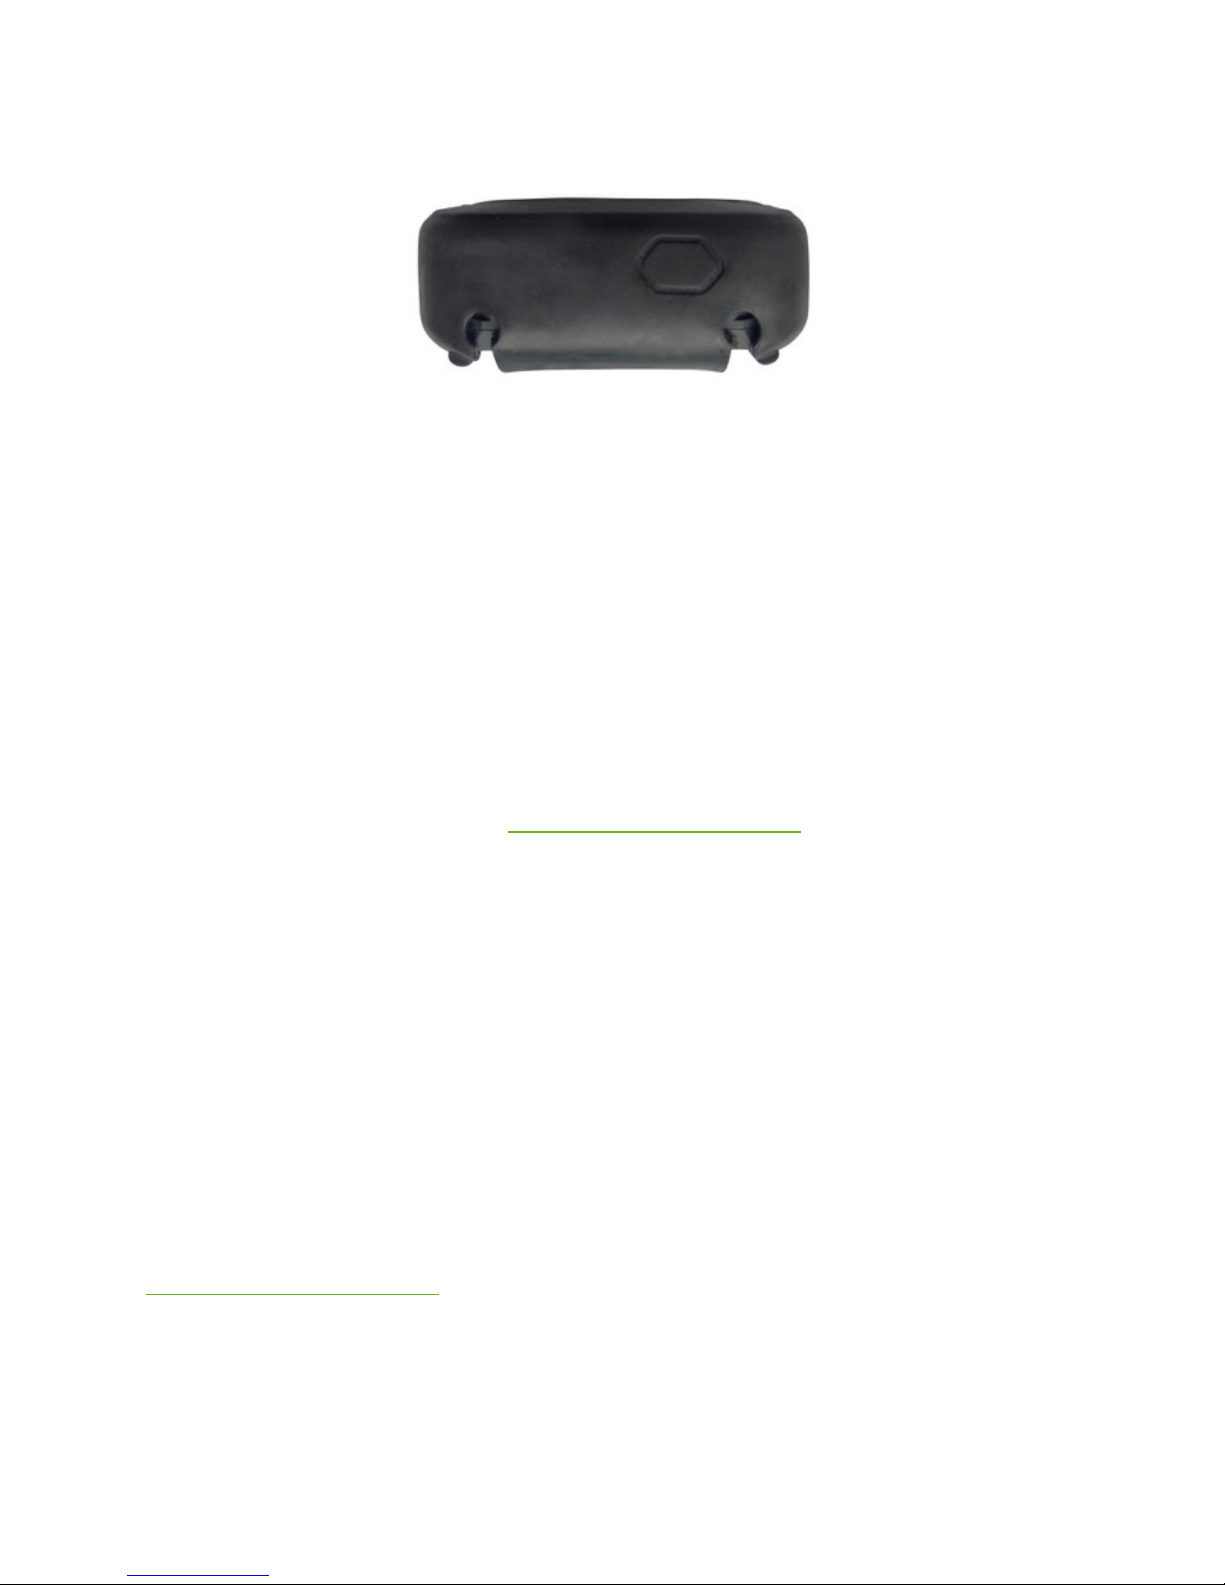
Ø Unique innovative holder design, easy to fit to most collars and to remove for
charging.
Ø Device size 52*38*17.5mm
Ø Suitable for pets above 4.5 kg – Weight: Device 33 grams, Holder 15 grams.
Ø GSM Quad band 850/900/1800/1900 2G Device
Ø Supports GPS/AGPS/LBS/WiFi for quick and accurate outdoor location positioning
and improved indoor location.
Ø Magnetic inductive charging.
Our WatchOvers PetTrackie App and device are designed specifically for Europe and
comes with full back-up support in English from the WatchOvers Team should you
ever need any help. Manufactured using quality materials with a strong body and
100% waterproof, the PetTrackie can be worn at all the times even when swimming*.
A subscription is required for Mobile Data, Pre-paid monthly, No Contract, Opt Out
Anytime. The subscription includes Unlimited location data. Subscribe once you
receive your device to activate your device sim card. Your device comes with our
European sim card which will work worldwide in over 150 countries. Unlike a
standard sim card, our sim card is not fixed to any one mobile network, it will roam

4
from network to network to use the strongest mobile network available, enabling the
device to get mobile coverage even in weak signal locations, vital in times of
emergency.
*The PetTrackie is 100% waterproof in water to a depth of -1 meter for up to 30
minutes, maximum temperature of 20 degrees Celsius as long as the back or side of
the device has not been opened.
WatchOvers SIM Card
This device relies on GPS technology and as a mobile device, in order for it to work it
requires a Micro SIM card with a 2G data plan.
Your WatchOvers device comes with the sim card pre- fitted so you can charge the
device, subscribe online and are ready to go. This advanced sim card is a European
‘always roaming’ sim card with a European mobile number which, unlike standard
sim cards, will always use the strongest mobile network that the device is located in,
not just the network of the sim card provider, so the device will get the best network
coverage available for that area. As our device is a location device, this is an
important feature. The always roaming feature does not work in the country the sim
card is issued from, i.e. Spain for device mobile numbers beginning with +34.
Charging the Device
Remove the device and the charging cable from the packaging. Connect the
magnetic head of the cable to the metallic contacts on the back of the device (rotate
the connectors until the magnets pull it into position) and connect the other end of
the cable to a USB power source.
Charging the device to its full capacity normally takes 2-3 hours. You can see a red
LED light flashing continuously when charging, once fully charged, the red light will
stop flashing.
To protect the battery and ensure a long battery life, please charge the device for at
least 12 hours for the 1st charge and for at least 8 hours for the 2nd and 3rd
charges. Thereafter the device should take 2 to 3 hours to charge. Always use the
USB cable provided and a CE approved USB charger plug to avoid irreparable
damage.

5
Powering on the Device
To Power on your PetTrackie, press and hold the Hexagon shaped button for about 3
seconds until you hear the device say “hello”.
After you turn on the device, you will see the LED light change colour red-blue-
green-red, which means the device is detecting the sim card. This can take up to 15
minutes.
Blue Light:The device is connected to the server using WiFi/LBS positioning.
Green Light: The device is using GPS positioning.
Note: For power saving the LED will then stop flashing, press the power button to
view the LED colour.
If the light does not flash;
(i) The device is powered off- charge and power on the device.
(ii) Your sim card has been deactivated/ you have not subscribed – Please
number.
(iii) The mobile coverage is not sufficient for data transfer- take the device
near a window or outdoors.
Getting Set Up - 6 Step Quick Set Up
IMPORTANT: To enable your device to pair with your APP correctly, after scanning
the CID QR code or manually entering the CID number, the device mobile number
should be added with the country prefix code if +34, add +34 to the 1st box
“Country and area” by choosing Spain as the country (+34). In the 2nd box add the
remainder of the device mobile number starting with 590 etc. Failure to follow ALL of
the 6 steps of the instructions will result in the device not pairing with your app and
you will be unable to use the features within the app. This can be corrected but will
involve a device reset that can take up to 72 hours. Contact

6
Step 1 - Activate SIM Card
Your PetTrackie comes with pre-fitted mobile SIM card which requires a subscription
and includes Unlimited location data worldwide in over 150 countries, Pre-paid
monthly, No Contract, Opt Out Anytime. Our advanced ‘always roaming’ Spanish sim
card, unlike a standard sim card, use the strongest mobile network available
enabling the device to pick up mobile coverage even in weak signal locations, vital in
times of emergency. To set up your monthly subscription, activating your SIM and
your warranty, go to www.watchovers.com/pettrackie-subscribe/
You must subscribe before activating your device.
Step 2 - Charge the Device & Power On
Attach the USB power cable provided to the charging contacts on the device. When
charged, press and hold the button on the top side of the device until you hear
“hello”. Your device will activate on the mobile network within a few minutes. All
device functions are set-up and managed through the App including time and date
display.
Note: To protect the battery, please charge the watch for at least 12 hours for the
1st charge and for at least 8 hours for the 2nd and 3rd charges. Always use the USB
cable provided and a CE approved USB charger plug with an output: 5.0V-1.0A, to
avoid irreparable damage.
iPhone App notifications settings screen

7
Step 3 - Download the WatchOvers PetTrackie APP
Scan the QR code below OR search for "WatchOvers PetTrackie" in Google play or
the App Store to download our App and Tap install. After install is complete please
Tap “OK” to allow notifications in order to receive alerts & notifications.
Only add a device to the app once it is charged, powered on and has a blue
or green LED light.
Note: Screens may vary for Android and iOS.
Step 4 - Register your Administrator App Account
Connect your phone with WiFi or switch ON your mobile data to get the internet
connection.
On the App login screen choose New User, enter your email address and your mobile
number using your international prefix such as 0044, 00353, 0033, 0049, 0039,
0034 etc. and Tap Next to receive your registration code automatically by email.
Check your junk mail if you do not receive the email.
Enter the registration code (within 10 minutes or repeat the process) and Tap Next.
Enter a password that you will remember and Tap Register.

8
Note: All phone numbers in the App should be setup using your international prefix
such as 0044, 00353, 0033, 0049, 0039, 0034 etc. to ensure location data transfers
when travelling to another country.
Step 5 - Pairing your device with the App
Sign into the App and Tap on the + Icon. From the card stored in the box scan the
CID QR code OR manually enter the 16 character CID number printed on this QR
code and Tap OK. Choose your pet type, Enter your pets’ name and the Device
Mobile Number printed on the card.
To enter the device mobile number, in the “Country and area” box, choose Spain
+34 to add the international country code of the device mobile number and in the
2nd box manually add the remainder of the device mobile number. Tap next on the
top of the screen.If Next is not displayed, hide the keyboard and next will be shown.
Tap on Master 1 and Tap Done. You can Edit Master 1 to your own name in Device
settings once device is set up.
Note: The first account connected to the device will become the device administrator.
This can be changed later if you wish.

9
Step – 6 Setup & Manage your PetTrackie
Your account and device is now set up. You can pair the device with up to 16
accounts including the administrator in the Master list. Ensure notifications are
turned on within your phone settings to receive alerts from your PetTrackie.
Set the correct time and date on the device. Tap Manage, Tap Device time, check
the time and date shown is correct and Tap Done. If the time is incorrect, tap on the
time, change it to the correct time and Tap Done.
Main functions
Home Screen
The Home screen or main screen is the first screen you see each time you open the
App. You can see all your devices at the bottom of the map. Slide the head image of
any device into the center of the screen to select any of the devices and see its’
location on the map.

10
Home Screen Location Map Screen
Add a Device
Tap the Plus + Icon and scan the CID QR code or add the CID number manually to
add a new device to your app account. It is important to follow the 6 steps above
when adding a device.
When allowing another person add the device to their App, you will receive an
approval request to allow them to add the device. Once you confirm our approval,
they will need to logout of their App account and log in for the device to appear in
their account.
Account Settings
Tap the Settings wheel Icon to view your account details, to change the App
language, to check which version of the App you are using and to read our licensing
agreement.
Location Map Screen
Tap anywhere on the map to enter the Location map screen.
The App uses Google Maps to locate the device. There are 3 map options: Satellite,
2D and 3D.
Tap the circle above the mobile phone Icon to switch between these options and to
choose your preferred option.

11
Locate
Tap the Loc button to see the current location of the device. The device updates
automatically every 60 seconds so the Loc button is only required where you have
the device set on Manual Location mode. If the device is powered off, the map will
show the last known location.
Phone location displayed as Blue dot
Display your phone location
Tap the mobile phone symbol to show your mobile phone on the location map to see
where your pet is in proximity to you. To remove your location Tap the mobile phone
symbol again.
Location History
Tap the Track button to see the location history of the device which will default to
show today’s history. Should you wish to view a different day’s history, Tap on
Today at the top of the screen and choose the date your wish to view or Tap Pre to
go back one day at a time.
Master Administrator
Tap Master to see people who have added the device to their App account. The
Administrator of the device is displayed at the top. The Administrator can add,
modify or delete any Backup administrator on the list and can transfer the
administration rights to a Backup administrator.

12
Edit an Administrator number or Delete a Backup Administrator
To edit the contact number or delete a Backup Administrator, Tap Master, press on
the contact number and hold it for about 2 seconds until the pop up is displayed. Tap
Edit or Delete. To Edit, press on the number and edit.
Delete the Device
To Delete the device from your App, Tap Master, press the Delete button and
Confirm.
How to transfer the Administration rights to another person
Only the Administrator can transfer the rights to a Backup Administrator. To transfer
rights, Tap Master, Tap and hold on one of the Backup administrators you wish to
transfer the rights to and Tap Transfer Administration Rights in the pop up menu.
How to block the device being adding to other accounts
The Administrator of the device can block others from adding the device. On the
main home screen, Tap Master, at the bottom of the screen, slide the yellow button
“Permit to add” to the left, the button will turn grey and display “Block adding”.

13
Messages /Alerts
Tap Message to open the messages screen. When there is an incoming message or
alert for the device for low battery, Enter/Exit Geo-fences, change of administrator’s
rights etc, a red dot will appear on the Message icon. Tap Message and scroll down
to check new messages or alerts.
Note:The date is displayed in MM:DD (month:day)
Manage Device Setting
On the Home Screen, Tap on your Pets’ Face or Tap Manage and then Tap on your
Pets’ Face to manage the device phone number and your pets’ information.
Device User Information
Tap the name / Pet Image to edit the following settings.
Tap on the Pet Image to add a photo of your pet.
Tap the Pen Icon to edit your pets name.
Tap the Device phone number to edit the device phone number.
Tap on the QR code to see the CID number or to allow another person to scan the
CID QR code from this screen to add the device to their app.

14
Tap on Owner / Caregiver to change Master 1 to your own name.
Tap Pet Type to change the type of pet.
Tap Birthday to set or edit your pets’ birthday
Tap Height to set or edit your pets’ height
Tap Weight to set or edit your pets’ weight
Device settings Tracking Mode
Tracking Mode
There are two tracking options
Smart mode: the device location is updated automatically every 60 seconds when
the device is moving outside.
Manual mode: the location will only be updated when you tap the Loc button on
the Map screen. With this setting there will be no Geofence alerts. The battery will
last longer between charges on this setting.

15
Fence list
Tap Fence list to set up or edit geo-fences. You can set up multiple geo-fences of
square, rectangular or circular shapes.
Tap on Add fence. Tap on the Icon to the left of the slider to set a circular, square
or rectangular fence.
To set a circular fence, once circular is selected, use the slider to set the diameter
of the fence.
Tap Fence name to add a fence name and Tap Done to save the fence.
To add square or rectangular fence, Tap on the Icon to the left of the slider,
select the Square Icon and use the slider to set the size of the square fence.
To set a rectangular fence, once you have selected the square icon, Tap the 3 dot
Menu Icon, select the vertical or horizontal Icon and use the slider to set the vertical
or horizontal distance.
Tap Fence name to add a fence name and Tap Done to save the fence.
Note: Geo-fencing will not work when location mode is set to Manual mode.
Powering off the Device Remotely
The device cannot be turned off using the power button to avoid the device being
turned off by accident. To turn off the device remotely through the App, Tap Manage,

16
Tap Turn off device remotely, Tap on the date box to set the time and date you want
the device to automatically power back on and Tap the Powered off button.
To turn off the device so that it must be powered back on using the power button on
the device, Tap Do not power on automatically which will turn green and Tap
Powered off.
When the device is powering off you will hear the word “goodbye” from the speaker
on the device.
Note: Only the administrator can turn off the device remotely.
Power off Device Remotely Device Date & Time
Device Date & Time
The Date and time must be set correctly on the device through the app so the
messages and location times are shown correctly.
To set the correct device Date and Time, Tap Device time, check the date and time
are correct and tap Done. If the Date or Time is incorrect, Tap on the Date or Time,
select the correct details and Tap Done.

17
Find the Device
This function helps you locate the device by the device playing a loud sound for 1
minute. Tap Find the device and tap Confirm. To stop the sound playing press the
power button on the device.
Restore Factory Setting
Warning: This setting will delete the device from all app accounts and
cannot be reversed.
Tap the Menu Icon at top right corner of the Manage screen to see Restore factory
settings. Tap Confirm to reset the device to factory settings or Tap Cancel.
Note: Only the Administrator can restore the device to factory setting and this
cannot be reversed once confirmed.
Warranty
This product is guaranteed by the manufacturer for a period of 1 year from the date
of purchase. This guarantee does not cover defects arising from accidental damage,
misuse or wear and tear and is available only to the original purchaser of the product.
This does not affect your statutory rights. Our device is designed to work with our
sim card. Attempting to change our sim card will void your warranty and we will be
unable to provide Support to resolve any issues created.
Box Contents
1 PetTrackie GPS tracker device with holder.
1x USB Charging Cable.
1 card with Device CID and mobile number.
The mobile application is compatible with iOS devices running iOS7.0 or later and
android devices running android 4.0 or later. Any device software/firmware updates
required in the future will be available to download from our website.
Safety & General Warnings
• The GPS will not work when the device is powered off or the SIM card/GSM
network does not have coverage/is out of service.
• The device is waterproof to -1 meter of water up to a water temperature of 20
degrees Celsius. The device is not vapour proof so steam conditions or hot water
should be avoided. If the back of the device or the side sim card port have been
opened the device is no longer waterproof.
• Do not attempt to repair the device yourself, as any modification to the product
will affect the use of the product and affect the warranty. Opening the device will
make your warranty null and void, if not carried out by a qualified professional.
Removing the sim card when the device is powered on may cause damage to the
device. If removing the WatchOvers sim card, the device must be powered off before
removing and when fitting the sim card, then powered on with the sim card fitted to
avoid damage to the device. We recommend that you do not open the back of the
device or the sim port door on the side of the device.
• Please keep the device away from fire and high temperature.

18
• Use only the original accessories recommended by the manufacturer. Using other
accessories may be dangerous and invalidate all warranties and licences.
• Avoid cleaning with corrosive cleaning agents and chemicals, use a soft, dry cloth
to clean the device.
• It is prohibited to use the device at the petrol stations, restricted chemical plants
or near oil depots as such use of the device in the above environments may raise the
risk of explosion.
• For Air travel please follow the airline mobile phone guidelines and power off the
device when requested. The manufacturer does not accept responsibility for any
damage which may be caused by Airport X-ray equipment.
• Batteries should be disposed of responsibly. It is dangerous to try to open the
battery or throw the battery into a fire. Never place the battery in the hands of
children.
App Versions
There is continuous upgrading and updating to enhance this product, thus the
content may be different to your product, which is subject to change without prior
notice. The illustrations in the Users’ Manual are for your reference only. WatchOvers
Limited reserves the right to change the User’s Manual. 1st May 2018.
Table of contents
Other WatchOvers GPS manuals